Tag Archives: ribbing

“Last Night Allison” Strikes Again

You all remember the last time Last Night Allison struck.  It wasn’t pretty. I mean, I managed to fix it, but it was touch and go for a while, and way more difficult than I expected it to be.

Unfortunately, Last Night Allison struck again.  But here’s the worst part.  I have no excuse for my bad decisions.  It wasn’t late (actually it was about 3:00 in the afternoon).  I hadn’t been drinking (except a cup of decaffeinated tea).  And, I really should have been paying attention.

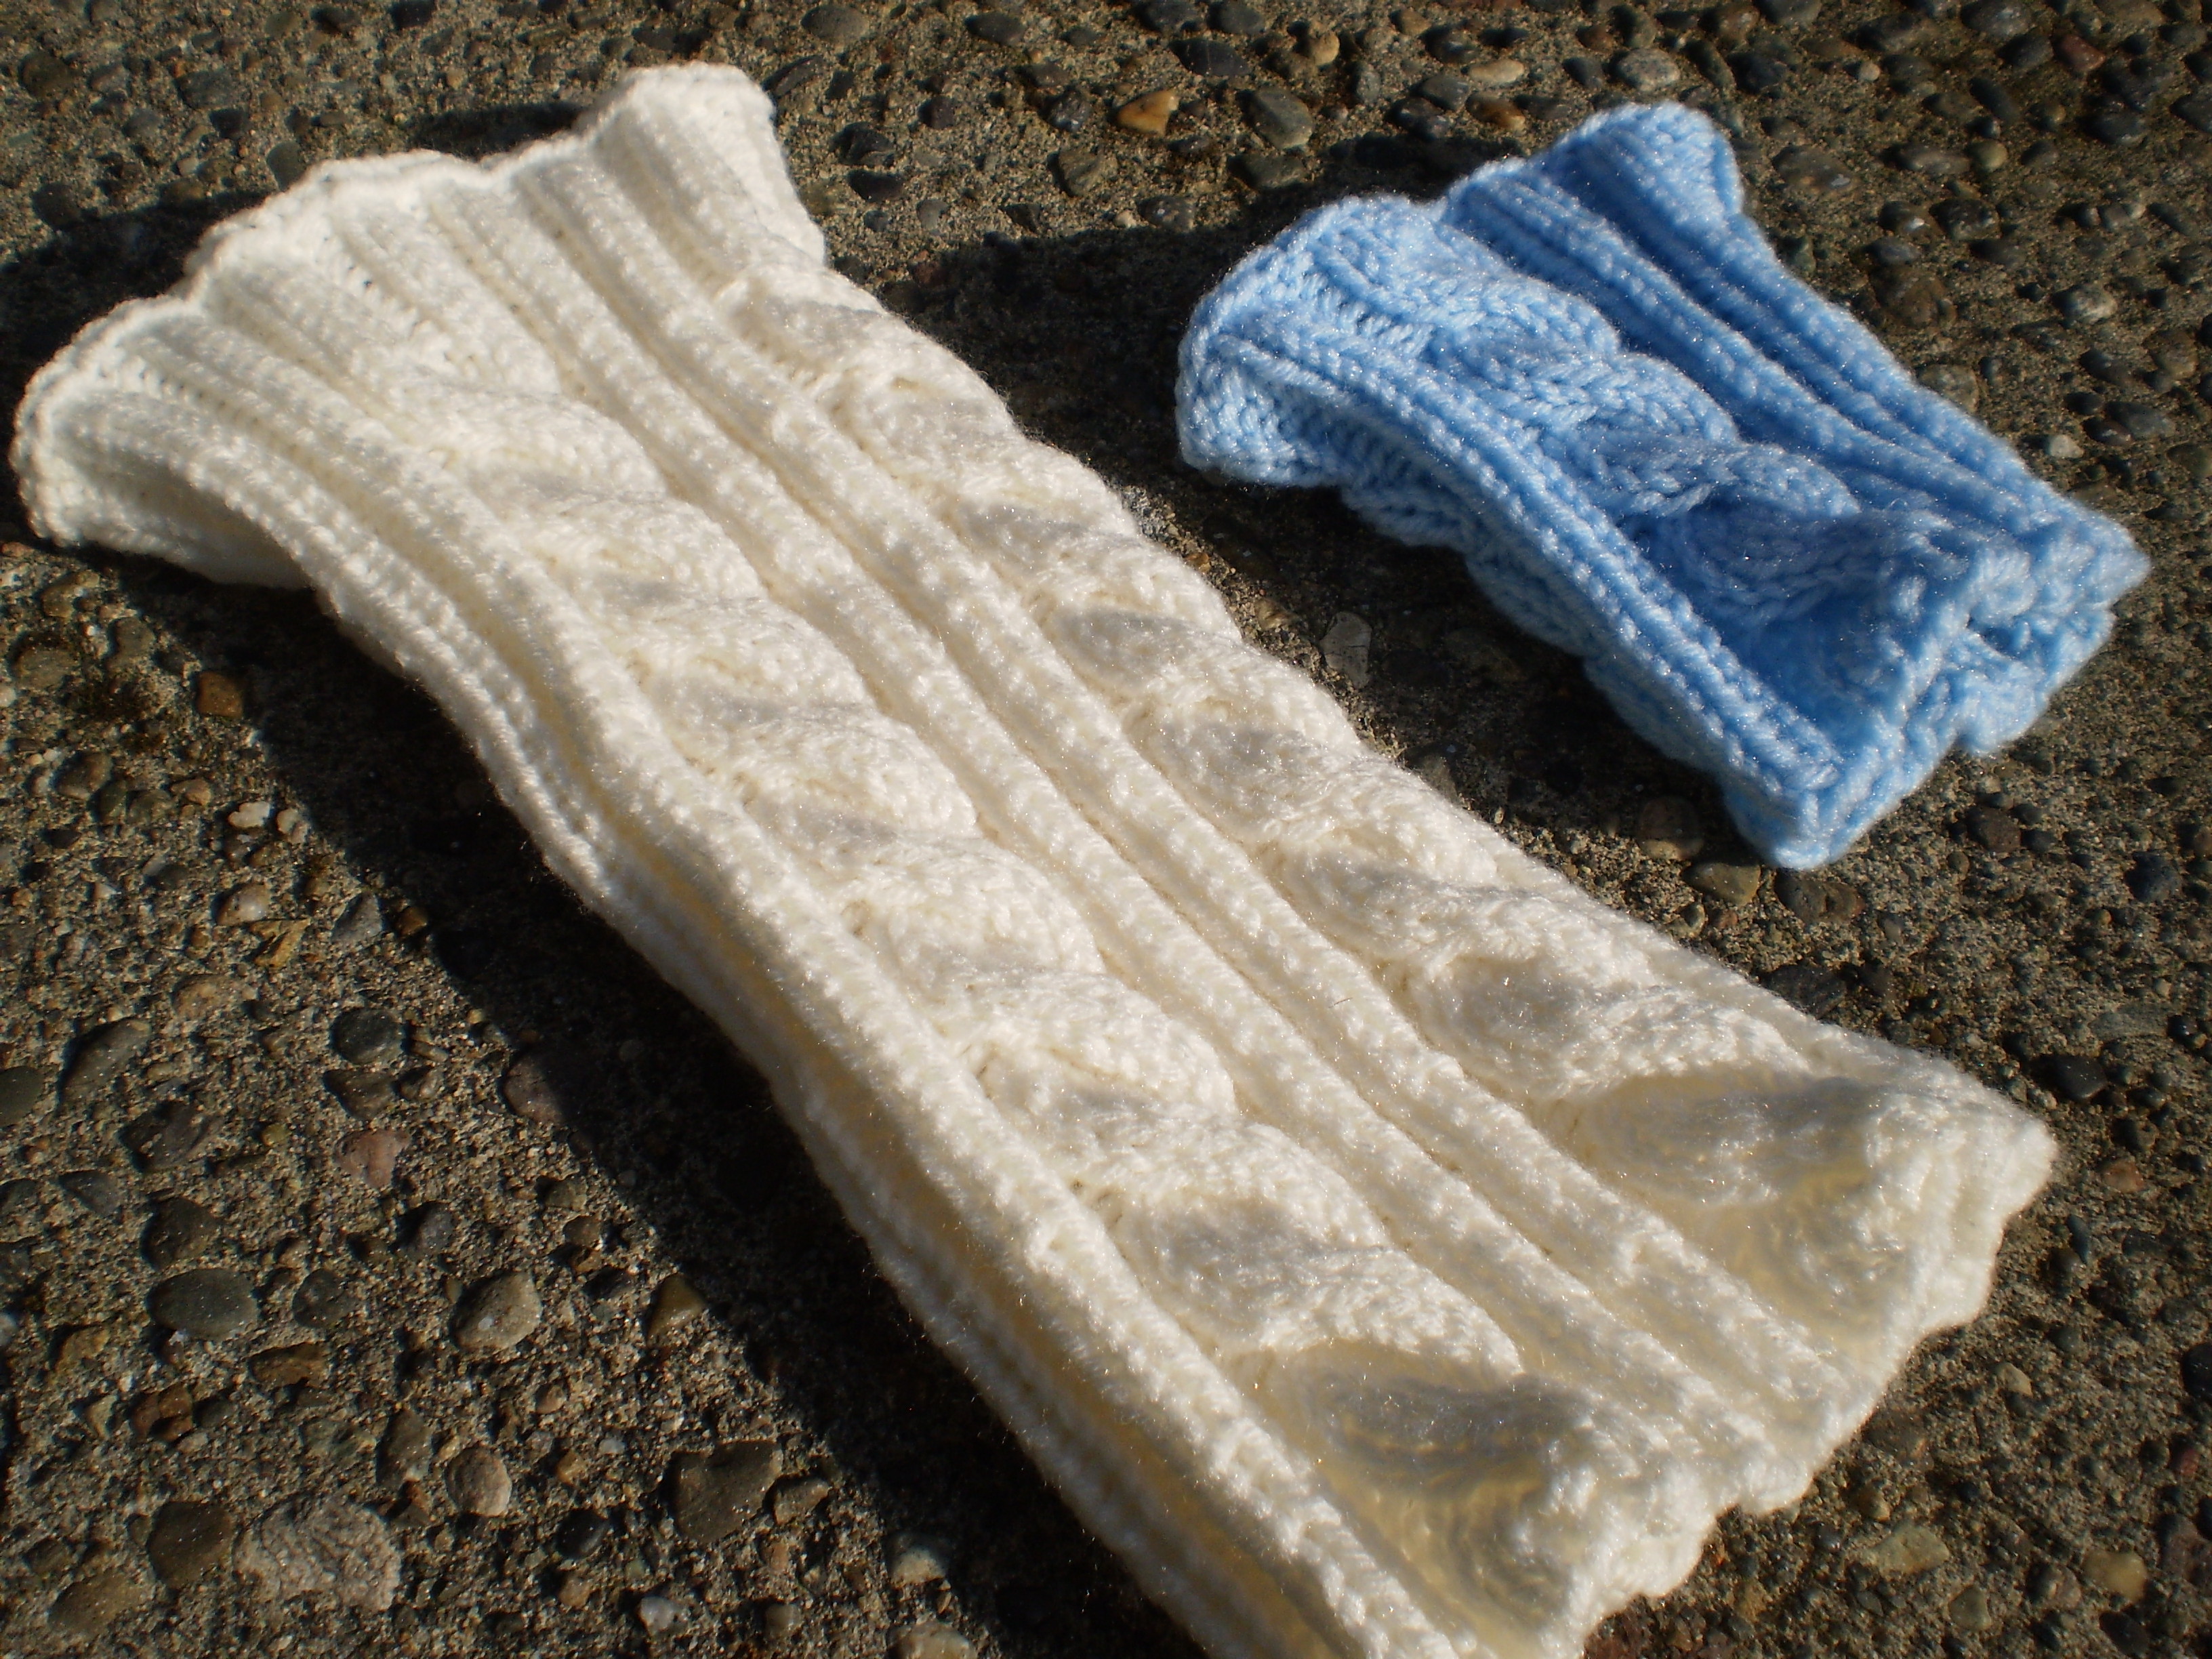
I was starting the prototype of a sweater I’m working on.  The pattern begins with (spoiler!) a 1×1 rib for about 2 inches.

This is what I knit:Allison, that’s not a 1×1 rib!  That’s a 2×2 rib!  That’s a 2×2 rib that you worked on for about three hours before realizing your mistake!  (There was swearing.)

So, then, I had to decide, do I rip out the whole thing?  Start over?  Or, do I painstakingly go through with a crochet hook and change half the knits to purls, and half the purls to knits?

I bet you can’t guess what Last Night Allison chose.  (That’s right!  She picked the most fiddly and difficult choice possible.)I ripped each column of stitches out, one by one, carefully picking them back up in the proper orientation.  Which is totally not a super annoying process.  Ha!
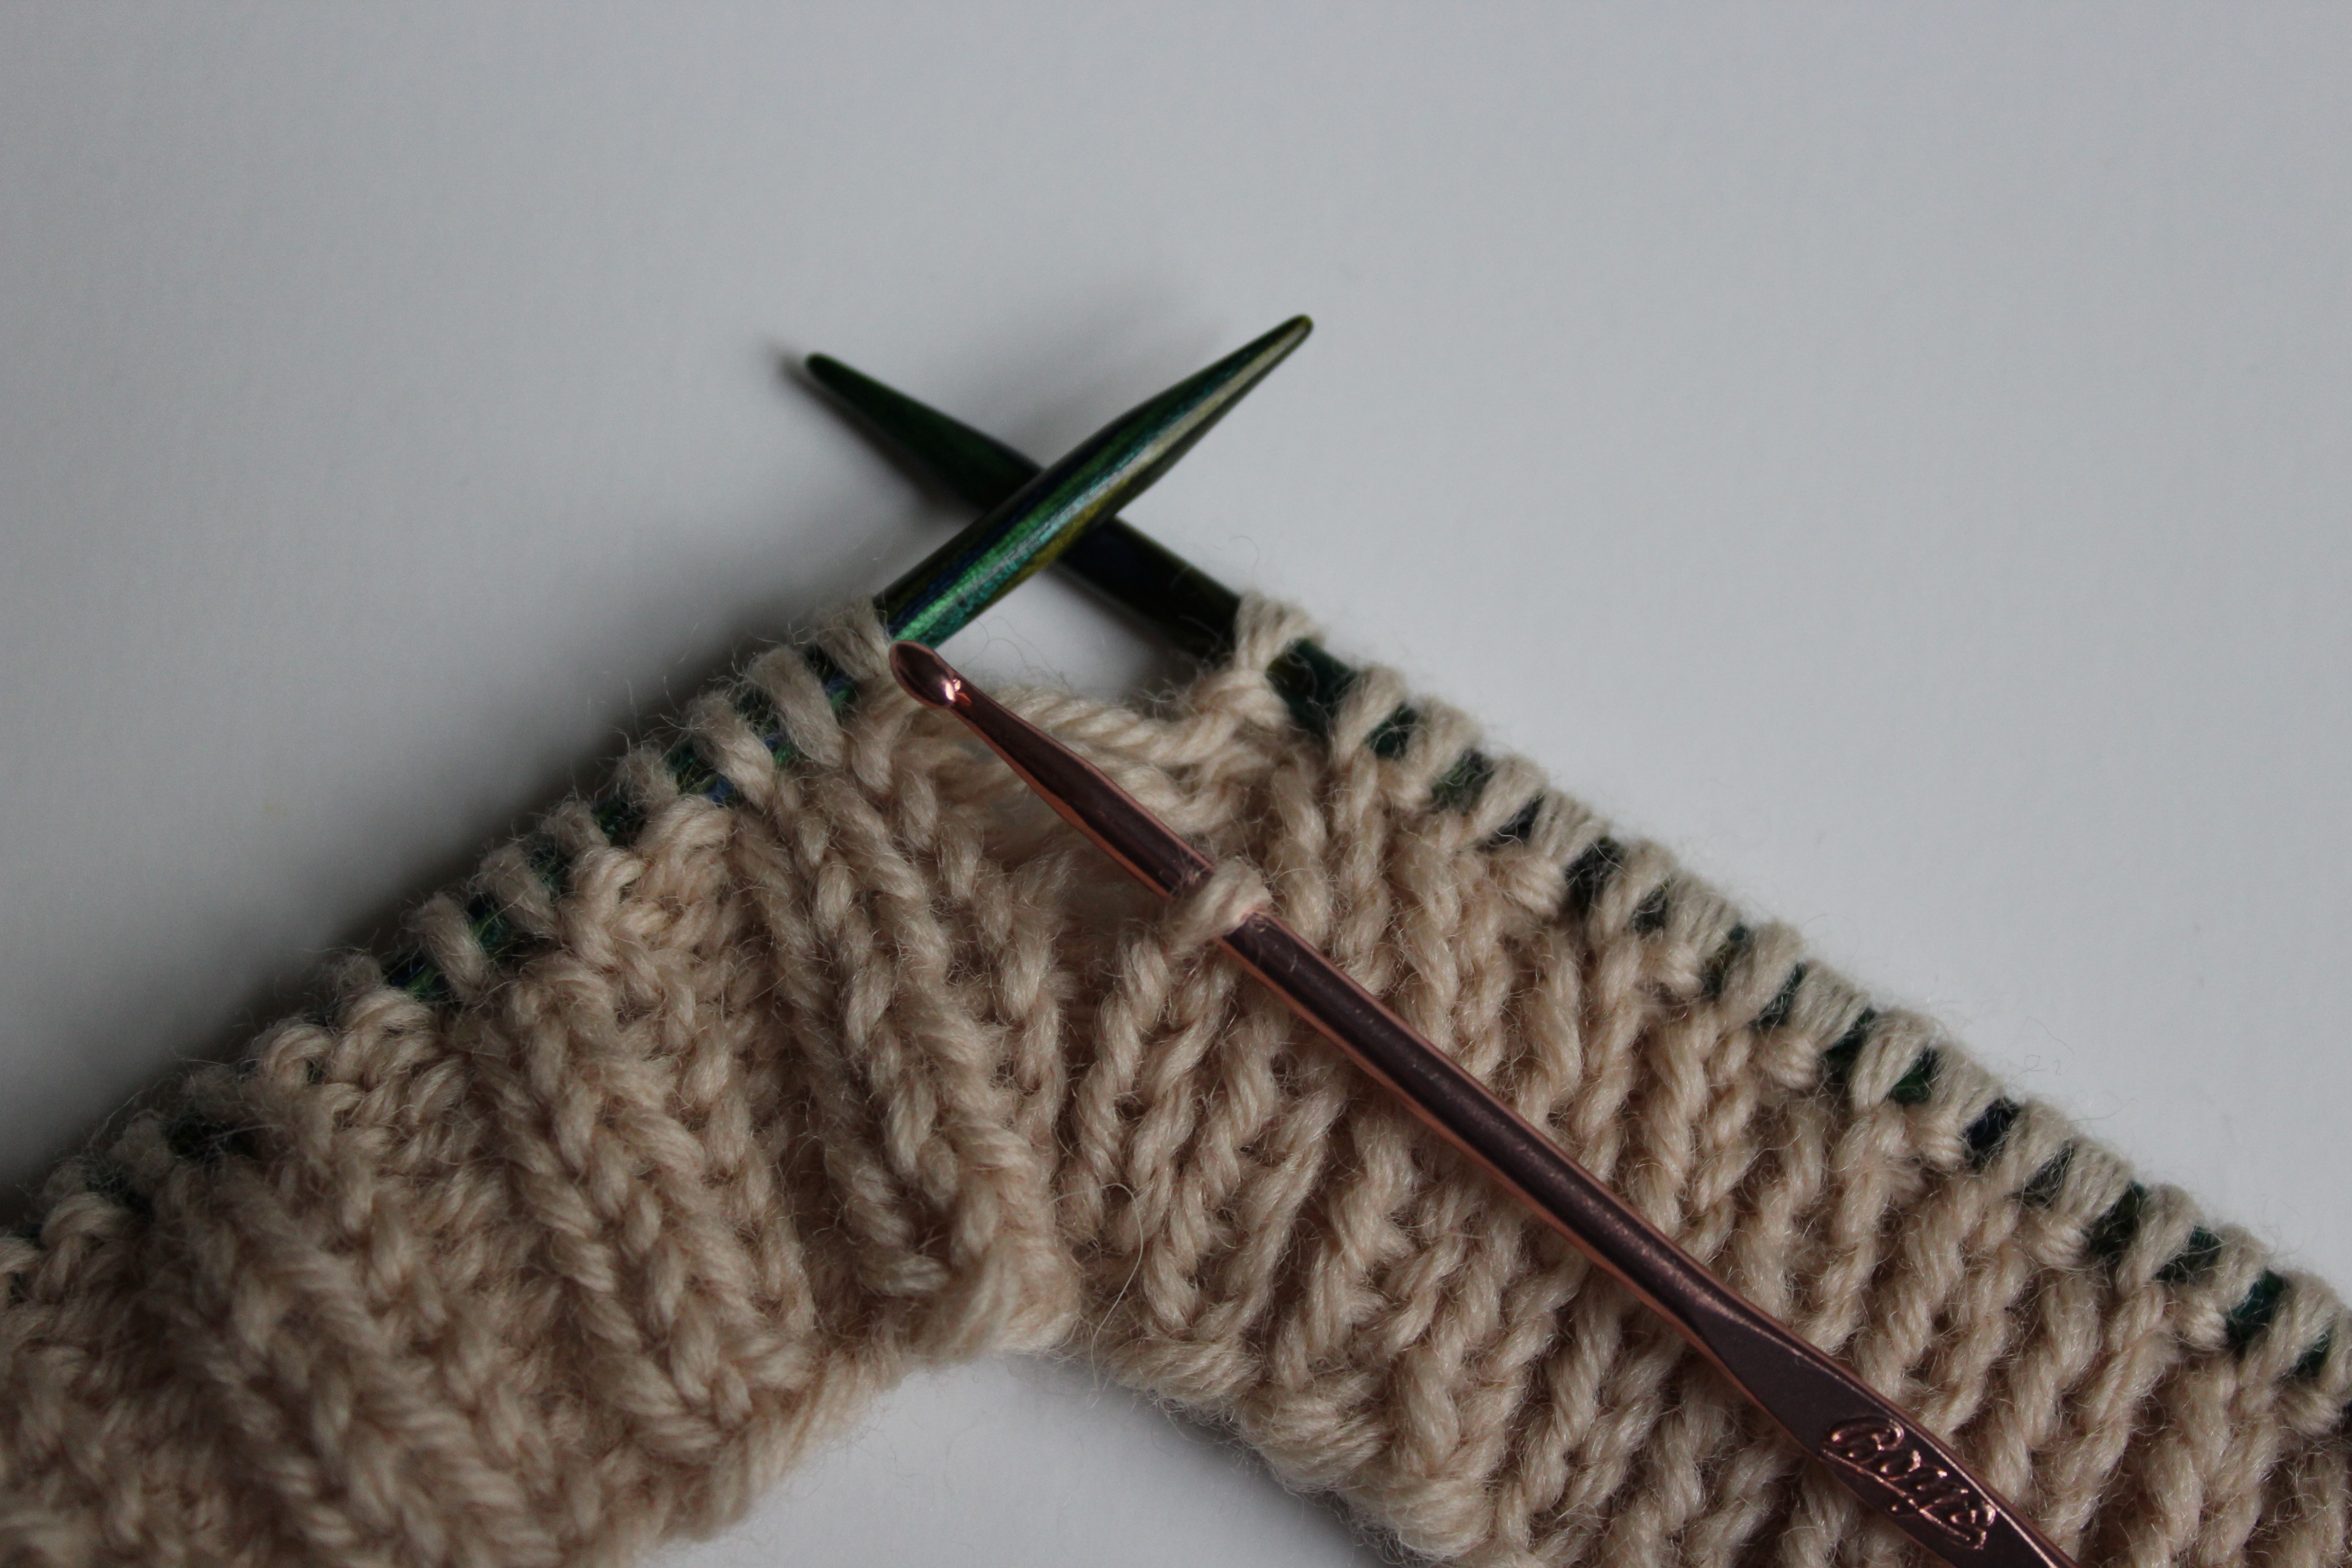
Amazingly, the fixed ribbing actually looks pretty good- I was afraid it would be a little wonky, but it looks OK.The only problem is I’ve still got well over halfway to go.  I think my “quick fix” is going to end up taking longer than re-knitting the whole thing would have.  Of course, at this point I’ve sunk too much effort into it, so I’m here for the long haul.
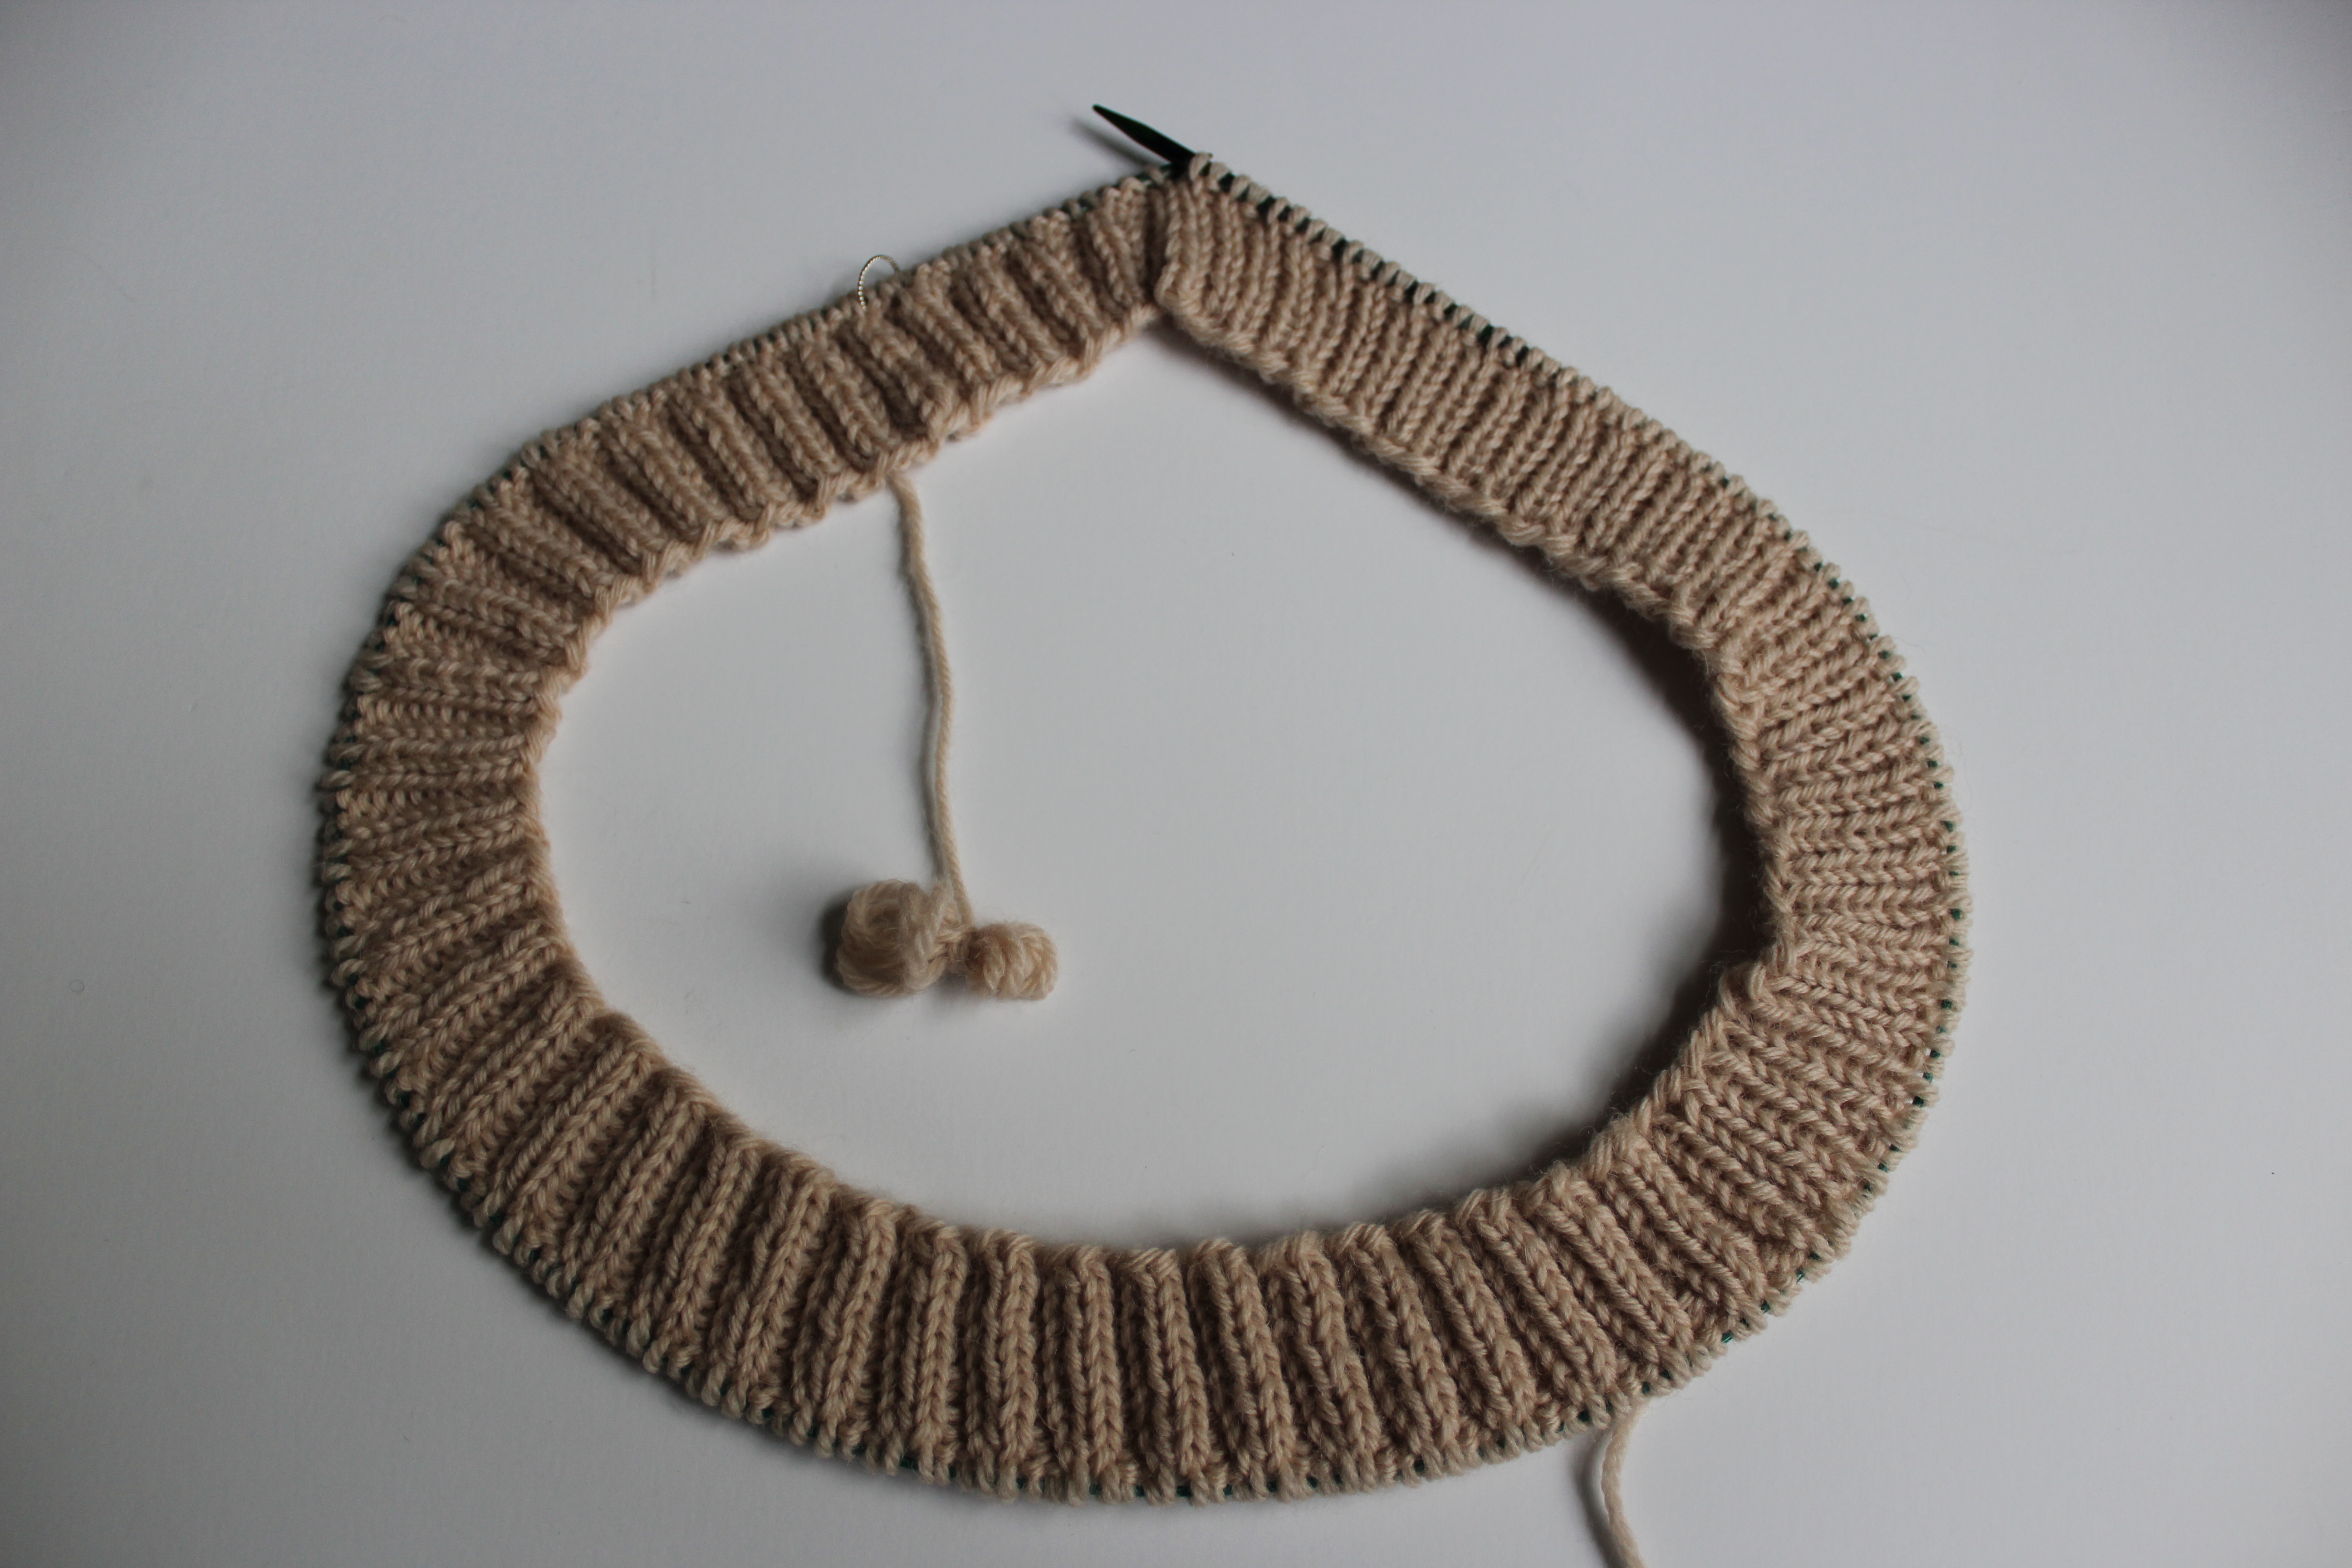
What would you have done?  Would you have ripped the whole thing and re-knit, or do you have agreed with Last Night Allison?  Or, do you have a magical solution that would have been better than either?

Design Series: Let’s go!

Guys.  It’s time.  Finally!

It’s time to cast on for our socks!

Just to recap, we decided to make simple, warm and cozy socks with a basic design.  We picked light gray and indigo blue for the colors, and we wanted them to be regular socks, not slipper socks.

Luckily, I had some lovely indigo blue and light gray sock yarn in my stash!

Knit Picks Stroll Sock yarn in Sapphire Heather and Dove Heather, about one skein of each.  (Which should hopefully be enough to make it through a whole pair of socks!)

24590[1] 25023[1]Pretty, right?  Of course, you’re more than welcome to use any color (or brand of yarn) that makes you happy, but I’ll be using this yarn.

Since we’re going for a nice warm and cozy design, I thought that using a lovely, squishy 2×2 rib would look really good.  (Not to mention that ribbed socks are super comfy.)

I’m going to be working this design in four sizes: Women’s Small (Medium, Large, Extra Large). (Don’t feel bad if you have to use the Extra-Large Size.  That’s the size I have to make for myself.  I have big man-feet.)

So, let’s start!

  • Materials:
  • 5 US2 double-pointed needles
  • Yarn needle
  • Scissors
  • 1 skein each, Gray (MC) and Blue (CC) sock yarn, such as Knit Picks Stroll Sock in Dove Heather and Indigo Heather.

Directions:

  • Using MC, cast on 48 (52, 56, 60) stitches using your favorite method.  Distribute the stitches evenly across 4 needles (12 (13, 14, 15) sts per needle) and join to work in the round.
  • Work around in a K2P2 rib for 15 rounds.  Break yarn and join CC.
  • Continue in ribbing for 10 rounds.  Break yarn and join MC.
  • Continue in ribbing for 10 rounds.  Break yarn and join CC.
  • Continue in ribbing for 10 rounds.  Break yarn and join MC.
  • Continue in ribbing for 30 rounds.
  • Work 1 round, knitting all stitches.
  • Knit 36 ( 39, 42, 45).  Break yarn and get ready to make the heel flap!

OLYMPUS DIGITAL CAMERANext time, we’ll turn the heel!  Woo Hoo!

Husband Sweater: The Hem!

Woo!  I finally made it through the body of my Husband sweater!  Phew!  That was a slog, I tell you what.  The combination of cotton yarn and acres of stockinette at a slightly-smaller-than-usual gauge made the body seem like it took for-ev-er.  (I suppose the fact that I kept getting bored and making gnomes didn’t help it go faster, either.)

As I mentioned before, I decreased very slightly down the torso, to make the sweater a little bit fitted.  And, the row before I worked the ribbing, I used a trick I learned from Elizabeth Zimmerman.  I decreased every 10th stitch ([k8, k2tog] across).  It seems like a lot of stitches to get rid of at the end.  But, it’s actually the perfect amount to decrease to make a nice, tight-fitting hem, instead of one that flips and curls away from the body.

OLYMPUS DIGITAL CAMERANow, I’m on to the hood.  Which I might need to modify, too.  The hoods on all the projects on Ravelry are a little Assassin’s Creed-y.

uploadedImage_medium2[1]But, a big hood isn’t a big deal, I suppose. Most of the time it’ll be just hanging down my husband’s shoulders, anyway.  I’ll have to think about it, and how much effort I want to put into changing the hood.

Have you ever made a hooded sweater?  How did it turn out?

Tubular Cast-on and Bind-off in the Wild

On Friday, I waxed poetic about the tubular cast-on and tubular bind-off.  How they look the same, how they’re perfectly stretchy, and how they are ideal for cuffs and collars.  But, I didn’t show you any examples.

Now, it’s time for me to put my money where my mouth is (metaphorically speaking.  I don’t have enough money laying around to just start eating it).

Behold, the hem and the collar of my (almost finished) Stellar’s Jay Cardigan.

OLYMPUS DIGITAL CAMERA OLYMPUS DIGITAL CAMERASee how they match perfectly?  The k1p1 ribbing makes a lovely subtle edging, and the tubular cast-on/bind-off stops the sweater from pulling even a little bit.  Sure, my perfect edges are something that only an obsessive knitter would notice, but as a slightly obsessive knitter, they’re something that makes me very happy.

And This Is How I Did It

Wednesday, I talked about a sweater I made for my grandfather, based off one that his mother made for him decades ago.

I thought it might be interesting to talk about how I combined a couple patterns, added my own details to create this customized sweater, and went from an idea to a finished product.

I started with the description my Grandfather gave me, “A brown and blue sweater with deer on it.”  From there I guessed that he meant an old-school ski sweater with some sort of color work pattern on the front and back.

235792[1]I looked at patterns for ski sweaters, and none of them were quite right.  They were either too fancy (too many colors or too fussy-looking), or more formal than I knew my grandfather would like to wear (he is a hunting, fishing, outdoors-y type).

Instead, I decided to start with a very simple pattern that I had used before, and modify it to my liking.  I picked the Weasley Sweater by Alison Hansel.  It’s a simple and easy drop-shoulder sweater that comes in a million sizes from infant to grown-up.  I’ve knit a couple sweaters from the pattern before, and they have all turned out really well.  (And the pattern is available for free!)1116161018_78043aab2b_z[1]

The only thing that I don’t care for with the Weasley Sweater is the rolled hem and collar.  Instead, I knit a k2p2 rib for the bottom, and a k2p2 crew collar.

OLYMPUS DIGITAL CAMERAAnd, instead of working the whole shebang in plain brown, I added a stripe of blue just above the cuffs and hem.  Adding a little bit of color work at cuffs and hem is a very “ski sweater” thing to do, and a stripe is the simplest color work you can do.

OLYMPUS DIGITAL CAMERAMy next problem was the deer motif that I had to put on the chest.  I looked at a lot of patterns, and finally decided to use the deer motif from the His & Hers Reindeer Jackets from Patons.  I originally planned to work the deer using the intarsia technique, but then I decided that I wasn’t insane.  (Intarsia and I don’t get along very well.)

Deer_Sweater_-_front_medium[1]Instead, I knit up the whole sweater in plain brown (except for the blue stripes at cuffs, hem, and the edges of the chest panel), and used the duplicate stitch to add the deer after once the knitting was done.  It took approximately 100 years to finish the deer (not really), but I think it was worth it.  Because the whole chest panel is knit plain, the sweater is stronger than it would have been if I had worked the deer in intarsia (and I think it looks better, too).

OLYMPUS DIGITAL CAMERASo, with a couple different patterns, some planning, a little futzing, and inspiration from the ghost of my great-grandmother, I think I managed to make exactly the sweater that my grandpa was looking for.

OLYMPUS DIGITAL CAMERA

Pattern: Sunday Morning Slipper Socks

OLYMPUS DIGITAL CAMERAPour yourself a cup of tea, pull out a favorite book, and slip on these thick and cozy socks for the perfect lazy Sunday morning.  Delicate lace flows from the leg to the top of the foot, making these super-warm slippers surprisingly girly and flattering.  They’re thick enough to be extra-cozy, but thin enough to leave on when you slip on your clogs and run to the store for some fresh doughnuts.  Worked in wooly DK-weight yarn and larger-than-normal needles, these socks knit up in a snap, so you have time to make a pair for yourself, your mother, your sister and your best friend.

See the pattern details on Ravelry.

Or, get the pattern here for $3: 

OLYMPUS DIGITAL CAMERA

Coffee Sweater

coffee sleeve

Keep your coffee comfy and cozy with this cup-sized sweater! If you’re as caffeine-addicted as I am, you know how important it is to keep your coffee nice and hot, while avoiding burning your fingers.  This coffee cup sleeve is super-fast to knit up, and the addition of a few simple cables will keep the attention of even the most caffeine-addled knitters. Since it’s a small project worked with worsted-weight yarn, you can make several from a single skein of yarn, making the Coffee Sweater a great pattern for gift knitting.

Get the pattern here:

Coffee Sweater

Slouchy Hipster Hat

Freaking hipsters.  Here in Seattle, they’re everywhere.  With their smug attitudes and their fixed-gear bicycles, and their super skinny jeans.  And suddenly, it’s cool to have gigantic glasses?  For real.  The poor kids who have perfect vision are actually wearing glasses frames without lenses because they think they look cool.  How weird is that?

Admittedly, if I really wanted to get away from hipsters, I could a.) not live in Seattle, b.) not play roller derby, c.) not hang out in brew-pubs and independent coffee shops or, or d.) all of the above.  But I like doing all of those things.

Actually… I think I might be a hipster.  Oh shit!

I like eating from food trucks, and think “organic” is pretty swell.  I wear cardigans and scarves, and my idea of a nice afternoon is one spent blogging from my local coffee shop.

God, that’s depressing.

But, I suppose, if you have to do a thing, you might as well go all-in.

So, fine! I give in!  Here’s a slouchy, hipster hat.  It’s knit with pretty fine yarn on largeish needles to give it a plenty of floppiness.  Deal with it.

(I even tried to make instagram-ish photos for this pattern, because why not.  Don’t laugh too hard.)

instagramish2


Materials:

1 skein sock or fingering weight yarn.  (I’m using Dale of Norway’s Baby Ull in color 9436)

Size 5  16″ circular needle (or size to get gauge)

Size 7 16″ circular needle (or size to get gauge)

Size 7 double-pointed needles (or size to get gauge)

Scissors and Tapestry needle

Gauge:

Size 5: 6.5 stitches/inch in stockinet stitch

Size 7: 5.5 stitches/inch in stockinet stitch

Size:

Women’s Small(Women’s Large)

Shown in size Large

Instructions:

  • Using your size 5 circular needle, cast on 120(136) stitches.  Mark the beginning of your row.  Work in the round, in a k2p2 rib for 2 inches.
  • Change to size 7 circular needle, and knit in stockinet stitch (knit all rows), until the piece measures 7(7.5) inches from the edge.
  • Work crown decreases as follows:

1.  [k6, k2tog] around
2. & 3. Knit
4. [k5, k2tog] around
5. Knit
6.[k4, k2tog] around
7. Knit
8. [k3, k2tog] around
9. Knit
10. [k2, k2tog] around
11. [k1, k2tog] around
12. [k2tog] around

  • Cut yarn, leaving a longish tail.  Draw the yarn through the loops at the crown of the hat to close up.  Sew in ends.
  • Put on hat and jump on your fixie to go down to the coffee shop for a nice organic matcha green tea latte with soy and a vegan cupcake.

instagramish

Cabled Container Cozy

I firmly believe that you can never own too many containers.  Bags, boxes, jars, crates… it doesn’t matter.  I can always find something to put in them.  Maybe it’s more containers… but the point still stands.

When those containers are pretty, it’s even better.

Here’s a recipe for a cabled sleeve that you can use to pretty-up any straight-sided containers around your house.  I’m using an oatmeal canister and a small coffee can, but you could use the same recipe to cover jars, pots, vases, or other plastic or ceramic containers.  They make great places to keep needles, flowers, and the tiny little balls of sock yarn that are left over at the end of a project that you don’t want to throw away.  (Don’t look at me like that… I know I’m not the only pack-rat out there.)

OLYMPUS DIGITAL CAMERA

Materials:

1 straight-sided container (Coffee cans, oatmeal canisters, old (clean) juice cartons with the tops cut off neatly, storage crate-the kind without big holes in them, vases etc.  Look around your house… I can guarantee you have something that would work for this project)

1 (or more) skeins of worsted-weight yarn.  (Use more than one skein if the container you are covering is gigundo.  Don’t spend too much money on this project… It’s not like a sweater or something that you’ll have to wear around close to your skin.)

Size 8 needles (DPNs or appropriately sized circulars, depending on the size of the project.  I’m working on a smallish coffee can, so I’ll be using DPNs.  If I was covering a big crate or something, I’d use circulars that were a little smaller than the diameter of the container.)

An appropriately sized cable needle

Tape measure

Calculator (optional if you’re good with math in your head)

Stitch markers

Scissors and tapestry needle

Spray paint (0ptional)

Hot glue (optional)

Instructions:

  1.  Make a stockinet (knit 1 row, purl one row) gauge swatch.  I know.  Lame.  But, it will be important later.  The container cozy really has to fit nicely to give you a good result.  Measure your gauge and write it down.  My gauge is 6 sts/in.
  2. Rip out the gauge swatch.  Or not.  Finished gauge swatches make excellent coasters.
  3. Measure the circumference of your container by wrapping the tape measure around the outside of the container.  (My container’s circumference is 12 inches.) Multiply this number by your gauge.  (6 sts/in x 12 in=72 stitches)OLYMPUS DIGITAL CAMERA
  4. Round this number to the nearest multiple of 4.  (72 already is a multiple of 4, so I can skip this step.)
  5. Cast on your number of stitches (in my case, 72), place a marker at the beginning of your round, and work 2 rows in the round in a k2p2 rib.
  6. On your next row, you’ll continue working the k2p2 rib, but at the same time you’ll start your cables.  I will be doing 3 cables on my coffee can, placed more or less evenly.  Make as many or as few as you want.  (You don’t have to do any.  I won’t call the cops or anything.)  Work along the row until you reach the spot where you want your first cable to be.  After a p2, place a marker, k6, and go back to your k2p2 rib pattern.  Continue to where you want your next cable to be, and the same thing (after the p2, place marker, k6, continue in pattern).
  7. Now that you’ve got your cables established, the rest is easy.  Continue working in pattern, following what you’ve been doing (k2, p2 rib, k6 when there’s a cable) for 3 more rows.
  8. Next row, get out your cable needle, and work up to your first stitch marker.  Transfer the first 3 stitches from the “K6” to your cable needle, and hold them in front of your work.  Knit the second 3 stitches of the cable.  Then knit the 3 stitches from the cable needle.  Continue working in pattern to your next cable and do the same thing. (Here’s a video with instructions if you’re having trouble with your cable.  She talks a lot, but gets around to instructions eventually.)
  9. Work in pattern for 6 rows, then work another cable row.  And rinse and repeat.   Keep adding height to your sleeve until the piece measures 1/2 inch less than your container height.
  10. To finish, work 3 rows even (after your last cable row), then work 3 rows of k2p2 rib, and bind off loosely.  If you want, you can continue the k2p2 rib for a few inches, if you want a folded-over edge.
  11. Weave in the ends, and trim the tails (making sure they lie on the inside of the tube).OLYMPUS DIGITAL CAMERA
  12. (Optional)  If your container has lots of colors and patterns on it, you may want to spray paint it with a color similar to that your yarn.OLYMPUS DIGITAL CAMERA
  13. Slip your piece over your container, like a sock.  If the tube is too long, fold the top of the tube over, inside the container to make a nice finished-looking edge.   If the tube is too loose, add a couple dabs of hot glue at the top of your container to hold the sleeve up.
  14. Add in flowers, knitting needles, or whatever else you want to display in your cool new container.  Brag to your friends about the handmade vintage vase on your mantelpiece that you got from Anthropology for about 500 bucks.  (They don’t have to know it’s an old coffee can and about 50 cents worth of yarn that you had in the back of your closet.)OLYMPUS DIGITAL CAMERA