Category Archives: Techniques

Better late than never

This is one of my favorite/least favorite genre of project. It’s one of those tasks that I know I should get done right away, because if I don’t do it right off the bat, then it’ll sit in my “to be mended” pile for months.

And that’s exactly what happened.

At the beginning of Fall, my big kid was wearing their favorite stripey sweater. It’s a cute, scrappy project that I made for them about a year ago. It’s getting a little “well loved” but still has plenty of life in it.

Anyway, I was sitting, chatting with them, and they were wearing the sweater inside-out (because that’s something that 4-year-olds do, I guess). They noticed the ends poking out of the sweater, and since it was a “use up all the scraps” project, there are quite a few ends. Before I could say anything, they grabbed one end, said “What’s this?” and yanked with all their might.

Sigh.

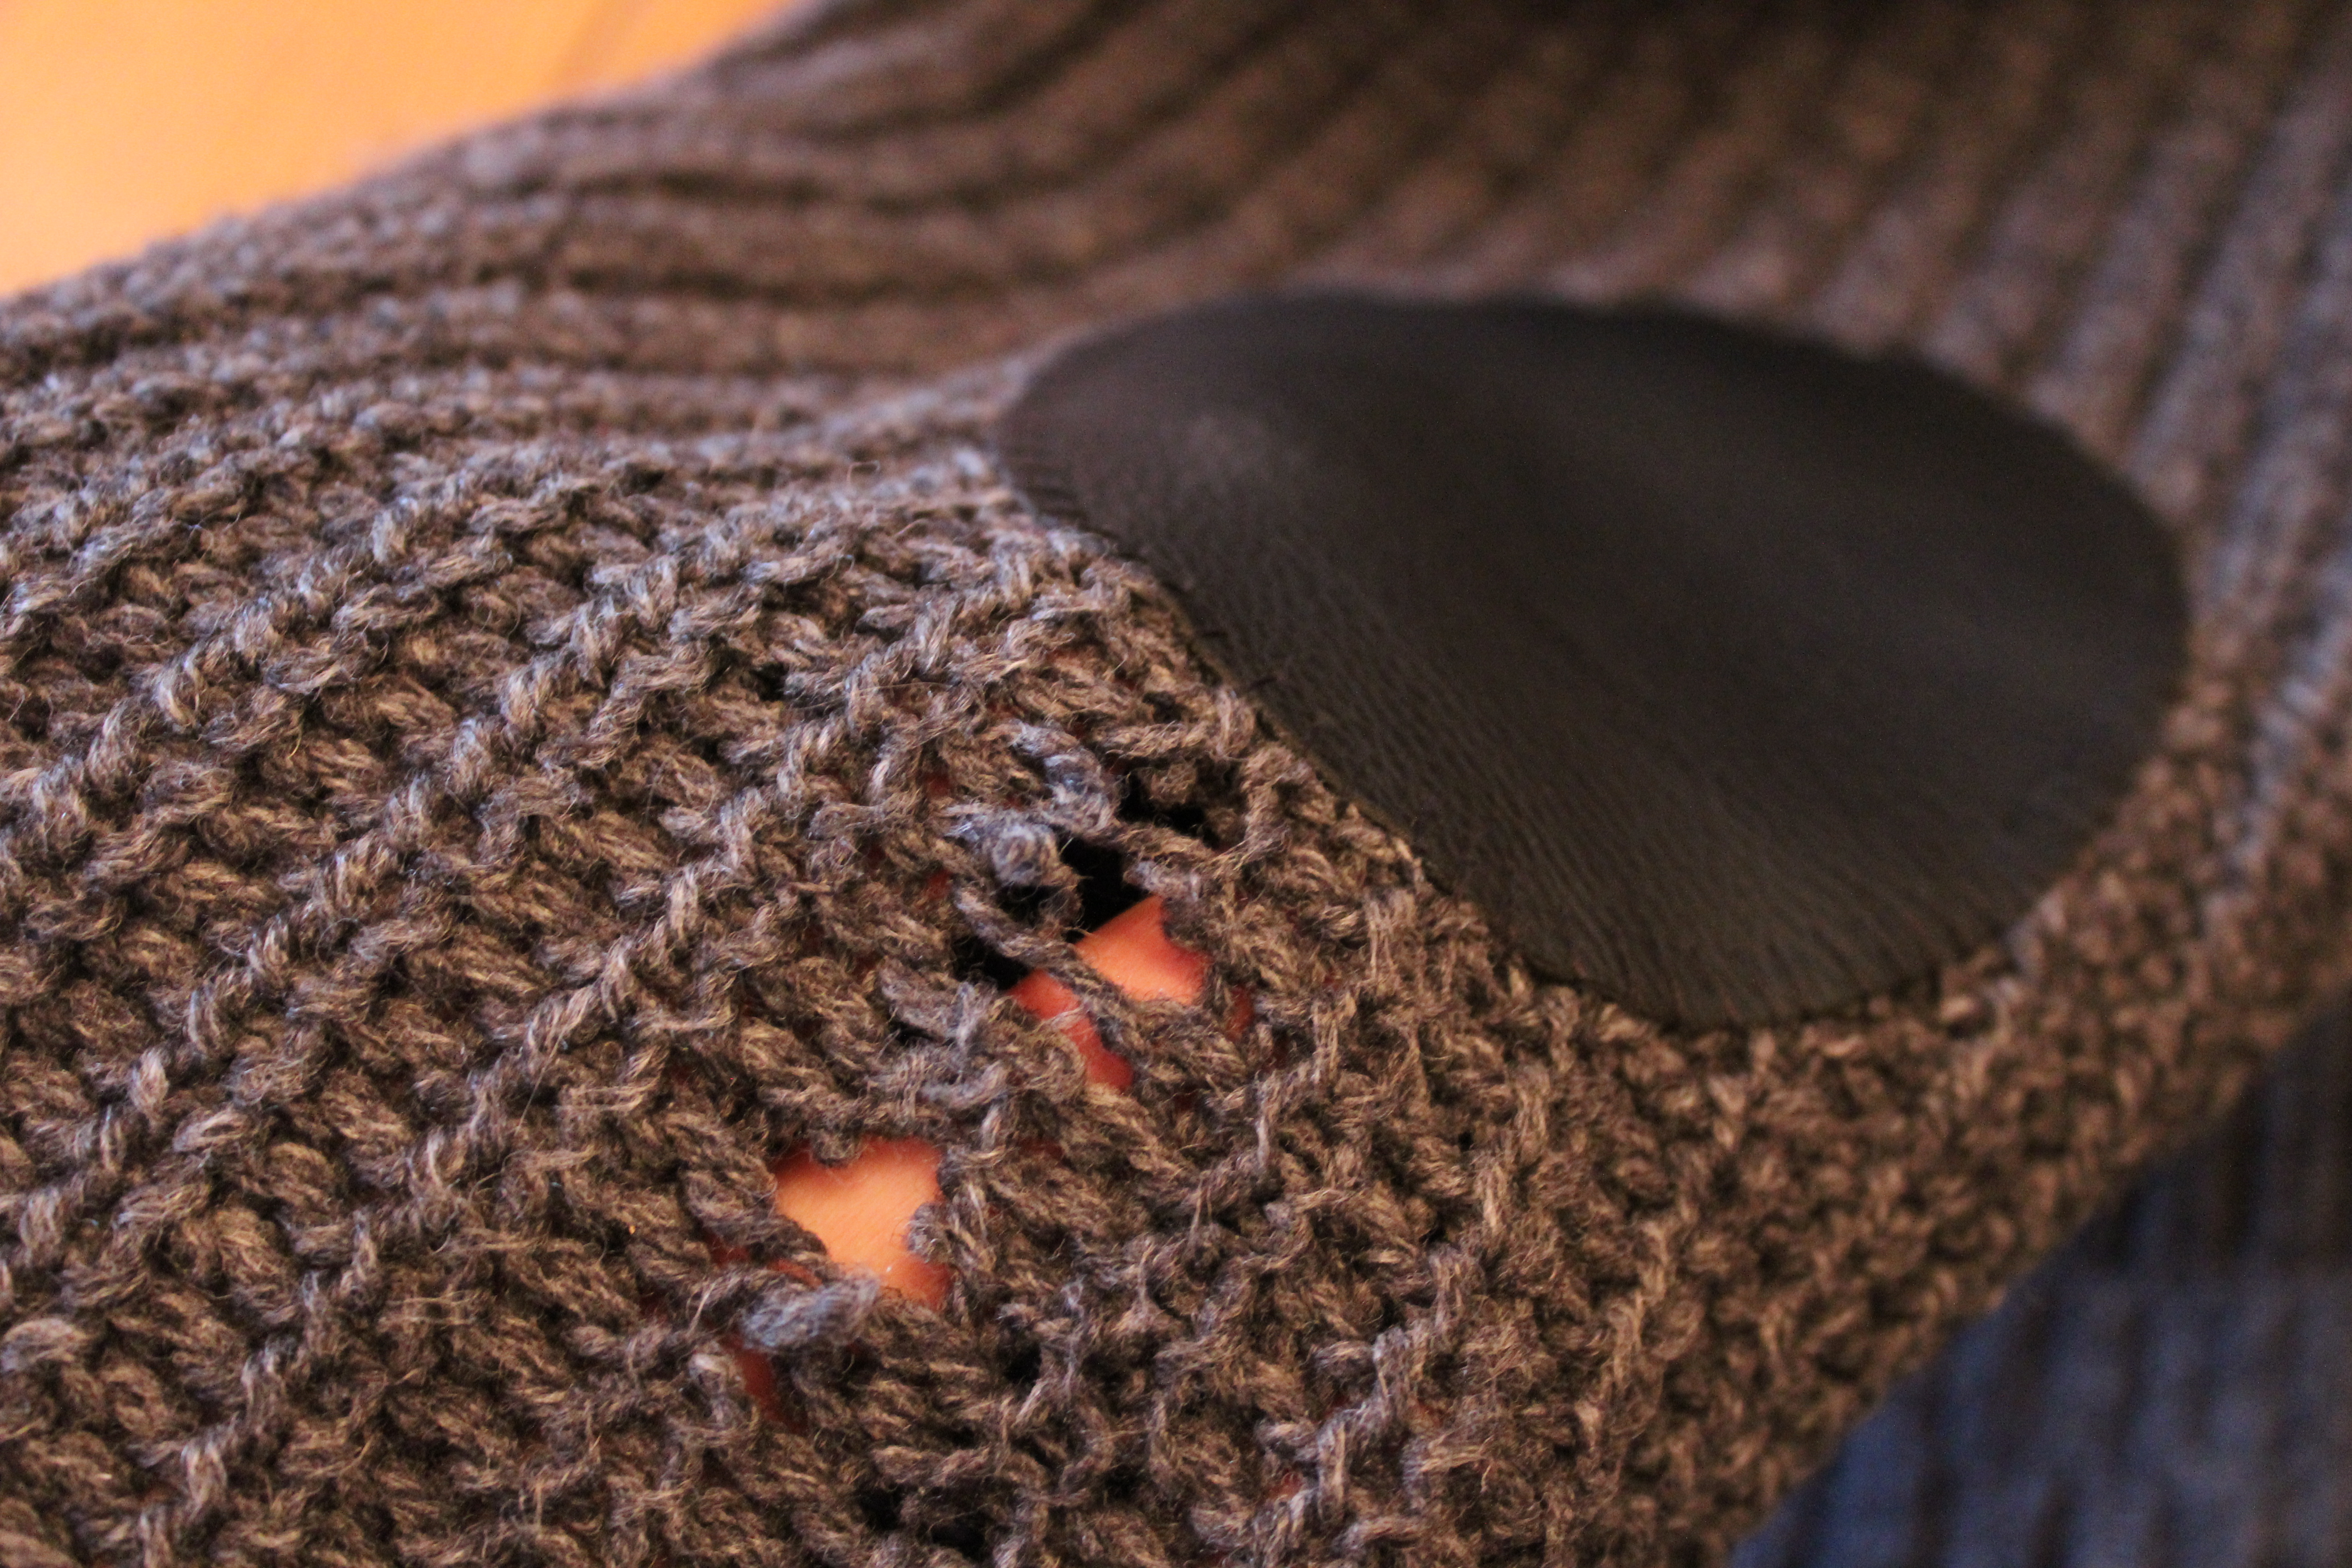
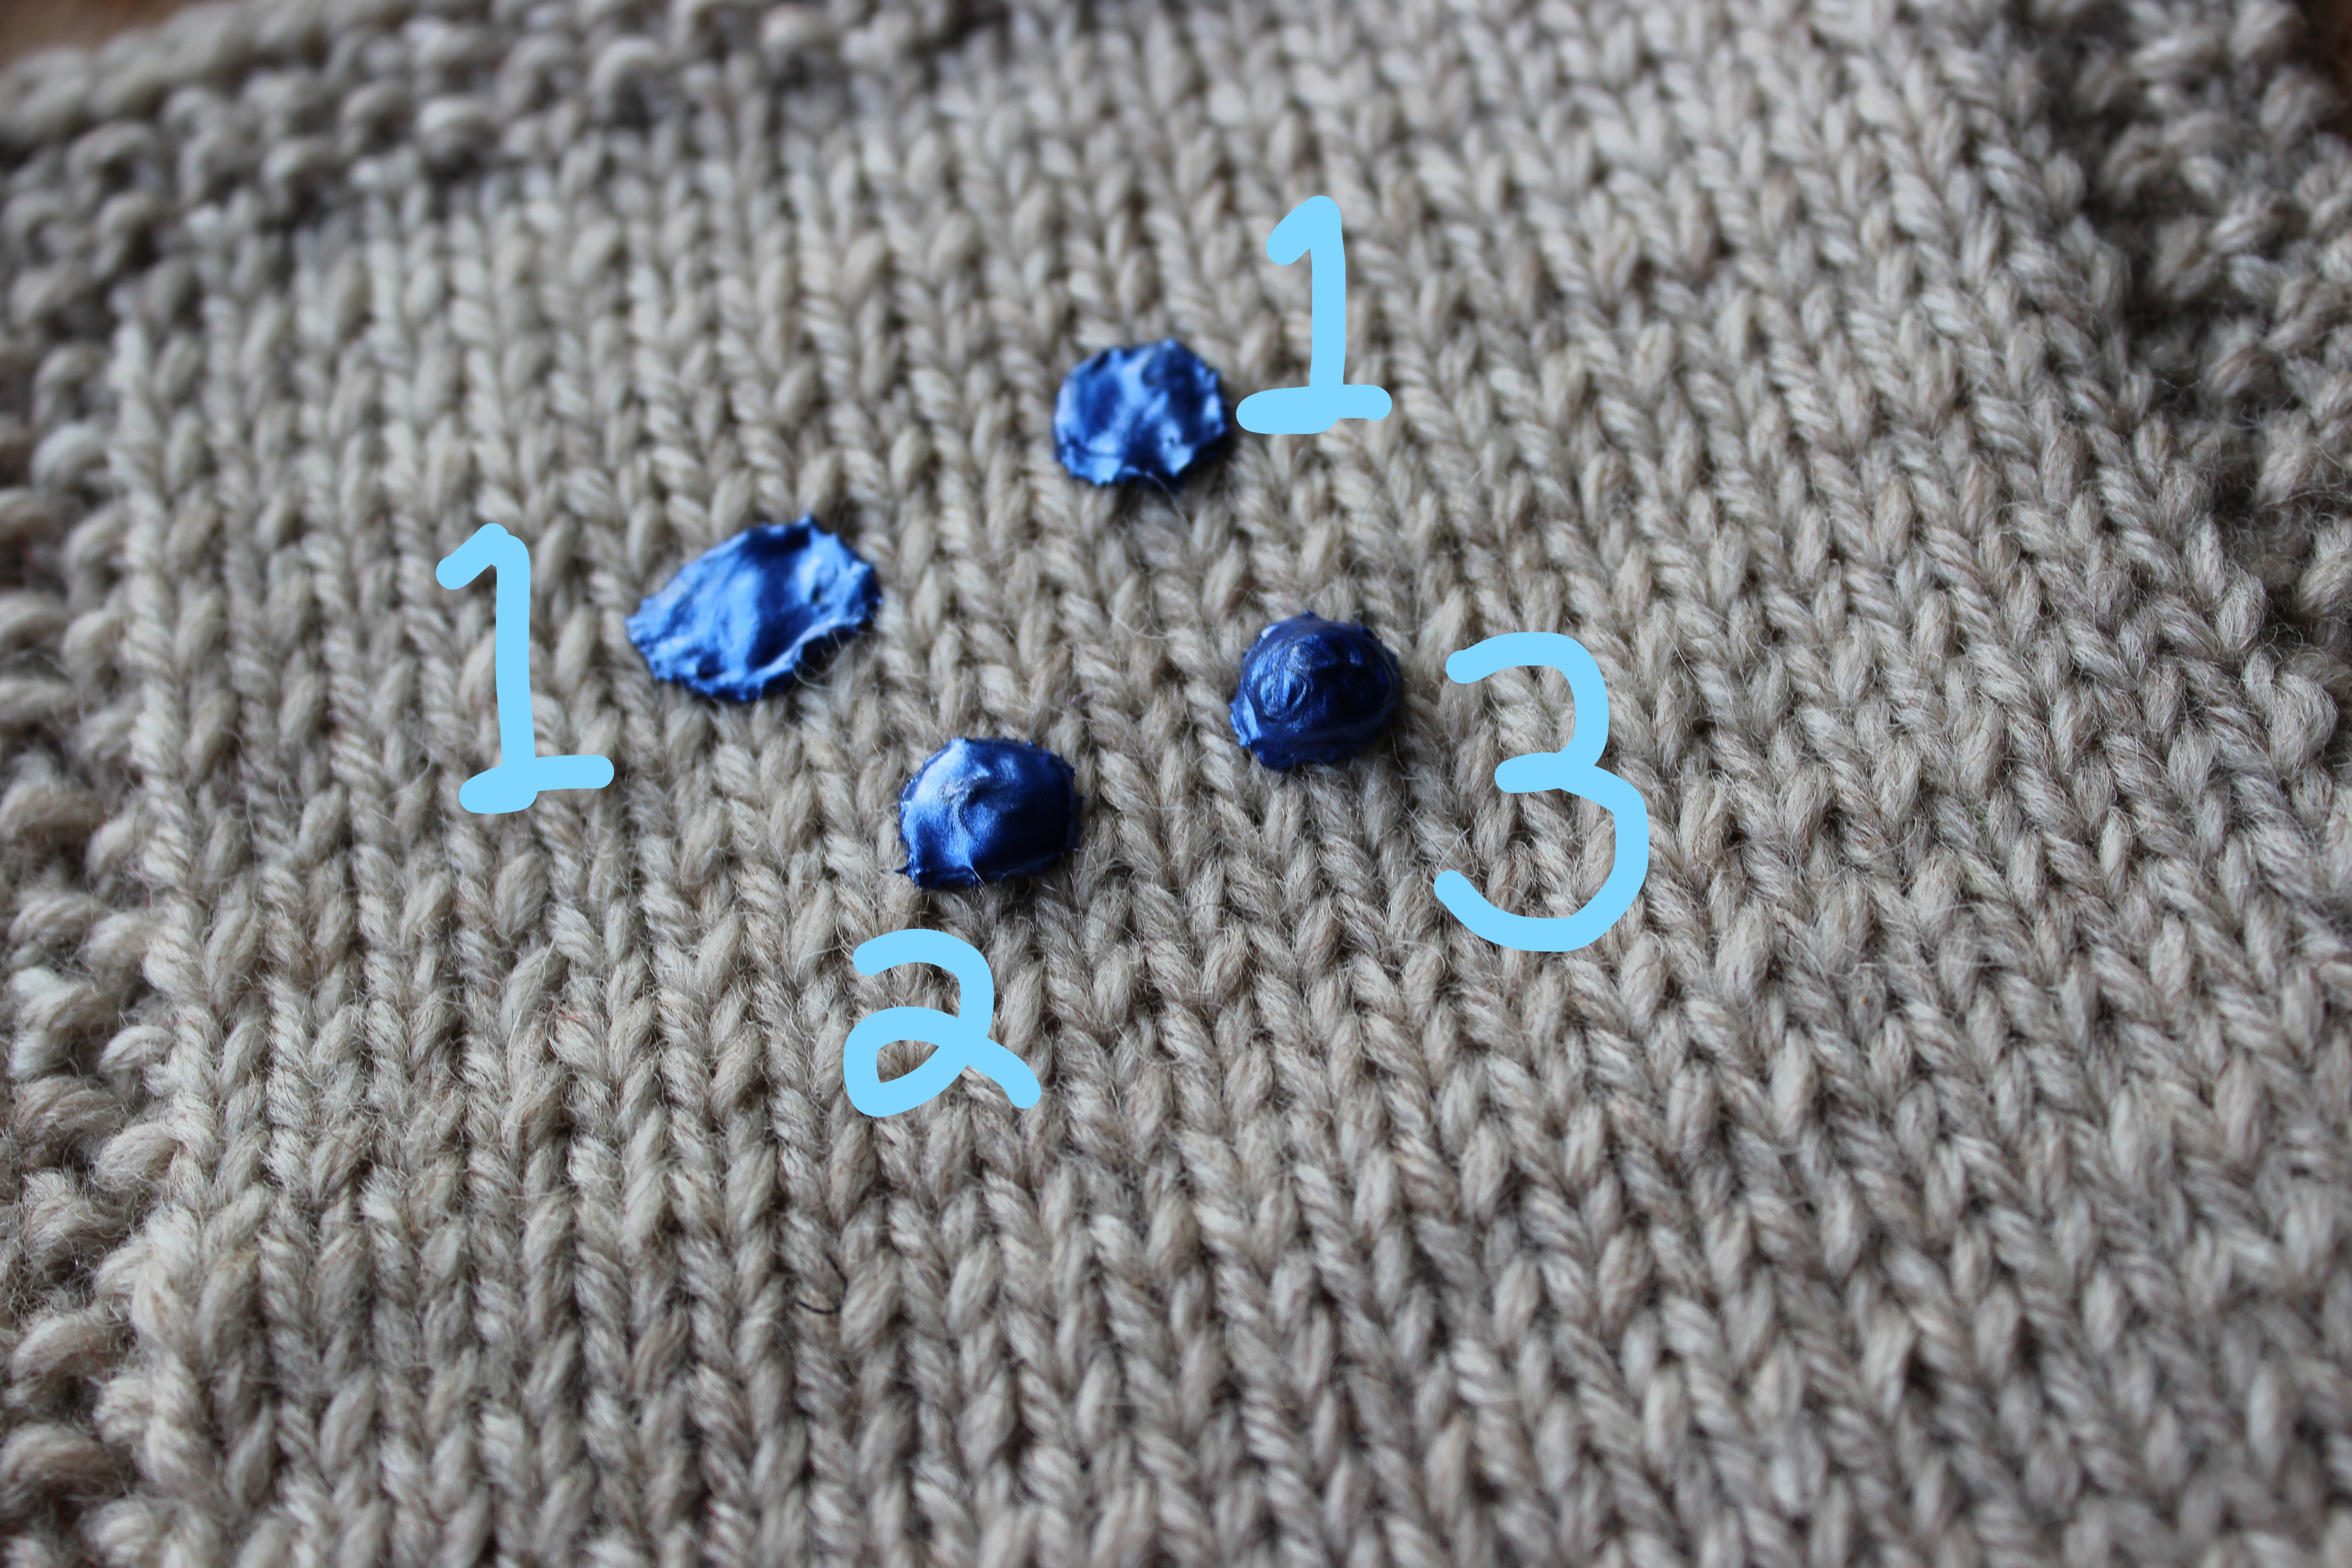
It doesn’t look that bad from the outside, but it’s turned into a weird, 4-inch-long lump. (It’s the blue stripe right at the top of the red section… It kind of pulls in and makes the blue disappear).

But if you look to the inside… it’s pretty obvious that something’s wrong.

So, I thew the sweater in my knitting/mending pile and figured I’d fix it when I had the time.

Long story short… that was probably 3 months ago, and I’m not even sure if the sweater still fits the kid.

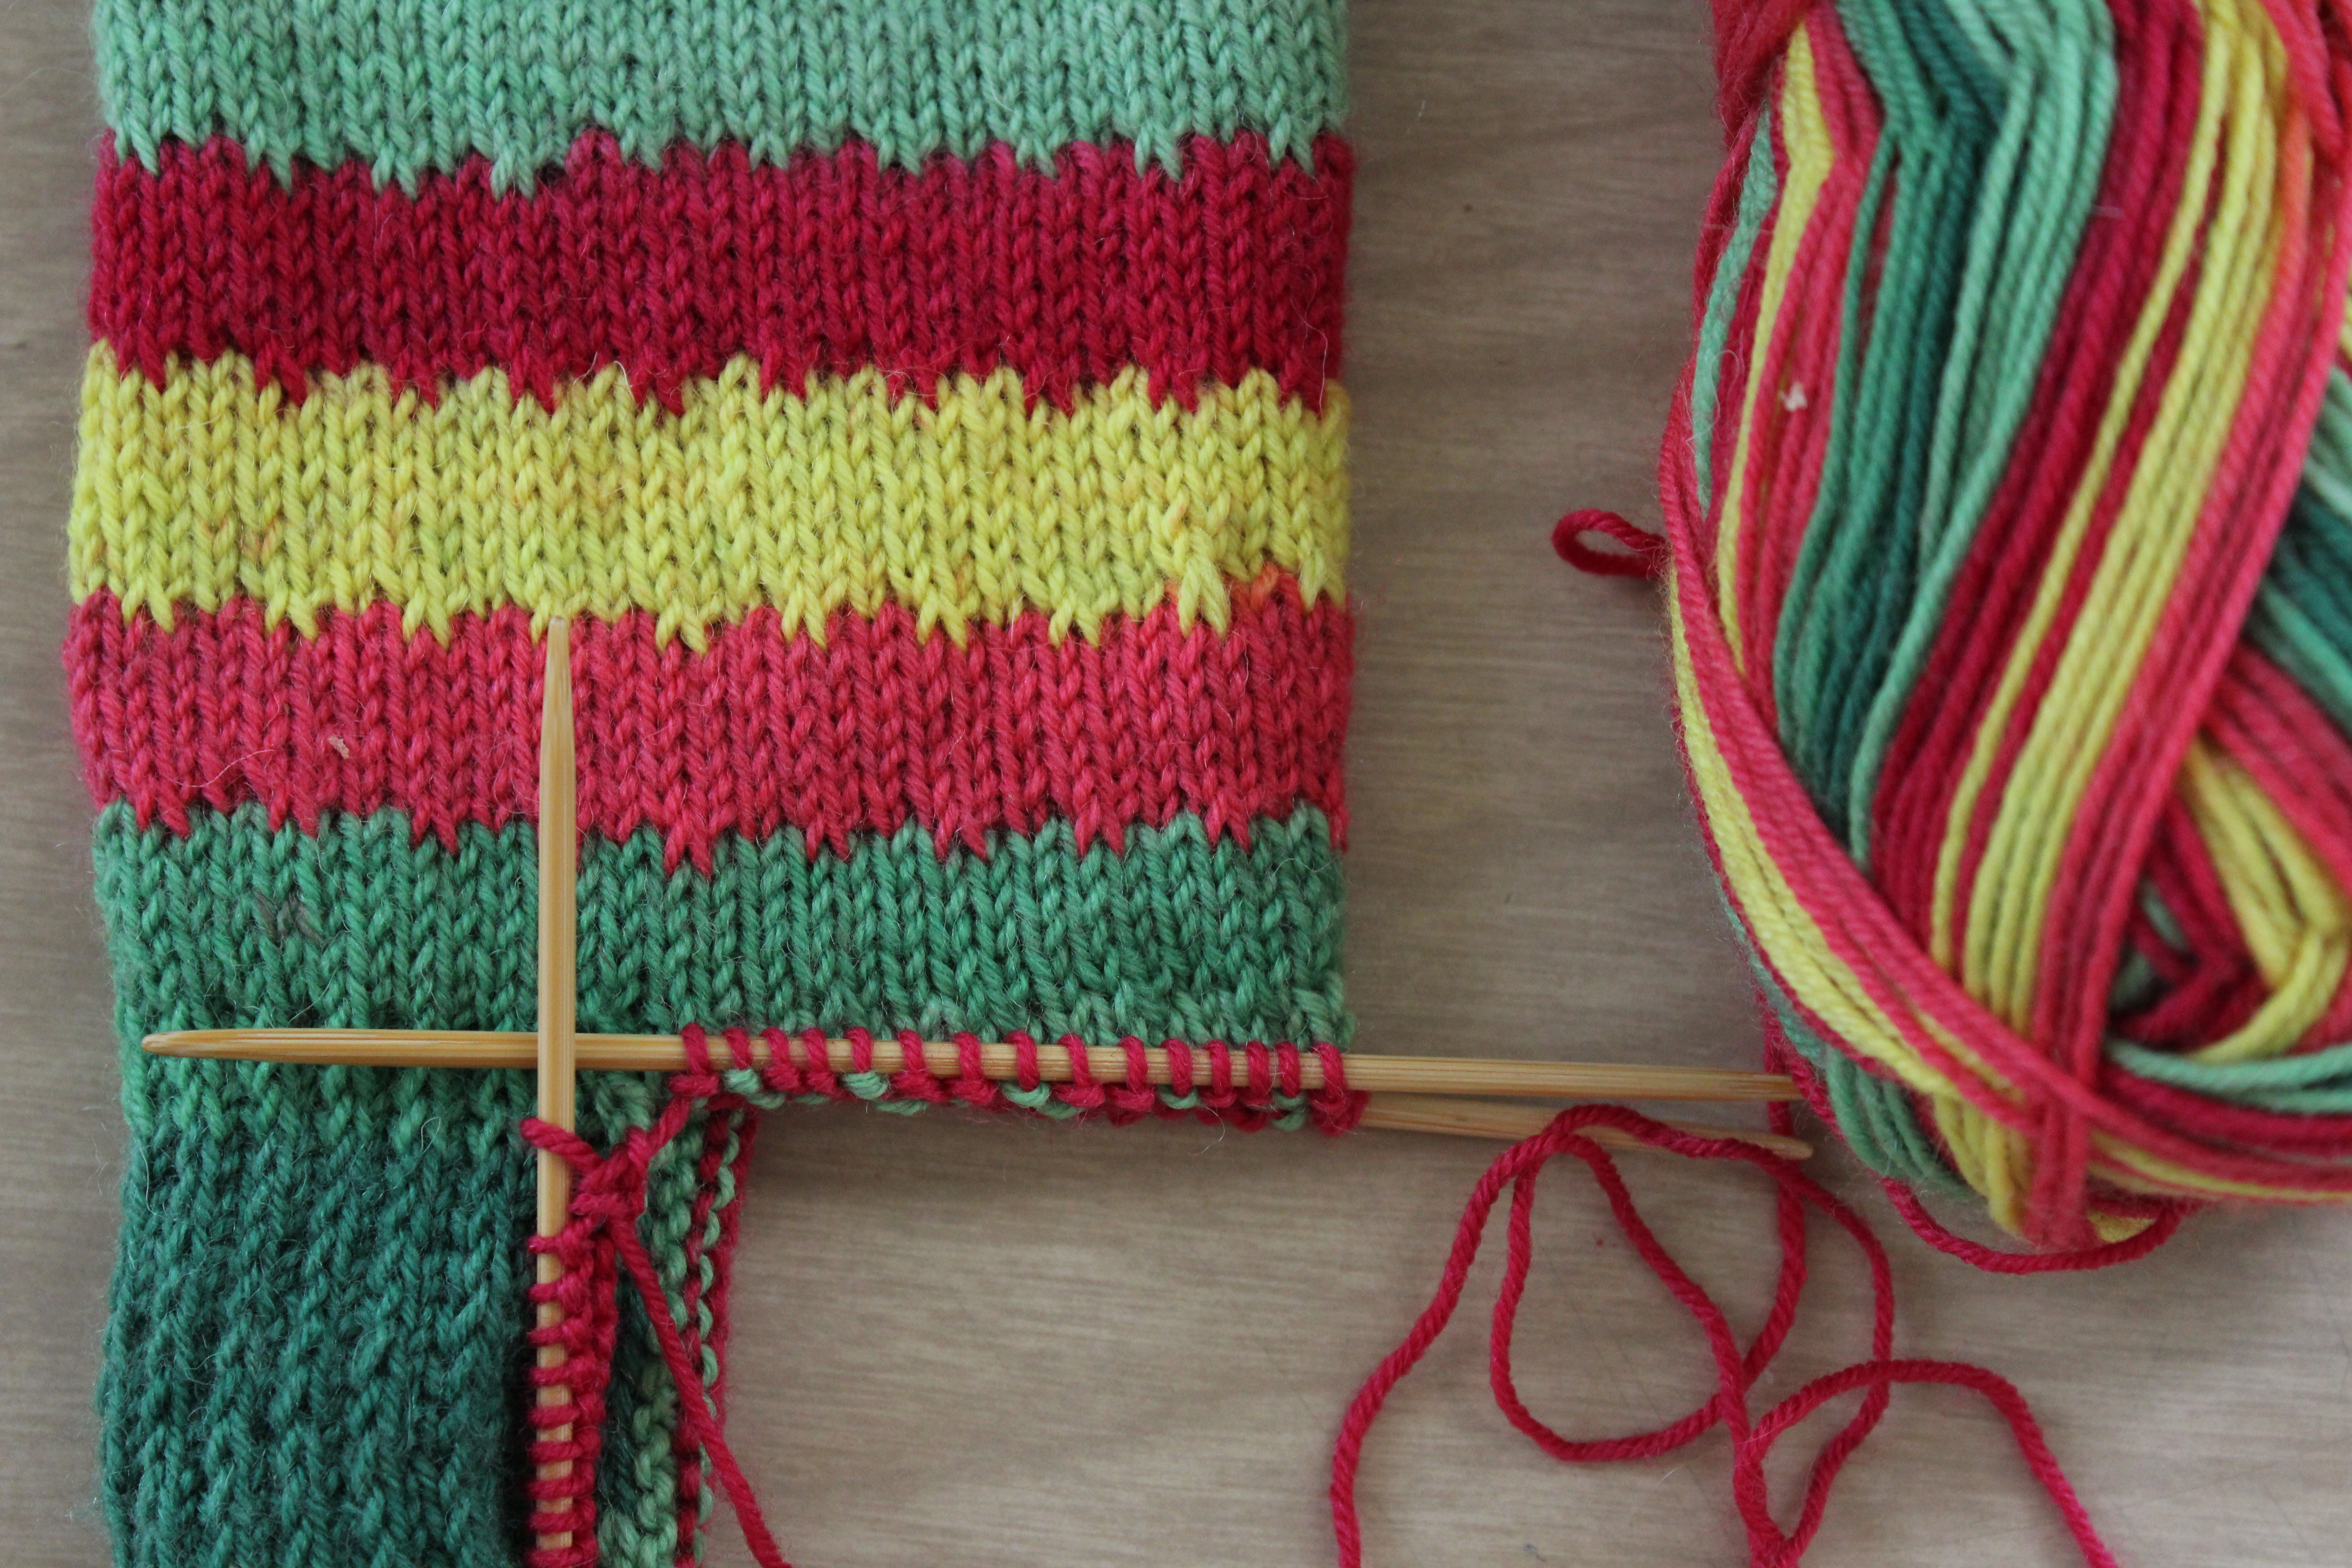
Anyway, in a fit of productivity this afternoon, I sat down for 10 minutes (with the kids crawling all over me, so I probably could have gotten it done in 5, had I been alone) and fixed the whole dang thing. I used a big needle to unpick all the super-tight stitches and redistribute the yarn. Simple.

The sweater is good as new! (I mean, not new. There are plenty of stains and the elbows are a little threadbare. But still.)

Why are the simplest tasks sometimes the hardest to finish?

Big Mending

I guess I’m on a mending streak here. My dad was in town a few weeks ago, and he brought his favorite sweater with him. (Hi Dad!) Halfway through the visit he showed me the elbows on his sweater, and they were… disreputable. But, that’s what happens when you wear a sweater every day for years. (Even if you put leather elbow patches on it.)

Elbow 1- Bad.

Elbow 2- Very bad.

He asked me if it was fixable, and I said yes, of course! But after a little investigating I realized that even if I was very careful, the holes/runs were so big that no matter what I did, wouldn’t be invisible. But Dad said that he didn’t mind, and in fact, he asked me to use bright red yarn to fix it! I love a little bit of visible mending, so I got to work.

I used a crochet hook to fix the bigger runs (again, not perfectly- the sweater was commercially made, so I didn’t have the ability to completely match the knitted pattern), then brought in the red yarn.

I picked up stitches along the bottom edge of the holes, and started working back and forth in stockinette stitch. Every RS row, I picked up a stitch from the sweater at the beginning and end of the row (and sometimes in the middle, too), and worked a K2tog with the red and the gray yarns.

The K2togs allowed me to attach the patches as I was knitting them, so there wasn’t any sewing! And, as a bonus, it let me increase and decrease the size of the patches to pretty precisely cover the thin parts of the sweater.

Is it perfect? Not exactly. But I do love the cozy charm of a well-worn and well-patched sweater. And Dad will (hopefully!) get to keep wearing his sweater for years to come.

What’s the biggest thing you’ve mended?

Into the Wash

It turns out I may have trained my family too well.

It took no more than 5 loads of laundry to get this dang swatch through the washer and dryer. Everybody kept pulling it out of the hamper (including my 4-year-old, who told me “Knitting doesn’t go in the laundry”). Which, I suppose is a good thing, in the long run. It’s nice to know that they all know how to treat knitwear.

But anyway. I made a swatch from Berocco Vintage. It’s half mistake-rib and half stockinette, worked on US5s. A nice sweater-y swatch. Nothing too out of the ordinary.

I took gauge and got roughly 5.5 sts/in in stockinette and mistake rib.

So, now it’s into the wash and…

Well, that felted up! It’s actually super soft and squishy, and I’m sure my 4-year-old would be very into a sweater made from this felted fabric. (They can truly never be “too cozy.”)

Just for science, I took gauge again and got basically 5.5 sts/in. Not much different gauge-wise, but the fabric definitely looks different.

I’m tempted to go ahead and knit up my first-ever felted sweater, but I wonder how much long-term wear a sweater like that would have. Would it felt more every time I washed it? Or, would I have to hand-wash a sweater for a preschooler?

Have you ever planned a big felted project?

Speeeeeedweve

You guys, I’ve got a new tool, and I love it!

It’s a Speedweve-style darning loom, and it’s just the coolest. I’ll be honest, I found out about this from an ad on Instagram, so you know, not the most high-brow place to learn about new tools. But, regardless of where I found it, I’m excited to have it, use it, and tell you about it!

First off, here’s the little loom. It fits really nicely in my hand, and has two parts. A lovely, smooth wooden disk that goes inside the sock (or whatever garment you’re darning), and a hefty metal piece that goes on the outside. They’re held together with rubber bands.

My favorite part is flipping the little hooks back and forth. It’s just so satisfying! In fact, it’s so satisfying, I taught myself how to make an animation, so you can experience it yourself:

Lucky for me, I’ve got about a million socks on the verge of falling apart, so I’ve got lots of darning ahead of me. This is one of my less-embarrassing socks:

So, I slip the wooden disk into the sock, and arrange it under the bare patch, hook up the metal part of the loom and lock it in place with rubber bands.

Then I get a nice long piece of sock yarn and start warping the loom. You make tiny stitches at the bottom of the area to be patched, and loop the thread around the loops.

Then it’s just a matter of weaving through the warps. Flipping the hooks back and forth lets you lift/lower the threads of the warp, which makes for faster weaving. And, at the end of each row, you make a tiny stitch into the sock, fastening the patch in place as you weave it.

After that, I take off the loom, sew the top warp loops in place with the whip stitch, and I’m on my way. I ended up making four different patches to cover all the thin spots on this sock- truly living my Oliver Twist Fantasy. (And like I said, these are some of my least disreputable… I really have to start up sock knitting again.)

Do you darn your socks? Do you have any fun new tools?

Eyeball Experiments

So, I’ve been experimenting, and need your input. Last week, I “finished” the little butterfly stuffies that are Christmas gifts for my kids. “Finished” is in quotes because they still don’t have faces. Just unsettling stitch markers where the eyes should be.

Obviously, I’m too late to add safety eyes (the safety of which is debatable), and buttons/beads are right out since I have a very chew-y one-year-old. I might do a bit of embroidery, or applique on little felt eyes, but that’s fussy.

There must be a better way! I’m a child of the 90s, so, I thought maybe puffy paint would work?

I pulled out an old swatch and gave it a try:

Cute, right? And promising! The paint beaded up nicely, at least at first. I let it dry, and…

Pffffft… Well, that didn’t dry as nicely as I wanted it to. It’s lumpy and flat, not nicely beaded up, like it was when it was still wet. On the plus side, at least it was really sturdily on there. No kid (even a heavy chewer) is going to get that paint off.

I added another coat of paint, in hopes that it would bead up, like I wanted it to in my dreams. And then I added another coat.

For comparison:

One coat was super-flat, 2 coats made a nice bump, and 3 coats was almost spherical. Unfortunately, all three versions were weirdly lumpy. But, I wonder if that’s a matter of the paint being kind of pearlescent. I think I’m going to go get some plain black, and try again.

I feel like this has the potential to be a great eyeball technique, but I’m not yet convinced. I think I need to do more experimenting before I commit to painting the butterflies (I don’t want to mess them up so soon before Christmas!).

Do you have any tricks for great eyes?

A Variation on a Theme

I don’t know about you, but I’ve been feeling the need for a little bit of simple, soothing, sock knitting. Nothing fancy, nothing crazy, something just this side of total vanilla socks.

So, I went for a dive into my stash (because I’m still not comfortable going out to an actual yarn store, though I miss my LYS (and the outside world) dearly) and pulled out a couple skeins of the Felici yarn that I designed for Knit Picks last summer. I like the idea of self-striping yarn, but I always get bored just doing a stockinette sock, so I decided to do something just a little bit different.

I’m adding slipped stitches!

I’m knitting these bad boys up using my usual sock pattern/technique, but instead of going for 100% stockinette, whenever I get to a color change, I do a round of (K2, slp 1) around, starting wherever the color changes. I love how they’ve got just a smidge more character. And, they’re keeping me just enough on my toes that I’m not getting bored with them!

And, in case you’re worried, the slipped stitch rows are such a small percentage of the whole sock, they don’t change the fit on the sock (or at least I hope they won’t).

I bet you could use the same slip-stitch technique with regular stripes, too, but then you’d end up weaving in all those ends… and who wants that?

What have you been working on lately?

Spring Cleaning

Or, I guess it’s Fall Cleaning…

The mornings are getting cooler and I’m reaching for my big wool sweaters again, sweaters I haven’t worn in months.  And, frankly, they’re kinda (very) gross.

Theoretically, I do a big cleaning of all my knitwear every year, then spot-clean as necessary.  But if I’m being honest, this hasn’t happened in quite a while.  Like, maybe 5 years since I last did a through once-over of all my sweaters.   And it shows.

I put on my Bubbles Pullover the other day, and my allergies went off like I’d just rubbed my face in a pile of pollen, dust, and cat dander.  Not ideal.

So, while I might not have the time to devote to every single sweater in my closet, I do have time to clean at least this one.  Let me show you how I did it.

First, I hit it with the de-piller.  I like this Sweater Stone.  It seems pretty efficient, and it’s what I’ve had for years.  The de-pillers with blades kind of scare me, like they might jump out and cut my sweater, but this one seems fairly gentle (maybe?).  But, if I have a really special sweater, made with really delicate fibers or featuring a lot of texture-work, I’ll just go through and pick off the really bad pills by hand.  Efficient? No.  Gentle? Yep.IMG_2110
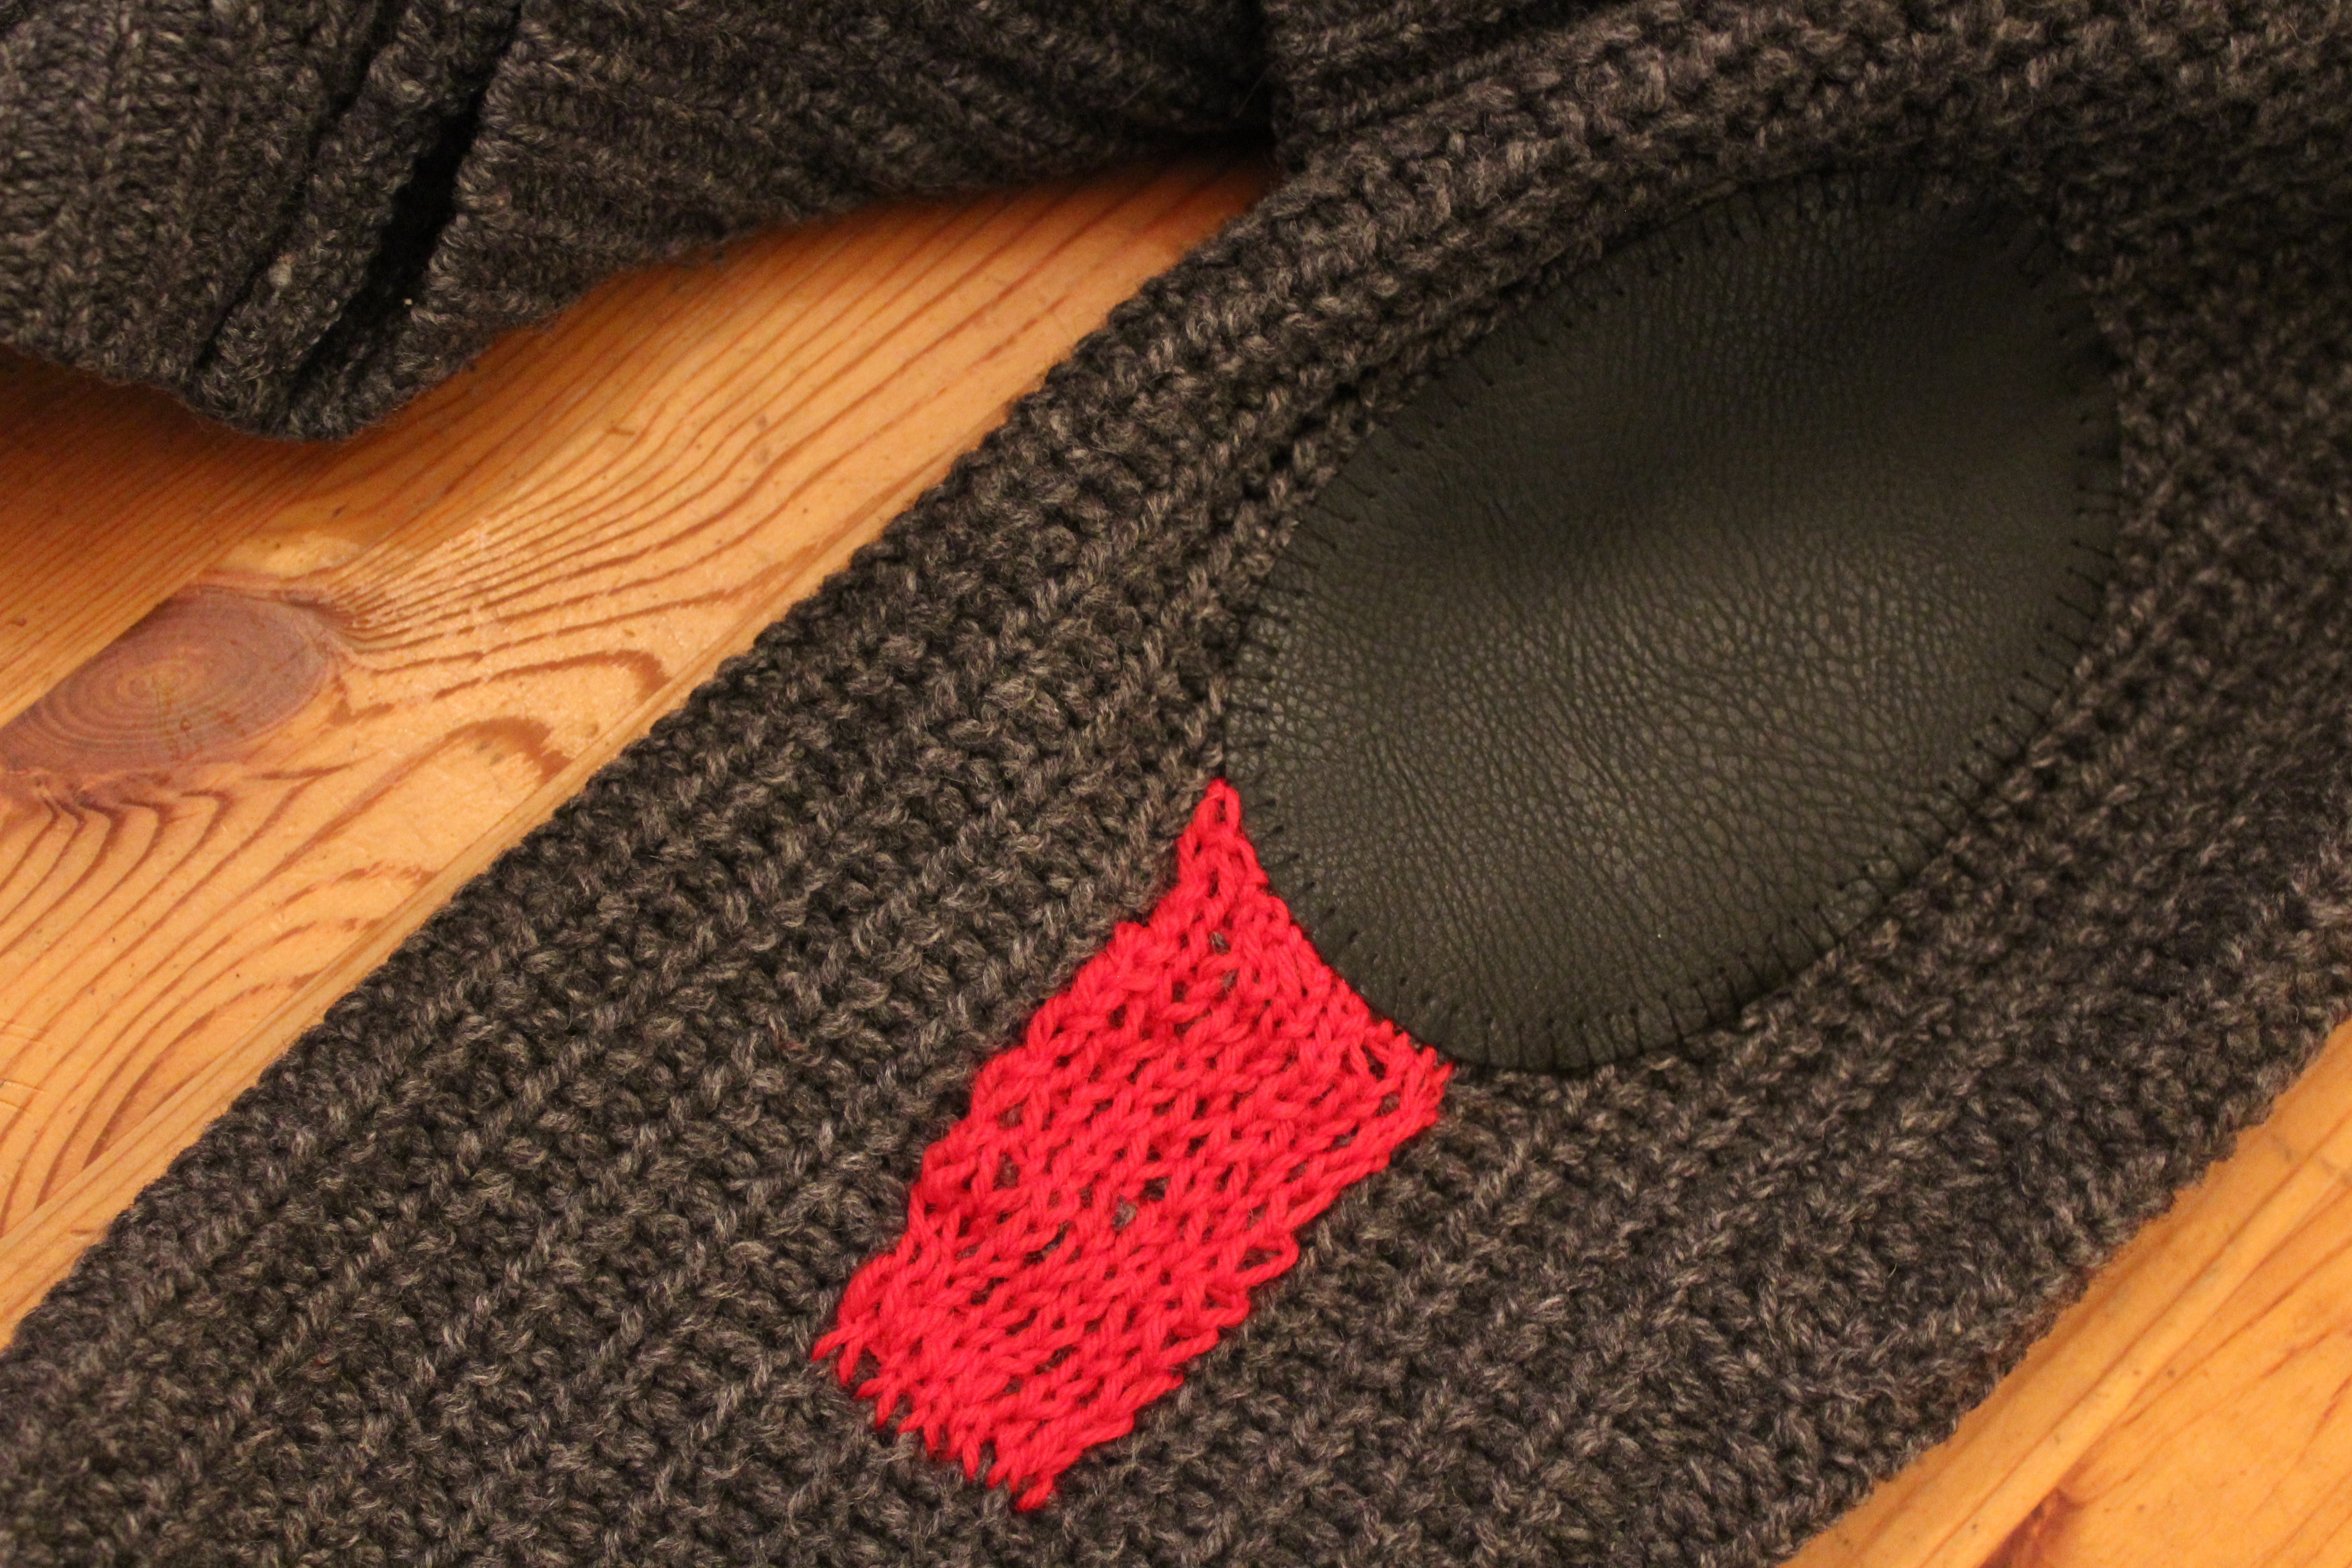
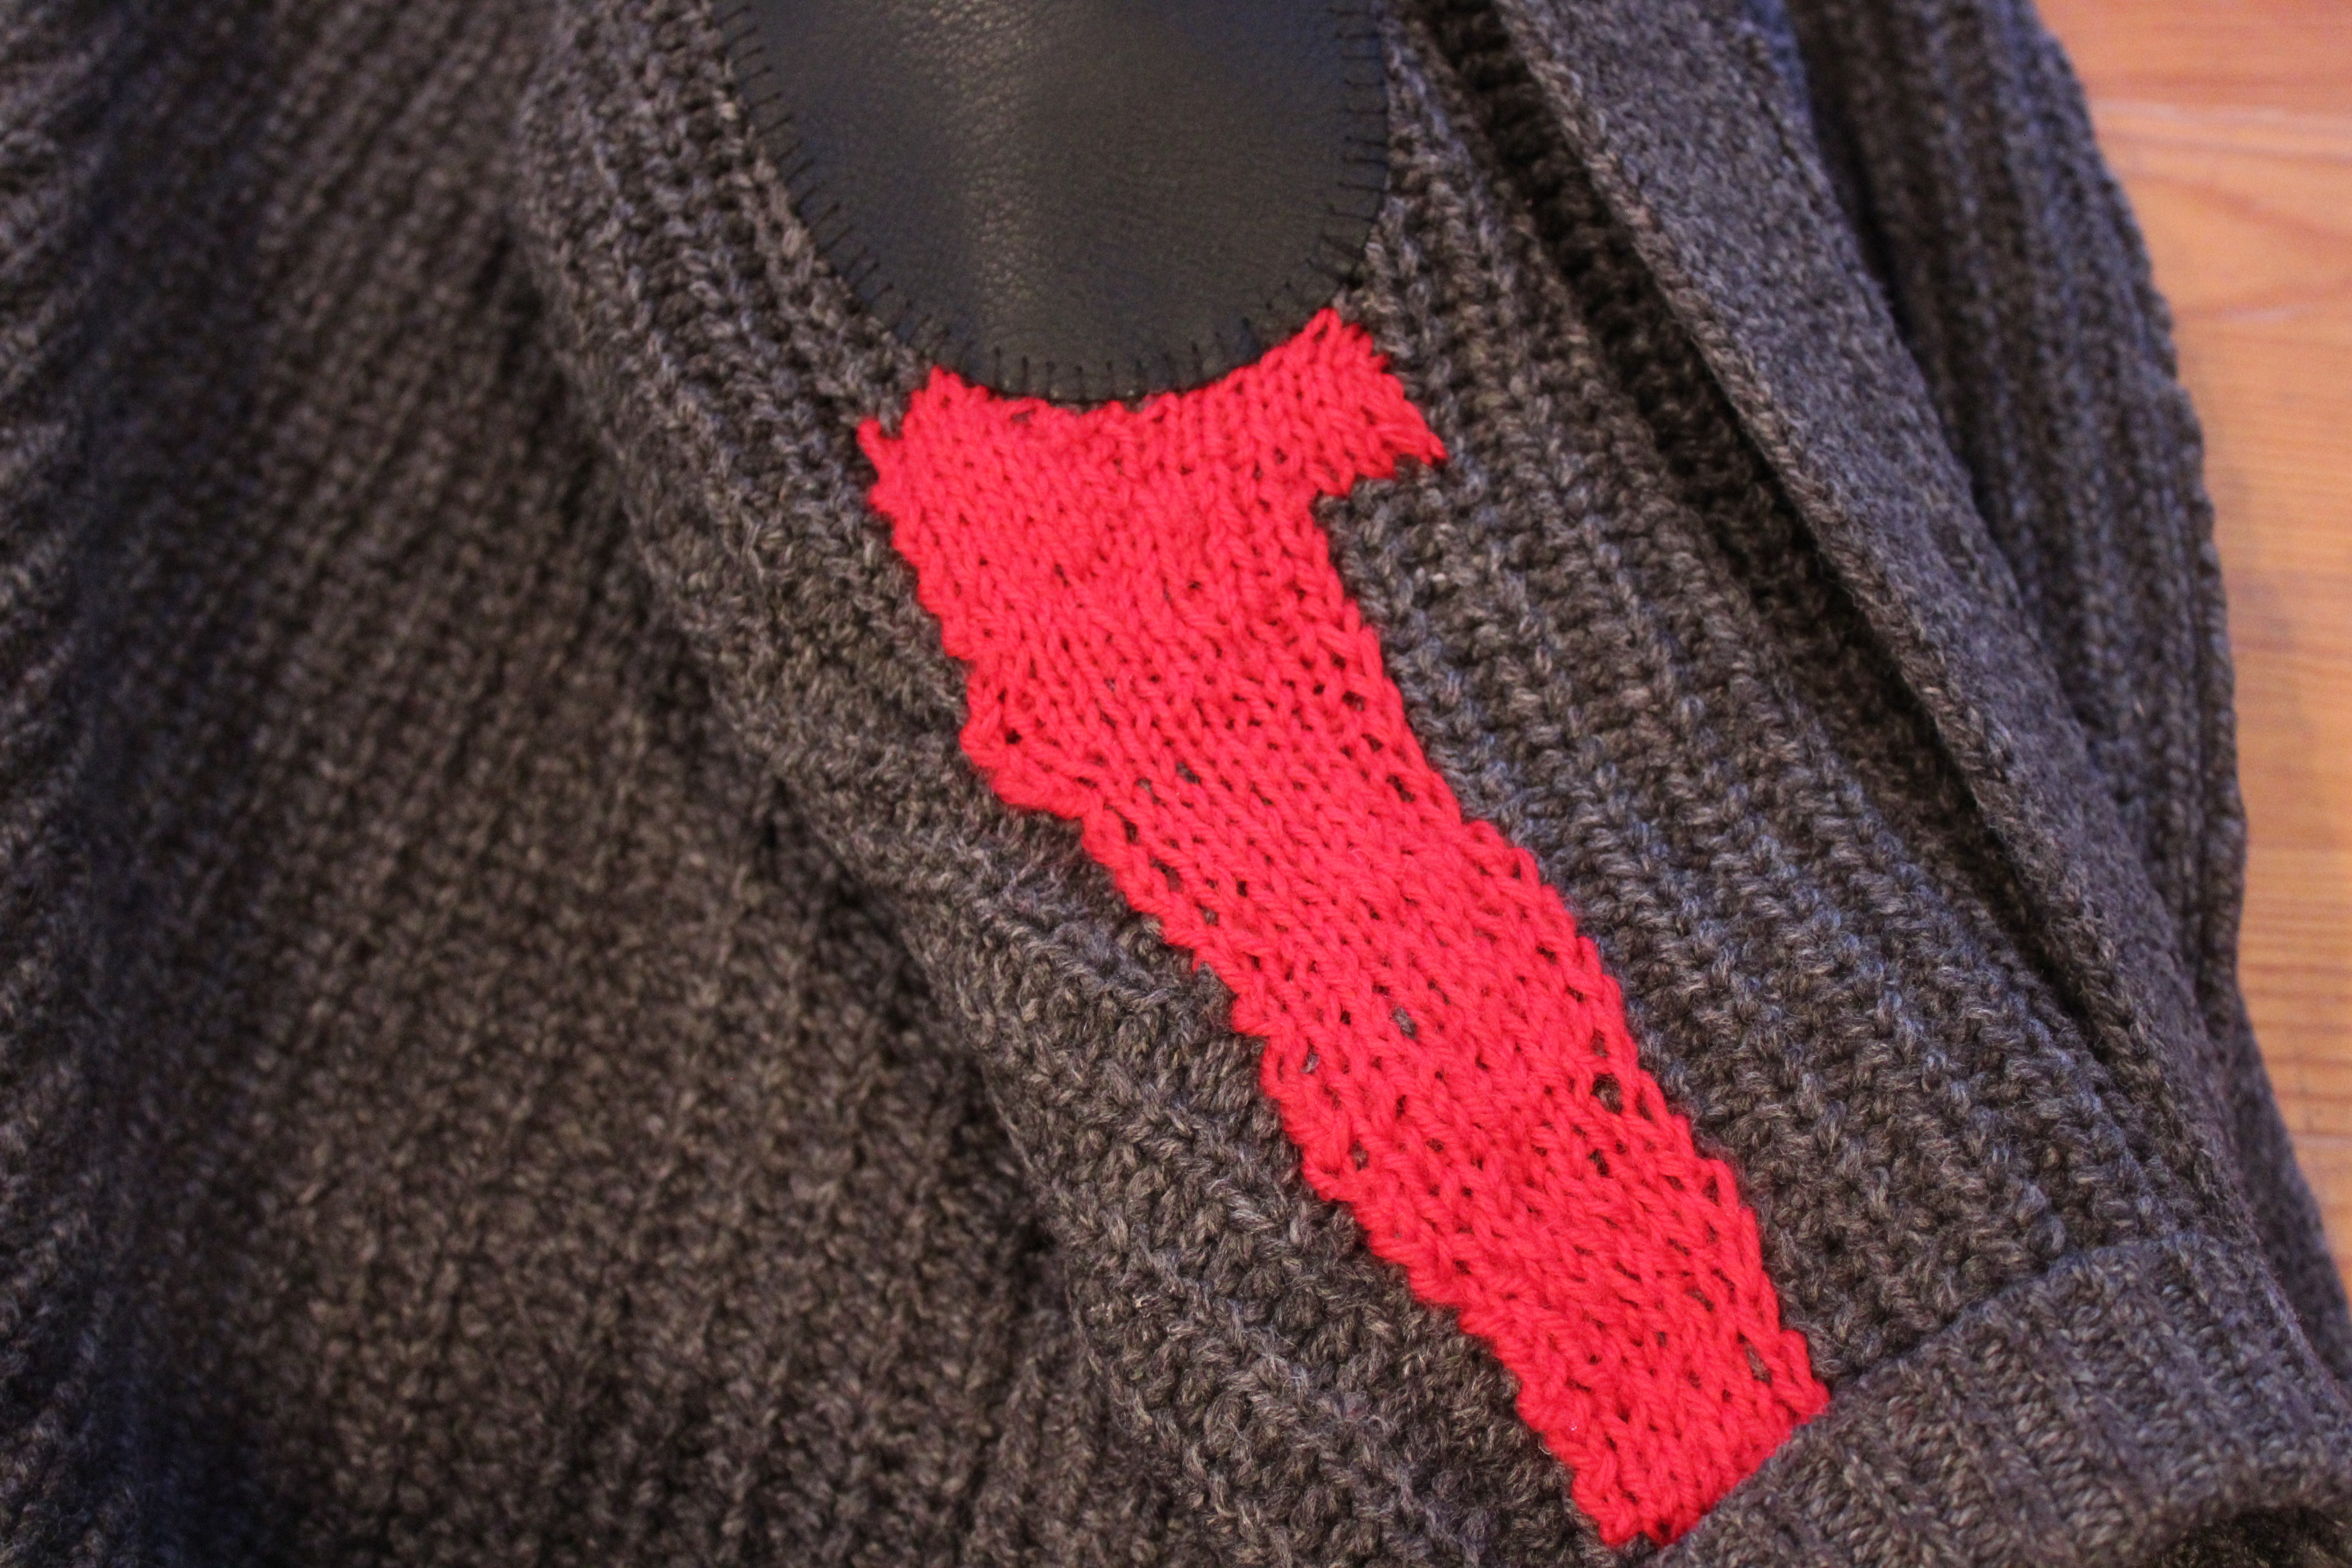
Then I did a once-over for any holes or snags.  I noticed a little hole near the collar of this guy.  It’s not so bad, so I’ll leave it for another day.  But, if it was worse or in a more critical spot, I’d fix it before I washed it, to prevent making the run worse.IMG_2119
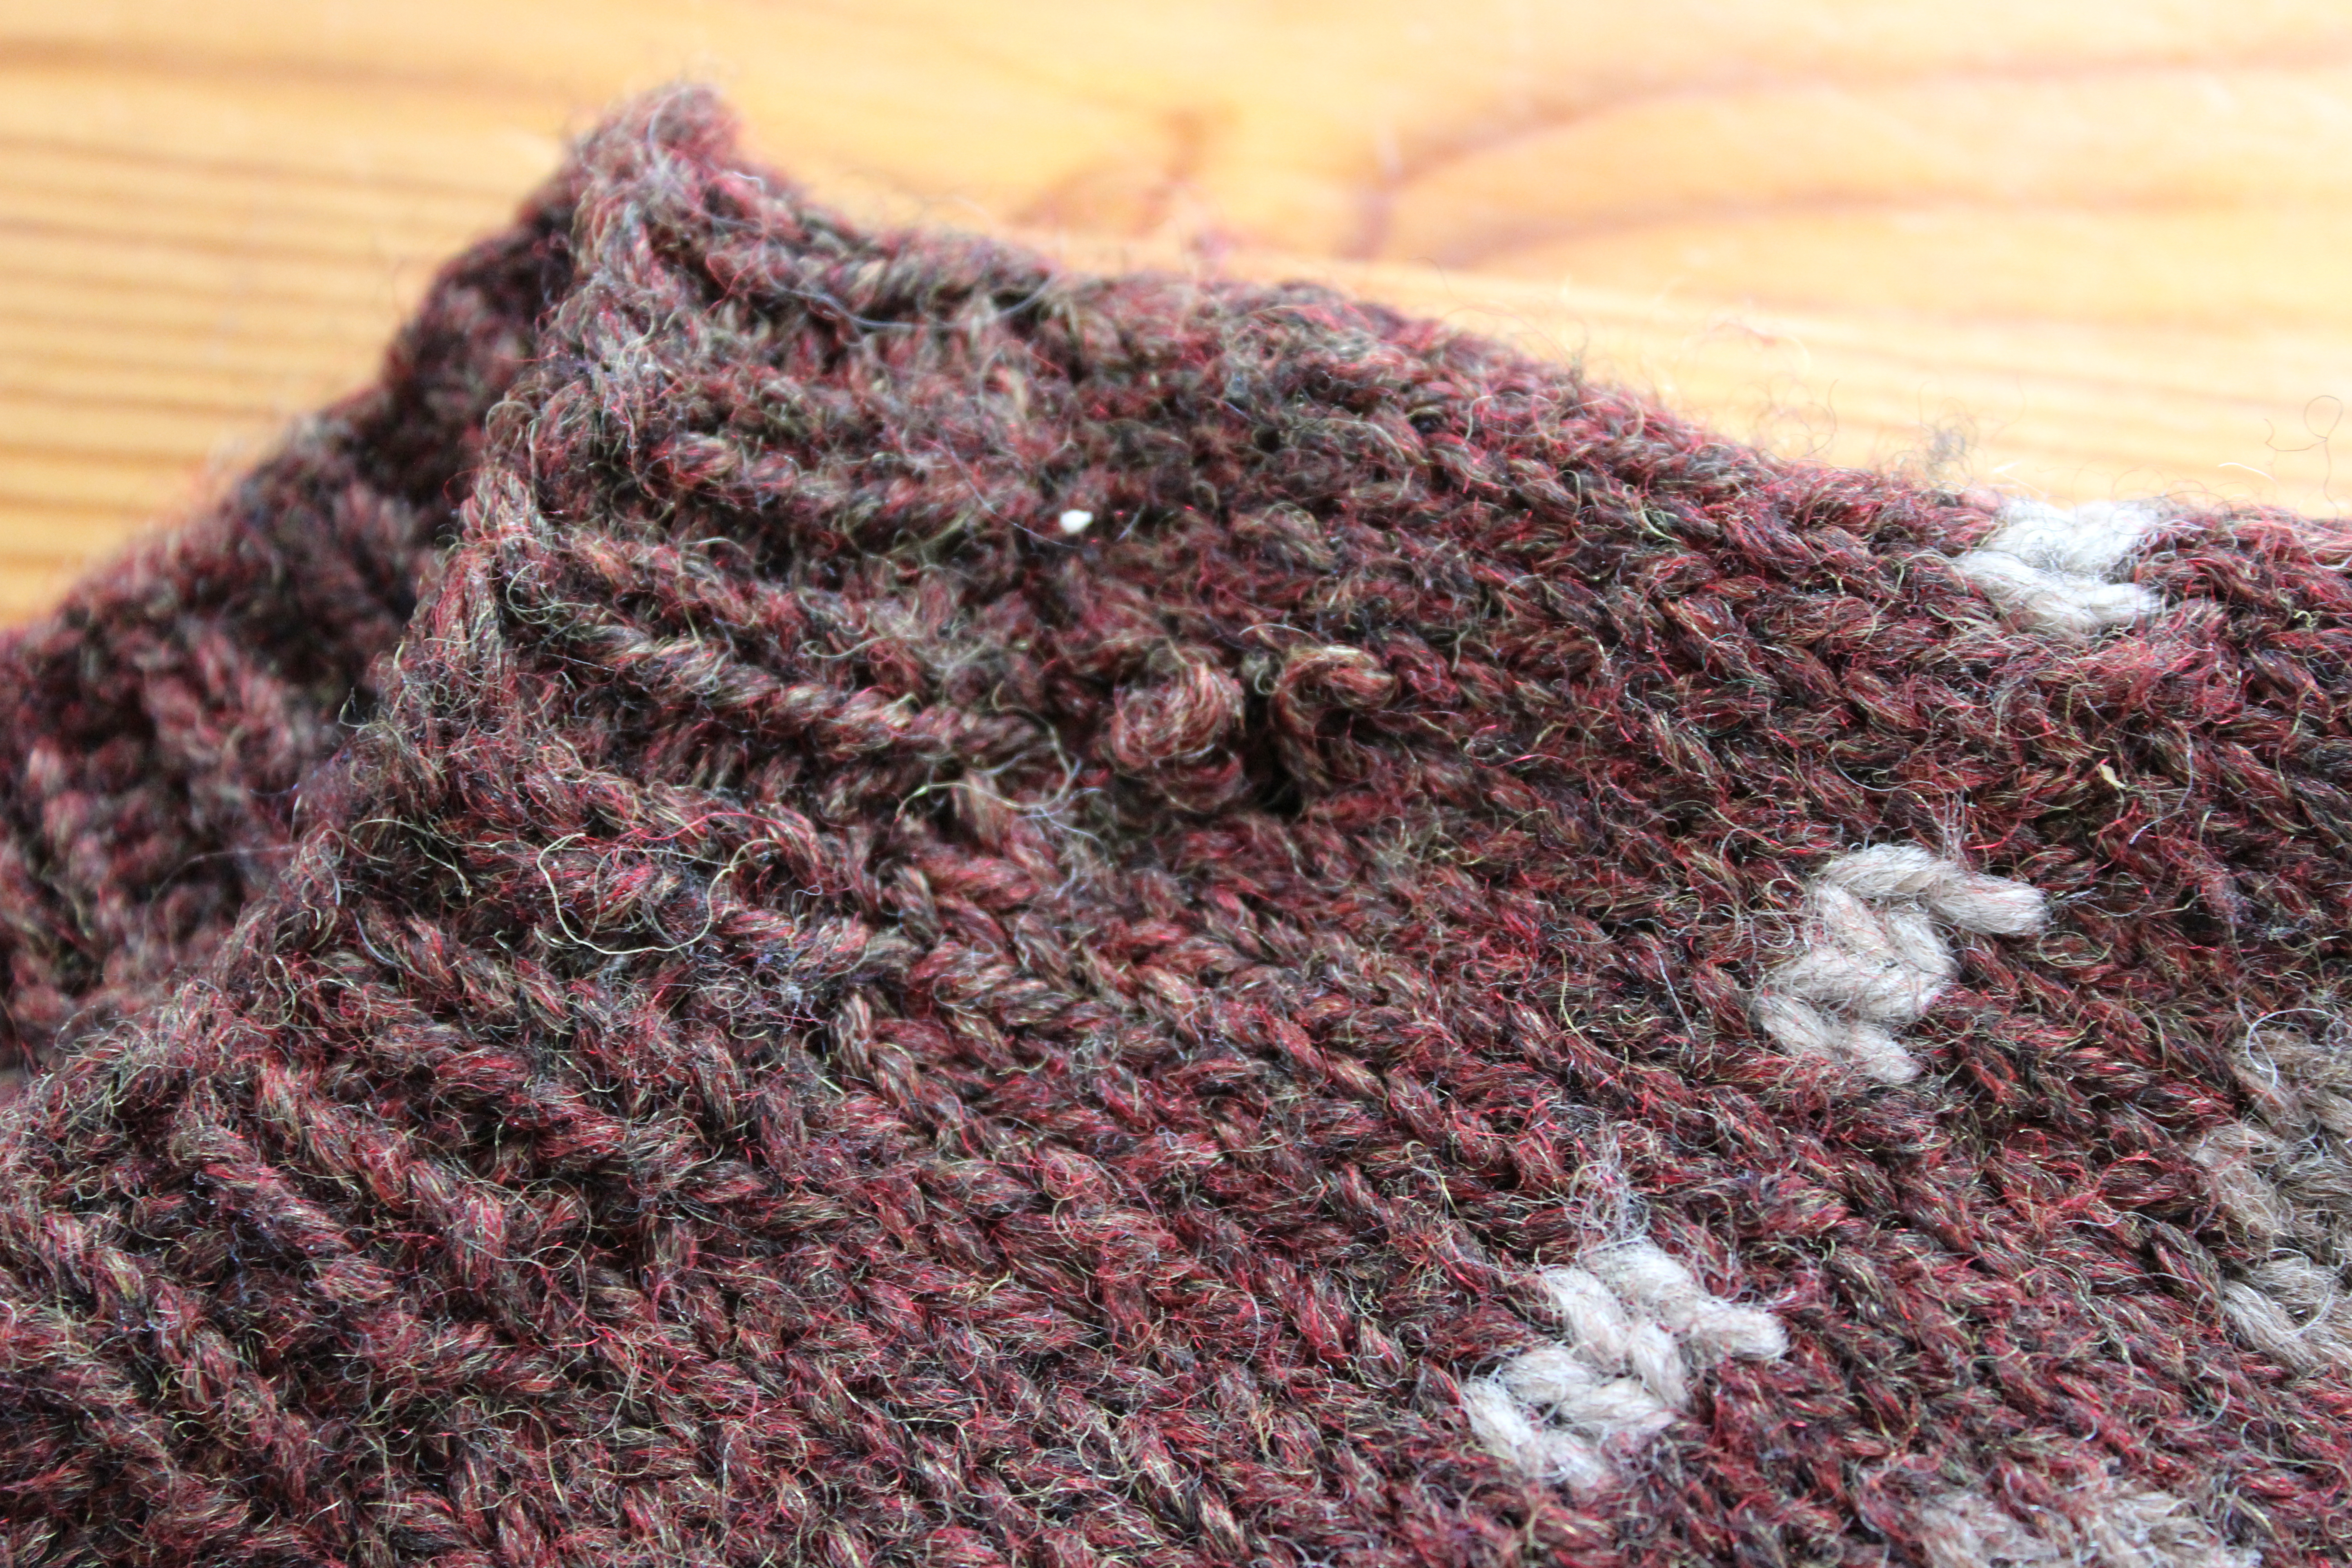
Now it’s time for a bath!  I folded the sweater, and lay it in a nice, warm, soapy bath.  I like Eucalan soap, since it’s super-gentle on wool, doesn’t require a rinse, and smells nice, but isn’t too scented. IMG_2121I never swish the sweater around or anything.  Remember, wool + agitation + water = felt, so I keep the agitation to a minimum.  I just push the sweater down into the water, squeezing out the air.IMG_2125
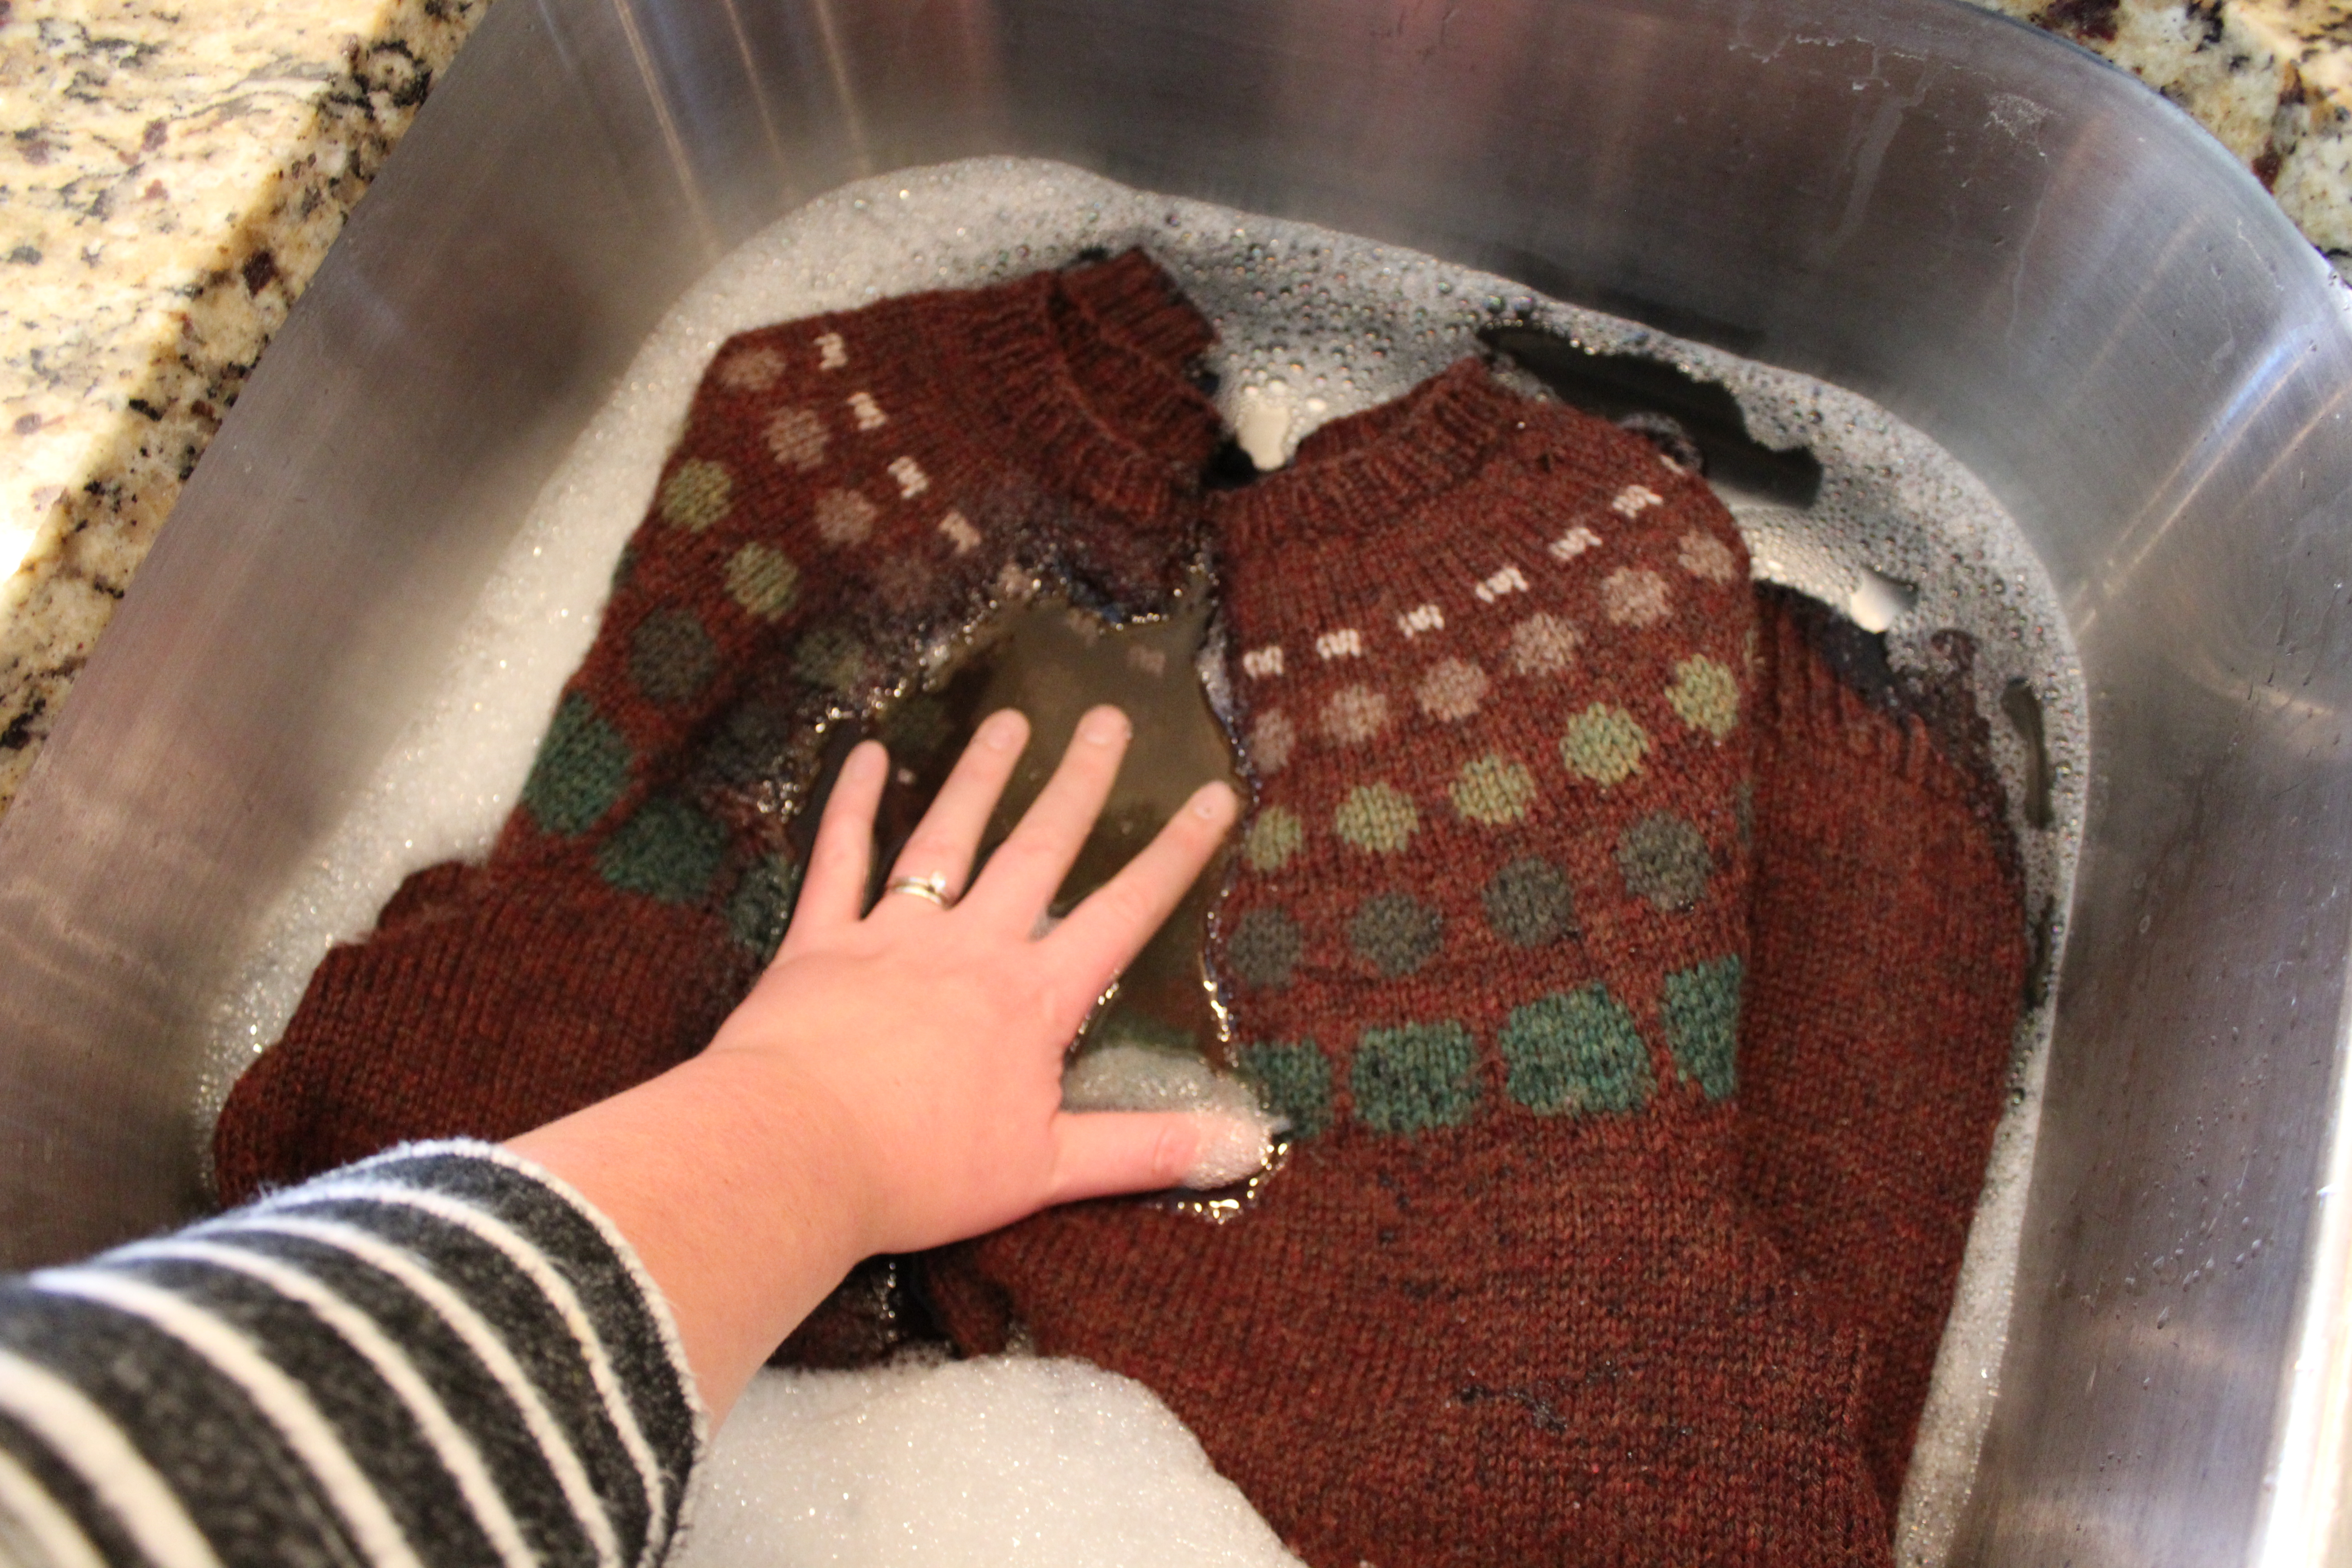
Then I let it sit for… a bit.  I’m sure there’s a rule about this, but I usually just let it hang out until I get bored.  At least 5 minutes or so (more, if you’re like me and wander off and forget).IMG_2128And this is the best/worst part:  Look at how gross the water is!!! Yuck!IMG_2131
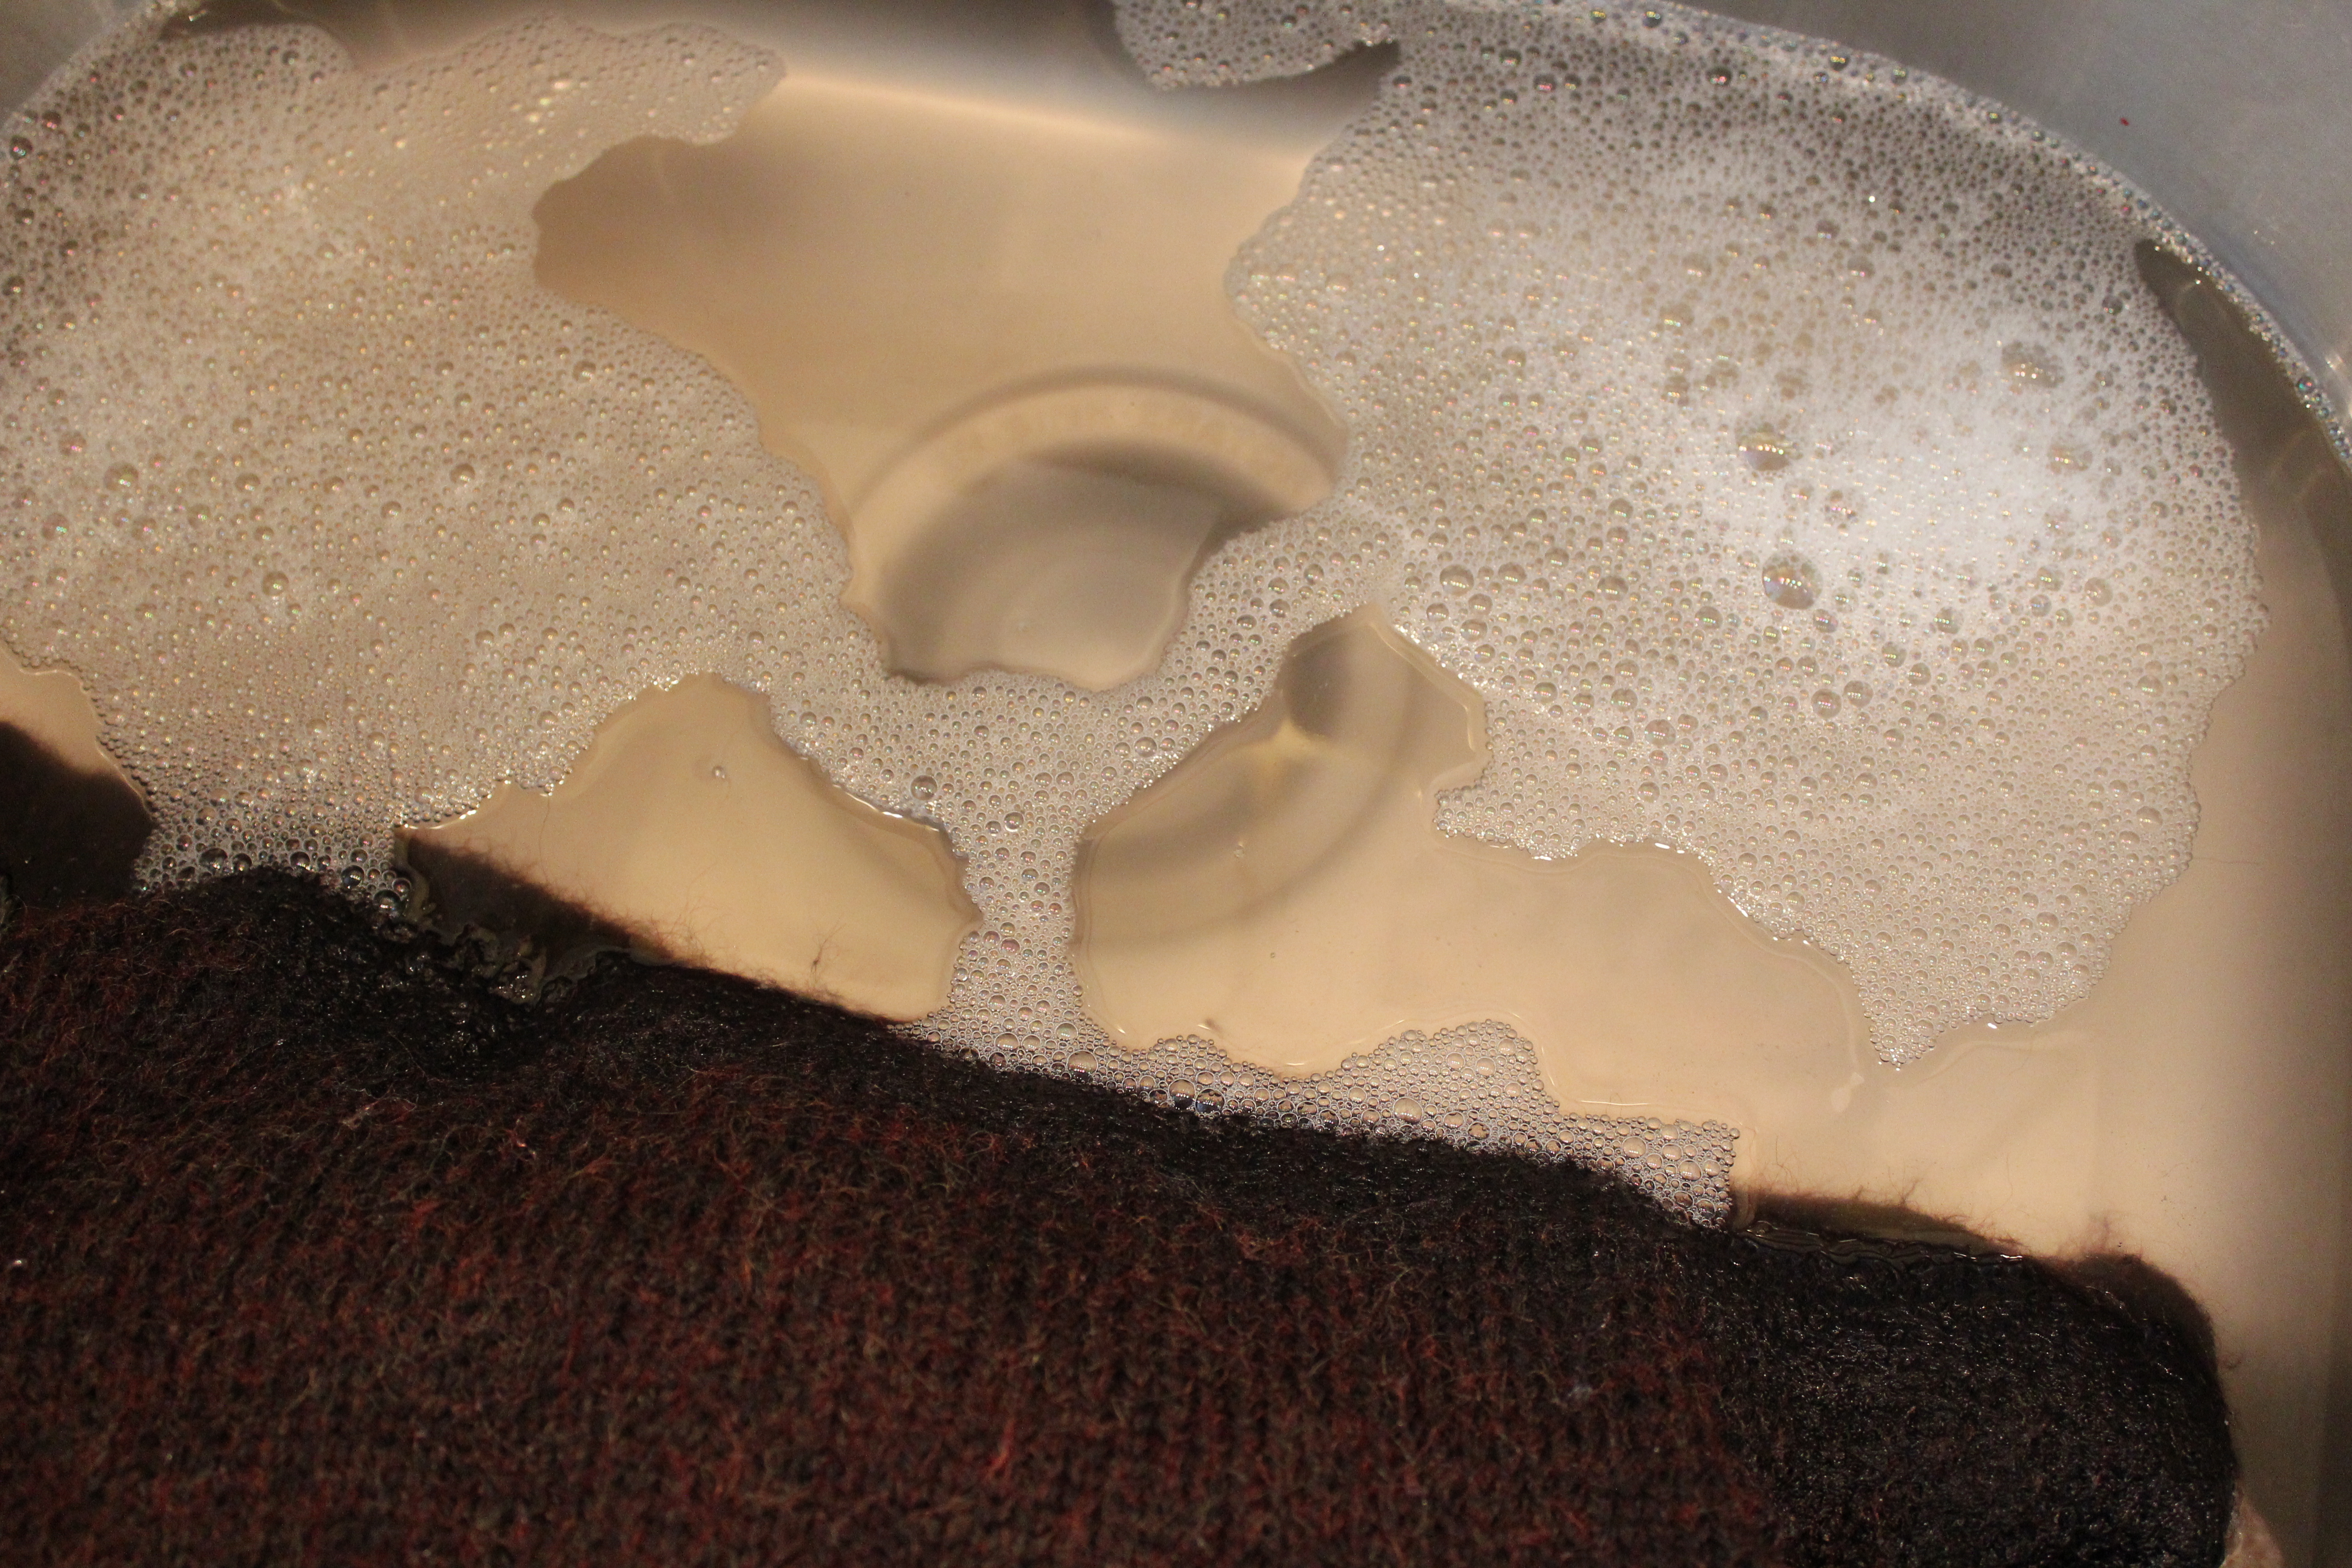
I let the water drain away, and carefully wrung out most of the water (again being careful not to agitate too much).  Then I rolled the sweater up in a towel or two, and squeezed the sweater burrito to get out even more water.IMG_2134
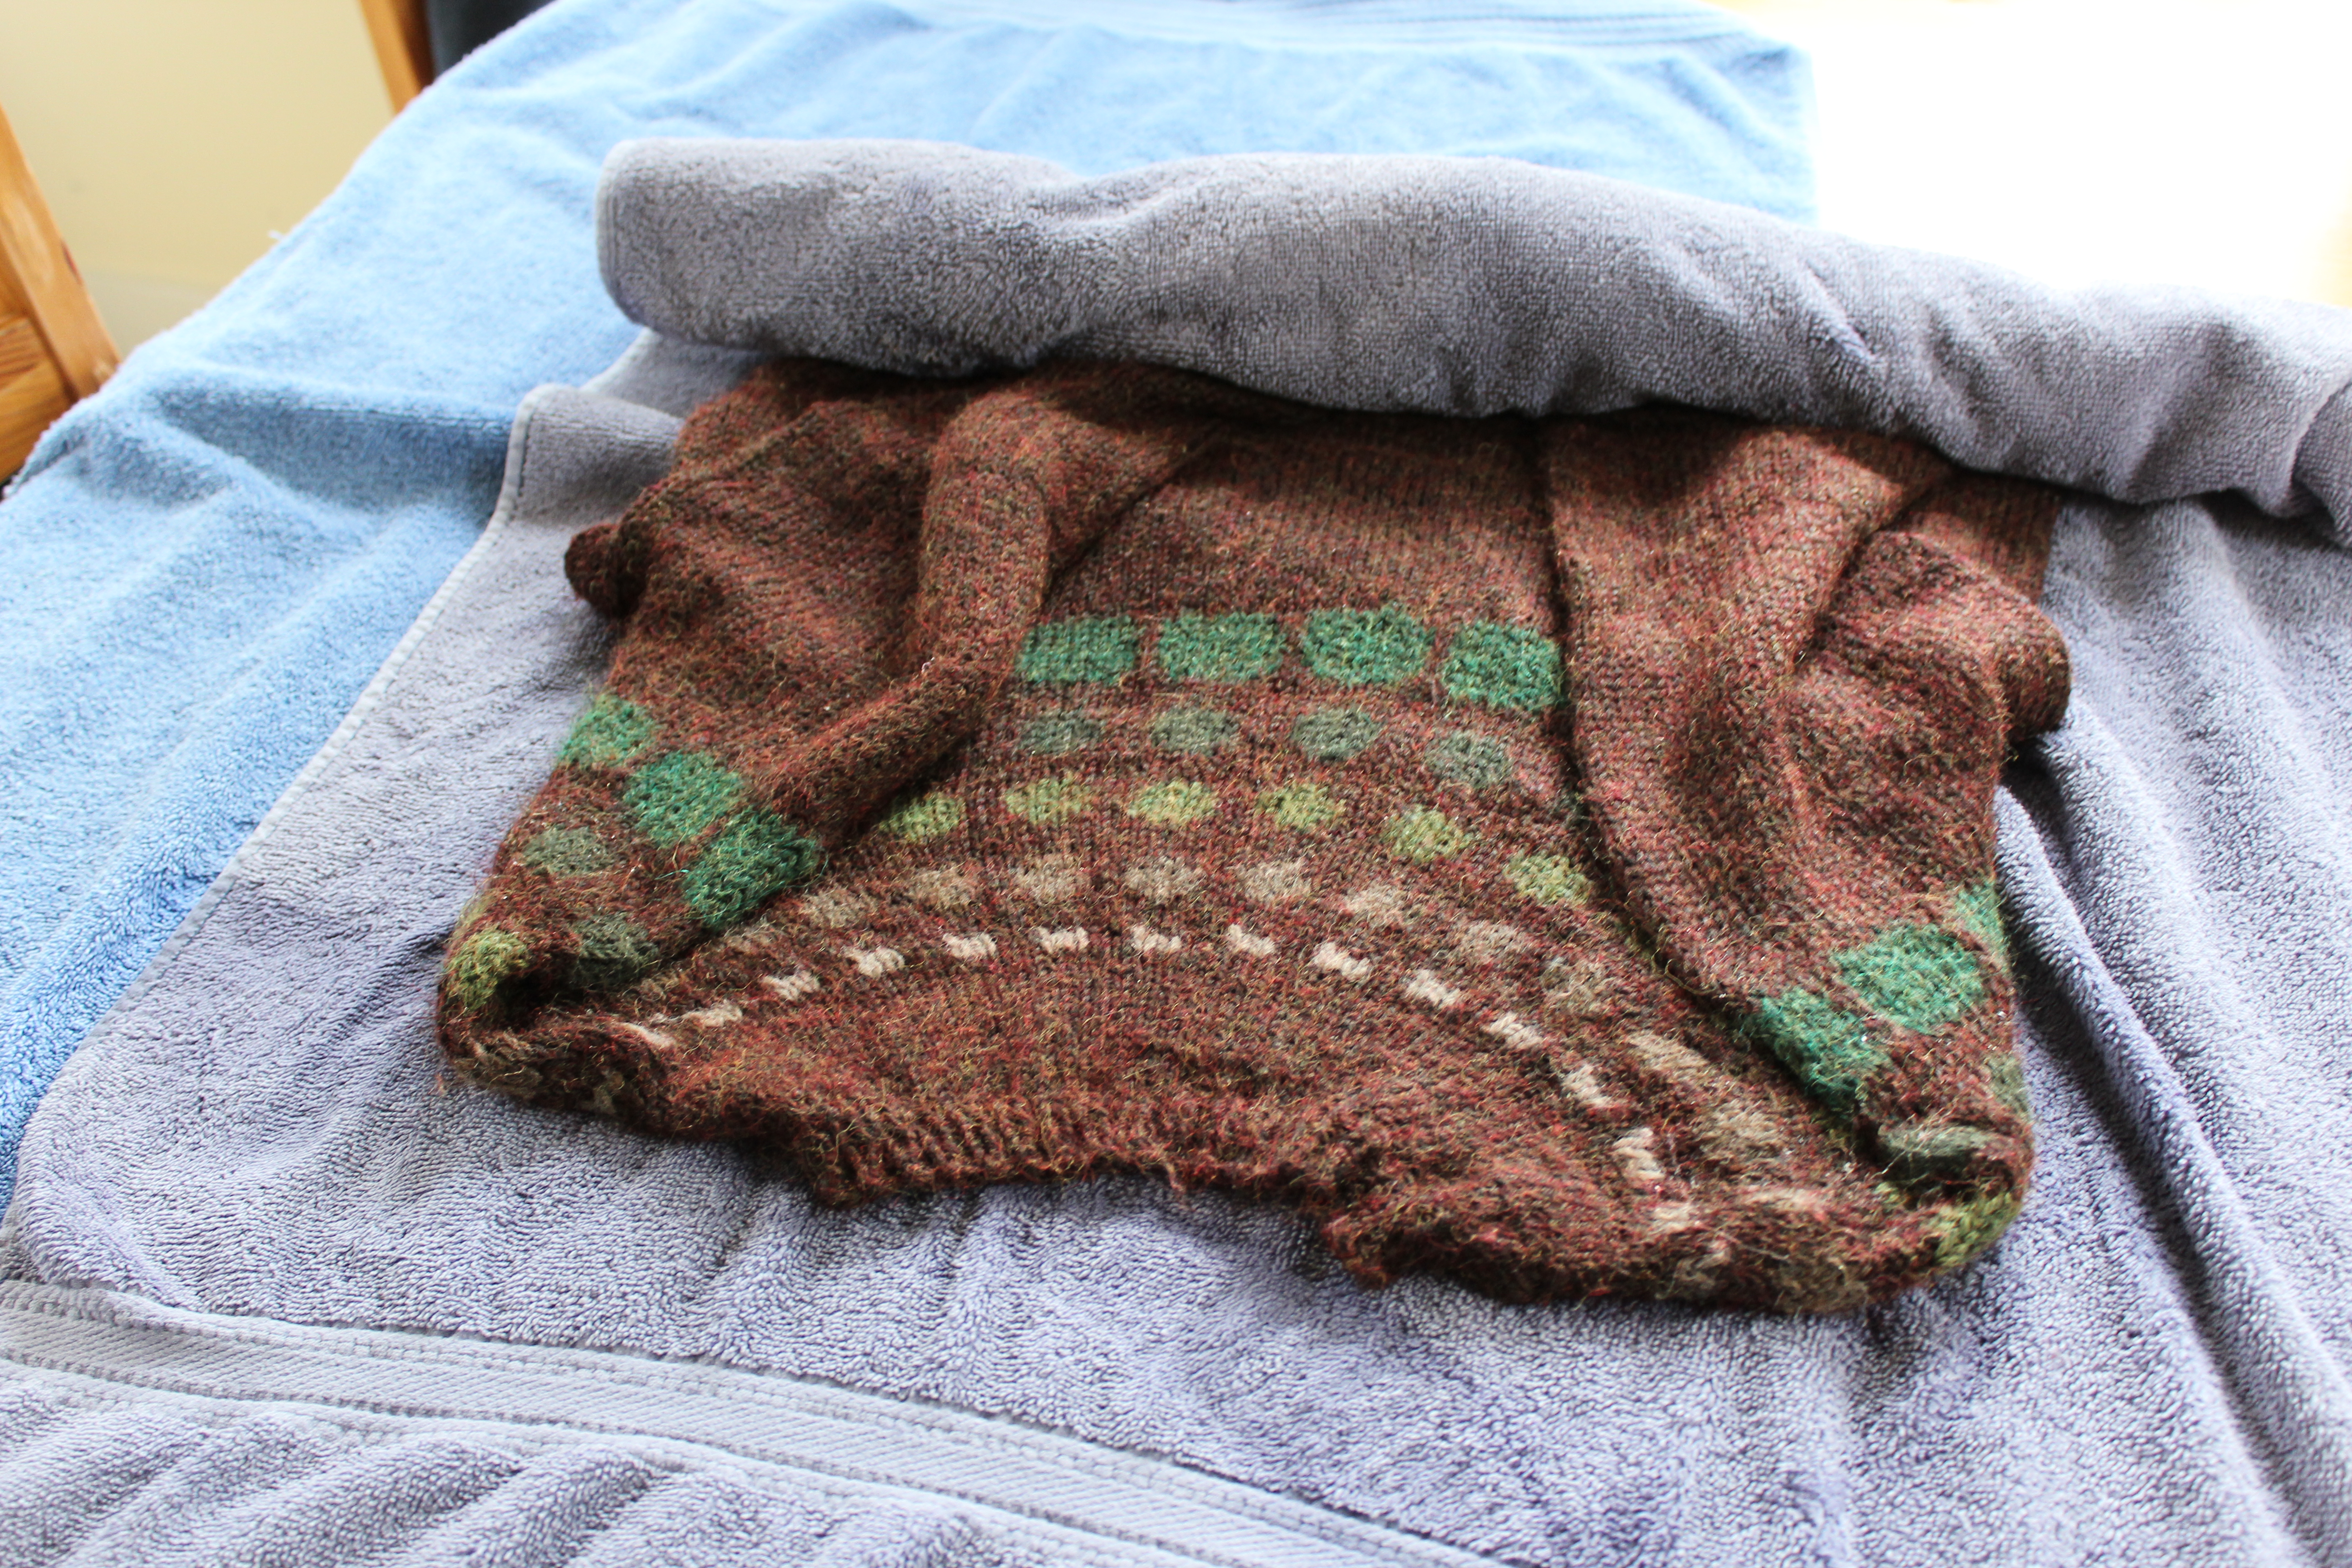
Then it’s off to the drying rack!  I like using these big (clean) window screens. (They were originally used as drying racks for hops, back when my husband grew hops for his home-brew beer, but now I mostly use them for my knitwear.)   You can also use your regular blocking boards or just lay your sweater out on more clean towels.  Just make sure you’ve got it blocking to the right measurements, otherwise your sweater might end up clean, but lopsided!IMG_2142
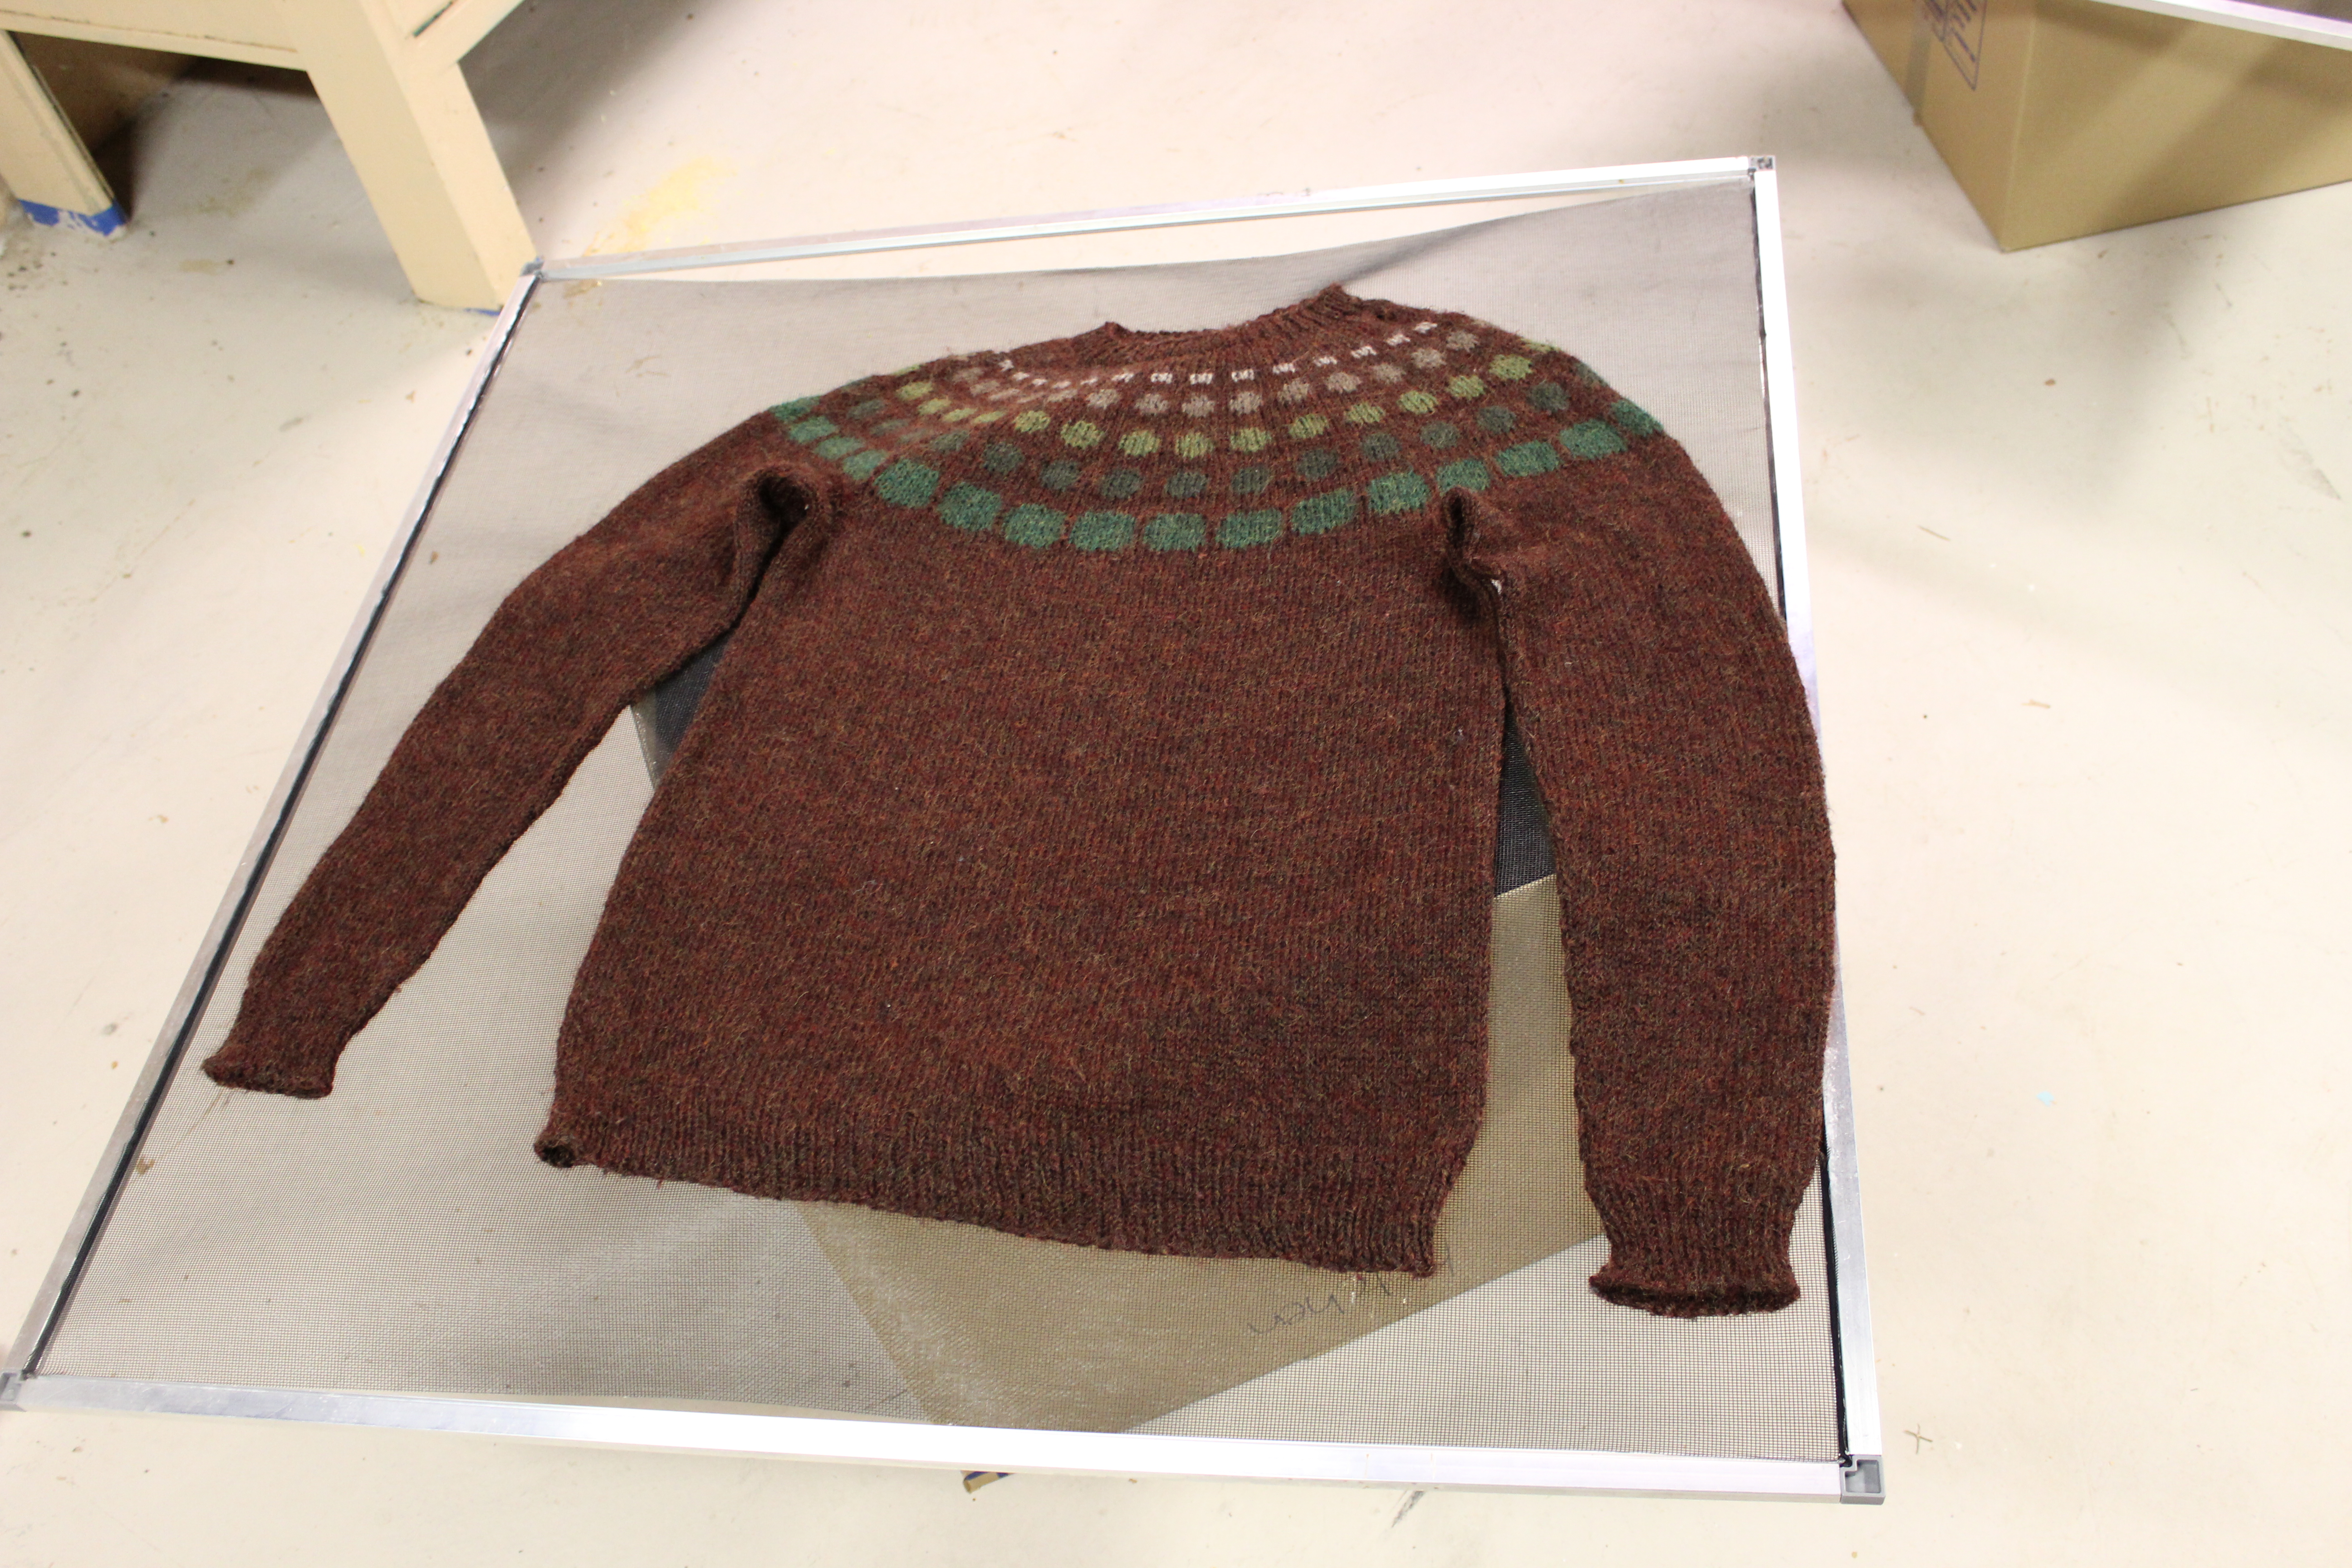
Now I just have to repeat the process for my other two dozen sweaters…

How often do you clean your knitwear?  Do you have any tricks to streamline the process?

Broken Seeds

I’m currently working on a big project for work (it’s another pattern, and I’m super stoked about this one… buuuuut, I can’t show it to you until next fall), and I’m in love with the stitch pattern I’m using.

This stitch pattern is insanely easy to work, but it looks crazy fancy.  It’s a great way incorporate some color into your knitting, and it’s so simple that you barely have to pay attention to what you’re working on.

It’s the Broken Seed Stitch:It’s literally a 4 row repeat, with nothing more complicated than knits and purls.  In fact, I’m going to give you the pattern right here:

In the round:

  1. MC (beige):  K
  2. C1 (dark brown): K1, P1
  3. MC: K
  4. C1: P1, K1

Worked flat:

  1. (RS) MC: K
  2. (WS) C1: K1, P1
  3. MC: K
  4. C1: P1, K1

It’s easier than I believed the first time I saw it.  It looks so complex- almost like there’s a MC  lattice knit over a C1 background.

I first found this stitch pattern on a pair of socks.  I was looking for a nice pattern to use up some half-finished ends of sock yarn last summer, when I came across the Broken Seed Stitch Socks.  It’s really more of a recipe than a full-blown pattern, but it got me started.  I love using the MC yarn for the details- cuffs, toe and heel.  And I really like how the designer used a variegated colorway for the C1 yarn.  I haven’t tried it with variegated yarn yet, but it’s on my to do list.

I’ve already made a pair of socks with this pattern (which turned out really nicely- this design works so well with stripes- a great way to use up little ends of yarn).  And now I want to put it on everything!  Broken Seed Sweaters!  Broken Seed Hats! Broken Seed Mittens and Blankets and Scarves!Have you come across any new favorite stitch patterns?

Sketchy

It’s planning time!

I’m working on my tea cozy, and as much as I would like to, I can’t just pick up my needles and start knitting.  I’ve got to do some planning.  And before I really get down to the nitty-gritty planning (math!), I’ve got to get some ideas.

I pulled out some of the yarn I’m thinking of using, my tea pot, and a steaming mug of peppermint tea.IMG_3268Believe it or not, I do this for almost all my designs (sometimes ideas come to me fully formed, but those are sadly few and far between).

I sketch out a half-dozen or so general ideas, and make notes next to them (in case I come back to the designs later and go “what the heck was I thinking”).  Some of the ideas I know aren’t going to go anywhere, but there are usually one or two that I end up liking.

So, let’s look at them.  (As usual, there are some I like, and some… not so much.)

IMG_3284At the top of the page, I did a little practical sketch, laying out the parts of the tea cozy.  I think I’ll knit it from the bottom up, with ribbing at the cast-on edge.  I’ll work it flat, leaving an opening for the spout (maybe a gusset, like a mitten, or maybe just a big button hole).  Then, I’ll knit in the round for the “crown” of the cozy, like a hat.  I think that should work pretty well.  Now I just have to decide how to decorate the cozy.

The first design I came up with is a plain stockinette cozy, decorated with flowers knit separately.  You know, old-school tea cozy.  I like this design in theory, but it’s so not me.  Also, I don’t want to knit up that many flowers.  Can you imagine all those ends?

I kind of like the next design, an alpine-sweater-inspired tea cozy.  Complete with a fun, geometric colorwork pattern around the “belly” and a big ol’ pom pom at the top.

Or, I could just do simple stripes.  I love stripes, and it  would be a good way to use up all the little ends of yarn I’ve got laying around.  But is it too simple?IMG_3275After the maybe-too-simple stripes, I swung the other way, going over the top with a fully-charted Fair Isle design.  Maybe little tea cakes?  Or trees? Or a Great British Bake Off theme?  I This one is still pretty vague in the back of my head… but I bet I could come up with something good.

Or, I could make some sort of “fancy stripes.”  Maybe alternate solid stripes with stripes polka-dotted down the middle?  It would be a fun way to use a mix of colors, but be fancier than the simple stripes.

Another idea was to go full-on Aran Sweater.  Big, fat cables. Texture out the wazoo.  Thick, lovely yarn to keep your tea piping hot.  But Aran Sweaters are usually undyed, and tea is brown.  I’d hate to stain my tea cozy.  I suppose I could work it in a different color, though.

And, honestly, the last idea was just to fill up the page.  Big old intarsia polka dots on a white/light background.  Not a fan.

I’m probably leaning toward the Fancy Stripes, the Alpine, or the Aran designs, but I’ll need to think about it before I do any swatching.

What do you think?

Casting On: Picking Up Stitches

I’m going to say something that might be controversial (or it might not be):  Picking up stitches is one of my favorite ways of casting on.

I know, radical stuff.  Let me explain.

If “casting on” is essentially a way of beginning a knitting project, making the initial row of stitches, then why can’t we count picking up stitches as a way of casting on?

I  think it’s pretty fun, easy, and results in a more polished finished product than knitting two separate pieces and sewing them together later.

Of course picking up stitches isn’t an any-time cast on.  You have to have an already-finished piece of knitting from which to pick up the stitches (obviously).  But I love using it to add button bands on sweaters, turning the heel on socks, and it’s essential for modular knitting projects (like this blanket).

So how do you do it?

Naturally, you start with a piece of knitting to form the base of your project.  I’m using a little swatch of stockinet, but you can pick up stitches off of any piece of knitting.  On this swatch, I slipped the first stitch of every row.  It leaves a nice, smooth edge that makes picking up stitches that much easier.  But, if I need to pick up a lot of stitches, I’ll knit all edge stitches.

OLYMPUS DIGITAL CAMERAThen, I’ll poke my needle through the spot where I want my first picked-up stitch to live.  See how I go through both “legs” of the stitch?  If you only go through one leg, you end up with a flimsy piece of knitting. No bueno.

OLYMPUS DIGITAL CAMERAWrap your yarn around the needle, just like every other knit stitch you’ve ever done.

OLYMPUS DIGITAL CAMERAAnd pull the new stitch through.  You’ve picked up one stitch!

OLYMPUS DIGITAL CAMERAKeep picking up stitches until you have the number that your pattern requires.  See how nice and neat the picked-up stitches look?

OLYMPUS DIGITAL CAMERAThey even look nice and neat from the back.  See that horizontal row of red V’s?  Those are the edge stitches that we picked up.  Prettier than a sewn seam!

OLYMPUS DIGITAL CAMERAThen, keep on knitting your project.  Your new knitting will grow off the side of your old knitting and be magical and wonderful!

OLYMPUS DIGITAL CAMERA