Tag Archives: cuff

Husband Sweater: The Picard Maneuver

In case it hasn’t been perfectly clear in the last two years of blog posts, I am a big nerd.  My husband is also a big nerd.  A big exciting night with friends usually includes home-brew beer and a rousing game of Settlers of Catan.  I’ve read through the Harry Potter books  so many times that I can practically recite them.  And, even though it’s nearly 30 years old, you’ll still find us curled up on the couch watching Star Trek: TNG whenever it comes on.

So, when my husband asked me to be sure that his new sweater is long enough that he doesn’t have to preform the “Picard Maneuver,” I knew exactly what he meant.

What?  You’re not a weirdo nerd, too?  You don’t know what the Picard Maneuver is?  Let me explain.  Captain Picard, Starfleet officer and coolest bald man in the known universe, always keeps his ship and his uniform neat and tidy.  So, whenever he sat down, stood up, or otherwise mussed up his uniform, he would always tug down his uniform top to make it lay nicely.  For example:


Thus, the “Picard Maneuver.”

My husband has a couple sweaters he has to use the Picard Maneuver on.  You can understand why he is worried about the length of his new sweater.

I’ve decided not to measure the sweater.  I know, crazy.  Instead, I’m going to keep knitting and trying it on him until it is the absolute perfect length.  I’m hanging it up for a couple days to let the yarn sag naturally, especially since it’s cotton, which tends to droop more than wool.

OLYMPUS DIGITAL CAMERA
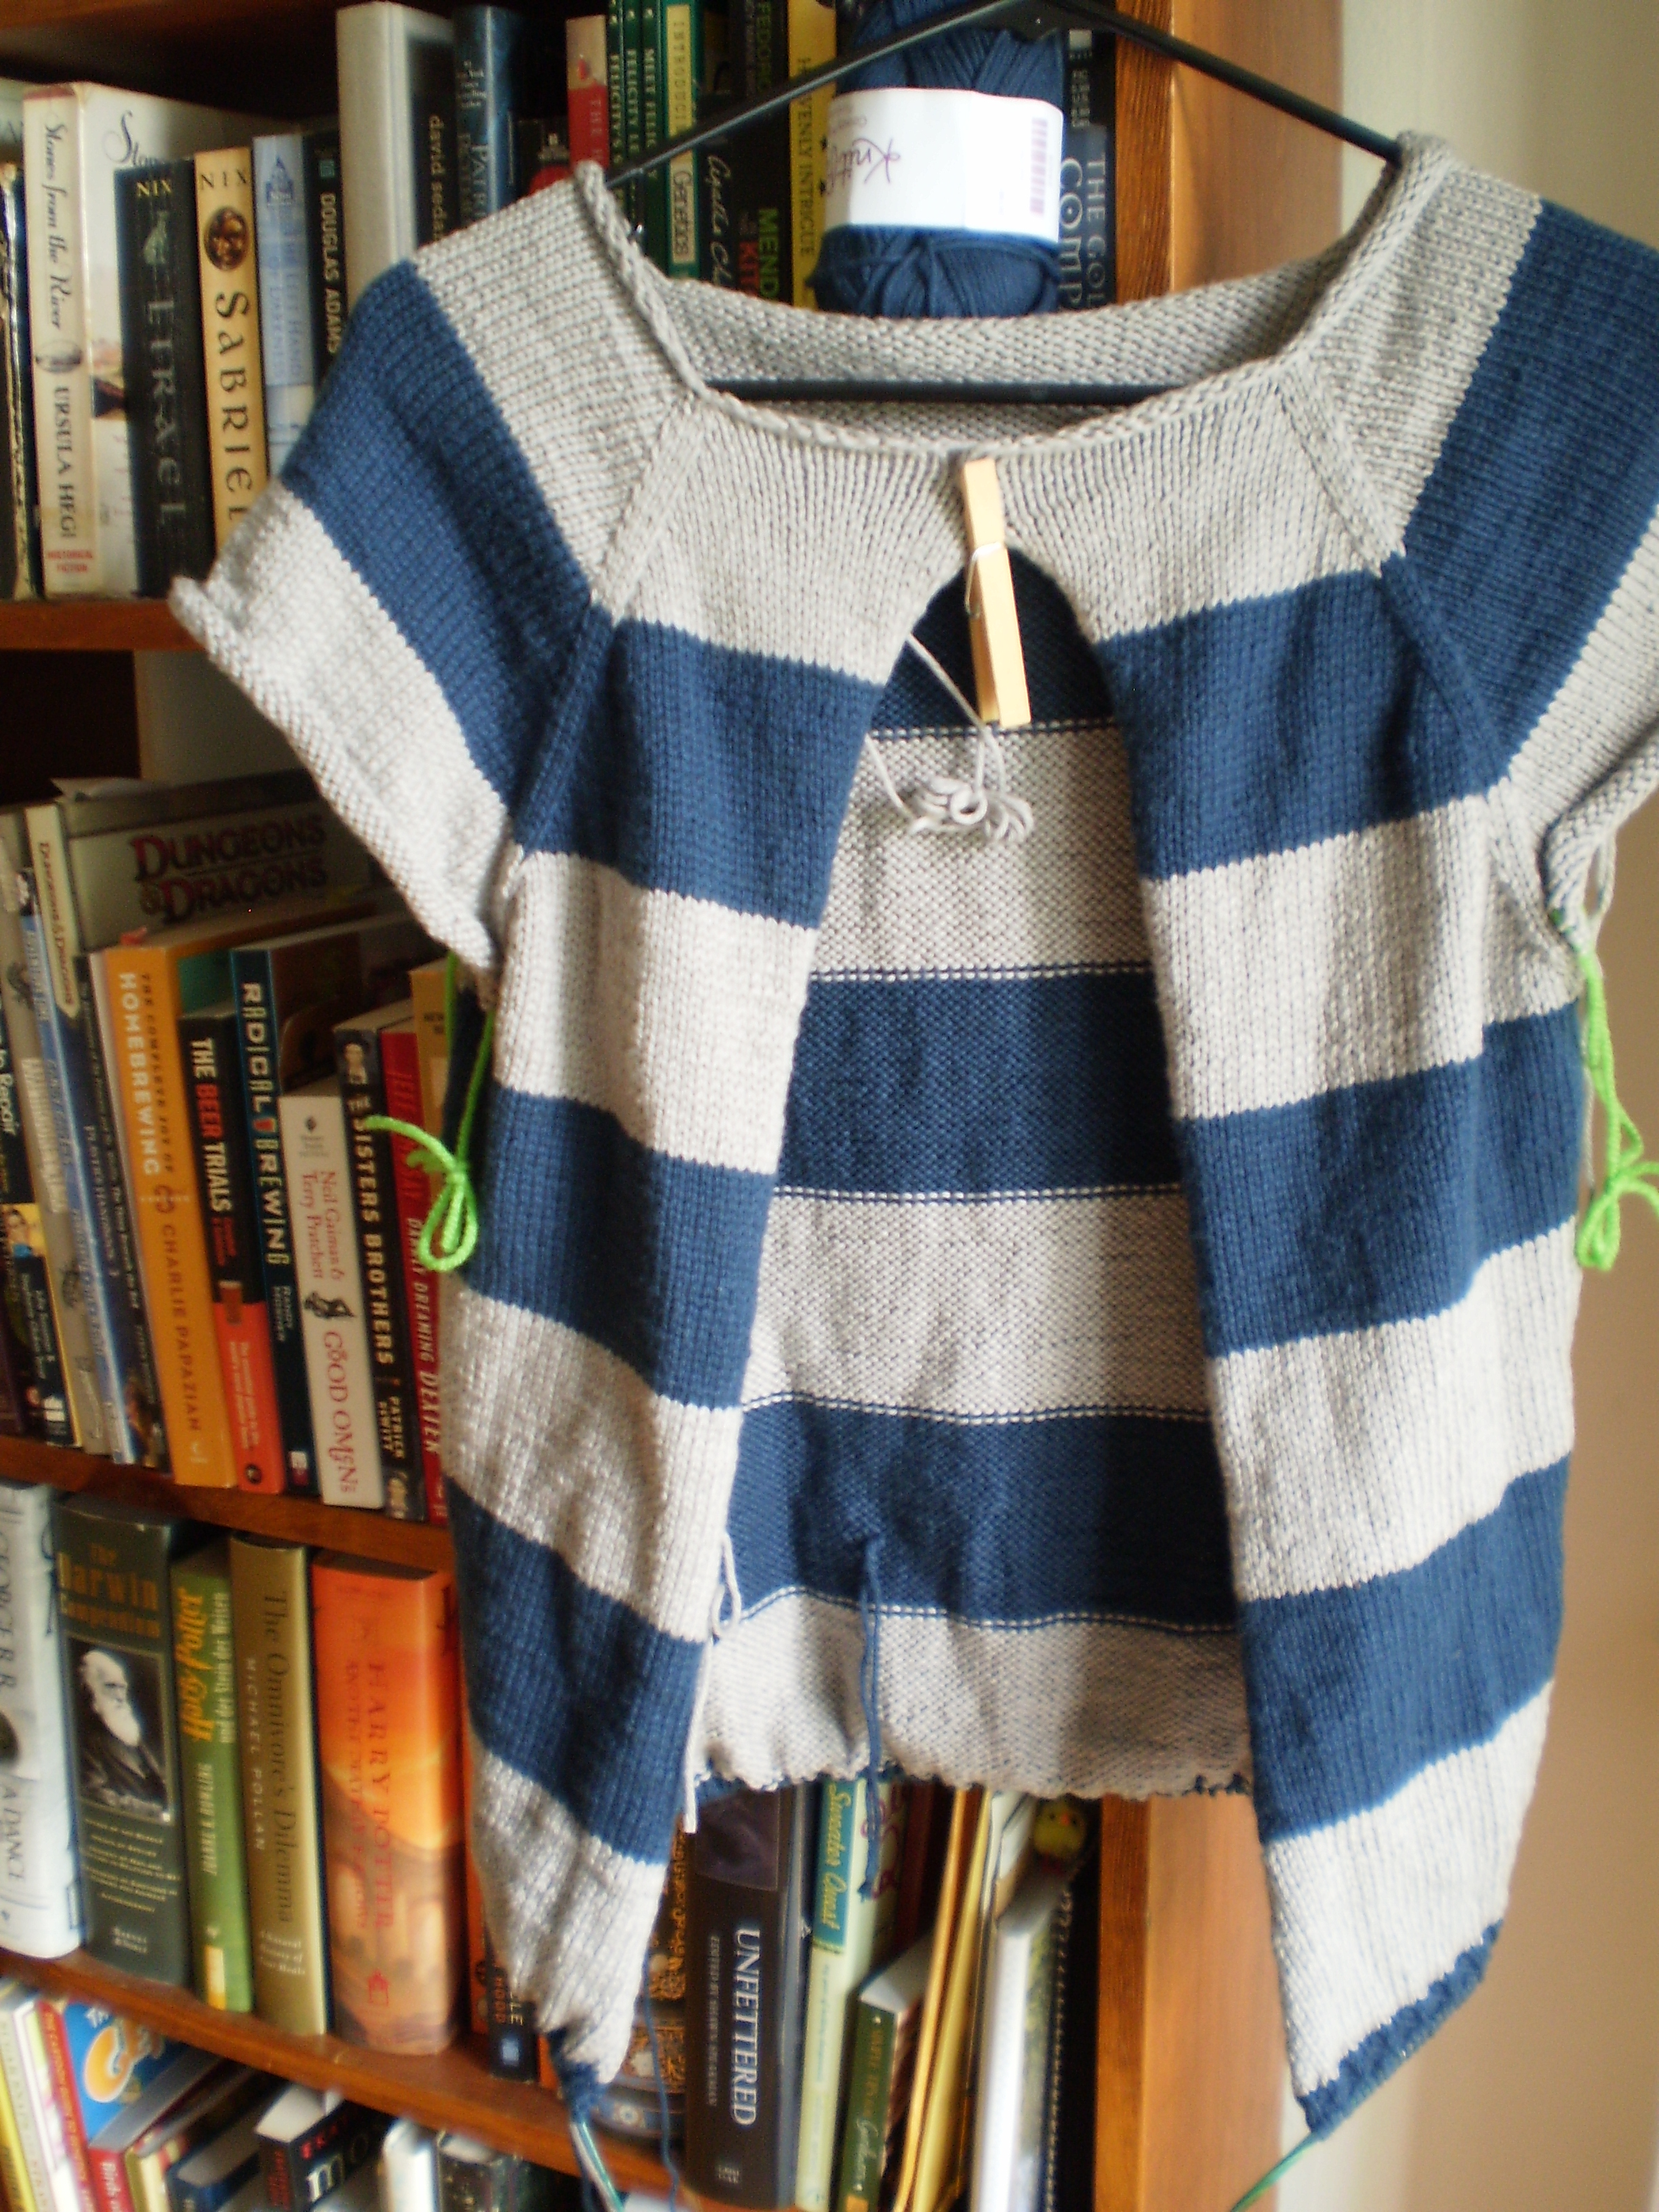
This weekend, I plan on knitting the rest of the waistband, based on how long it ends up looking on my husband.  Hopefully, all this elaborate hanging up, trying on, and re-trying on will make the Picard Maneuver unnecessary.

Do you have any clothes you have to do the Picard Maneuver on?  How do you prevent it?

Stellar’s Jay Sweater- Sleeves

My Stellar’s Jay Sweater is roughly based on Elizabeth Zimmerman’s EPS (Elizabeth’s Percentage System) sweaters.  EPS sweaters are based on the idea that the size of someone’s arm is roughly proportional to their bust size, which is roughly proportional to their neck size.  It’s not perfect for people with more unusual body types, but I’ve found that most people can make the EPS work for them on the whole.  It’s a great basic sweater recipe that you can customize, tweak and otherwise futz with to make yourself the sweater you’ve always dreamed of.

My Stellar’s Jay Cardigan is knit from the bottom up, which means that make the body first, from hem to armpits.  Then I cast on the sleeves at the cuffs, and knit up the arm.

I wanted a slightly fitted, tapered sleeve, so I cast on 22% of the stitches I used for my torso.  It sounds weird, but EZ spent years perfecting her formulas, until she figured out that a cuff should measure about 20-25% of the torso in diameter.  (Crazy, right?)

Then I slowly increased (increasing 2 stitches every 8 rows in a line along the inside of the arm) until I reached 64 stitches, which was my planned upper arm measurement (about 35% of my torso measurement).  Then, I knit along, without any more increases, until my sleeve was long enough for my arm.

The result was a gently tapered sleeve, that perfectly fit my arm.

OLYMPUS DIGITAL CAMERAThe next thing to do was to join the arms to the body.

Tubular Cast-on and Bind-off in the Wild

On Friday, I waxed poetic about the tubular cast-on and tubular bind-off.  How they look the same, how they’re perfectly stretchy, and how they are ideal for cuffs and collars.  But, I didn’t show you any examples.

Now, it’s time for me to put my money where my mouth is (metaphorically speaking.  I don’t have enough money laying around to just start eating it).

Behold, the hem and the collar of my (almost finished) Stellar’s Jay Cardigan.

OLYMPUS DIGITAL CAMERA OLYMPUS DIGITAL CAMERASee how they match perfectly?  The k1p1 ribbing makes a lovely subtle edging, and the tubular cast-on/bind-off stops the sweater from pulling even a little bit.  Sure, my perfect edges are something that only an obsessive knitter would notice, but as a slightly obsessive knitter, they’re something that makes me very happy.

Casting on-Tubular Cast On (with bonus Tubular Bind Off!)

A couple months ago, I told you about one of my favorite cast-ons, the Tubular Cast On.  It’s still one of my favorite techniques, so I figured that I would tell you about my favorite aspect of the tubular cast on:  the Tubular Bind Off.

I know, that’s a cheater’s answer. How can a bind off be my favorite part of a cast on?  Let me explain.  The tubular bind off and cast on look identical when they’re finished.  I love using the tubular cast on/bind off on sweaters, because it means that my cuffs (cast on) and my collar (bind off) can have the exact same finished edges.

I’ve already linked you to a really good tutorial, so I won’t waste my (or your) time with showing you again.  But, I will show you how to do the Tubular Bind Off.

Start with a piece of knitting (it looks best with a bit of 1×1 ribbing, which is why I particularly love it for cuffs and collars).

OLYMPUS DIGITAL CAMERARepeat the following to the end of the row: (Knit 1, bring yarn to front, slip 1, bring yarn to back).  Then turn the work and do the same thing on the next row.  This seems weird, but think about it this way:  you’re knitting all the knit stitches on the right side of your work, then you’re knitting all the knit stitches on the wrong side of your work.

Then, here’s the cool part.  Grab an extra needle (try to use the same size that you’ve been knitting with, but if it’s a little smaller, it’s not a problem.  Don’t go buying extra needles for this).  Now you have two stitch-less needles and one needle attached to your work.

Slip the first knit stitch onto one of your needles.  Slip the first purl stitch onto the other needle.  OLYMPUS DIGITAL CAMERA

Then continue, slipping all the knit stitches onto the first needle, and all the purl stitches onto the second needle.  When you’re done, your knitting will look like this:

OLYMPUS DIGITAL CAMERAThen, cutting a tail at least three times as long as your knitting is wide, use a tapestry needle and the Kitchener stitch to join the two needles’ stitches together.

OLYMPUS DIGITAL CAMERAYou end up with a lovely, seamless, super-stretchy bind off that looks identical to the Tubular Cast on.

OLYMPUS DIGITAL CAMERA

Techniques: Tubular Cast-On

Nine times out of ten, when I cast on for a project, I use a basic long-tail cast on.  But sometimes, if the Knitting Gods so move me, and if the project is really special, I like to break out my Tubular Cast-On.

(I’m using it for my Stellar’s Jay Sweater.)

It’s absolutely gorgeous, especially paired with fine ribbing (it’s perfect with a 1×1 ribbing on sock cuffs).  Properly executed, it looks like the stitches on the front of the piece simply swoop around the edge and continue on the back.

tubular8[1]And (double bonus!), it is super stretchy, so you don’t have to worry about weird tension issues that sometimes happen at cast-on edges.

There are a couple ways to do it, which have all been written about online many, many (many) times.

The way I learned, is apparently the “Italian Way.” Who would have thought?  There’s a great tutorial for it here.

There’s another way to do a tubular cast on, that frankly, looks much easier, but I haven’t tried it, so you’ll have to give it a shot and let me know how it goes.  Here‘s a tutorial that looks pretty good.

What kinds of cast-ons do you like?

And This Is How I Did It

Wednesday, I talked about a sweater I made for my grandfather, based off one that his mother made for him decades ago.

I thought it might be interesting to talk about how I combined a couple patterns, added my own details to create this customized sweater, and went from an idea to a finished product.

I started with the description my Grandfather gave me, “A brown and blue sweater with deer on it.”  From there I guessed that he meant an old-school ski sweater with some sort of color work pattern on the front and back.

235792[1]I looked at patterns for ski sweaters, and none of them were quite right.  They were either too fancy (too many colors or too fussy-looking), or more formal than I knew my grandfather would like to wear (he is a hunting, fishing, outdoors-y type).

Instead, I decided to start with a very simple pattern that I had used before, and modify it to my liking.  I picked the Weasley Sweater by Alison Hansel.  It’s a simple and easy drop-shoulder sweater that comes in a million sizes from infant to grown-up.  I’ve knit a couple sweaters from the pattern before, and they have all turned out really well.  (And the pattern is available for free!)1116161018_78043aab2b_z[1]

The only thing that I don’t care for with the Weasley Sweater is the rolled hem and collar.  Instead, I knit a k2p2 rib for the bottom, and a k2p2 crew collar.

OLYMPUS DIGITAL CAMERAAnd, instead of working the whole shebang in plain brown, I added a stripe of blue just above the cuffs and hem.  Adding a little bit of color work at cuffs and hem is a very “ski sweater” thing to do, and a stripe is the simplest color work you can do.

OLYMPUS DIGITAL CAMERAMy next problem was the deer motif that I had to put on the chest.  I looked at a lot of patterns, and finally decided to use the deer motif from the His & Hers Reindeer Jackets from Patons.  I originally planned to work the deer using the intarsia technique, but then I decided that I wasn’t insane.  (Intarsia and I don’t get along very well.)

Deer_Sweater_-_front_medium[1]Instead, I knit up the whole sweater in plain brown (except for the blue stripes at cuffs, hem, and the edges of the chest panel), and used the duplicate stitch to add the deer after once the knitting was done.  It took approximately 100 years to finish the deer (not really), but I think it was worth it.  Because the whole chest panel is knit plain, the sweater is stronger than it would have been if I had worked the deer in intarsia (and I think it looks better, too).

OLYMPUS DIGITAL CAMERASo, with a couple different patterns, some planning, a little futzing, and inspiration from the ghost of my great-grandmother, I think I managed to make exactly the sweater that my grandpa was looking for.

OLYMPUS DIGITAL CAMERA