A couple months ago, I told you about one of my favorite cast-ons, the Tubular Cast On. It’s still one of my favorite techniques, so I figured that I would tell you about my favorite aspect of the tubular cast on: the Tubular Bind Off.
I know, that’s a cheater’s answer. How can a bind off be my favorite part of a cast on? Let me explain. The tubular bind off and cast on look identical when they’re finished. I love using the tubular cast on/bind off on sweaters, because it means that my cuffs (cast on) and my collar (bind off) can have the exact same finished edges.
I’ve already linked you to a really good tutorial, so I won’t waste my (or your) time with showing you again. But, I will show you how to do the Tubular Bind Off.
Start with a piece of knitting (it looks best with a bit of 1×1 ribbing, which is why I particularly love it for cuffs and collars).
 Repeat the following to the end of the row: (Knit 1, bring yarn to front, slip 1, bring yarn to back). Then turn the work and do the same thing on the next row. This seems weird, but think about it this way: you’re knitting all the knit stitches on the right side of your work, then you’re knitting all the knit stitches on the wrong side of your work.
Then, here’s the cool part. Grab an extra needle (try to use the same size that you’ve been knitting with, but if it’s a little smaller, it’s not a problem. Don’t go buying extra needles for this). Now you have two stitch-less needles and one needle attached to your work.
Slip the first knit stitch onto one of your needles. Slip the first purl stitch onto the other needle. 
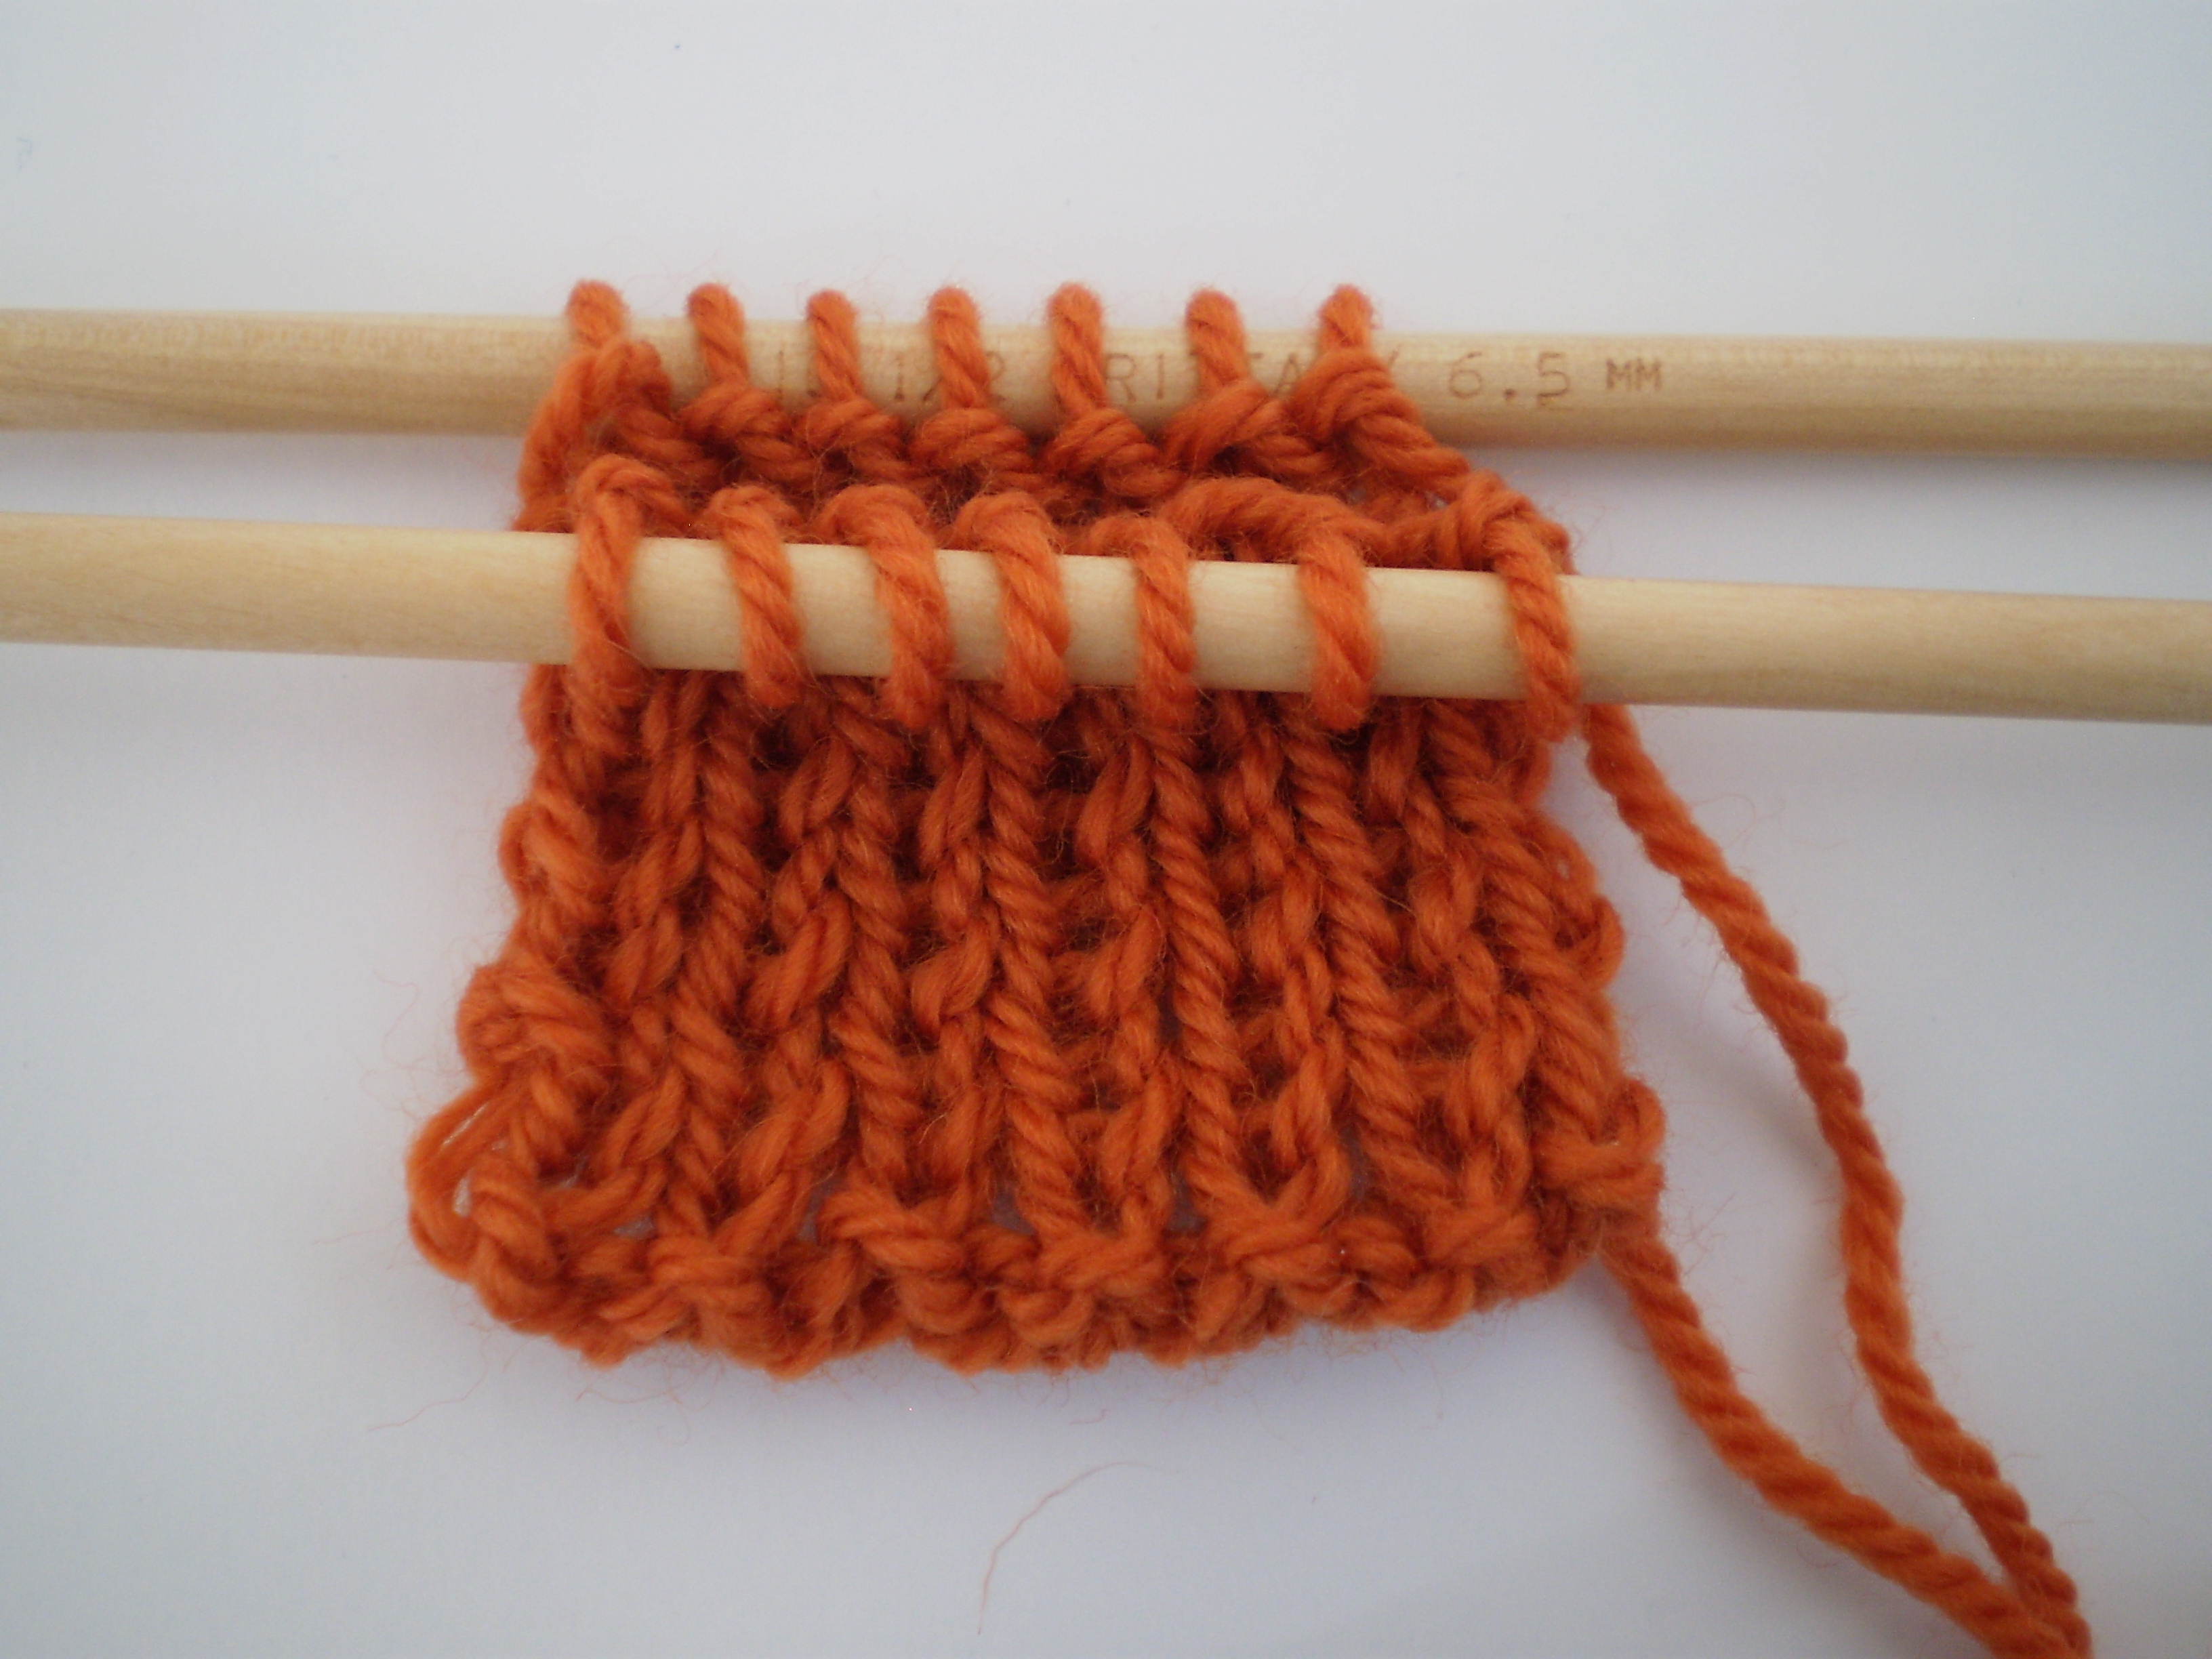
Then continue, slipping all the knit stitches onto the first needle, and all the purl stitches onto the second needle. When you’re done, your knitting will look like this:
 Then, cutting a tail at least three times as long as your knitting is wide, use a tapestry needle and the Kitchener stitch to join the two needles’ stitches together.
 You end up with a lovely, seamless, super-stretchy bind off that looks identical to the Tubular Cast on.


 See how they match perfectly? The k1p1 ribbing makes a lovely subtle edging, and the tubular cast-on/bind-off stops the sweater from pulling even a little bit. Sure, my perfect edges are something that only an obsessive knitter would notice, but as a slightly obsessive knitter, they’re something that makes me very happy.