Category Archives: FYI

In which I do a bunch of math

If you’re a mathphobe, be warned. There’s gonna be a lot of math in this one.

Because I’ve got a pile of yarn and a plan. But not too much of a plan, because obviously that wouldn’t be fun.

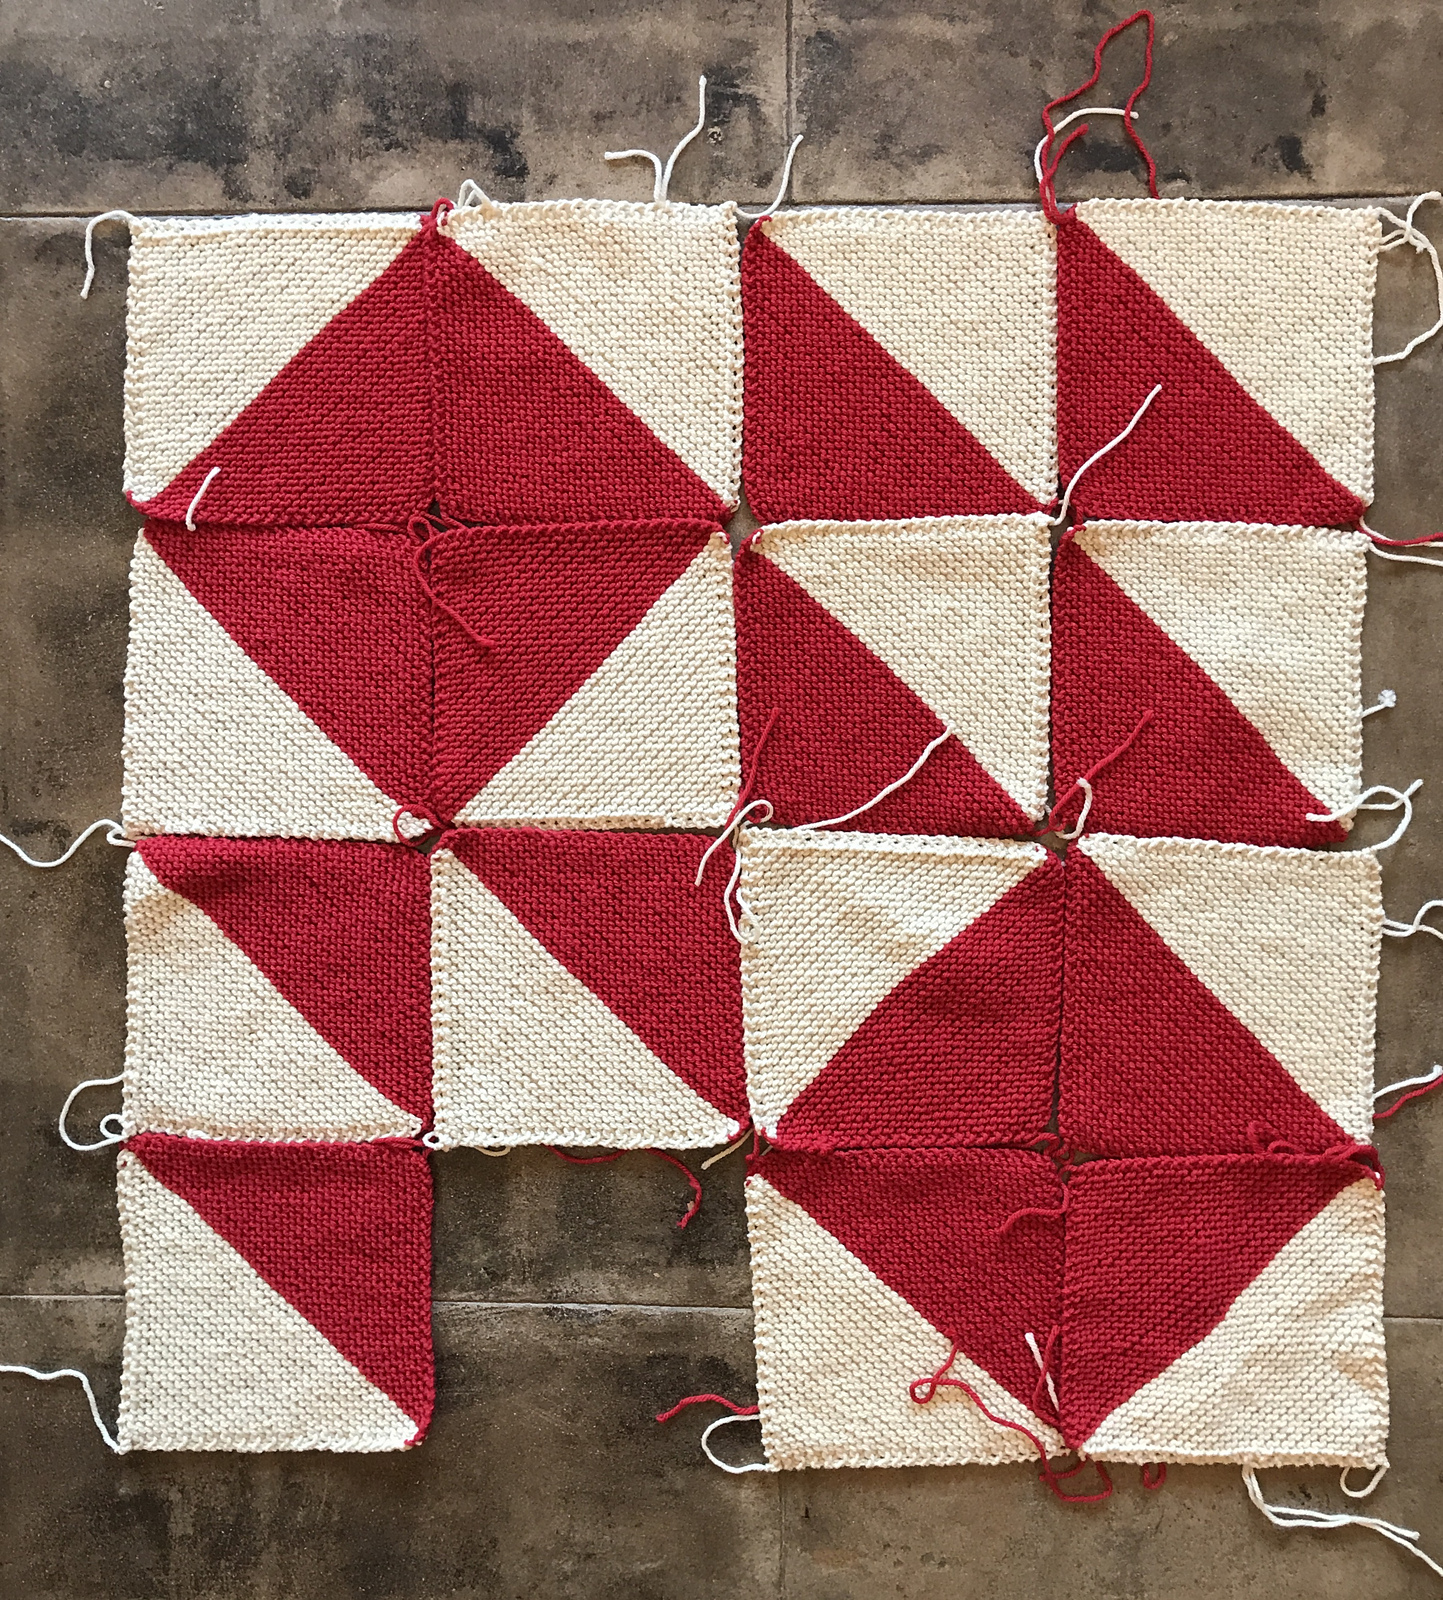
So, I’m making a blanket- with a largeish gauge (I’m using US9s) in a lace pattern that I found… somewhere on the internet at some point in the past. I know that’s not great, and I would love to cite the original designer, but I literally have no information, except that it was a charted Japanese stitch pattern, probably from a stitch dictionary. Which one? I have no idea. (If you recognize it, please let me know and I’ll happily share the source.)

Anyway, I worked up a decent-sized swatch, I know I’m going to do this all-over lace pattern with a simple garter border, and I have a big pile of yarn. But how many repeats to cast on?

I could just guess, but that never ends well. Either I end up with a weirdly small blanket or I run out of yarn halfway through a king-size monstrosity. I’m aiming for a nice throw blanket this time. Big enough that the newlyweds can snuggle underneath it, but not so big that they will be celebrating their silver anniversary before it’s done.

I grabbed some tools. A pad and pen (I’m still old-school when it comes to math), a tape measure and my trusty kitchen scale.

First, I weighed the swatch: 30 grams. (I’ve got 12 skeins of 100 grams each, so 1200 grams of wool to work with.)

Then I measured the swatch. The whole blocked swatch was about 7.5x 9 inches, or 67 square inches.

So if 30g=67 square inches, I can do a little math to figure out that I can use my 1200g to work about 2680 square inches.

Then the next question is, If I have 2680 square inches to play with, how wide should the blanket be? In my head, the blanket is about 50 inches square… ish.

So I divided 2680 by 50, leaving me with 53.6. So, if I cast on 50″ across, I’ll have enough yarn for a 53″ long blanket.

Each repeat is about 3″ across, plus an inch and a half for each border, so dividing it out, that will give me 16.16. But, of course I can’t do part of a repeat, so I’ll round down to 16.

So to get my stitch count, I’ve got 6 stitches for the edges, plus 14 x 16 (14 stitches per repeat, 16 repeats), which gives me 230 stitches.

So now I’m off to cast on and cross my fingers that I did my math right!

Mending

I feel like I’ve been on a streak lately, where everything I pull out of storage is full of holes.  I found two sweaters, a tea cozy and a hat that needed repair, and I just tried on my most favorite pair of socks, and my toe went right through the tip.

Fair warning:  The following are photos of an *ahem* well-loved sock.  Not exactly the pretty things you might be looking for in a knitting blog.  You have been warned.

Anyway, the toe:

IMG_2219

You can see that these socks have already received some TLC- I patched up a big bare spot on the ball of the foot last winter.  Now the toe’s busted through and the heel is about to go.  Some might give up on so worn-out a pair of socks, but not me!  I worked dang hard on these bad boys, and I want to wear them!

It’s time for my favorite knitting mending technique- the duplicate stitch. (This tutorial is more about using the duplicate stitch for decorative use, but it’s the same idea if you want to use it for repair.)

Whenever I want to darn a piece of worn-out knitting (usually socks), I use duplicate stitch, carefully going over the worn-out spot (plus a little extra all the way around).  It’s a way to reinforce worn stitches with a new layer of wool.  I carefully trace the knit stitches with the new yarn, following the path of the last few fibers of the old yarn.

IMG_2225

And when there’s a real, honest-to-goodness hole, where the yarn has fully broken and there’s nothing left to “trace”, I use a knitting needle to hold my stitches until I can hook them up to the other side of the hole, building new “knitted” fabric to cover the space.

IMG_2226

Until, the hole is covered and the sock is good as new.  Well, you know what I mean.

IMG_2231

Now I just have to repeat with all the other sad socks in my drawer.

Do you ever mend your knitting?

A Halloween Curse

I haven’t got anything pretty or cute or nice to show you today- I’m in-between personal knitting projects and neck-deep in super secret work knitting.  I had thought about writing about some cute knitted pumpkins I saw the other day.  Or maybe looking up spider-related knitting patterns (my kid is currently obsessed with the “Itsy Bitsy Spider”, or as he calls it “Pider Pider Pider”).  Or maybe writing a quick warning that we’re just under 2 months away from Christmas (which we are, so if you’re doing any Christmas knitting, you’d better get moving).

But no, instead, I will tell you a spooky Halloween story.  A tale of a real live cursed hat, and the person who must live with it (me).

Because, you guys, I’m totally and completely cursed.

Guess I'm Cursed

So, a couple months ago, I came across a call for a design, and I came up with an idea for a really cute cabled hat (I’d love to show it to you, but it’s currently embargoed.  Don’t worry, though, once it’s done I’ll be excited to share it).  “This will be an easy job,” I thought to myself.  Oh how wrong I was.

It’s a simple little cap, with a handful of semi-complex cables all the way around.  Nothing too crazy, but getting the sizing right on something like this is kinda tricky.

So, before I even submitted my proposal, I knit up the following:

  1. Swatch #1: The cable didn’t look the way I thought it was going to.  Ripped out.
  2. Swatch #2: The cable looked closer to what I was imagining , but needed some tweaks.  But, I figured I could do the tweaks on the hat that I was going to do next. Ripped out.
  3. Hat #1: Got about 3 inches into the hat and realized it was a hat for a giant.  Ripped out.
  4. Hat #2: Got about 4 inches into the hat and realized it was a hat for a toddler.  Ripped out.
  5. Hat #3: Made it all the way to the crown, but ran out of yarn about 5 rows from the end.  Ripped it out.
  6. Hat #4: Made the pattern slightly smaller, and made it to the end with about 3 feet of spare yarn.  Turned out cute!  Fit! Yay!

I wrote up the proposal, and figured, “Hey, if it gets picked up, great!  I have the pattern essentially figured out already.  And if it doesn’t get picked up, I’ve got a cute new hat. Win-win.”

A few days later, I got the news that the pattern was picked up (Yay!), but they want it knit in a different yarn (Oh no).  So the process started over again.

  1. New Swatch #1: Looks good! Right on the money, gauge wise (which is shocking, since my prototype yarn and actual yarn are quite different).
  2. New Hat #1:  This hat is killing me.  It’s taking forever, it’s super slow-going for some reason, and making my hands ache.  I can only knit on it for an hour or two at a time.  But then…

Last night, I sang a little song of triumph as I got to the crown.  I decided to stay up past my bedtime because I thought I might be able to finish!  I pulled out the US7 DPNs from my knitting bag, and switched them out for the circular I had been using.  Suddenly, the knitting felt weird.  A little too easy.  A little loose.

Y’all, I had been knitting the whole dang hat on US5s, instead of swithing to US7s after the brim.

There were swears.

So, I’m going to go rip out the hat.  Again.

Talk about a true Halloween horror.

Have you ever worked on any truly cursed projects?


Getting those needles into shape!

I admit, this is a little bit of a silly one, but something that I’ve been needing to do for literally years.  I’ve done it.  I’ve officially organized my DPNs!  *Applause please.*

For a long time, I tried to keep my DPNs in their original packaging, but that was a mess.  It looked awful. I had packs of needles stashed everywhere, and I could never find the ones I needed.

Then several years ago, I put all my needles in one big ceramic jar.  I figured they’d at least be all in the same place.  I didn’t have to go rummaging through thirty-seven different project bags, or digging in my desk, or looking through my various pencil cases and backpacks.

And they looked cute! Bonus!IMG_2080

But that was quite a while ago, and in the interim, I’ve acquired *ahem* quite a few more needles.  (I don’t have a problem, you have a problem.)

I was digging through them the other day, looking for some US6’s, and I ended up so frustrated that my husband offered to help (looking through probably 100+ nearly identical needles will do that to you).  He immediately said “There must be a better way.”  Which made me realize that there must be a better way.

Why had it never occurred to me!?  I like to think that I’m pretty smart, but sometimes I question my own intelligence.

Anyway, I was thinking of what I wanted, and I knew I still wanted my needles out on display, and I wanted to be able to grab the size I needed at a moment’s notice (or at least without a half-hour long search and a lot of swearing).

Long story short, I ended up at Target, and found a “lipstick organizer” (Who’d have thought that was a thing?!).  It’s a short-ish organizer with 16 little spaces, plenty for each size of needle to have its own spot. IMG_2072

So far, it’s working great!  It still looks a little messy, but it gets the job done.  I think I might add little stickers or something to label the sizes, but for now, it’s working out OK.

I can’t believe I wasted so much time digging through that old jar… sigh.

How do you organize your needles?

Off (or on) the Map

I get emails on a fairly regular basis asking me why I use charts in my patterns instead of just writing out the instructions.  I try to explain why I prefer charts over written instructions (they are easier to read, they give you a visual representation of what the finished pattern should look like, etc), but I feel like I’ve never had a really good, succinct explanation.  Until now.

I was chatting with a friend about charts vs. written instructions (like you do), and she had an amazing analogy.  An analogy I’d like to share with you.

The year is 1998.  The Barenaked Ladies, Destiny’s Child and Brittney Spears are on the radio, Armageddon is in the movie theaters, and I’m in middle school.  You’re planning on taking a road trip (while listening to your new NSYNC CD in your very high-tech car CD player), and you need directions. 541c9257a84d7.image

You boot up the modem and go to Mapquest for driving directions.  After 45 minutes (which seems very fast), you’ve downloaded and printed out your instructions.  You’re ready to go.


You hop in the car, follow your instructions.  Left on Aurora, right on 145th, take the northbound on-ramp, drive 5 miles, get off at Exit 220.  But wait, there is no Exit 220!  Where’s Exit 220?  I thought I was supposed to be on the freeway?  Why am I in the middle of a neighborhood? What happened?

You don’t have a map with you, because you didn’t need it- you had your Mapquest directions.  Sure you could retrace your steps, carefully make your way back home and try following the directions again, but that’s a lot of work.  You’re lost.  You’ve got to cross your fingers that you can find a friendly gas station attendant to give you new directions.CaptureNow imagine you’re on that same road trip, but this time you’ve got a map (or better yet, you’ve got a map and your instructions).  If you get off track, you can pull over, find your cross street and figure out your location.  Sure, reading the map might be a little tricky, but in the long run you know you won’t ever be stranded like you were with just the instructions.

Knitting is the same way.  Sure, if you’re knitting with only written instructions, and you follow the instructions exactly to the letter, you’ll end up with a beautiful garment.  But let’s be honest, when’s the last time you knit a garment without a single mistake?  (I can’t say I’ve ever done that.)  And once you’ve made a mistake, all you have is a big block of text that you have to wade through to figure out where you went wrong- not easy.Capture1If you’re using a chart, on the other hand, you can usually tell much more quickly where you went wrong.  Maybe there’s a yarn over where there should be, a section of lace that is missing a stitch, or a cable that’s been crossed the wrong direction (the bane of my existence).  Because a chart gives you a birds-eye view of what your project should look like, it’s easier to figure out what’s going on, where you went wrong, and ultimately how to fix it.

I know charts aren’t for everybody (just like some people will never be able to read a map, no matter how hard they try), but if you’re on the fence about trying a charted pattern, give it a go!  You might like it!

Welcome! (Blanket)

You guys know I like a big project, I like a nice group project, and I like using my knitting for positive change.

So, honestly, it was only a matter of time before I wrote about the Welcome Blanket project.

WB-flier-2side-final-updateLanguage-1

The Welcome Blanket project is a lovely pro-immigrant activist statement/group art project/just a dang nice thing to do.

Basically, people across America knit or crochet or quilt smallish lap blankets (they ask for 40″x40″), and send them in to be collected at an art gallery somewhere in the US. (So far they’ve been in Chicago and Atlanta, and they’re getting ready to do an installation just outside of Boston.)  Once the donated blankets have been on display for a bit, they are then distributed to newly-immigrated families, along with notes of welcome and encouragement.

WB-Sept25_10

(These blankets were displayed in Chicago last fall.)

It’s a beautiful, loving gesture to families that are doing something incredibly difficult in a country that isn’t always the most welcoming to new people.

If you’re interested in taking part, unfortunately the most recent round of blanket collection (at the Fuller Craft Museum) has just finished, but don’t fear!  The Welcome Blanket folks are going to keep going, and I’m sure a new collection will be just around the corner.  I know I’ve got a couple ideas for blankets that I want to make (in all my free time).

If you’re running short on ideas, but want to participate, there’s an official “Welcome Blanket” pattern that you’re more than welcome to use (but feel free to get creative).

Come Together Blanket by Kat ColeIMG_1009

Do you ever do any activist/charity crafting?  What projects have you participated in?

SNOWPOCALYPSE 2019

We’ve had a crazy mild winter this year- 40s and 50s, and more often sunny than not.  It almost felt like we forgot to have winter.

Well.  We remembered.

And decided to have an entire season’s-worth of winter all in one weekend.IMG_1270.JPGIt started snowing Friday around lunchtime, and kept on going all through the night, until we ended up with knee-deep (or at least calf-deep) snow blanketing the city.  We hit 9 inches on our back deck on Saturday morning!IMG_1280
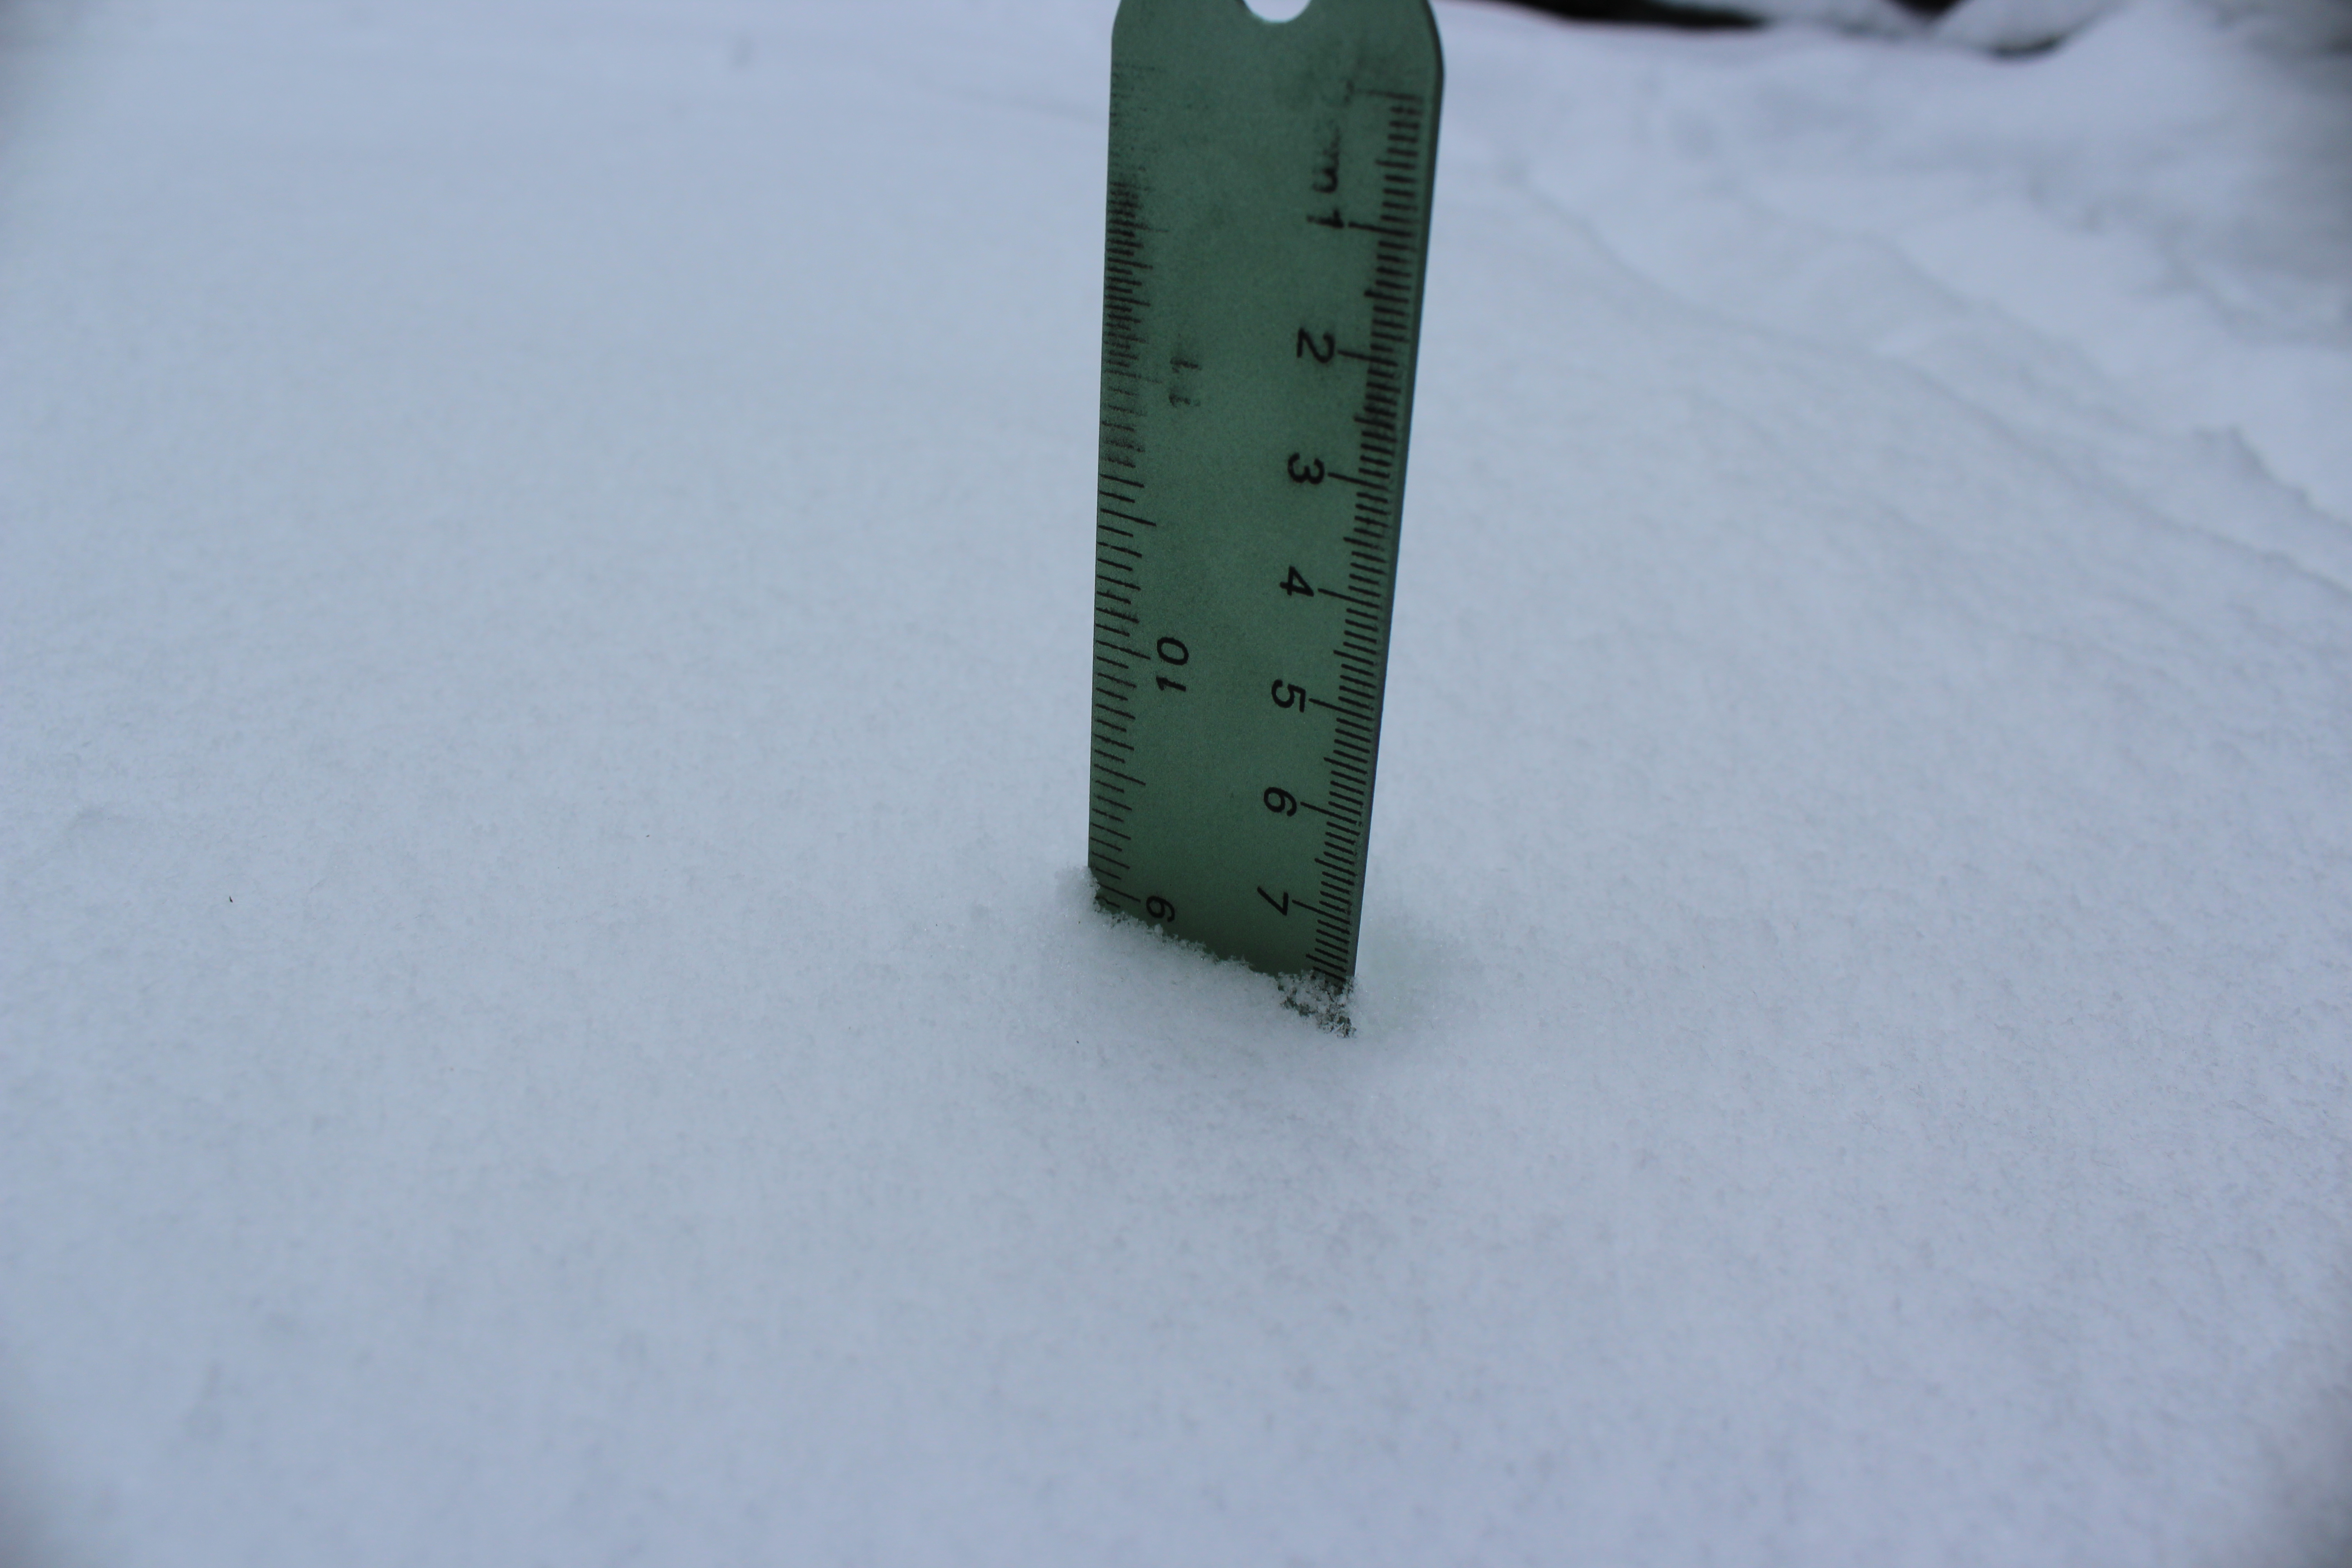
I know that as a transplant from the Midwest I’m supposed to go on and on about how “back in my day we’d drive in three feet of snow, uphill both ways, with our eyes closed, just for fun.”  But, I gotta say, I kind of love the Seattle way of dealing with snow.  Here, we don’t tough it out, we don’t fight it, we don’t shovel or salt or plow.  We just stock up on food when there’s snow in the forecast, call out from work and hunker down.  This morning, I’m fully embracing my inner Seattleite and enjoying the snow through the window, cozy with my knitting and a cup of tea.  Maybe we’ll go outside and make a snowman later, or maybe we’ll just stay inside until the snow melts.  IMG_1284
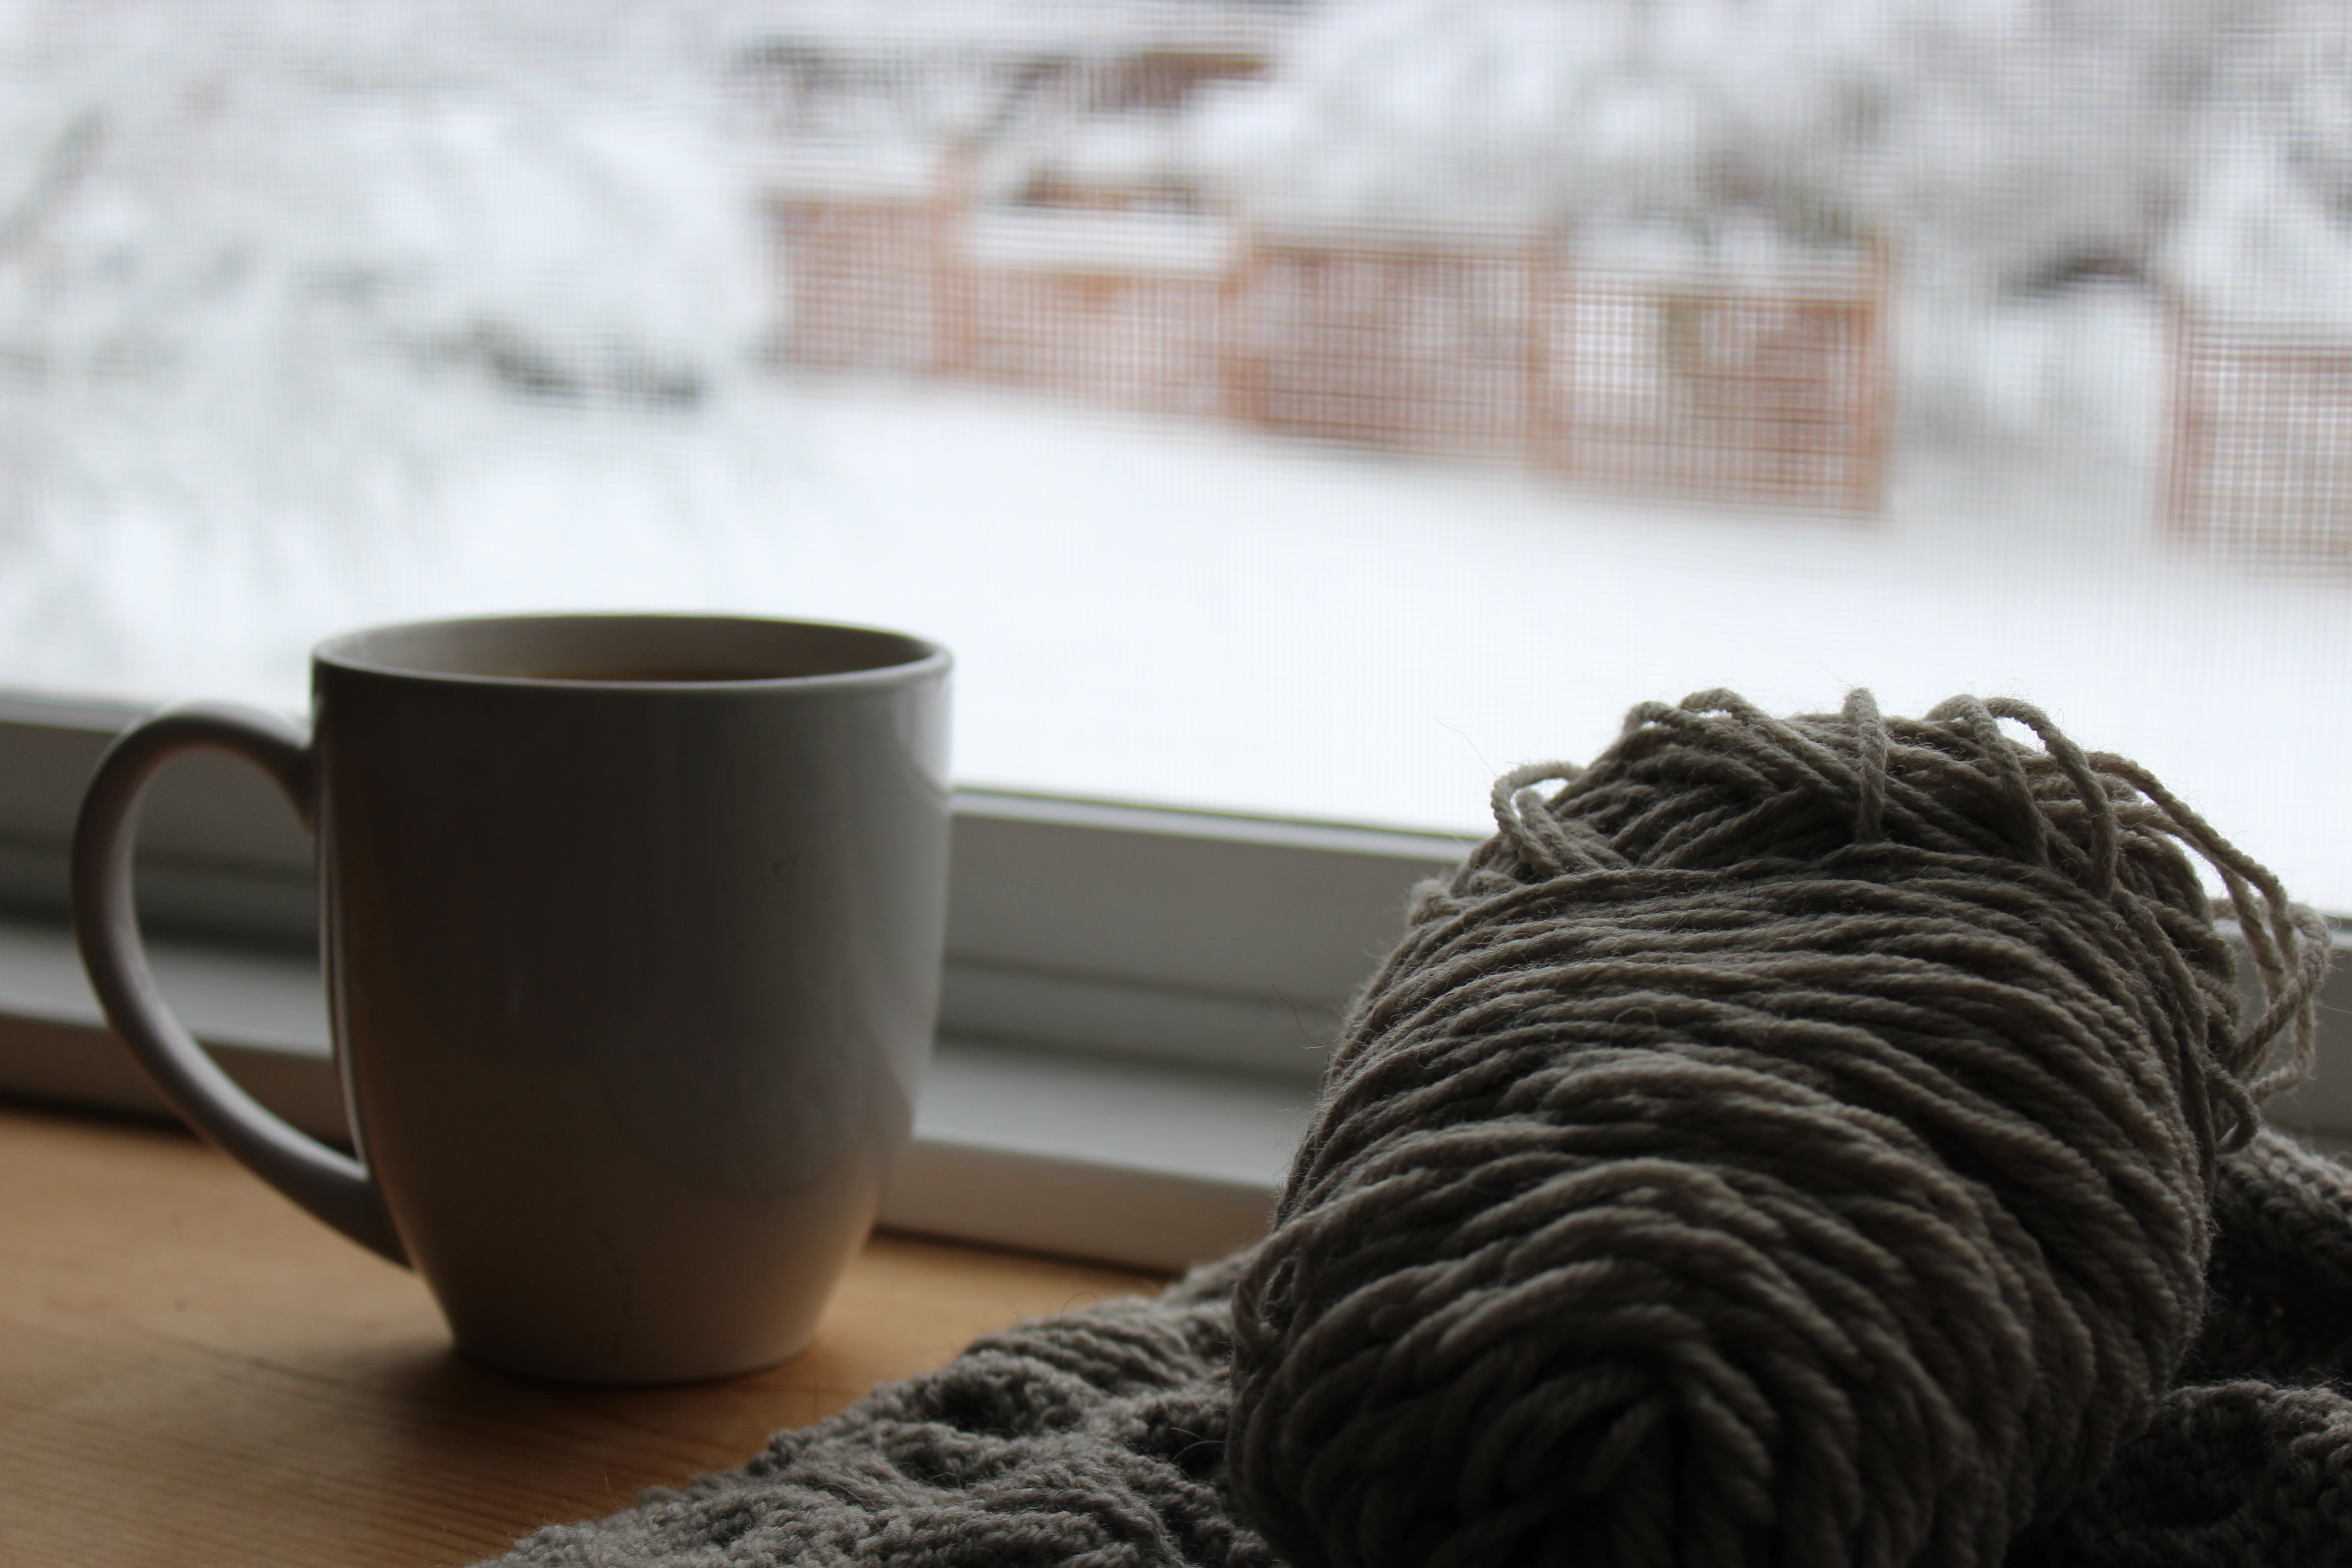
Is there snow where you are?  What do you do when the snow hits?
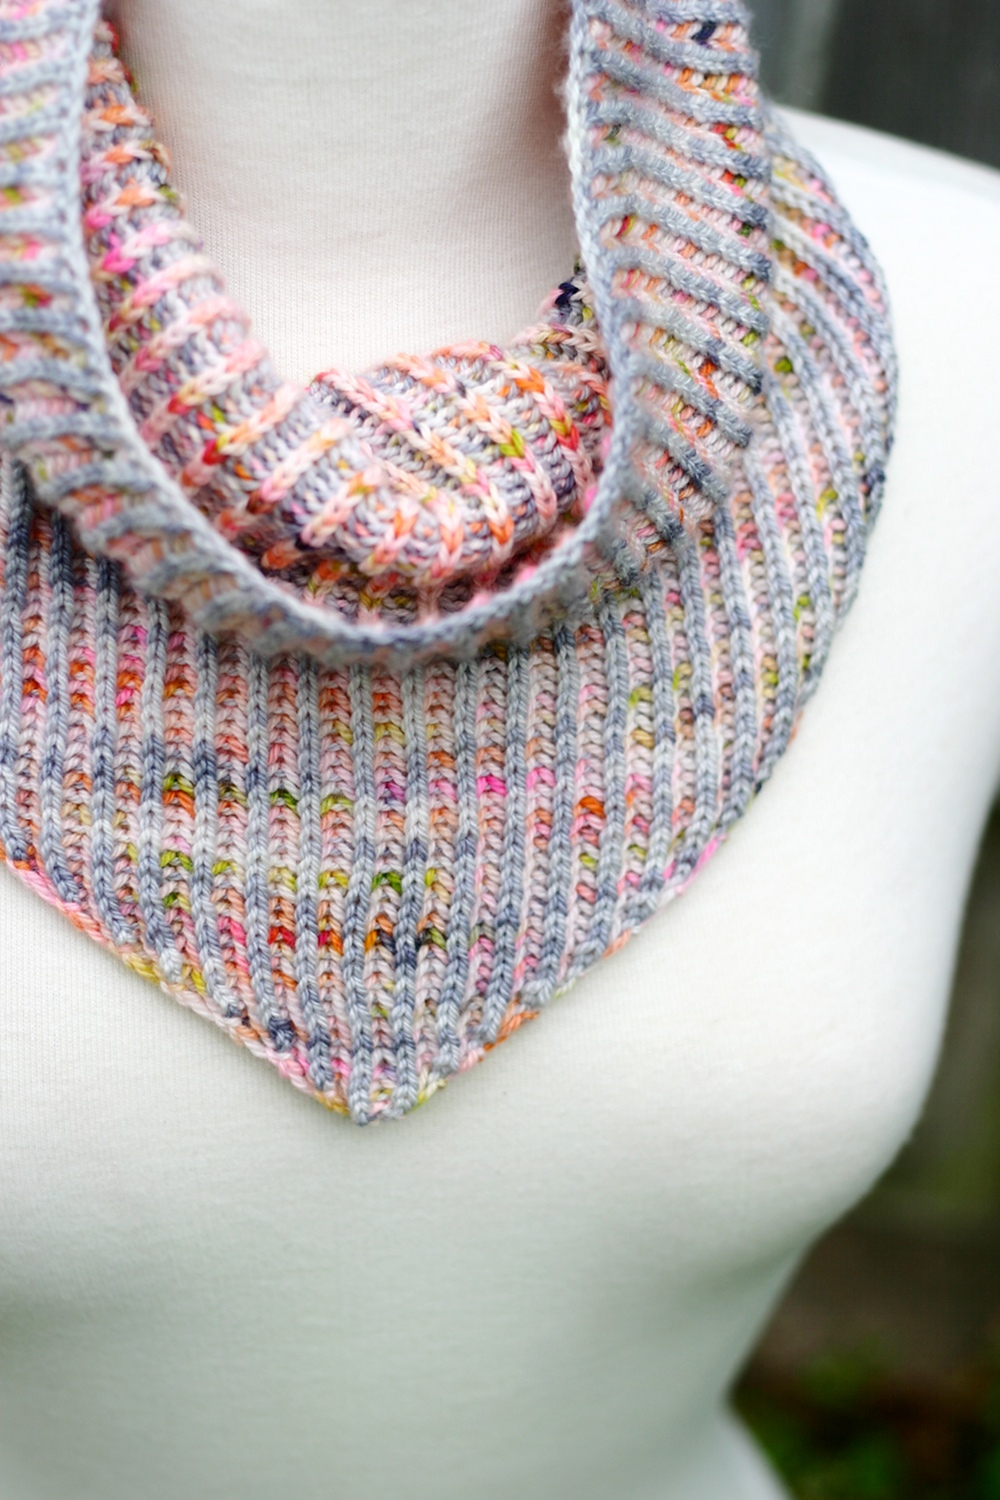
A Little Something New

It’s been a while since I tried something truly new in knitting.  I’ll try a new cable or stitch pattern, but even the most complicated stitch pattern still just uses a combination of the same handful of stitches.  And I’m not afraid to try a new pattern or come up with a new design, but it’s all really just putting the same stitches in different order.  I’m not complaining, I love my usual knitting, but none of that is really a new skill.

So I decided to try something that’s truly new to me.  Brioche!  (This isn’t a tutorial about brioche knitting- I’m not even finished with my first piece, so I’m very much not an expert!) Brioche is super cool! It’s knitting, but its stitches are just different enough from regular knits and purls that it’s a little tricky.  It took me a few evenings to really get the feel of it.  The finished product ends up with a sort-of two-color ribbing, and is seriously fluffy.  It’s kind of magical.

I browsed Ravelry and found the Fingering Brioche Bandana Cowl by Lavanya Patricella.  It looked simple enough and like something I’d actually wear.  (These days with a very grabby kid, long scarves and shawls aren’t terribly practical, but my neck is still cold!)fingerbandanacowl01I pulled out those mini-skeins of Tosh Merino Light, fired up Google to look for instructions, and after a few false starts, I was cruising along. img_1234
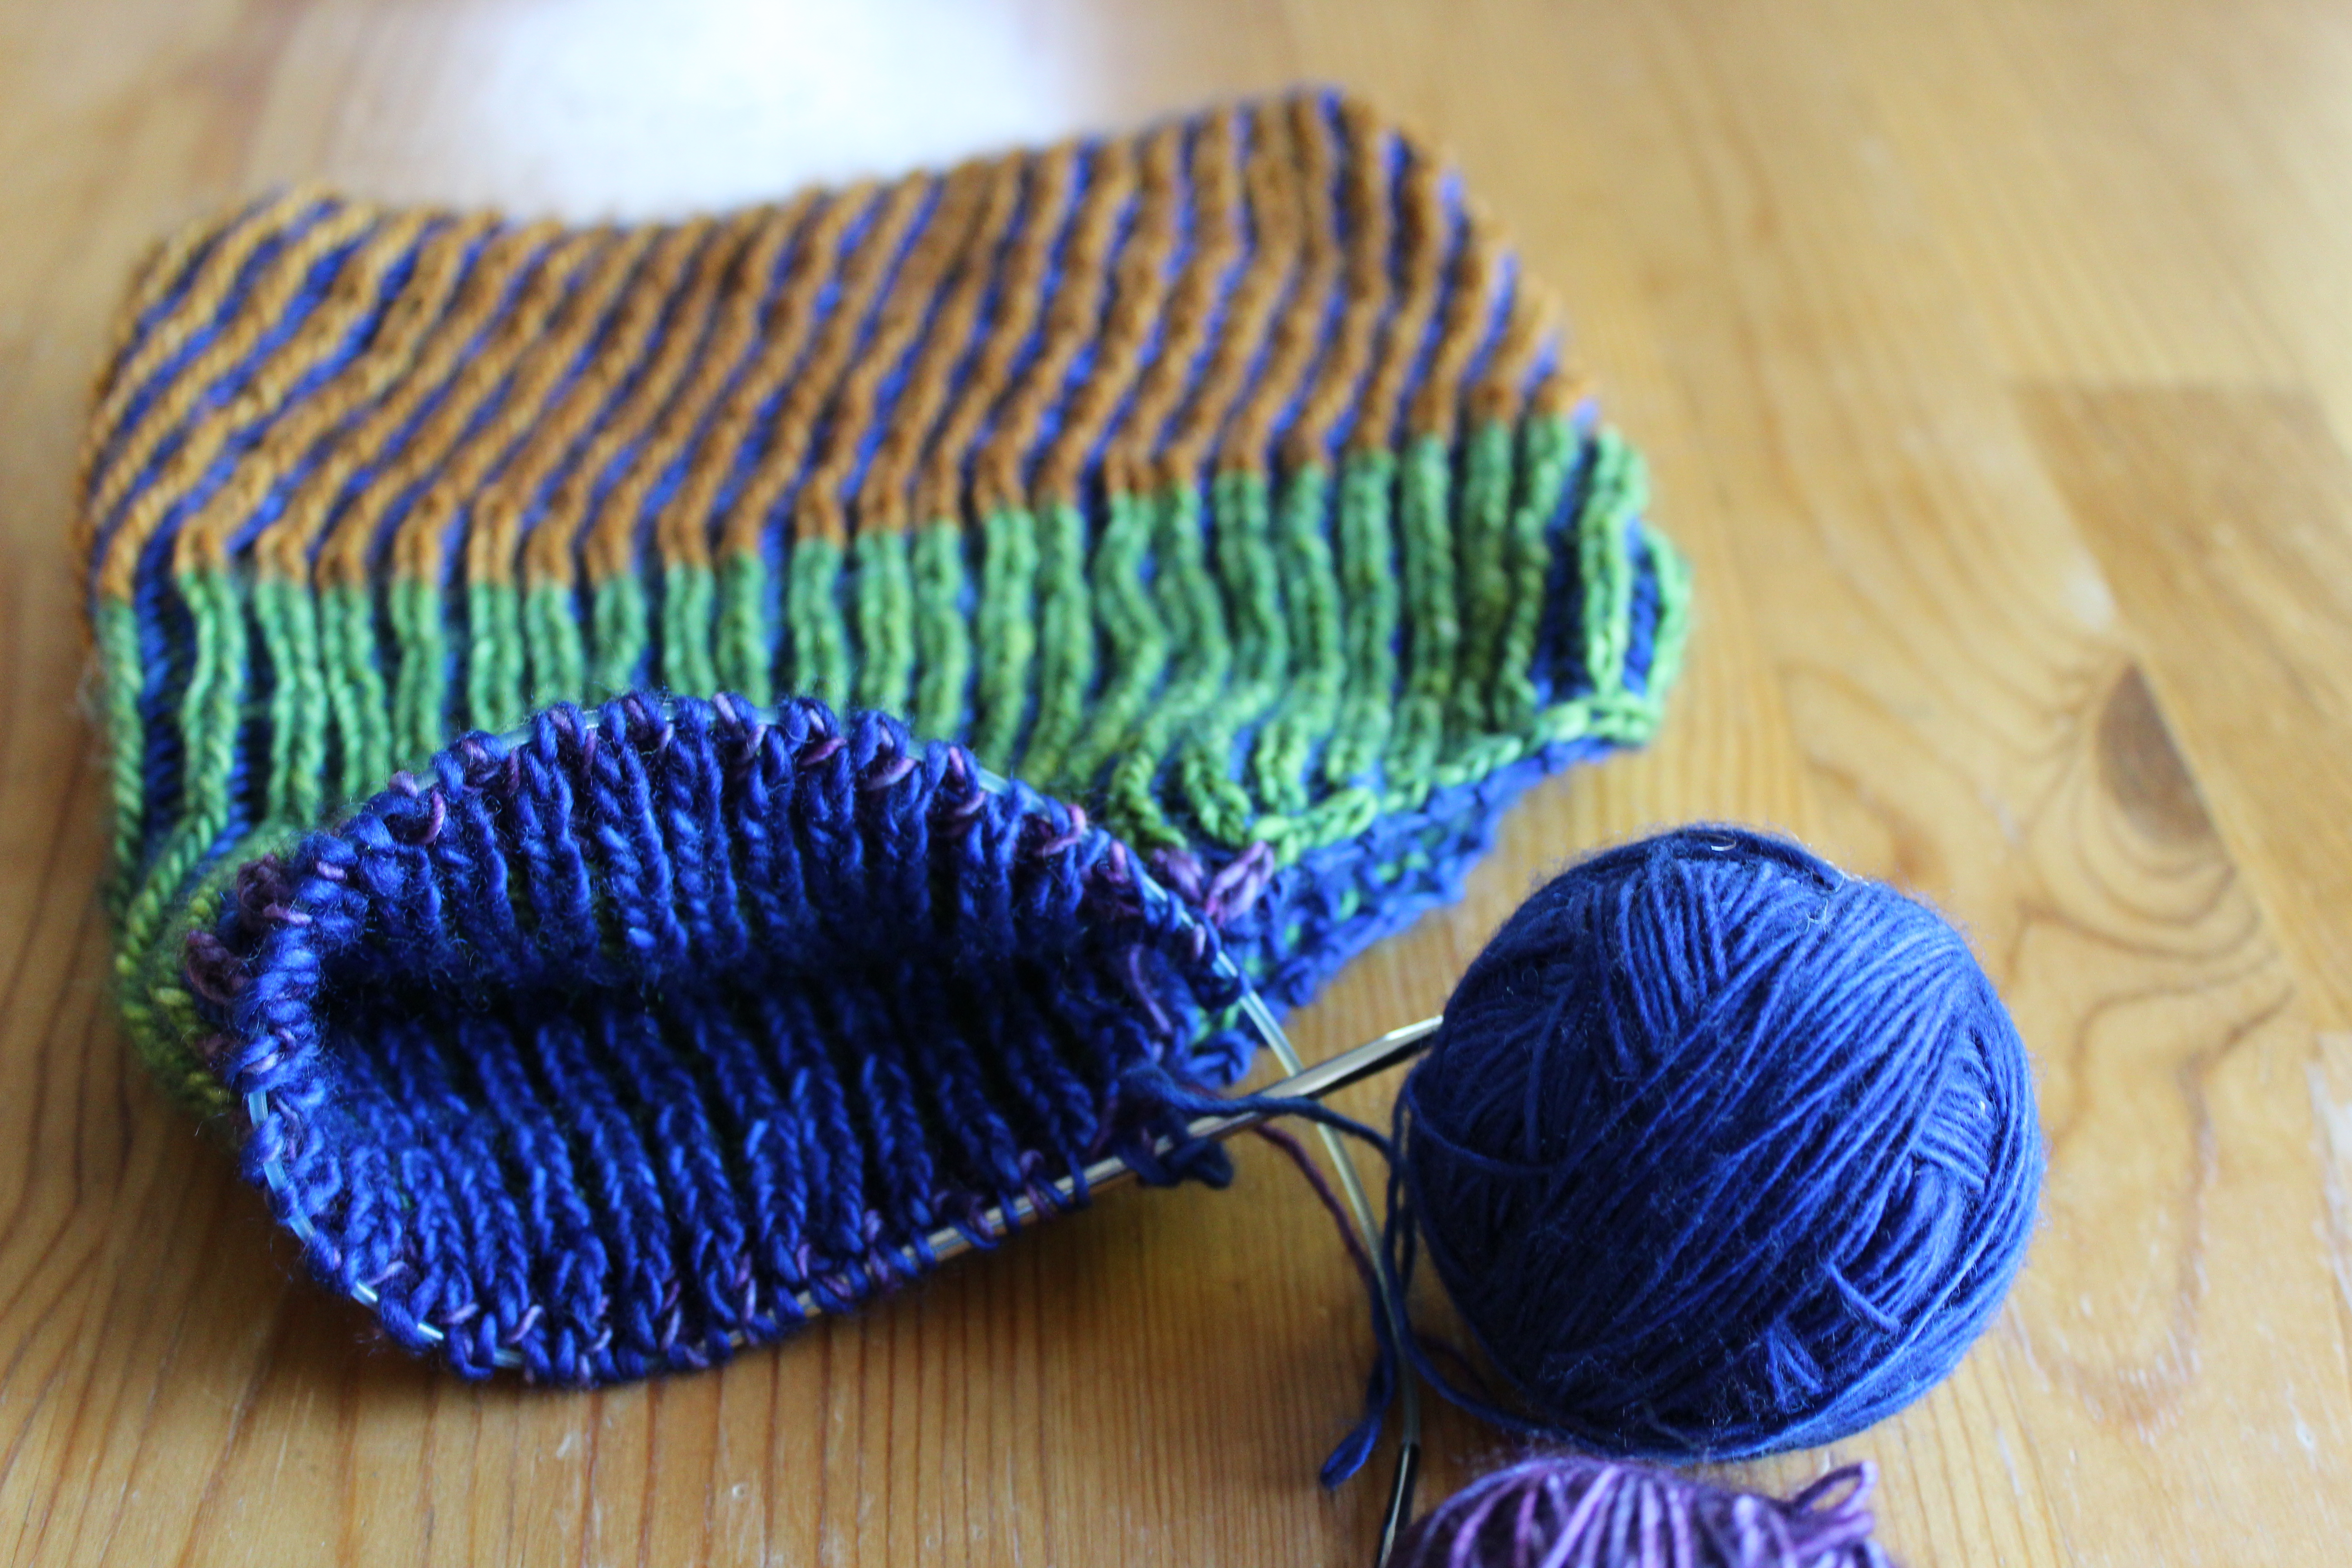
I love how the royal blue peeks through to the outside of the cowl, and I love how squishy the fabric is!img_1236
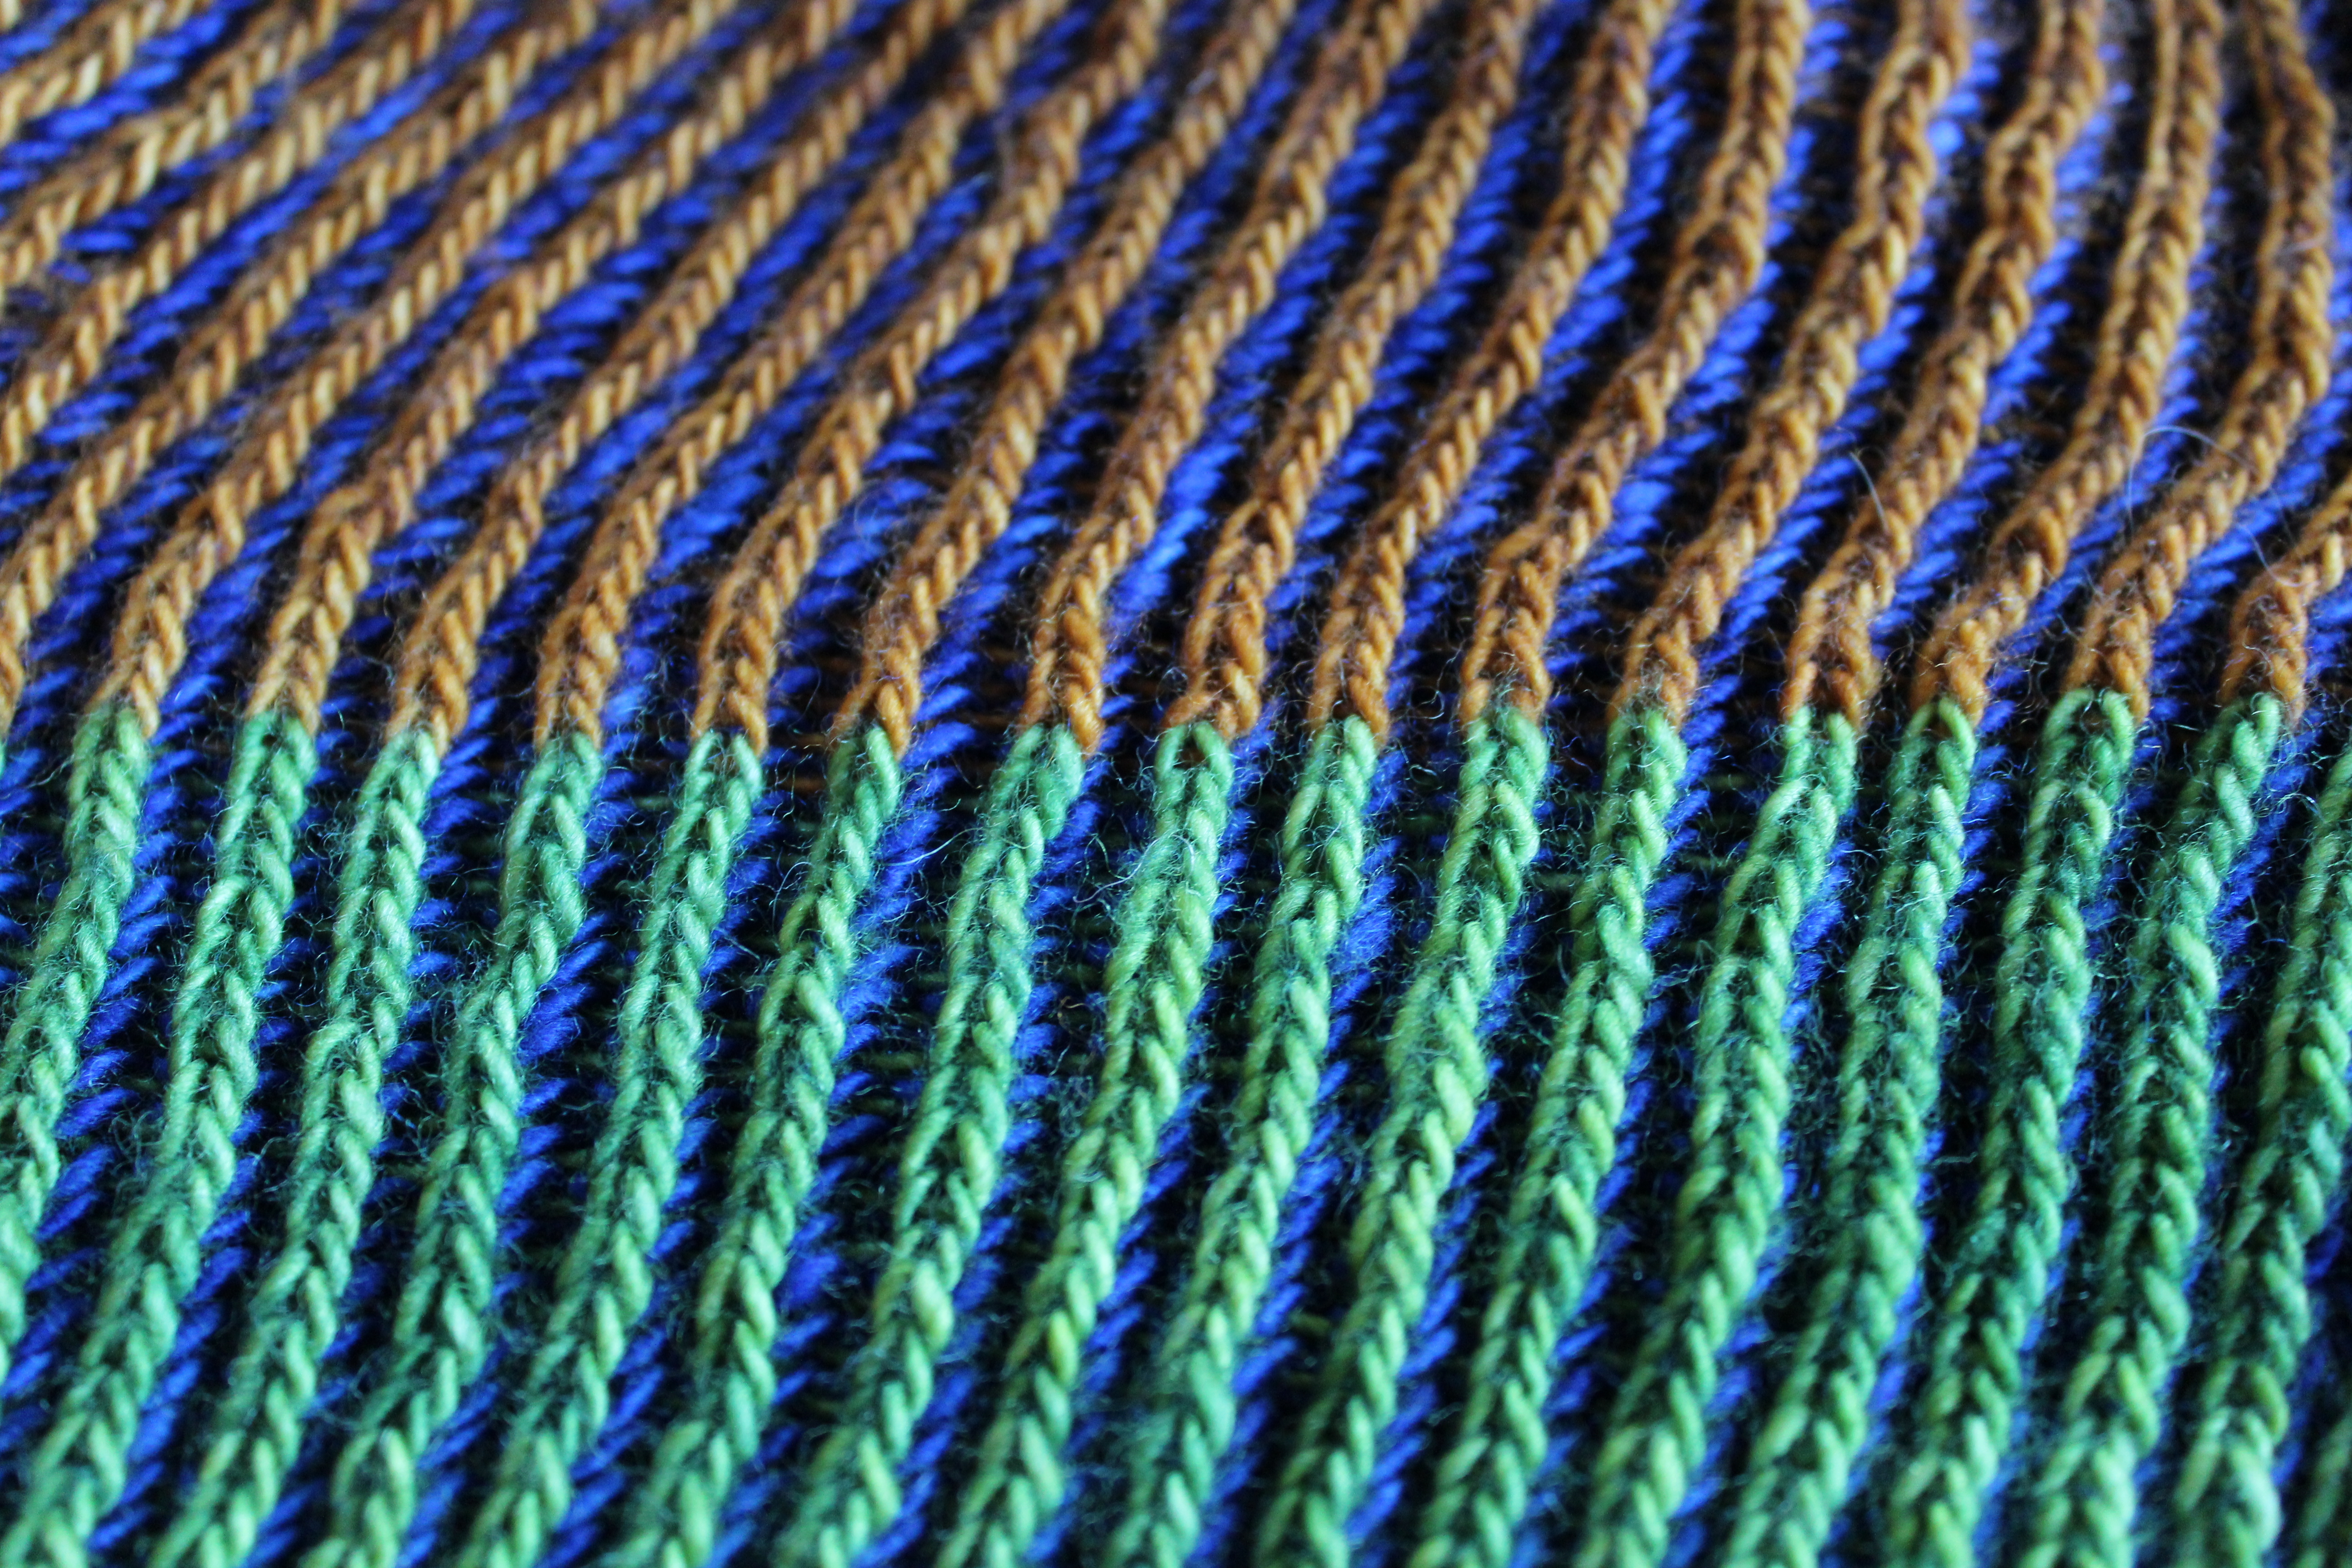
(Though I might actually like the “inside” better.  The color-blocking is a little more subtle, just peeking through between the ribs of blue.)img_1240
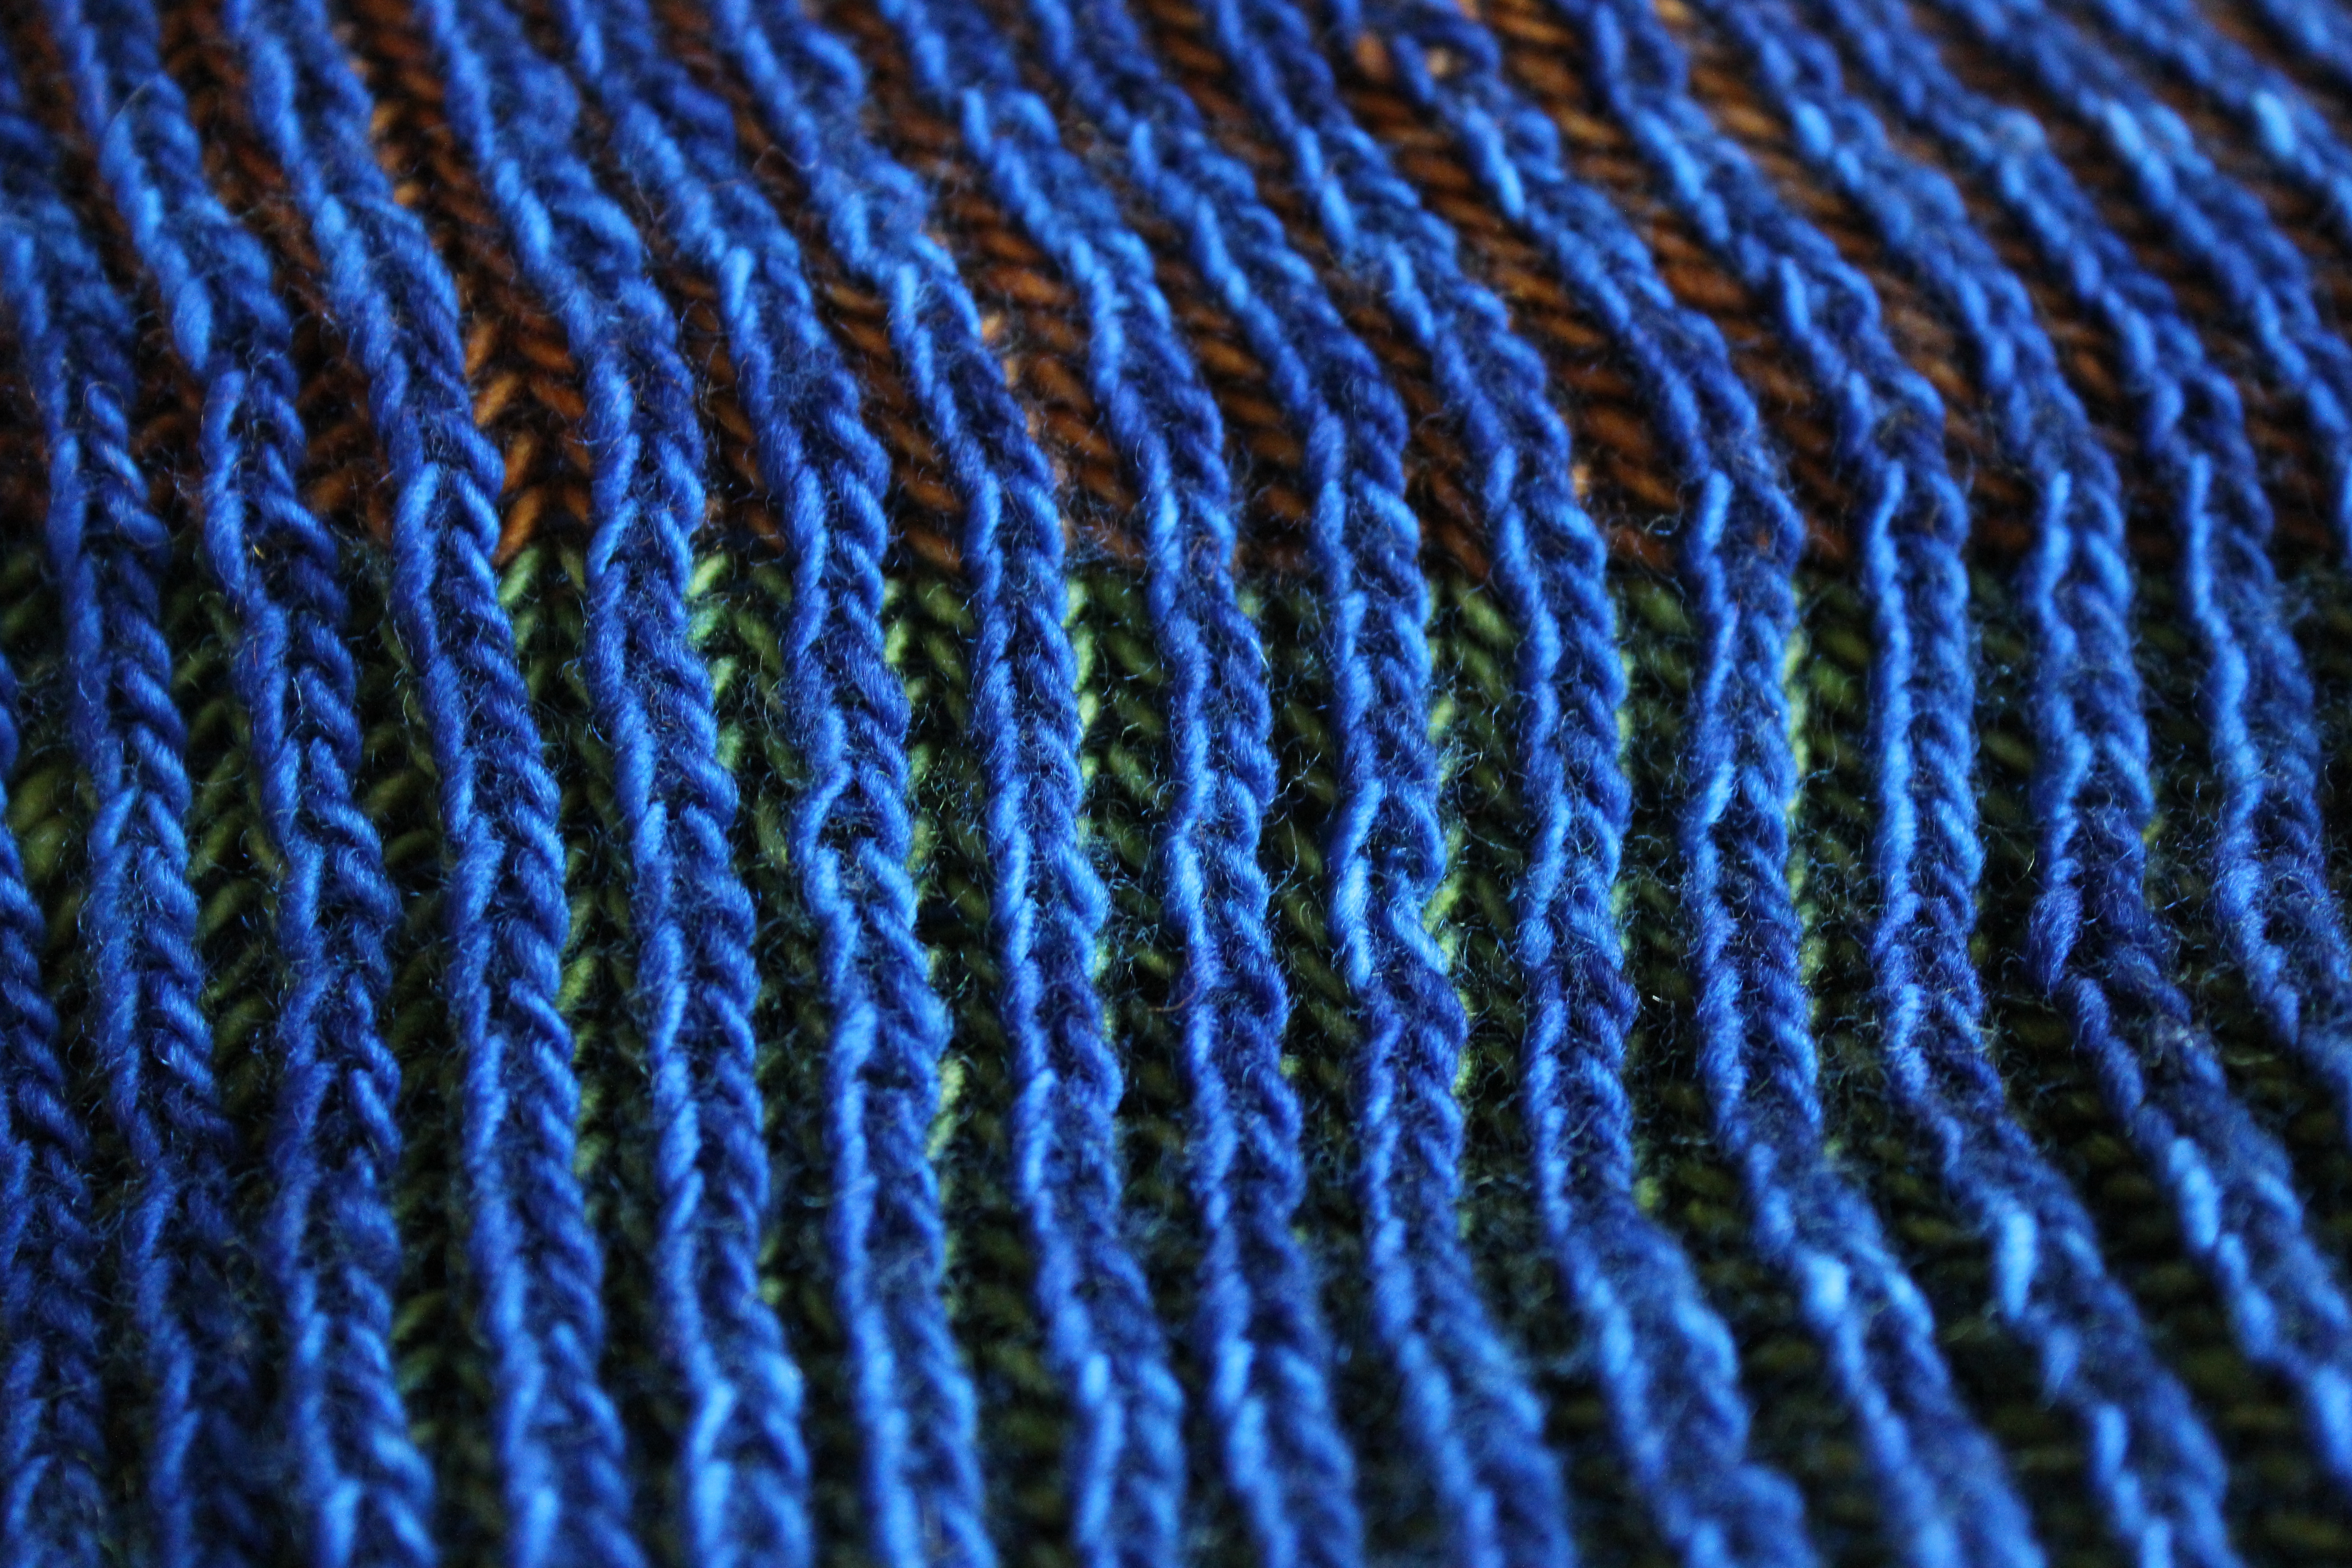
I’ve still got a way to go before I perfect my brioche knitting though, my gauge is a little bit all-over the place and my decreases are a weird and sloppy (though I might be able to block them out a bit).  At least I have a reason to keep practicing!img_1247
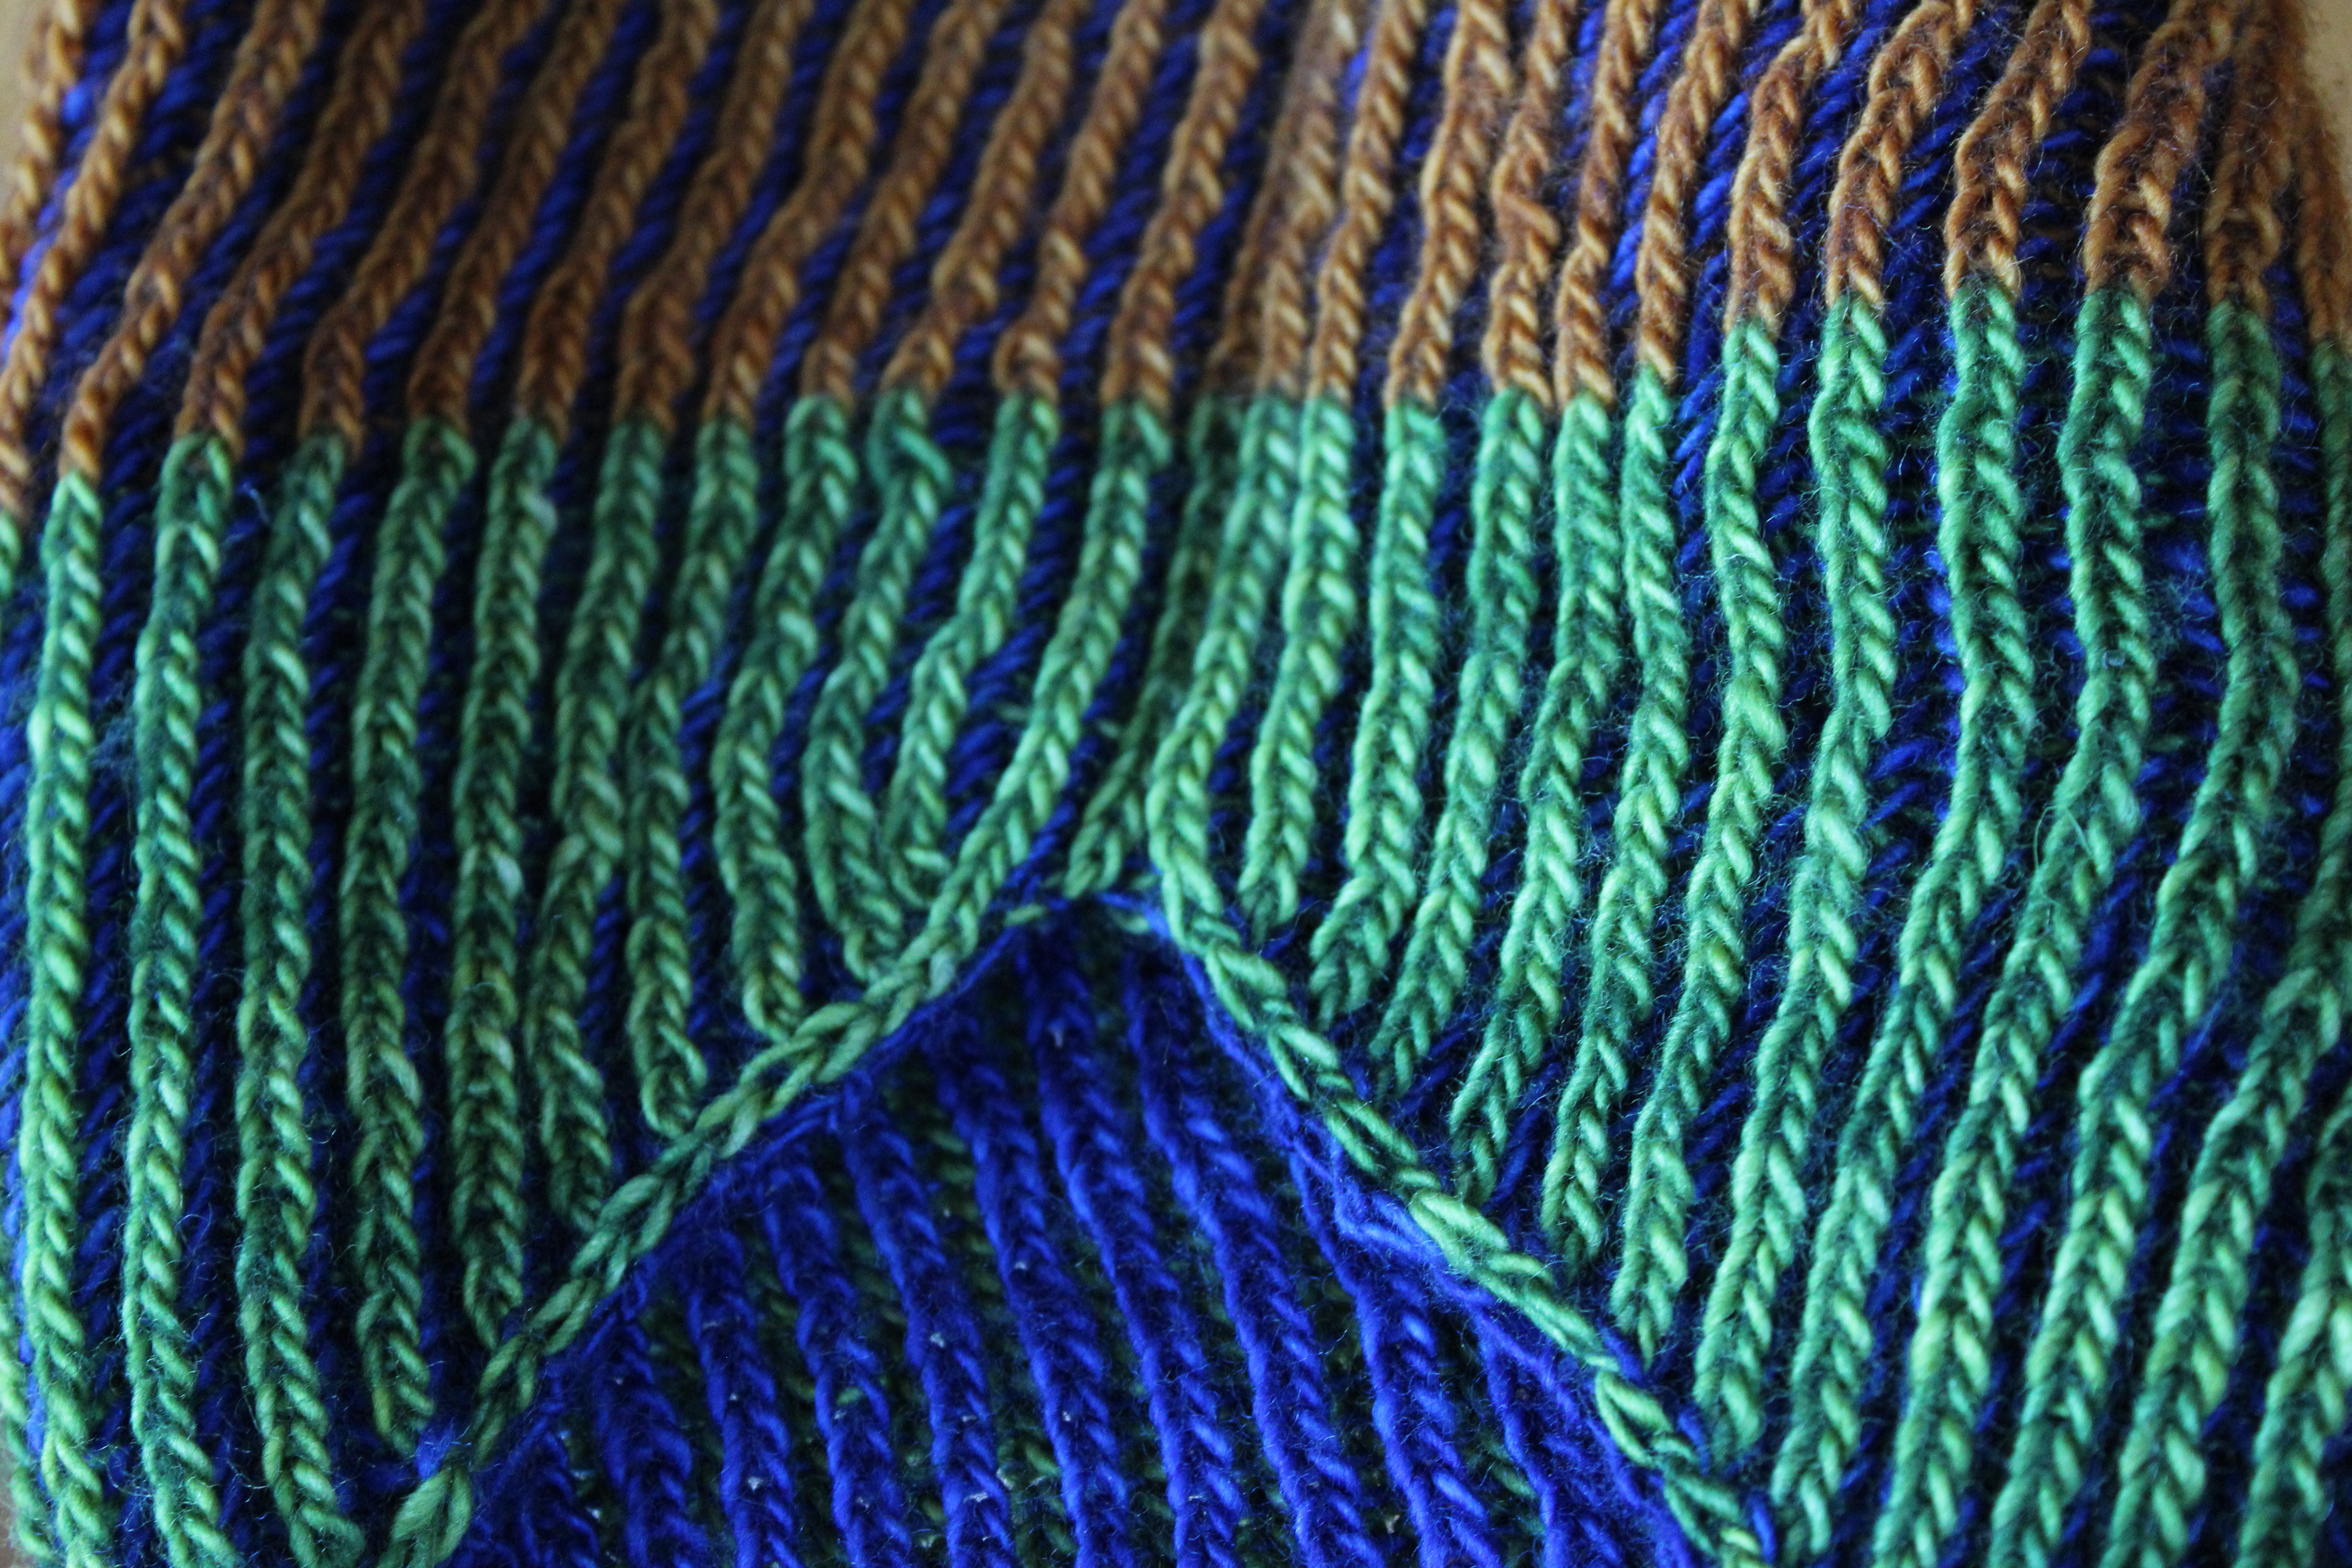
Have you tried any new techniques lately?  What were they? How did it go?

Busy Busy Busy

I’ve been busy, designing and swatching away.  It’s been great!  But, I can never help thinking that after I finished a swatch, I should be able to do something fun with it.  I’ve got a bunch pinned up on the bulletin boards in my studio, which is nice.  But, honestly, most of them just hang out in a stack in my closet.  My mind is always chugging away in the background, trying to think of something to do with my leftover swatches.

And, over the last few weeks, I’ve been getting a jump on a new sewing project for the kid- a busy book.  Basically it’ll be a little book with quilted/apliqued pages for the baby to play with, and I plan on adding more age-appropriate pages as he grows up.  Right now, the pages are all basically just things for him to touch, feel, and put in his mouth (he’s only 6 months old, after all), but down the line I’ll add pages with fun things like zippers, flaps, velcro, etc.

For example, I made a sheep page with some leftover terrycloth.IMG_0567Cute, if I say so myself!  (Gotta start teaching them to appreciate wool from an early age, right?)

That got me thinking- how could I use knitting in the busy book?

I dug up an old sock swatch (I figured the smaller gauge would work better with the scale of the book) and got to work.  I machine-sewed two lines with very short stitches down the back of the swatch, and cut in-between them- kind of like this. (I’ve never steeked before, and I think this is about as close as I’ll be getting in the near future.  Scary!)  Then I took some iron-on adhesive and ironed it to the back of the swatch, cut out a sweater shape and ironed it to the background fabric. It was more or less intact, but the edges were fraying a smidge, so I ran a quick zig-zag stitch around the edge, and presto! an actually-knit sweater page!IMG_0577I really should have taken pictures of each step, but I really didn’t think it was going to work!

Now that I’ve done this once, my mind is spinning with all the knitting-as-applique possibilities!

What’s the weirdest thing you’ve done with your knitting?

Vacation Yarn

Some people collect miniature spoons, or porcelain thimbles when they go on vacation.  Others collect magnets or key chains or tiny, personalized license plates.

I try my darnedest not to collect tschotchkes, but I still want something to remember my vacations by.  So, I’ve started collecting something that I think you guys could get behind.

Vacation yarn.

I try to buy a skein of vacation yarn whenever I go out of town for the last few years.  At first I would just get a skein or two of whatever piqued my fancy.  But now, after realizing I have a bunch of skeins vacation yarn in my stash that I’m probably never going to use for one reason or another, I have given myself Vacation Yarn Rules:

  1. The yarn must be purchased at a local yarn store- no online stores, no big box stores that happen to be in the area.  It’s gotta be something I can only get on location, or what’s the point?  (Plus, it’s a great excuse to go find a new yarn store!)
  2. The yarn must be spun, died, or both by a local yarn producer.
  3. The yarn must be in a colorway that reminds me of the vacation. (This rule has a little more wiggle-room than the others… I can pretty much convince myself that whatever skein I find the prettiest is the one that most closely matches the location.)
  4. One skein must be enough to make a complete project.  This means that 95% of my Vacation Yarn ends up being sock yarn.  But that’s great, because now I’ve got a bunch of pairs of Vacation Socks!

We just got back from a trip to Lake Tahoe, down in California (which is lovely by the way.  I highly recommend going in October- It’s practically empty, the weather is perfect for taking long walks along the lake or sitting in the sun with a cup of tea and some knitting.  And when the weather’s not perfect, it’s a great time to go inside and play board games with your buddies).

And, of course I got a skein of Vacation Yarn.

It’s from a very cute little shop in South Lake Tahoe, Knits and Knots Tahoe, and was hand dyed in the area. This sock yarn was dyed in a colorway called “Driftwood” and it’s a lovely brown-y olive, with little speckles of dark brown and a splash of bright leaf green.  It really reminded me of the colors of the area- the soft brown of the dead pine needles that cover the ground under the massive pine trees, and the green of the little plants peeking through the forest floor.  IMG_0486

I can’t wait until I have time to knit up my Lake Tahoe Socks!

What do you collect when you’re on vacation?