Monthly Archives: August 2014

Inspiration: Waiting In Line

PAX is officially here!  Woo Hoo!  It’s one of my favorite weekends of the year.   We’ve got a whole bunch of friends that spend the weekend with us (this year, we’re hosting 10 people! Eep!), and we’re going to spend the weekend trying new video- and board-games, eating terrible convention center food and staying up way too late.  It’s going to be a blast!

Although, the one thing that is less than awesome about PAX is the lines.  All the best talks have long lines, and wasting all that time makes me want to pull my hair out.  So, what can I work on while I’m waiting in line?

I’ve got 3 criteria for a perfect waiting-in-line project:

1. It’s got to fit in my purse.

2.  It’s got to be a pattern that is easily memorized, especially if it has lots of stockinet or garter stitch.

3.  It’s got to be pretty and fun (as always)!

Let’s see what I can find:

Bandana Cowl by Purl Soho

6235518543_46ba4d5d58_z

Camp Out Fingerless Mitts by tante ehm

IMG_5341-6_medium2

Turkish Bed Socks by Churchmouse Yarns and Teas

turkish_JJF_0359_medium

Casting On: Picking Up Stitches

I’m going to say something that might be controversial (or it might not be):  Picking up stitches is one of my favorite ways of casting on.

I know, radical stuff.  Let me explain.

If “casting on” is essentially a way of beginning a knitting project, making the initial row of stitches, then why can’t we count picking up stitches as a way of casting on?

I  think it’s pretty fun, easy, and results in a more polished finished product than knitting two separate pieces and sewing them together later.

Of course picking up stitches isn’t an any-time cast on.  You have to have an already-finished piece of knitting from which to pick up the stitches (obviously).  But I love using it to add button bands on sweaters, turning the heel on socks, and it’s essential for modular knitting projects (like this blanket).

So how do you do it?

Naturally, you start with a piece of knitting to form the base of your project.  I’m using a little swatch of stockinet, but you can pick up stitches off of any piece of knitting.  On this swatch, I slipped the first stitch of every row.  It leaves a nice, smooth edge that makes picking up stitches that much easier.  But, if I need to pick up a lot of stitches, I’ll knit all edge stitches.

OLYMPUS DIGITAL CAMERAThen, I’ll poke my needle through the spot where I want my first picked-up stitch to live.  See how I go through both “legs” of the stitch?  If you only go through one leg, you end up with a flimsy piece of knitting. No bueno.

OLYMPUS DIGITAL CAMERAWrap your yarn around the needle, just like every other knit stitch you’ve ever done.

OLYMPUS DIGITAL CAMERAAnd pull the new stitch through.  You’ve picked up one stitch!

OLYMPUS DIGITAL CAMERAKeep picking up stitches until you have the number that your pattern requires.  See how nice and neat the picked-up stitches look?

OLYMPUS DIGITAL CAMERAThey even look nice and neat from the back.  See that horizontal row of red V’s?  Those are the edge stitches that we picked up.  Prettier than a sewn seam!

OLYMPUS DIGITAL CAMERAThen, keep on knitting your project.  Your new knitting will grow off the side of your old knitting and be magical and wonderful!

OLYMPUS DIGITAL CAMERA

Whoops! A Counterpane Follow-up

Do you remember Grandma Anna’s Counterpane?  I spent hours reverse-engineering one of my great-grandmother’s bedspreads from a little snapshot my Mom sent me.  I even posted a pattern.

It turns out, I didn’t have to.  (Insert sad noise here.)

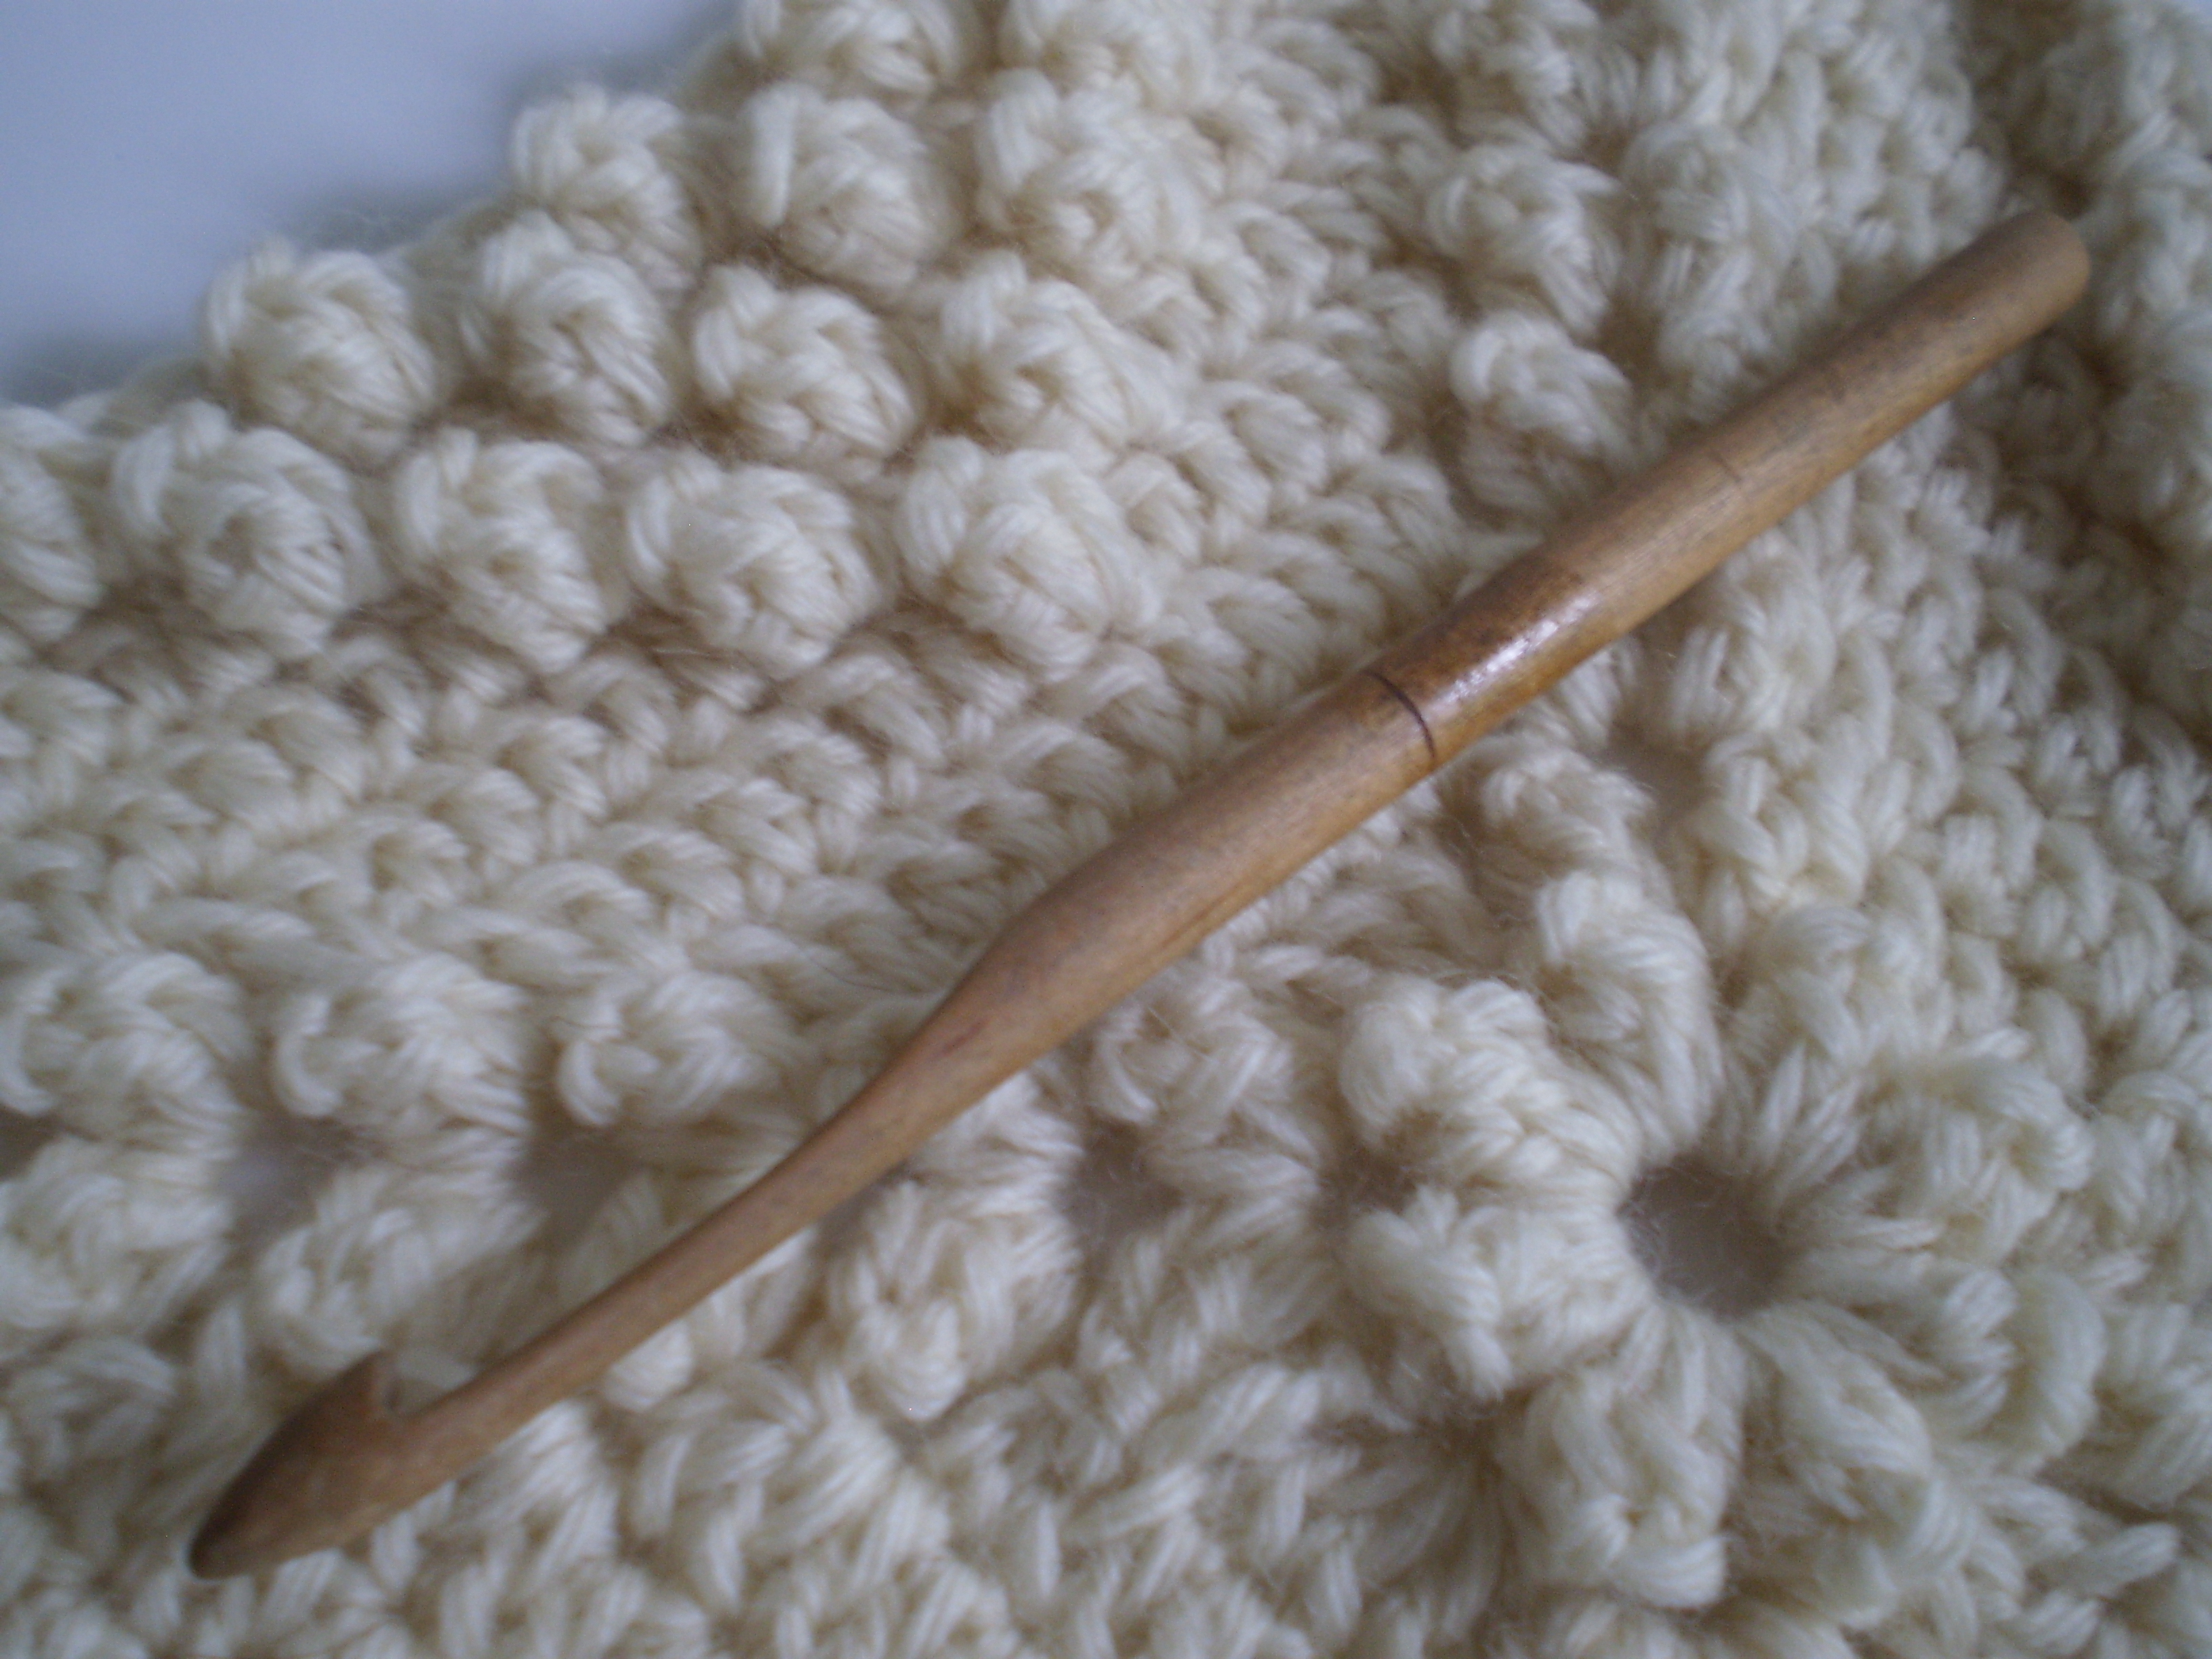
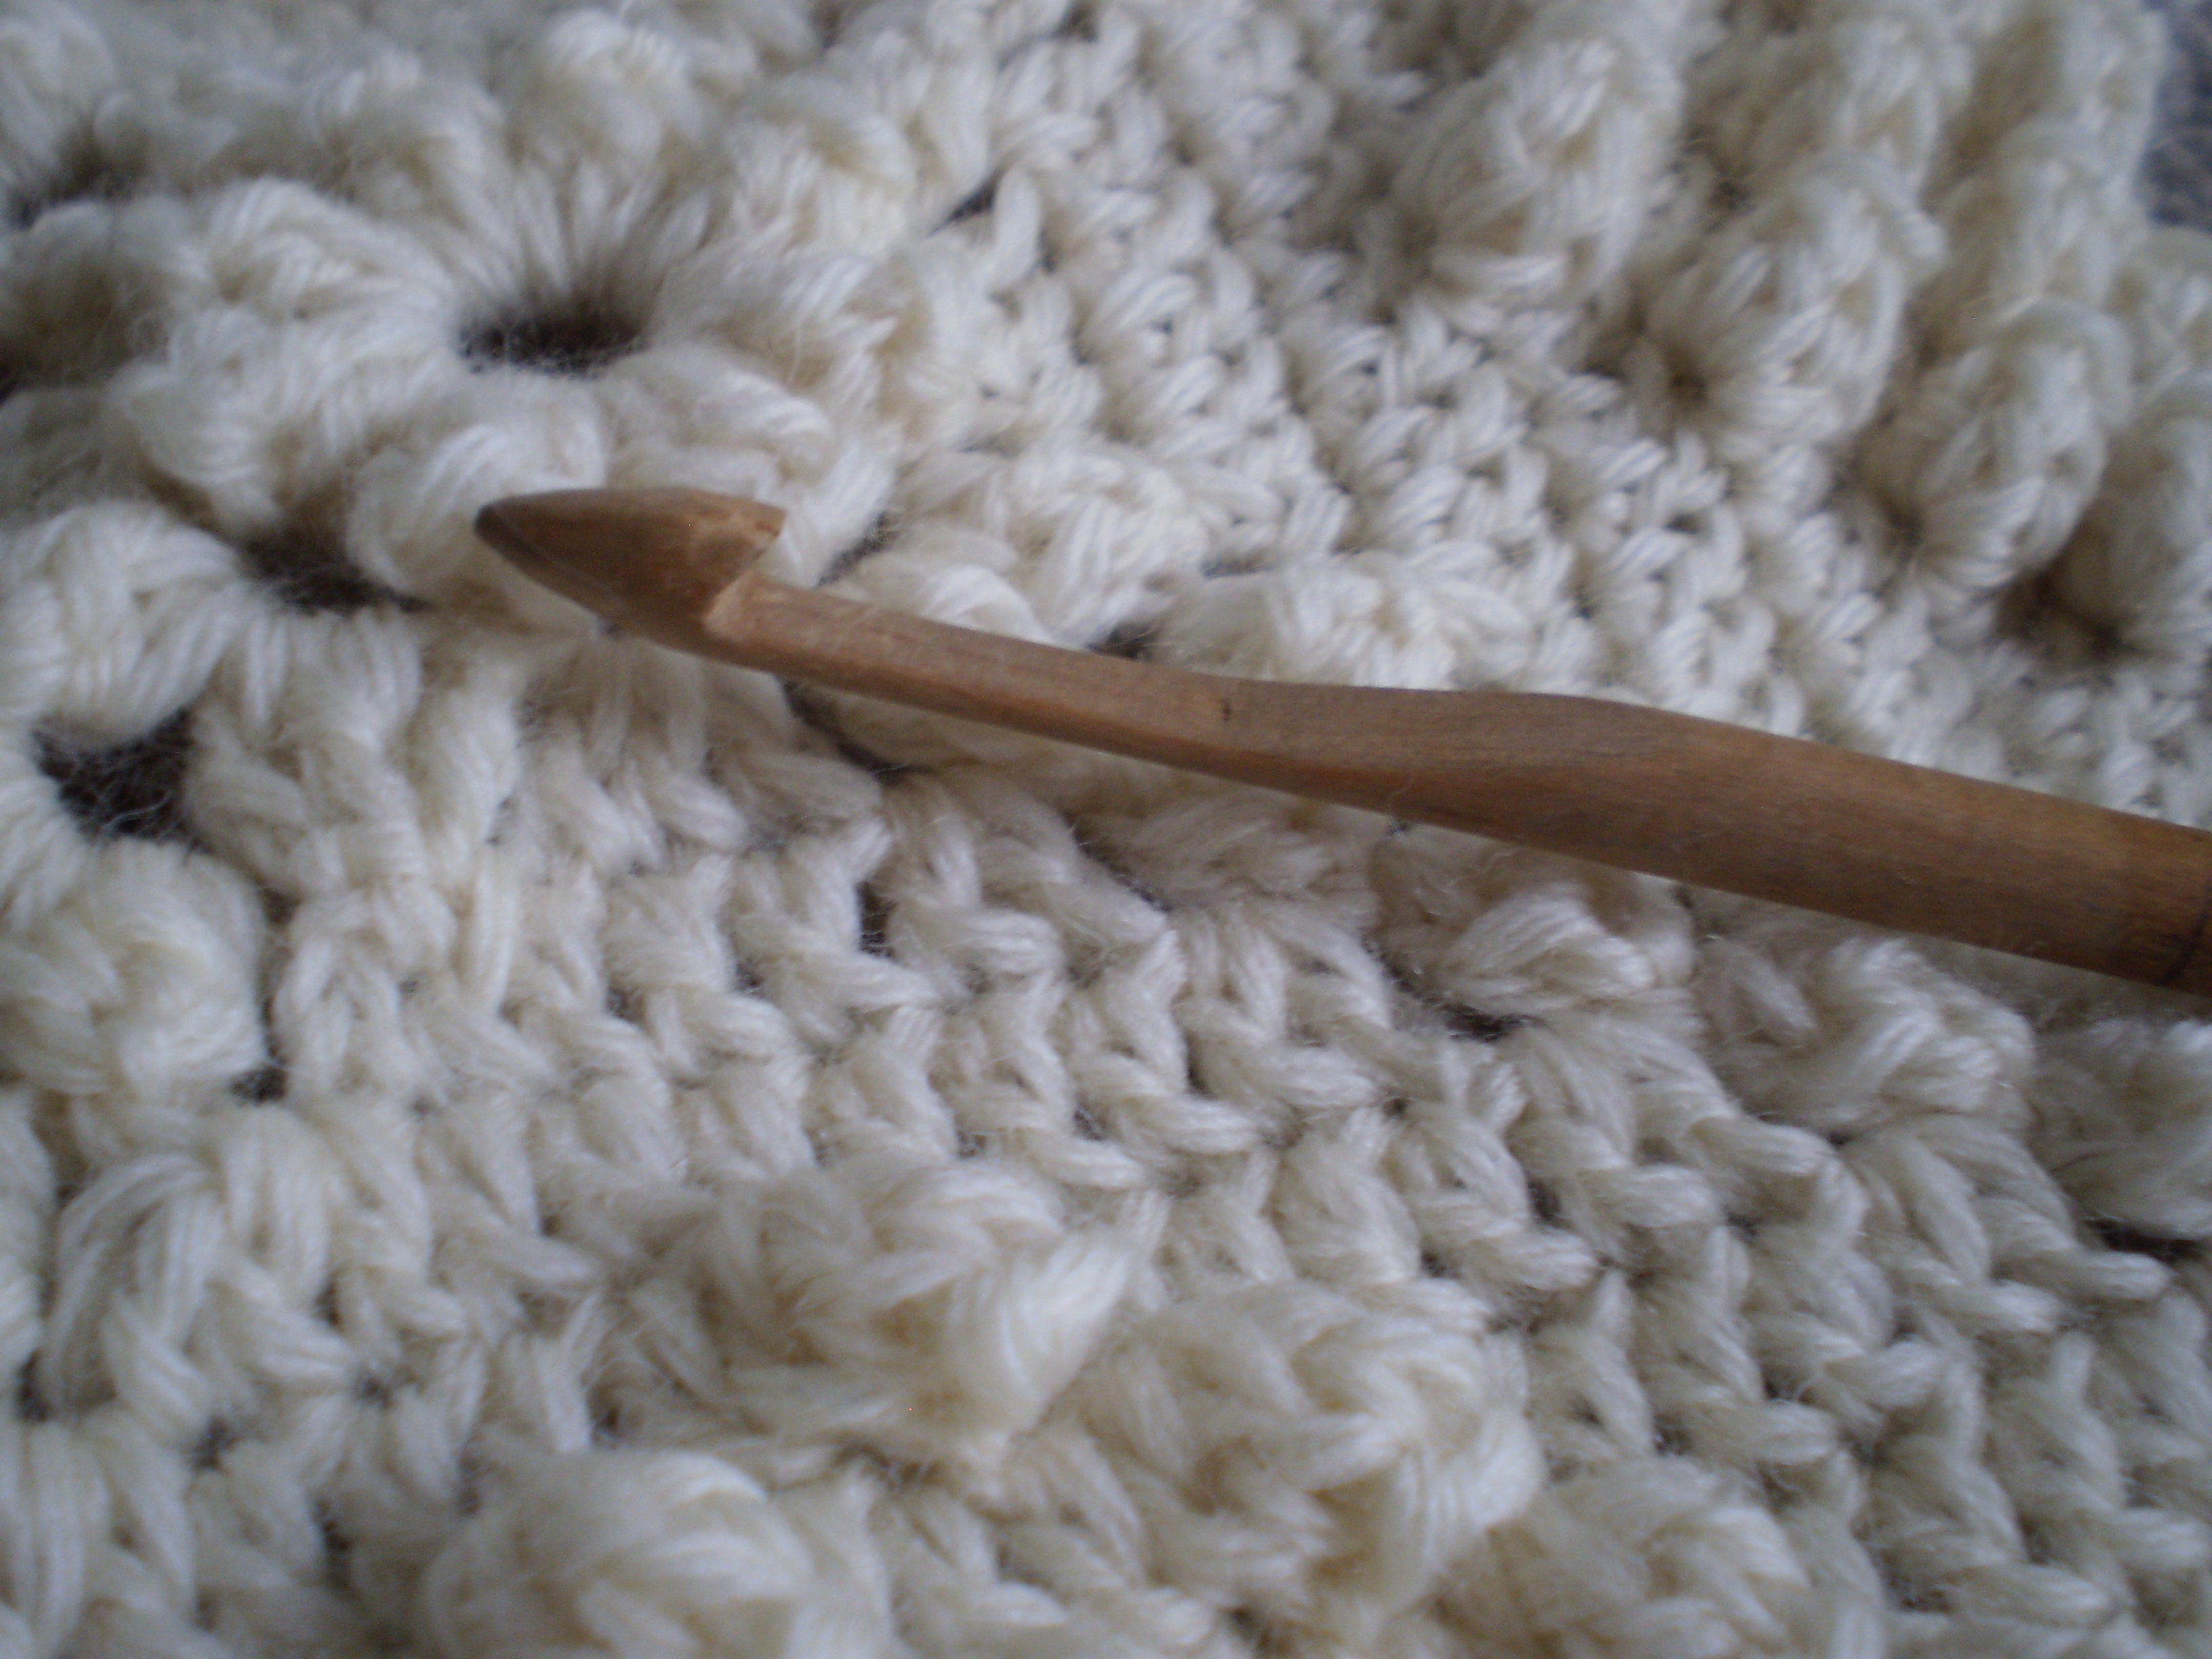
I received a package from a great-aunt a few weeks ago (one that also included a few of my great-grandmother’s crochet hooks).  In the package was also a couple of my grandmother’s old craft magazines.

OLYMPUS DIGITAL CAMERA
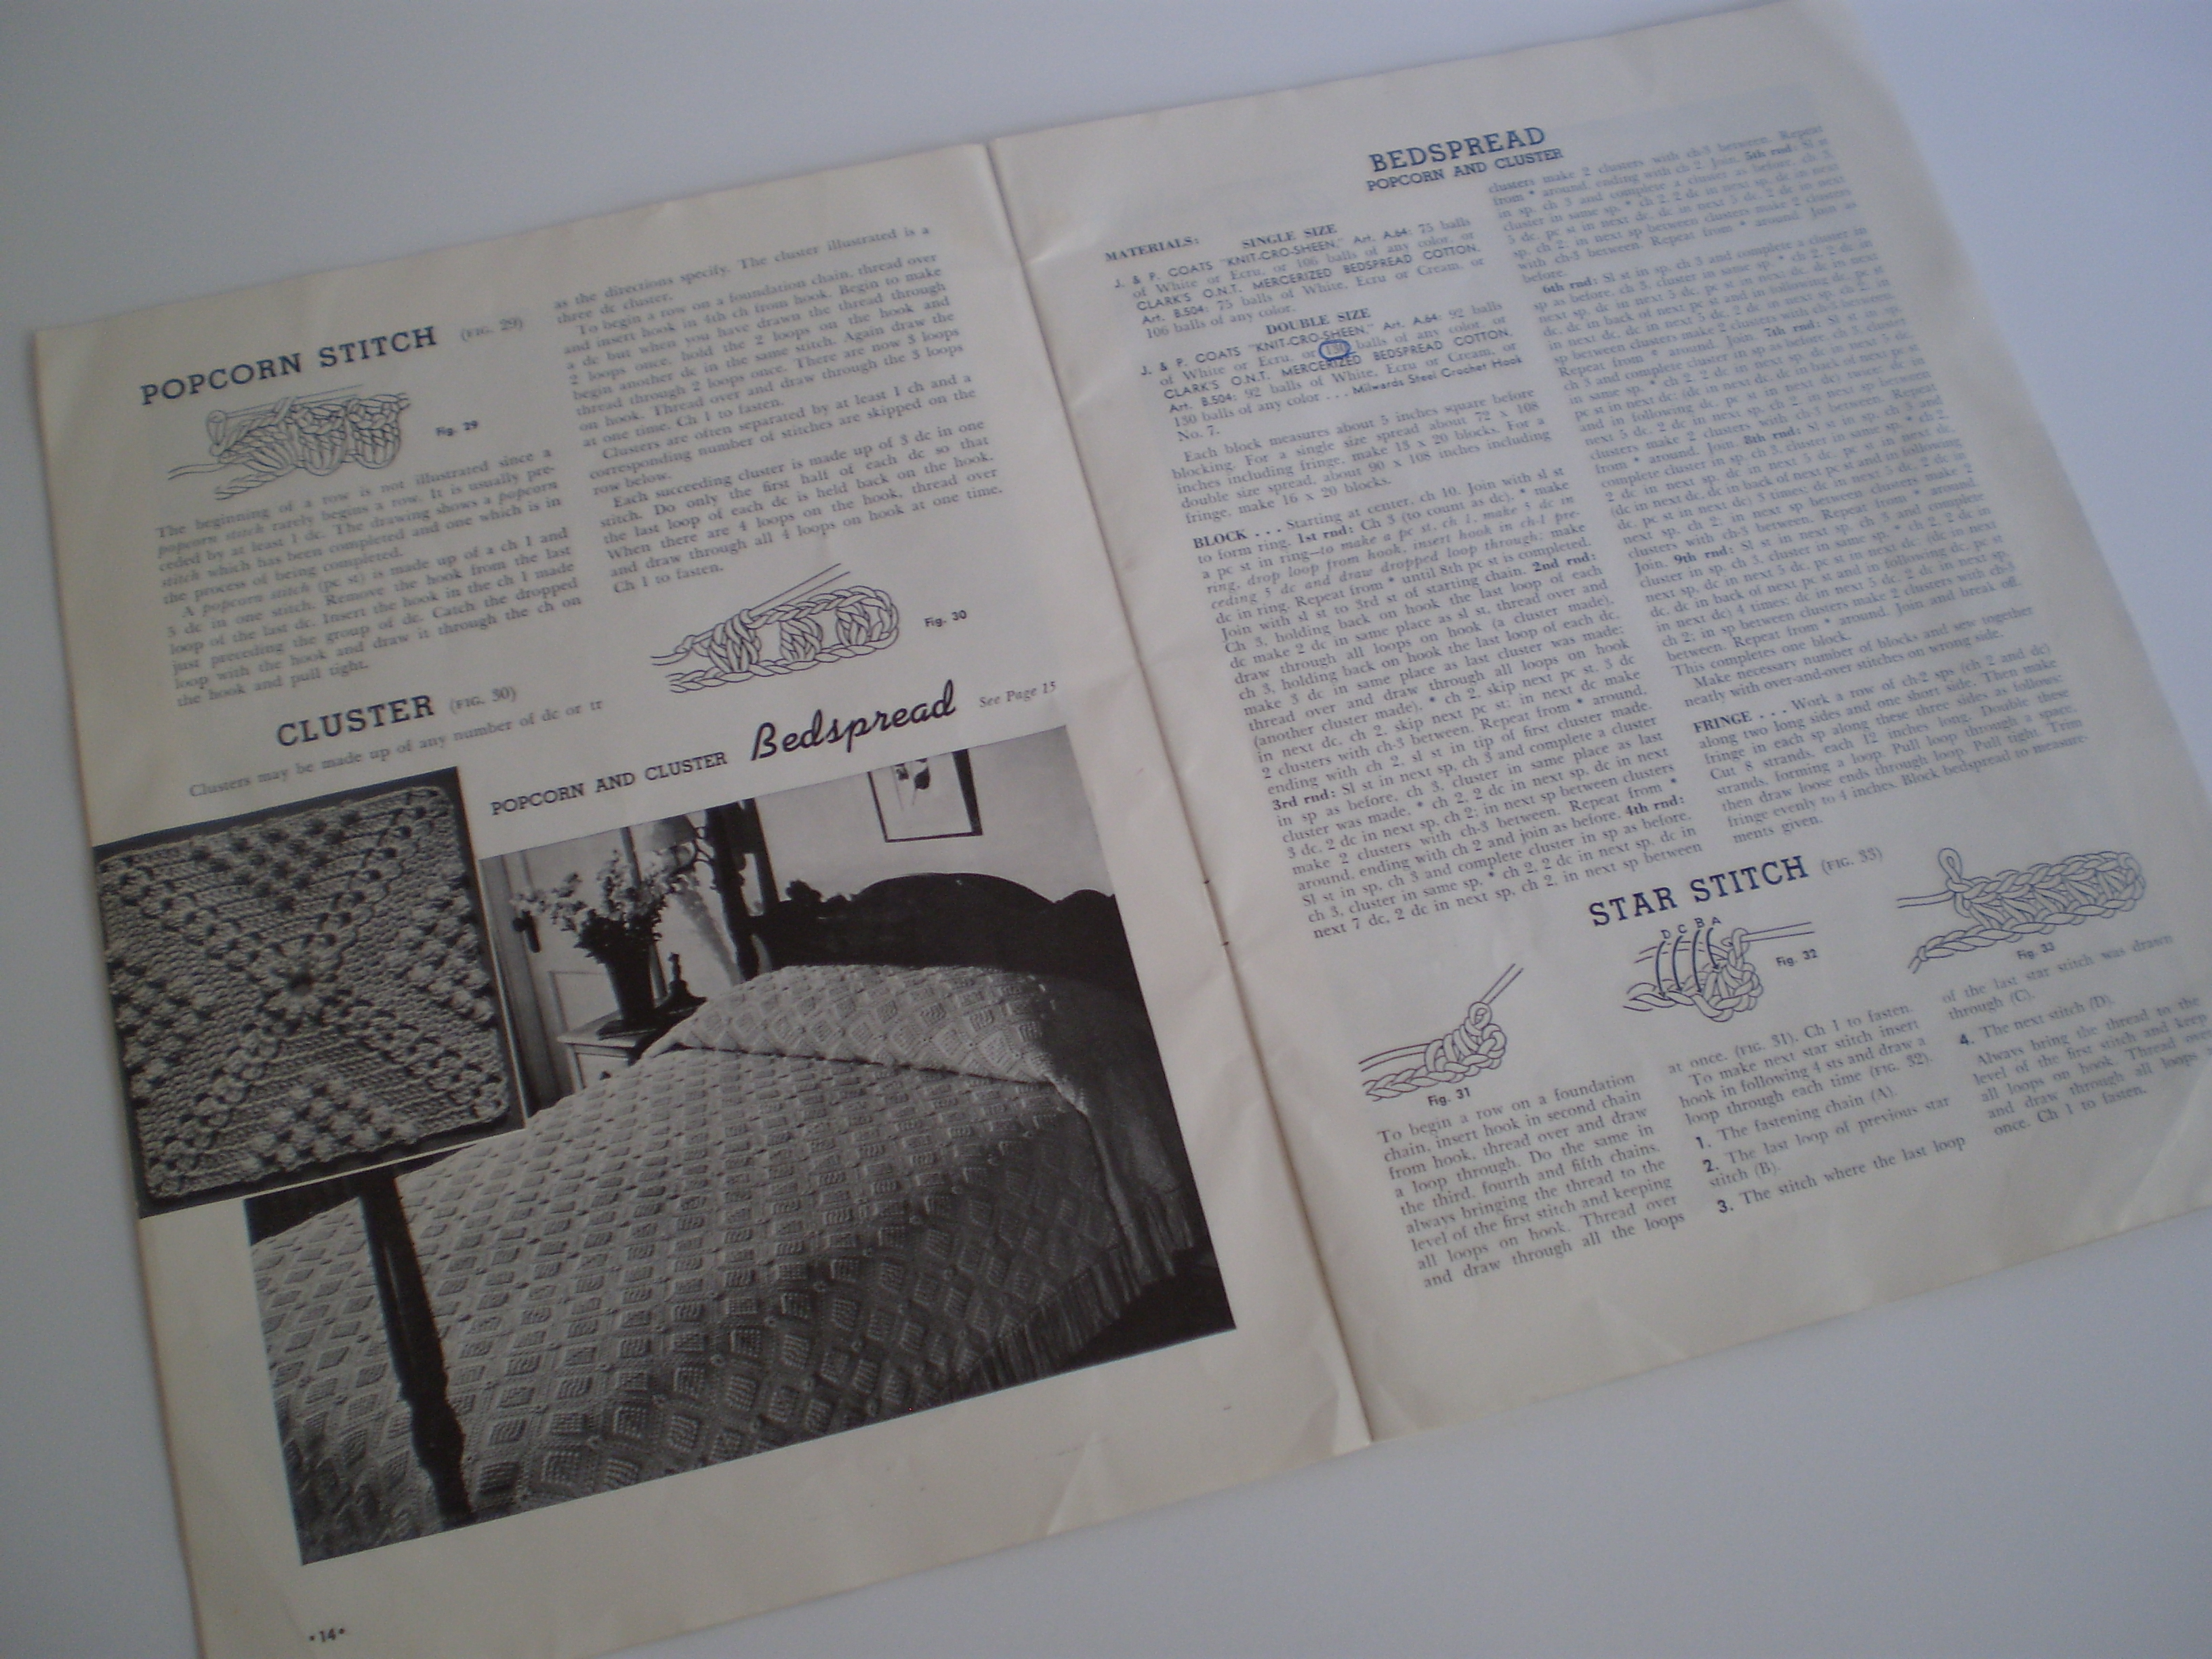
This booklet, the Learn How Book, was published in 1952 by Coats & Clark.  It has a few simple projects and extremely thorough instructions on crochet, knitting, embroidery and (very usefully) tatting.  (The projects are actually pretty and practical, especially considering the publication date.  There’s even a sweater that I would totally make for myself, if I wore a girdle.)

But, right at the end of the crochet section, something popped out at me and literally made me do a double take.

OLYMPUS DIGITAL CAMERAIt’s the counterpane!  The counterpane!  I couldn’t believe it!  Not more than a month after spending all that time working out the pattern from a tiny, blurry, cell-phone picture, and the pattern lands in my lap!  I couldn’t believe it!

OLYMPUS DIGITAL CAMERAIt even used the word “cluster” for the bunches of stitches, just like I did.  Weird, right?  (Sure, the big clusters were called popcorn stitches in this pattern, but hey.  Close enough.)

I scanned through the pattern, and it looks like we both did mostly the same things, which is amazing.  Although, it’s a little hard to read the pattern in the booklet… look at that block of text!

The biggest difference I saw, though, was that they used a much, much finer gauge on their bedspread than I did.  I used a size H crochet hook, which is about 5 mm in diameter.  The booklet calls for a size 7 steel crochet hook, which is super tiny!  It’s actually less than 2 mm in diameter.  That means that instead of the blocks being about 10 inches across, like mine turned out, the original counterpane squares were only 5 inches by 5 inches!  That means, if you’re following the original pattern, you’ll need 260 squares just to make a twin-bed-sized blanket.  Talk about dedication!

I’m glad I got to see the original pattern, and I love seeing my great-grandmother’s old-fashioned handwriting in the margins of some of the patterns.  But one thing is for sure, I definitely won’t be making this bedspread at the original gauge.  That’s just crazy!

Stellar’s Jay Cardigan: Closing Time

Originally, I had planned to add a typical button band to my cardigan.  But, of course, I changed my mind (because I like to make things difficult for myself).  Once the sweater was nearing completion, it occurred to me that a vertical button band would totally break up the beautiful, simple horizontal lines of the sweater.  So what’s a girl to do?  What could I use to close up my sweater invisibly?

My first thought was to use hooks and eyes.  I bought a couple packs of great big hooks and eyes (sized to be used on a coat), and attached them to the front edge of my sweater.

OLYMPUS DIGITAL CAMERAI sewed 20 stupid little hooks in place, and then I tried it on.  And then, I just about cried.  It looked terrible!  It was all weird and pucker-y.  It pulled at every single hook when I wore it.  (Of course some of the terrible-ness came from me sewing the hooks on incorrectly-too far from the edge, but a part of it was just the nature of the hooks.  Hook-and-eye fastenings work best with stiffer fabrics, not soft, stretchy wool sweaters.)OLYMPUS DIGITAL CAMERAI immediately cut off the hooks and eyes.  I’ve still got them, so maybe I’ll use them for another project down the line, but definitely not another sweater.

Instead, I bought myself a nice long separating zipper and sewed it carefully by hand along the front plackets. Because the zipper has absolutely no stretch to it, I made sure to sew it in very carefully.

OLYMPUS DIGITAL CAMERAWhen I closed up my sweater this time, I was overjoyed with how it turned out. The edges match up perfectly!  There’s no unsightly gap or puckering, and I even managed to make sure the zipper didn’t buckle or pull at the front of the sweater.  Victory!

OLYMPUS DIGITAL CAMERA


Stellar’s Jay Sweater-Shoulders

Indulge me in a little “do as I say, not as I do.”  The first time I made an EPS sweater, I ignored a step in the shoulders.  It was a vague little instruction where Elizabeth Zimmerman said to “work a few short rows across the shoulders”.  I was so close to being finished, and anyway, I didn’t know what “short rows” were, so they couldn’t be that important.

I ended up with a perfectly fitting sweater, except that if felt like it was trying to choke me.  Constantly.  With Icelandic Wool.

Ha!  That showed me.  I’ve never skipped the short rows on a sweater again.

So, where do short rows come into play for a bottom-up (or a top-down) sweater knit in the round?

It turns out, that, if you look at your neck from the side, it actually points a little forward, instead of pointing straight up.  (It points even further forward if you’re a sloucher, like me.)  See?

??????????????????????????????????????????????????????????????????????????????????????????????????So, if you make a sweater without any short rows, the neckline will sit parallel to the floor.  This will pull uncomfortably on your throat and make you want to burn your sweater.  Also, it looks kind of dumb.

??????????????????????????????????????????????????????????????????????????????????????????????????What you want, to be comfortable, is a sweater that is higher (by an inch or two) at the back of the neck than the front.  Like this:

??????????????????????????????????????????????????????????????????????????????????????????????????Looks better, right?  So how do you do it?  Usually three or four short rows in the last couple inches of the shoulders are enough to raise the back of the neck enough to make it comfortable.  I am a big fan of doing a simple wrap and turn.

I like to make my first short row go all the way to the points of my shoulders (or a little past).  Then, each short row after the first gets progressively shorter by 8 or so stitches.  It requires a tiny bit of math, but it works out pretty well.

??????????????????????????????????????????????????????????????????????????????????????????????????All I know is, I will never leave out the short rows on a sweater like this again!

A Very Special Hook

I don’t talk a lot about crochet.  I’m mostly a knitter, after all.  But I do enjoy a good crochet project from time to time.  There’s something very gratifying about the speed that you can work up a lovely afghan.  And I love the idea that you can use a tool as simple as a little hook to make such beautiful and complicated patterns.

Hooks like this one that I received in the mail from one of great-aunts:

OLYMPUS DIGITAL CAMERAIt’s a beautiful  little tool.  It’s wooden, and well worn to satin-y smoothness with years of use.  And the most amazing part:  It was hand-made by my great-grandfather for my great-grandmother.  And (amazingly!) it’s managed to survive all these years.

Can you imagine whittling a crochet hook by hand?  I can only imagine how many times my great-grandfather must have started this hook, only to end up cutting all the way through and having to start again.  (Or at least that’s what I would have done, but then again, I’m a knitter, not a woodworker.)

OLYMPUS DIGITAL CAMERAI haven’t worked up the guts to try crocheting with the hook yet, but it would be perfect for making a lovely cozy blanket with chunky yarn (the hook is about a size US M).  I’m afraid of breaking it all these years!  For now, I think I’ll keep it in a shadow box in my knitting studio, where it will stay nice and safe.

Casting On: Backwards Loop Cast On

Today’s cast on is the easiest cast on of all time.  For real.  The backwards loop cast on only uses one strand of yarn (no fussing with tails or scrap yarn).  If you can do a loop increase (sometimes called a make-1), you can totally do the backwards loop cast on!

My favorite part of the backwards loop cast on is that you can use it in the middle of a project.  Need to cast on extra stitches for an underarm?  Making a baby sweater, and need to start knitting sleeves?  The backwards loop cast on is for you.  Let’s see how it works:

OLYMPUS DIGITAL CAMERAKnit along, until you’re ready to start your increase.

OLYMPUS DIGITAL CAMERAForm a backwards loop with your yarn, and slide the loop onto the needle.  Pull it snug.  (It’s really that easy!)

OLYMPUS DIGITAL CAMERAKeep making backwards loops and adding them to the needle until you’ve got as many cast-on stitches as you need.

OLYMPUS DIGITAL CAMERAThen, keep on knitting.  The very first row after the cast on might be a bit tricky; sometimes the backwards tail cast-on stitches try to fall apart.  But, if you go slow and knit carefully, you won’t have a problem.

This isn’t a cast on that I would use for an entire sweater or blanket, it’s a little delicate, and doesn’t look great.  But it’s very useful in small doses, especially when you need to cast on extra stitches mid-project.  So file it away in the back of your brain and pull it out when you find a project that calls for the backwards loop cast on.

Stellar’s Jay Sweater: Joining the Sleeves

Once I had my sleeves (and body) all knitted up, it was time to join the whole thing together.  On first glance, this seems like it would be difficult to do, cumbersome and fiddly, but it’s not too tricky, actually. Just go slow, and make sure you count your stitches correctly!

The goal is to end up with the sleeves arranged on either side of the body, with active stitches all the way around (so that you can keep  knitting the shoulders).  If you are imagining looking at your sweater from the top down, it would look something like this:

SchematicStart knitting at the beginning of your round (usually the center back of a pullover, or the center front for a cardigan).  Make sure to use a great big circular needle, or you’ll run into trouble in a few minutes! Work your way across the body of the sweater until you reach the armpit.

Schematic 1Then, pick up your sleeve and knit around the outside of the sleeve, leaving its armpit unworked.  Leave the active armpit stitches on a piece of scrap yarn or a stitch holder.

Schematic 2Switch back to knitting the body, and work your way all the way across the back (or front) of your sweater.

Schematic 3Then, repeat the process for the other sleeve, knitting around the outside of the sleeve, while leaving the armpit alone.

Schematic 4The final step is to close up the armpits.  Attach the sleeve armpit stitches to the body armpit stitches on either side.  I like to use the Kitchener stitch, but you could also use a 3-needle bind-off, if that’s your favorite.

Schematic finalNow you’re all set up for the knitting the shoulders on your bottom-up sweater!  Just keep going in the round (if you’re making a pullover), or turn the work and go back the other direction (if you’re making a cardigan).  Simple!

Inspiration: Cables

Oh, KnitPicks sales…. You cause me so many problems.   There I was, reading my email, minding my own business, when that dang KnitPicks Ad showed up.  One thing led to another, and the next thing I know, I have a dozen skeins of heathered camel-colored wool.

Whoops.

So, now I guess I have to figure out a pattern worthy of my lovely new yarn.  I’m thinking something with cables.

Flat/Shawl Collar Cardigan 7065 by Hayfield:  I like this sweater, but it seems a little too old-fashioned.

hayfield7065main_medium2[1]Antler Cardigan by tincanknits:  This sweater is super pretty, too.  But I was hoping for a more all-over cable pattern.

PK-antler-10_medium2[1]Persistence is Key by Amanda Woeger:  This might be the perfect sweater!  It’s got enough cables to keep me interested, but it’s modern enough to satisfy my current sweater whims.  I think I have a winner!

IMG_2928_medium2[1]

Stellar’s Jay Sweater- Sleeves

My Stellar’s Jay Sweater is roughly based on Elizabeth Zimmerman’s EPS (Elizabeth’s Percentage System) sweaters.  EPS sweaters are based on the idea that the size of someone’s arm is roughly proportional to their bust size, which is roughly proportional to their neck size.  It’s not perfect for people with more unusual body types, but I’ve found that most people can make the EPS work for them on the whole.  It’s a great basic sweater recipe that you can customize, tweak and otherwise futz with to make yourself the sweater you’ve always dreamed of.

My Stellar’s Jay Cardigan is knit from the bottom up, which means that make the body first, from hem to armpits.  Then I cast on the sleeves at the cuffs, and knit up the arm.

I wanted a slightly fitted, tapered sleeve, so I cast on 22% of the stitches I used for my torso.  It sounds weird, but EZ spent years perfecting her formulas, until she figured out that a cuff should measure about 20-25% of the torso in diameter.  (Crazy, right?)

Then I slowly increased (increasing 2 stitches every 8 rows in a line along the inside of the arm) until I reached 64 stitches, which was my planned upper arm measurement (about 35% of my torso measurement).  Then, I knit along, without any more increases, until my sleeve was long enough for my arm.

The result was a gently tapered sleeve, that perfectly fit my arm.

OLYMPUS DIGITAL CAMERAThe next thing to do was to join the arms to the body.