Monthly Archives: December 2021

Speeeeeedweve

You guys, I’ve got a new tool, and I love it!

It’s a Speedweve-style darning loom, and it’s just the coolest. I’ll be honest, I found out about this from an ad on Instagram, so you know, not the most high-brow place to learn about new tools. But, regardless of where I found it, I’m excited to have it, use it, and tell you about it!

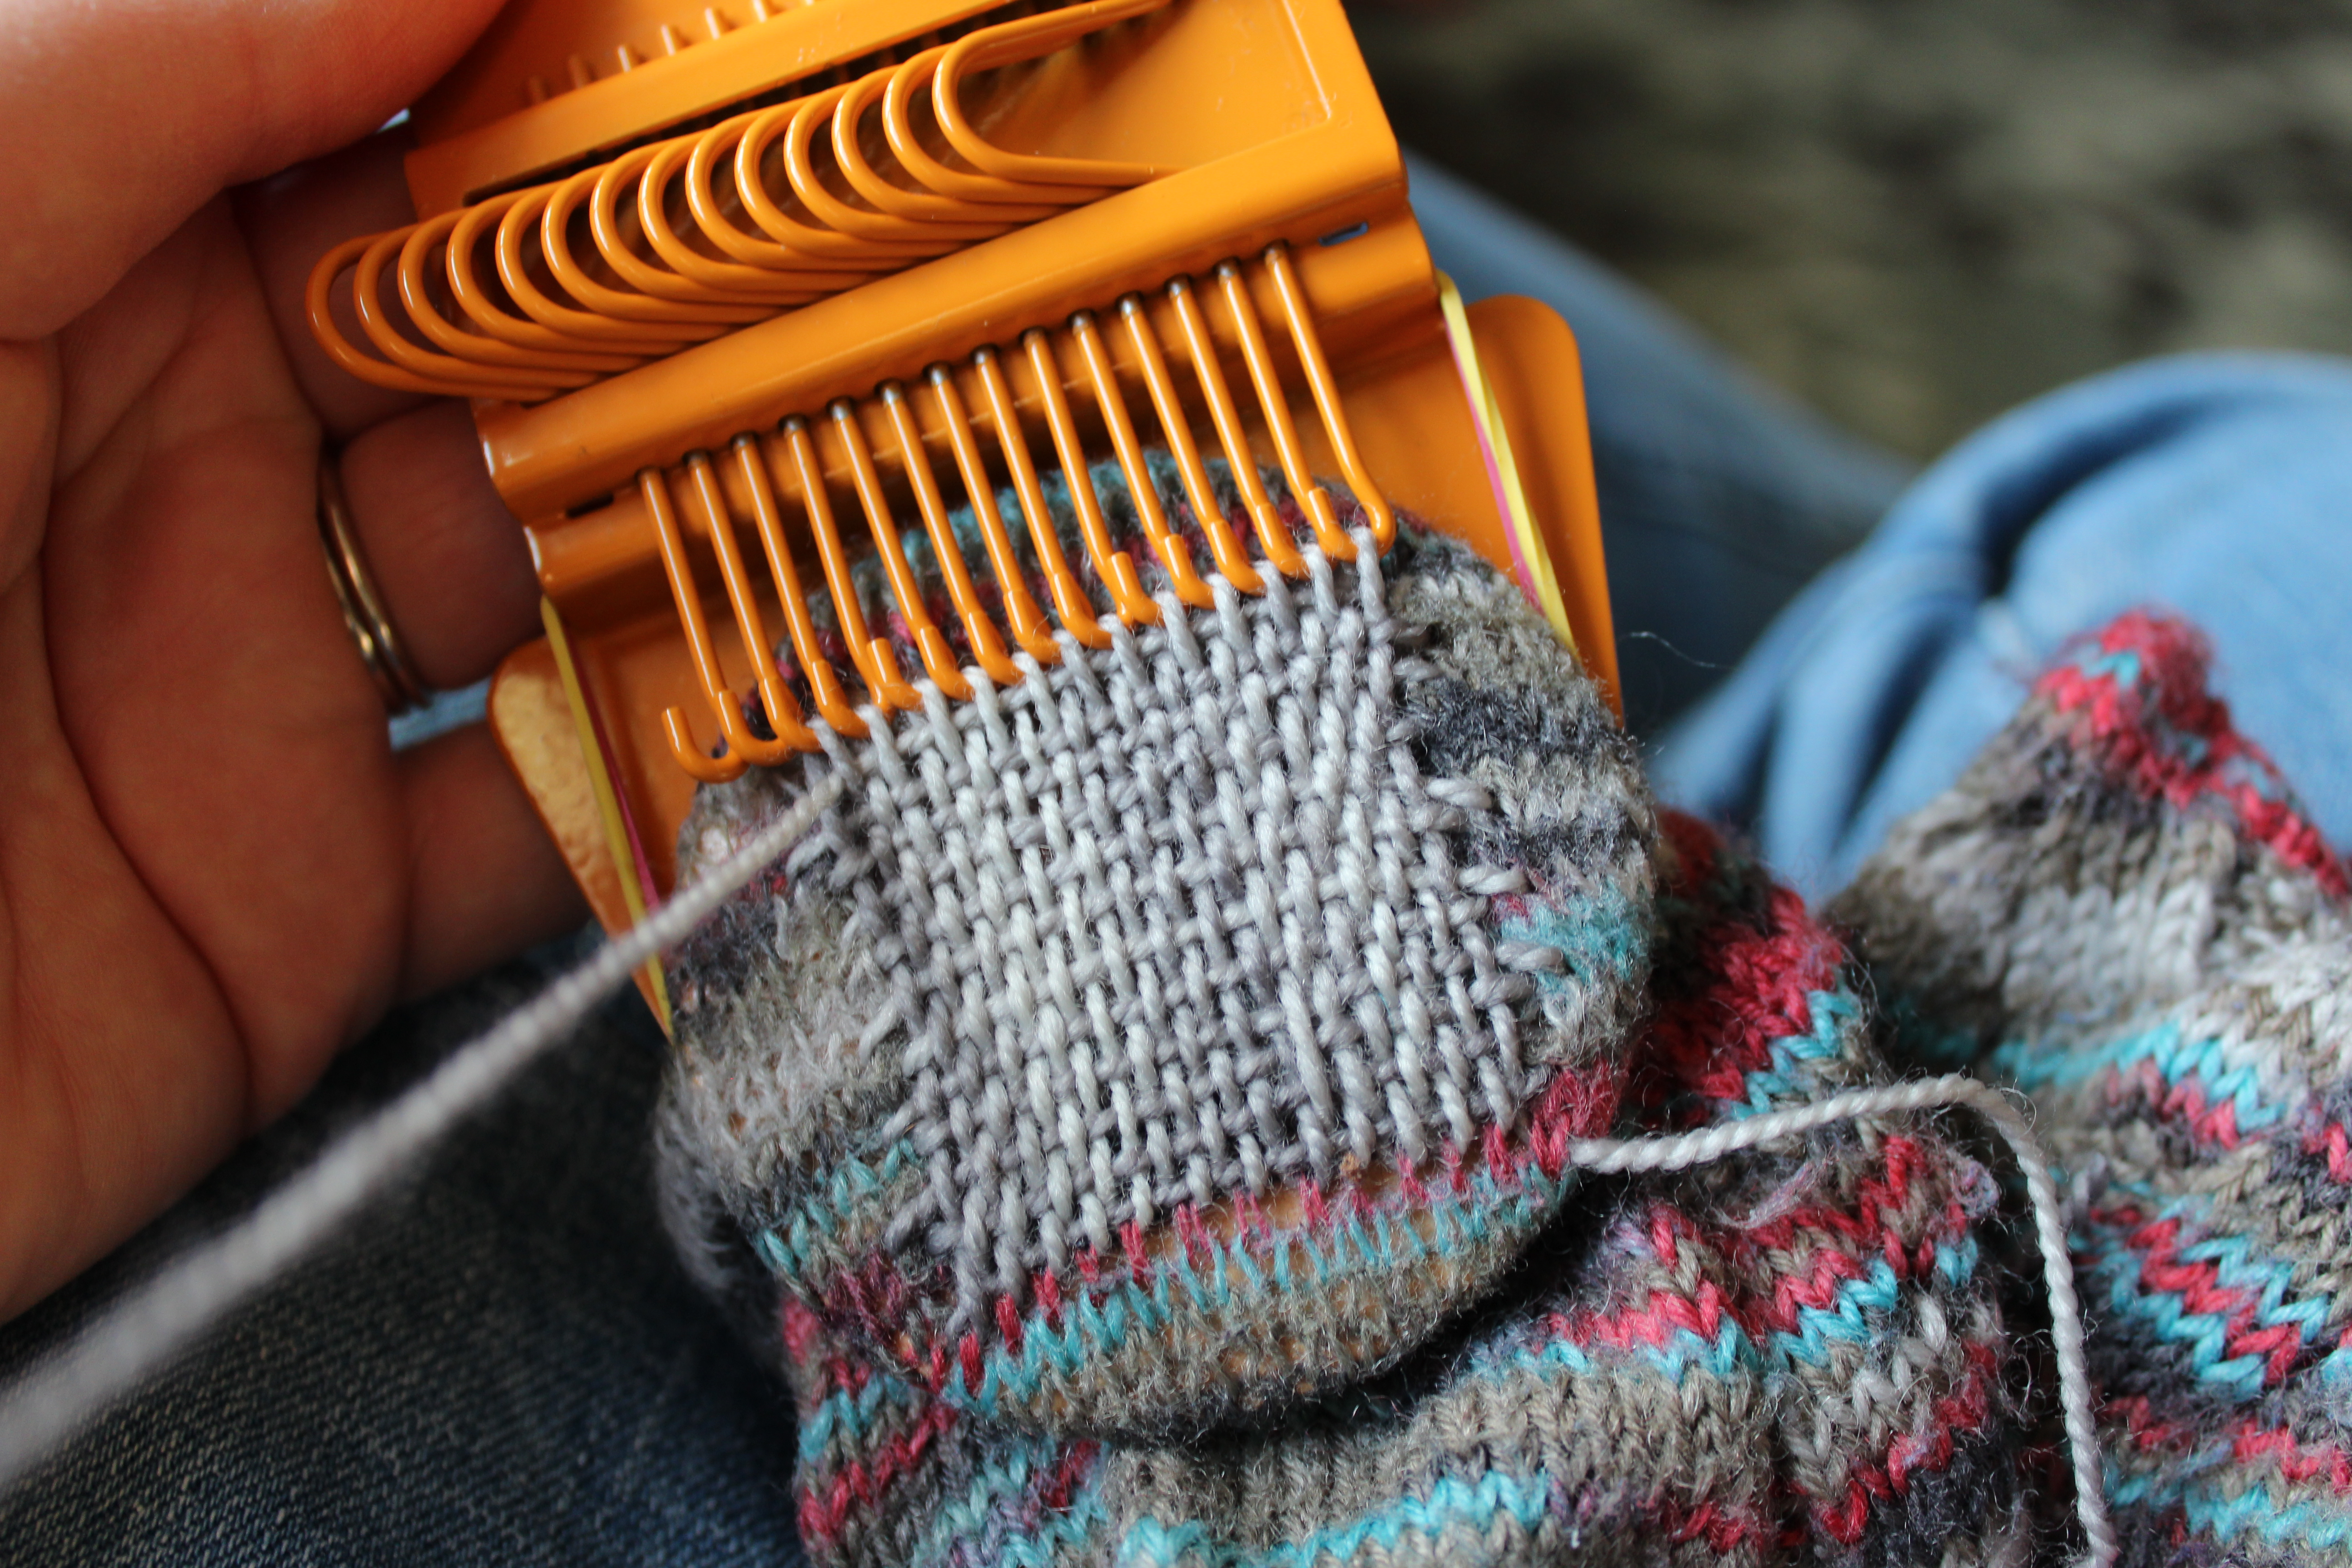
First off, here’s the little loom. It fits really nicely in my hand, and has two parts. A lovely, smooth wooden disk that goes inside the sock (or whatever garment you’re darning), and a hefty metal piece that goes on the outside. They’re held together with rubber bands.

My favorite part is flipping the little hooks back and forth. It’s just so satisfying! In fact, it’s so satisfying, I taught myself how to make an animation, so you can experience it yourself:

Lucky for me, I’ve got about a million socks on the verge of falling apart, so I’ve got lots of darning ahead of me. This is one of my less-embarrassing socks:

So, I slip the wooden disk into the sock, and arrange it under the bare patch, hook up the metal part of the loom and lock it in place with rubber bands.

Then I get a nice long piece of sock yarn and start warping the loom. You make tiny stitches at the bottom of the area to be patched, and loop the thread around the loops.

Then it’s just a matter of weaving through the warps. Flipping the hooks back and forth lets you lift/lower the threads of the warp, which makes for faster weaving. And, at the end of each row, you make a tiny stitch into the sock, fastening the patch in place as you weave it.

After that, I take off the loom, sew the top warp loops in place with the whip stitch, and I’m on my way. I ended up making four different patches to cover all the thin spots on this sock- truly living my Oliver Twist Fantasy. (And like I said, these are some of my least disreputable… I really have to start up sock knitting again.)

Do you darn your socks? Do you have any fun new tools?

And Done!

I have hemmed and hawed about these eyeballs for longer than was strictly necessary. But, hey, that’s just how I roll. I do love to overanalyze.

I had gotten myself a brand new tube of black puffy paint, and tried it out on more scrap fabric, with similar results as the pearlescent blue paint. Both dried halfway between lumpy and smooth, but the black at least didn’t show every single little bump the way the blue did.

I went back and forth about the eyes for several days, afraid to pull the trigger on the puffy paint eyes, but not wanting to do anything else. Then, Saturday night in a fit of either confidence or frustration with my own commitment issues, I went ahead and just did it. I just did the eyeballs in a minute.

And… I like them! I mean, they’re obviously not as perfect as safety eyes would be, but they’re functional and cute, and I’m sure they’ll last for a long time. Plus they were so easy and fast.

I don’t think they’re the best eyes ever, but for stuffies for my kids, they’ll work great.

And I got them done before Christmas! Now, if only I could finish the last couple inches of that ding dang wedding blanket…

Are you finishing up any holiday knitting this week?

(Also, I just realized I forgot to add mouths… oh well. They’re mouthless butterflies, I guess…)

Eyeball Experiments

So, I’ve been experimenting, and need your input. Last week, I “finished” the little butterfly stuffies that are Christmas gifts for my kids. “Finished” is in quotes because they still don’t have faces. Just unsettling stitch markers where the eyes should be.

Obviously, I’m too late to add safety eyes (the safety of which is debatable), and buttons/beads are right out since I have a very chew-y one-year-old. I might do a bit of embroidery, or applique on little felt eyes, but that’s fussy.

There must be a better way! I’m a child of the 90s, so, I thought maybe puffy paint would work?

I pulled out an old swatch and gave it a try:

Cute, right? And promising! The paint beaded up nicely, at least at first. I let it dry, and…

Pffffft… Well, that didn’t dry as nicely as I wanted it to. It’s lumpy and flat, not nicely beaded up, like it was when it was still wet. On the plus side, at least it was really sturdily on there. No kid (even a heavy chewer) is going to get that paint off.

I added another coat of paint, in hopes that it would bead up, like I wanted it to in my dreams. And then I added another coat.

For comparison:

One coat was super-flat, 2 coats made a nice bump, and 3 coats was almost spherical. Unfortunately, all three versions were weirdly lumpy. But, I wonder if that’s a matter of the paint being kind of pearlescent. I think I’m going to go get some plain black, and try again.

I feel like this has the potential to be a great eyeball technique, but I’m not yet convinced. I think I need to do more experimenting before I commit to painting the butterflies (I don’t want to mess them up so soon before Christmas!).

Do you have any tricks for great eyes?

Baby Bugs

Y’all! These turned out SO CUTE!

I absolutely loved making these little guys. They worked up super quick, and turned out exactly like the pictures! The little wrapped antennae are just so clever, and the tiny loop at the top of the cocoon is just adorable. Plus, I was able to do them entirely with scraps I had in my stash, since they only use a few grams of any one color.

I mean, come on! Even the (very fiddly) wings look good!

Now, I just have to figure out how I want to add the little faces. It’s too late for safety eyes (plus, I don’t know if I’d trust the baby with them… he’s still very chew-y), but I don’t usually love how embroidered eyes look. I’ll have to brainstorm.

How do you do eyeballs?