Are you as excited as I am about this project? Doubtful. Possible, but doubtful. I am very excited. One of my favorite things to do is teaching people how to knit, so this is totally up my alley.
So, let’s jump right in and start casting on. Knitted fabric is made of a whole series of loops that all interlock in a very specific way. These loops give the finished fabric stretch, which is what makes knitting so awesome for making sweaters, socks, and hats. The first row of loops is created by casting on. We’ll be doing a long-tail cast on, since it’s the most versatile way to do a cast on. (I use it on 90% of all my projects).
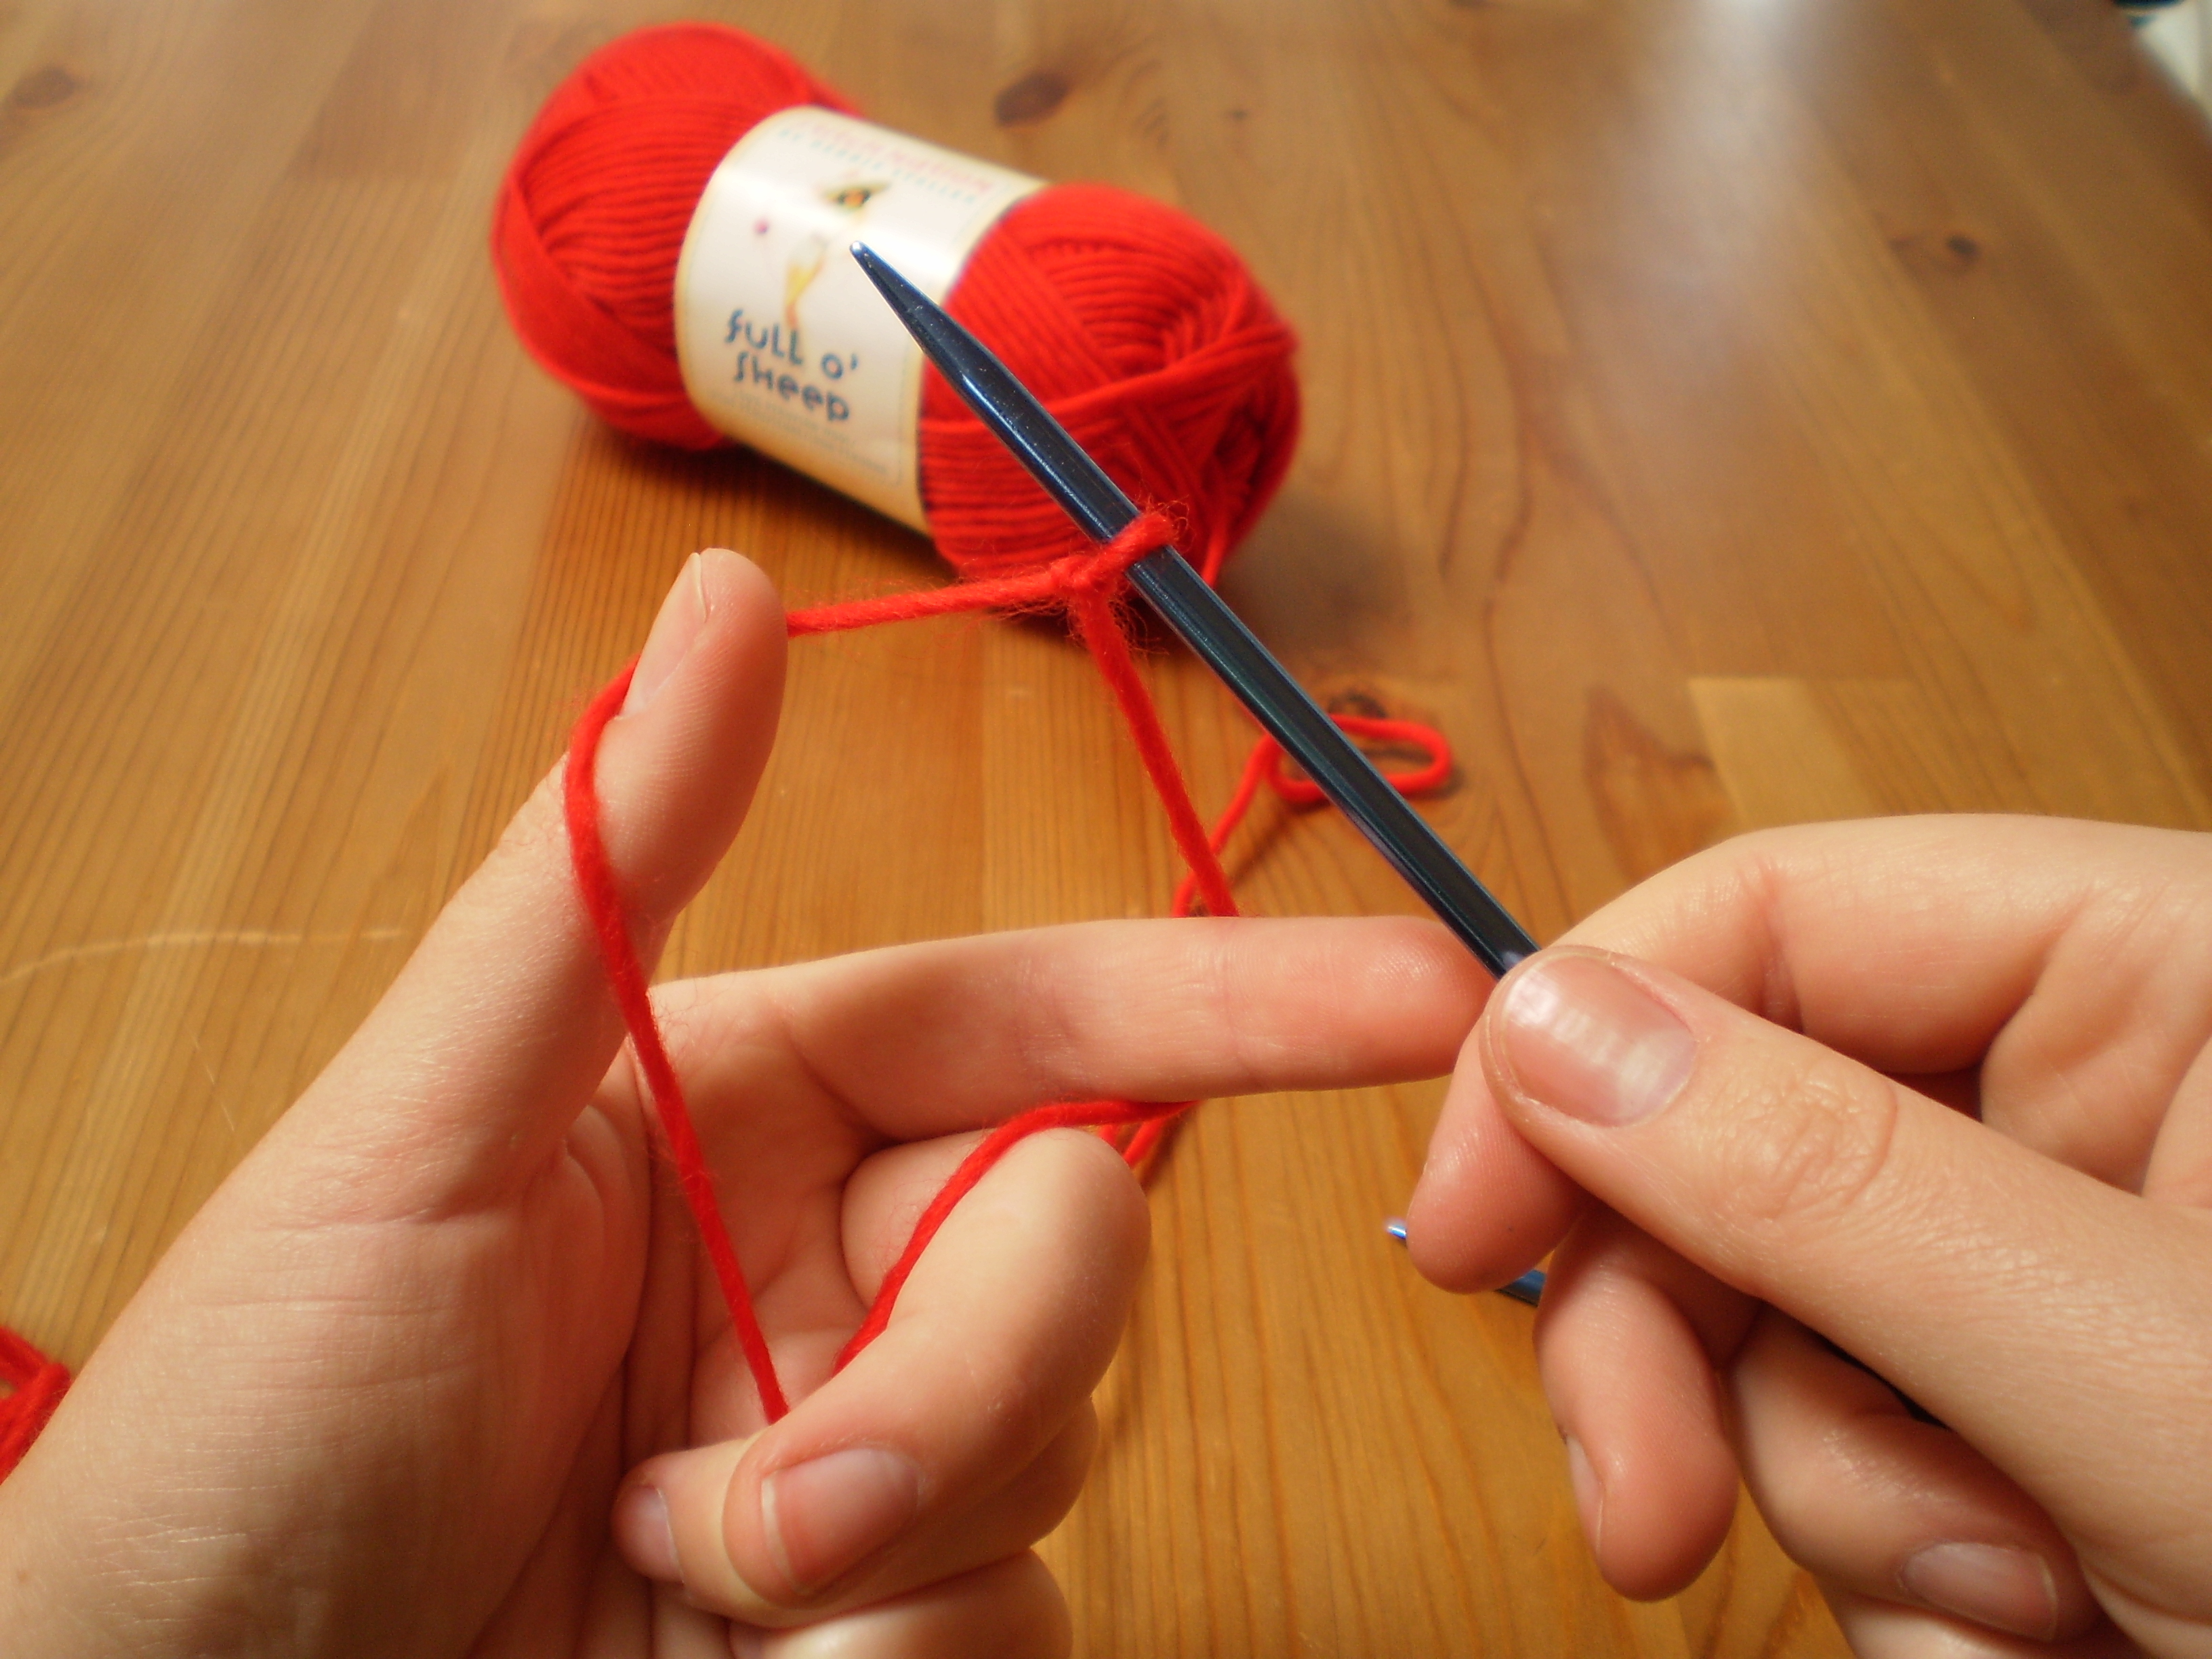
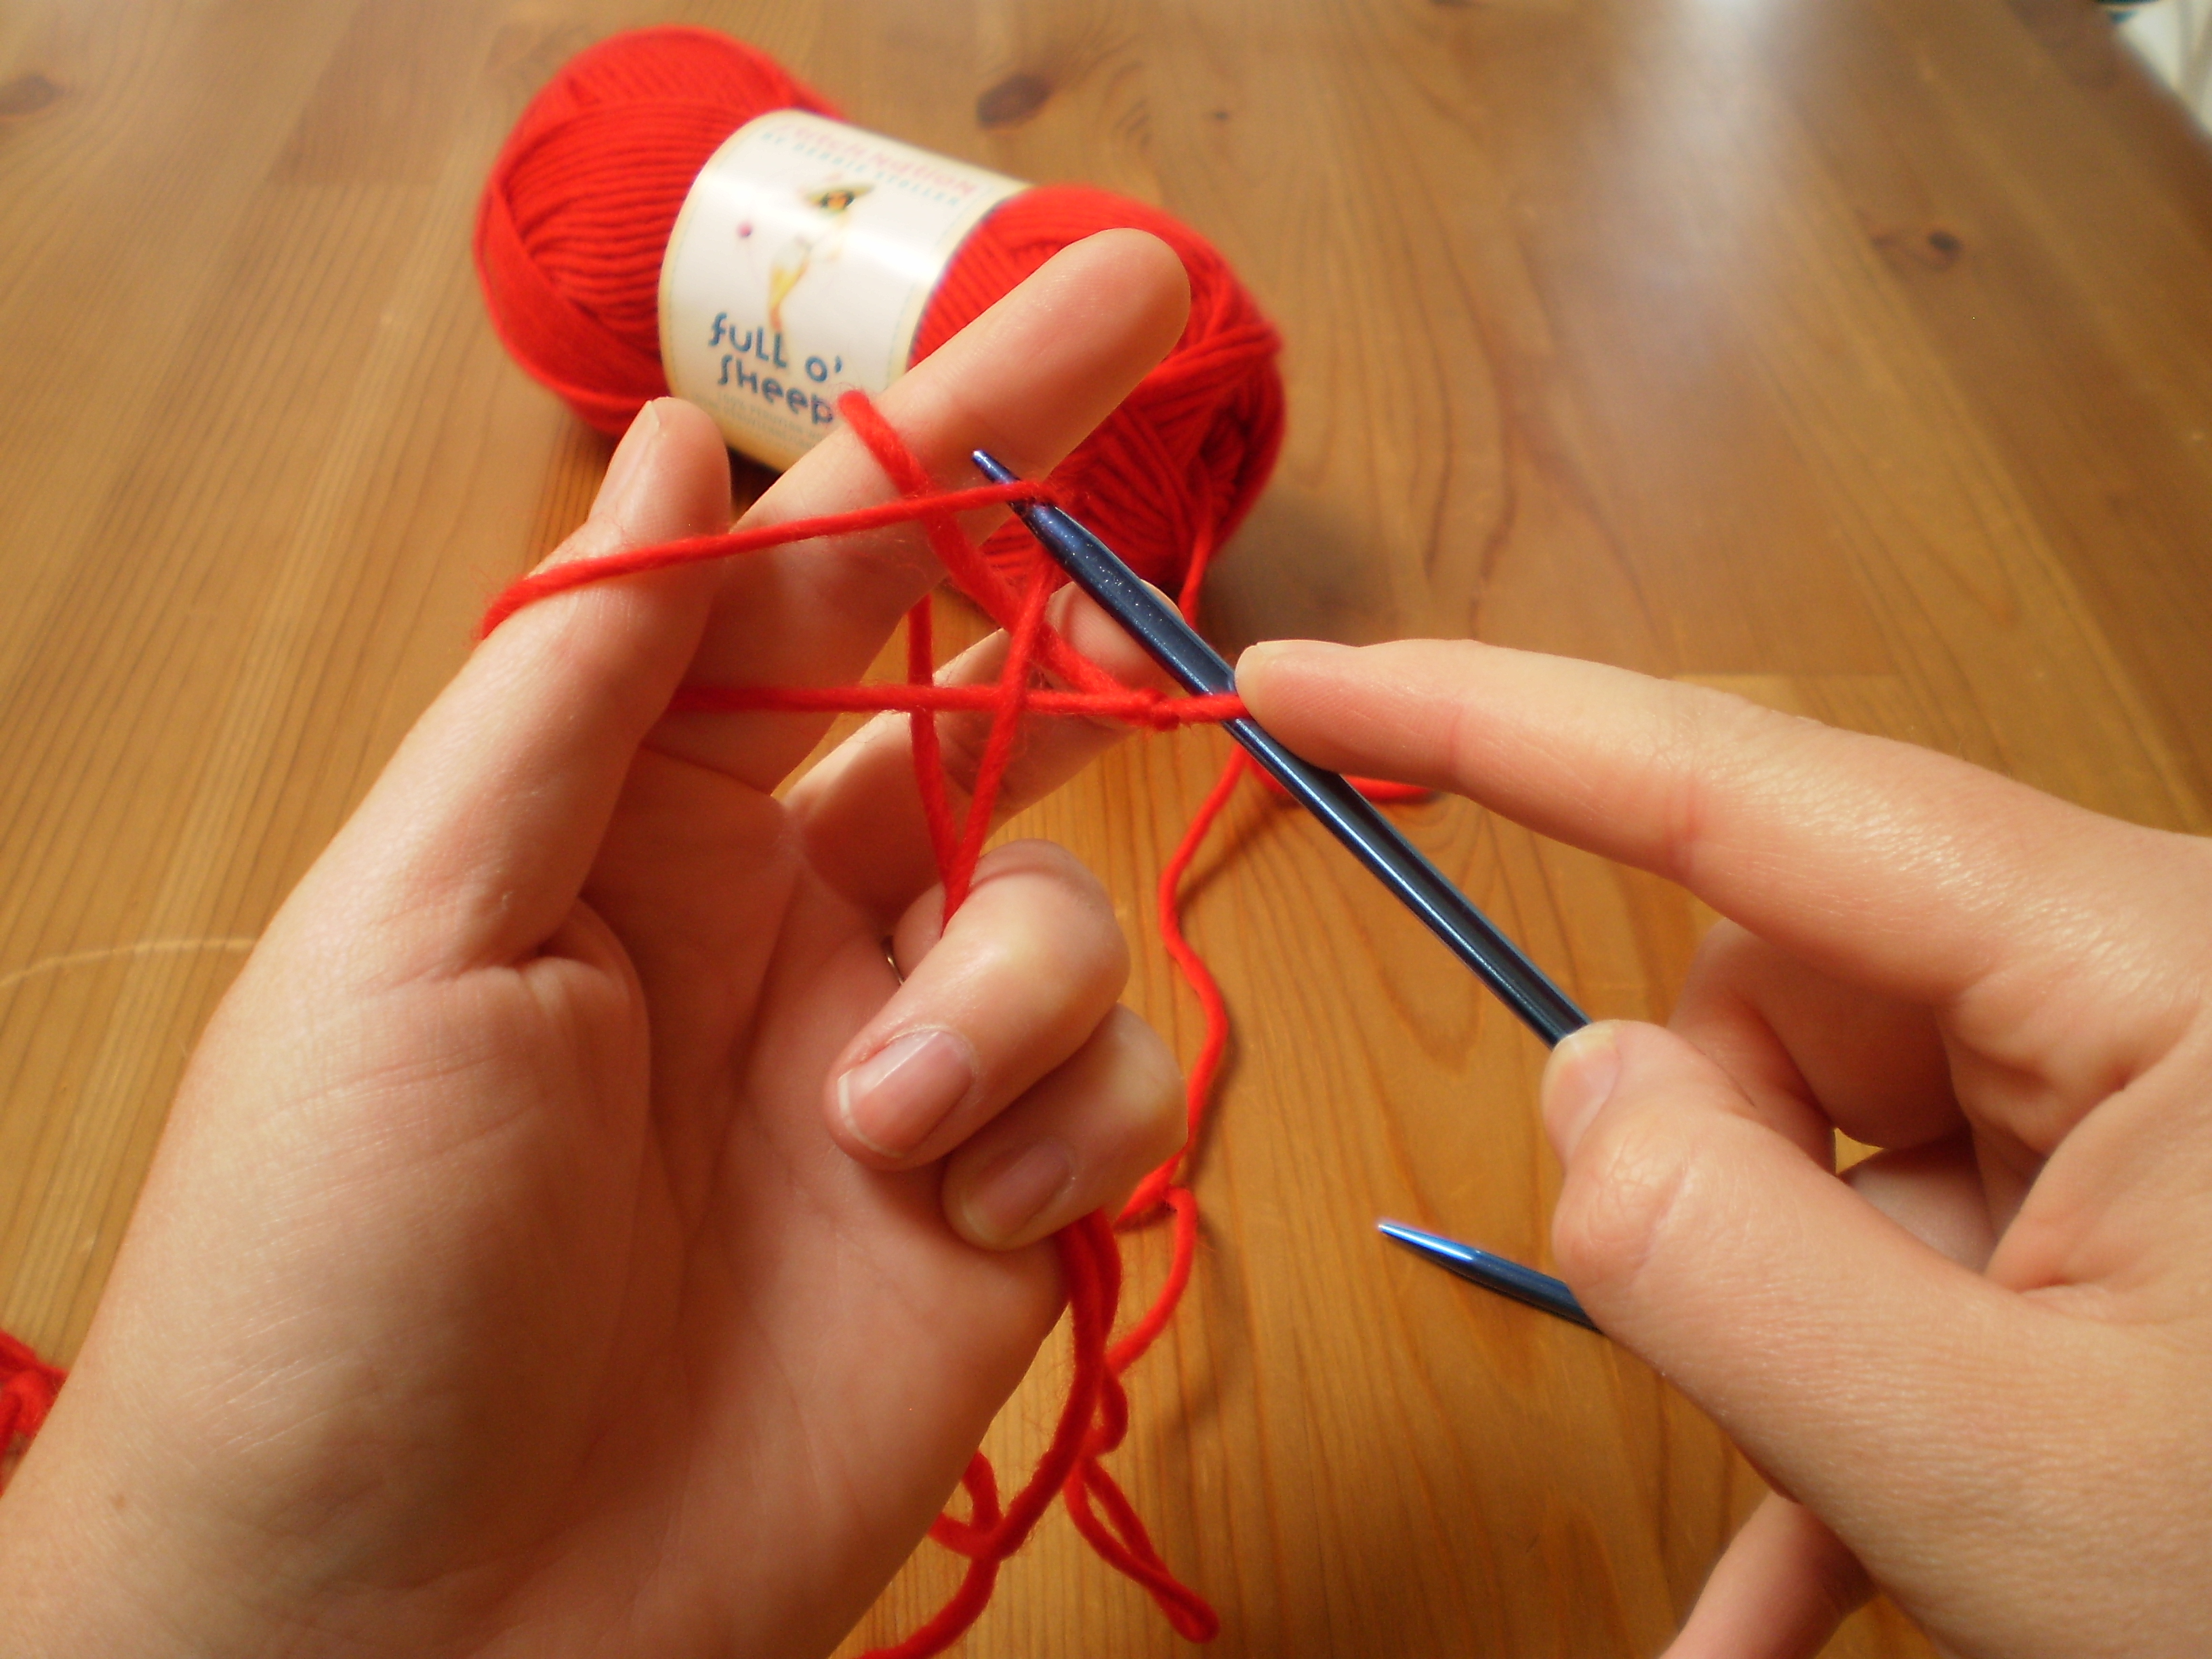
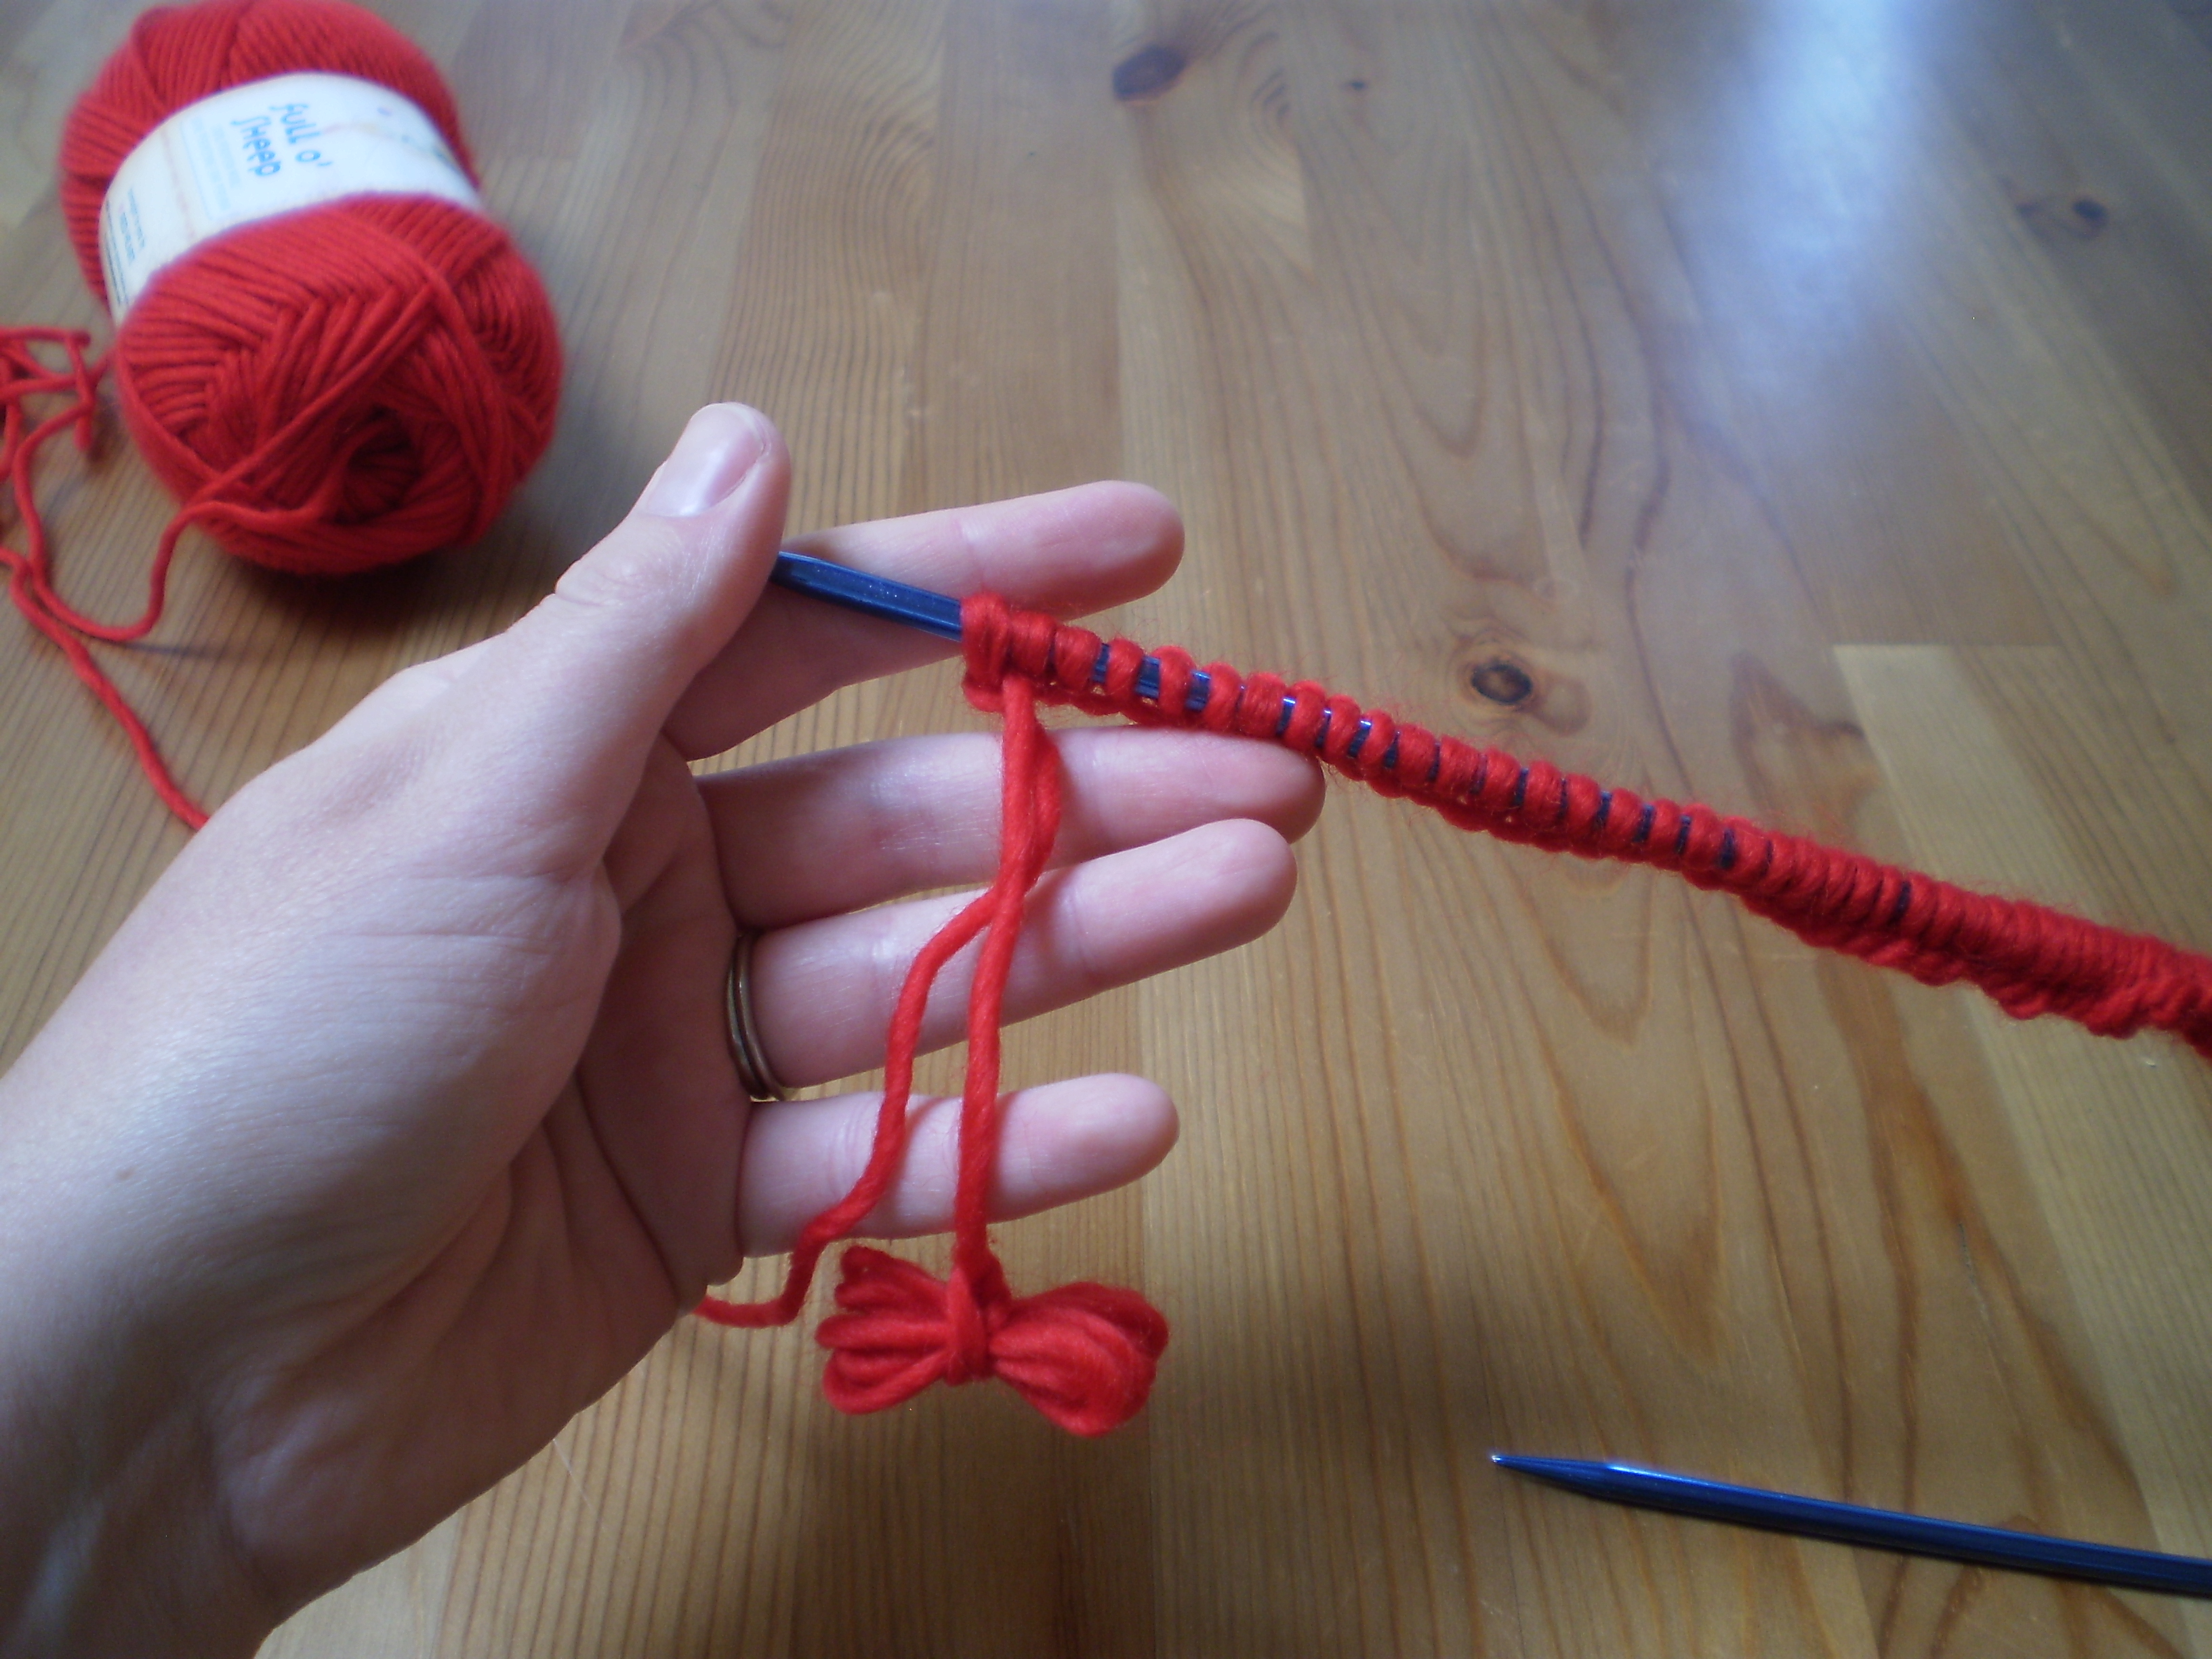
Start by measuring out a long tail (duh) that is about 4 times as long as your finished project. (Since this is a hat, you can wrap your yarn around your head 4 times to estimate your length.) Then, make a slip knot at the point that you measured. In this case, you’ll have your ball of yarn on one side of the slip knot, and about 6 or 7 feet of yarn on the other end. Slip the slip knot on your needle and tighten the loop so that it won’t fall off the needle.
 Now, with your non-dominant hand, grab both the ball yarn and the tail yarn with your pinky and ring finger. Then, slip your thumb and index finger between the two ends of yarn. Make sure that the tail yarn is the one wrapped around your thumb.
 Use the point of the needle to slide from the bottom of your thumb to the top, picking up a loop of yarn. Don’t let the yarn slip off your thumb. Your pinky and ring fingers should keep tension on your yarn, which can help this.

 Then, move the point of the needle over to the tip of your index finger.
 Slide the point of the needle down your index finger, then down your thumb, too. This will hook the loop of yarn from your index finger, and pull it through the thumb loop.
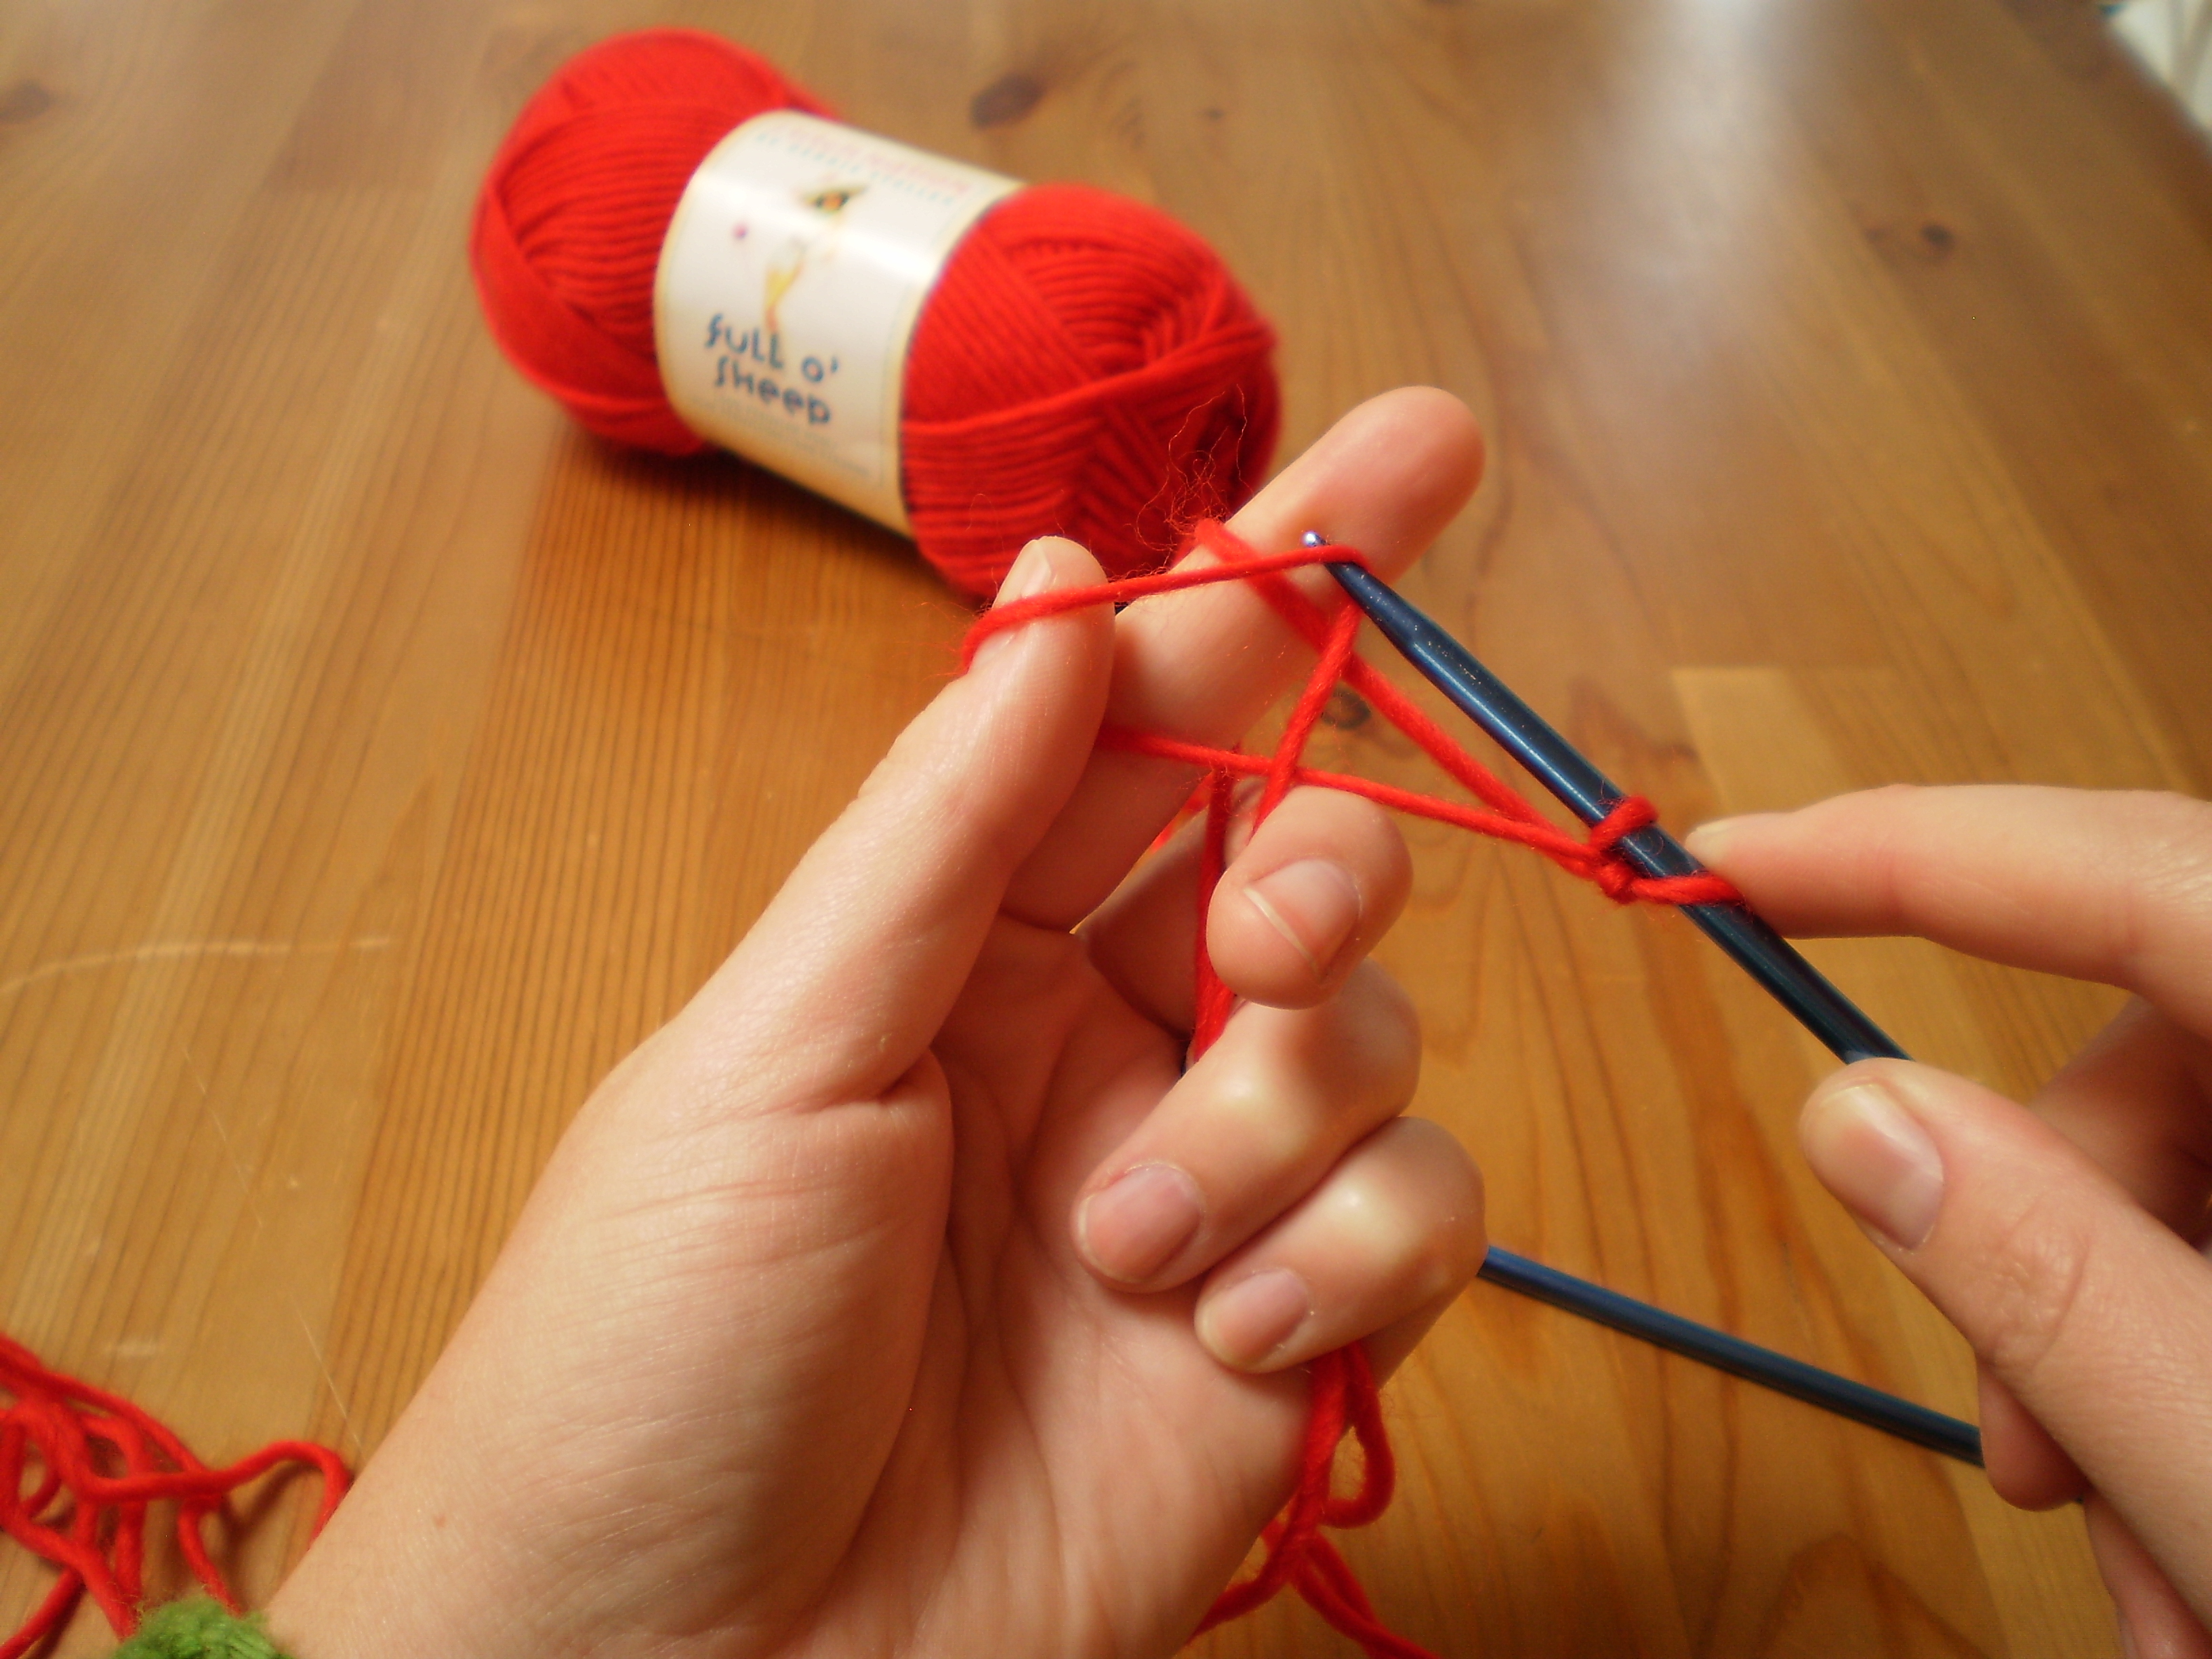
 Now, here’s the scary part. Drop the yarn from your left hand. I promise you won’t loose your work.
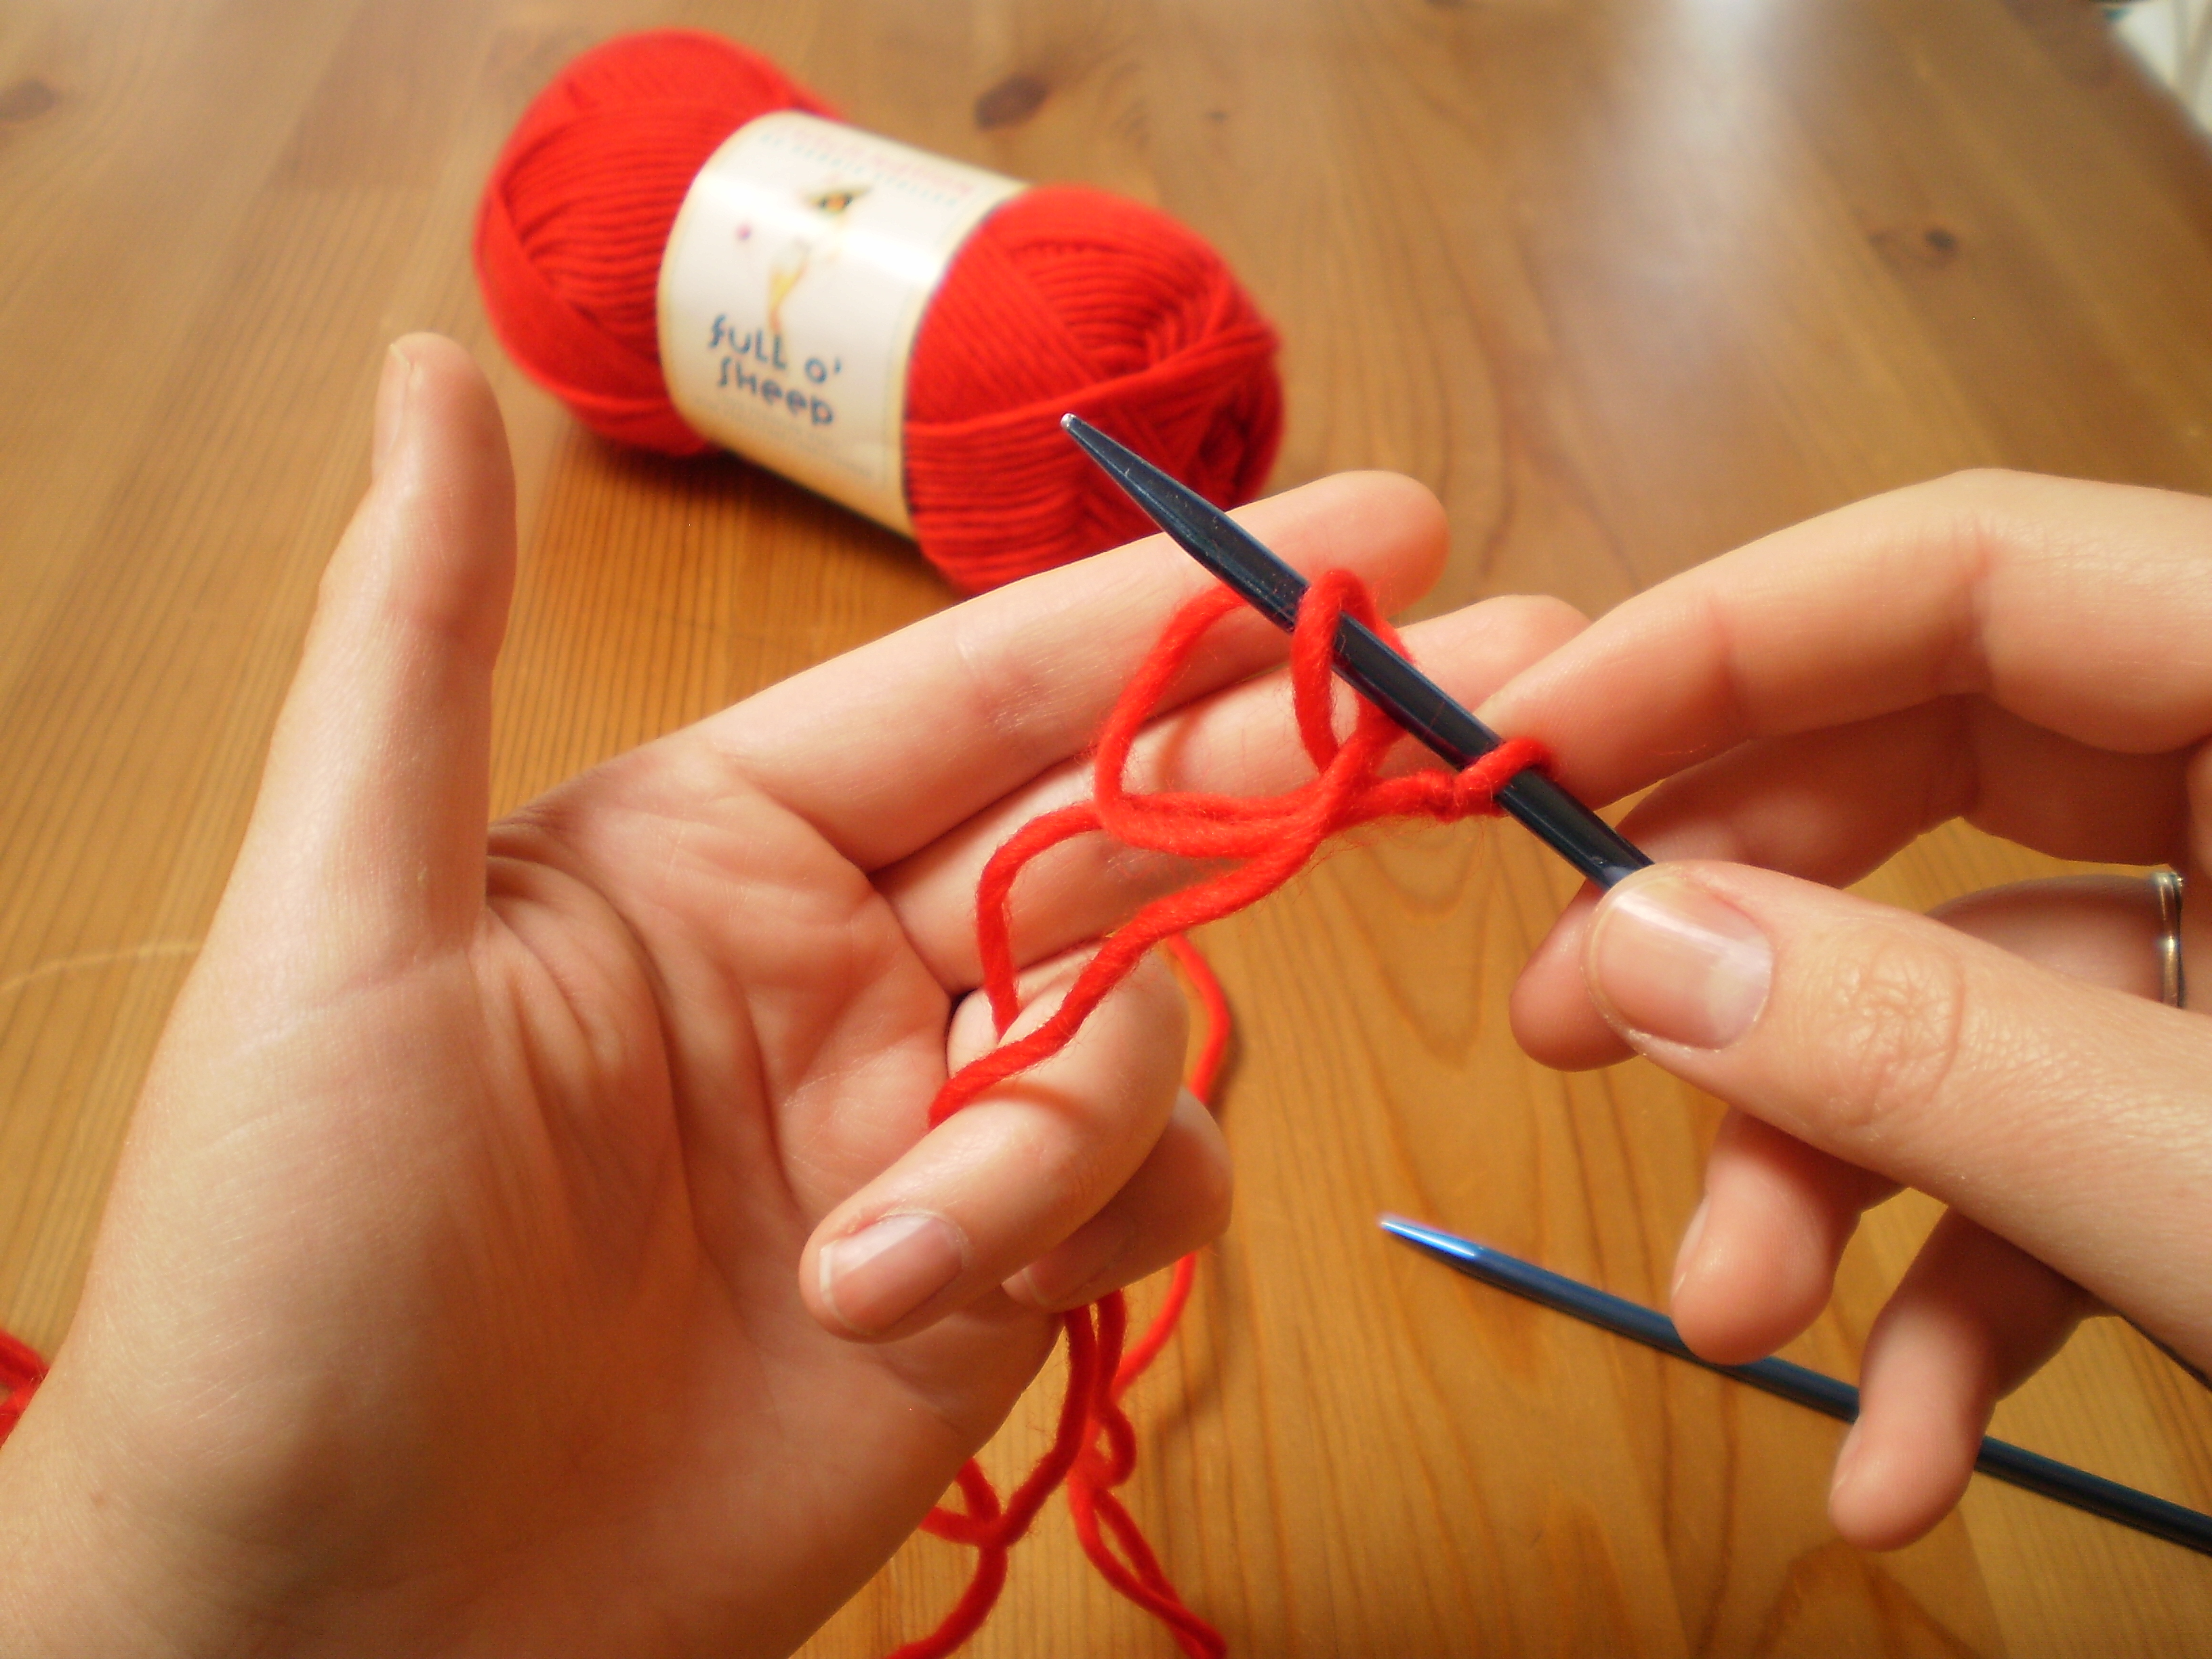 Pull on the yarn tails to snug up your new stitch. Now you have two stitches! Huzzah!
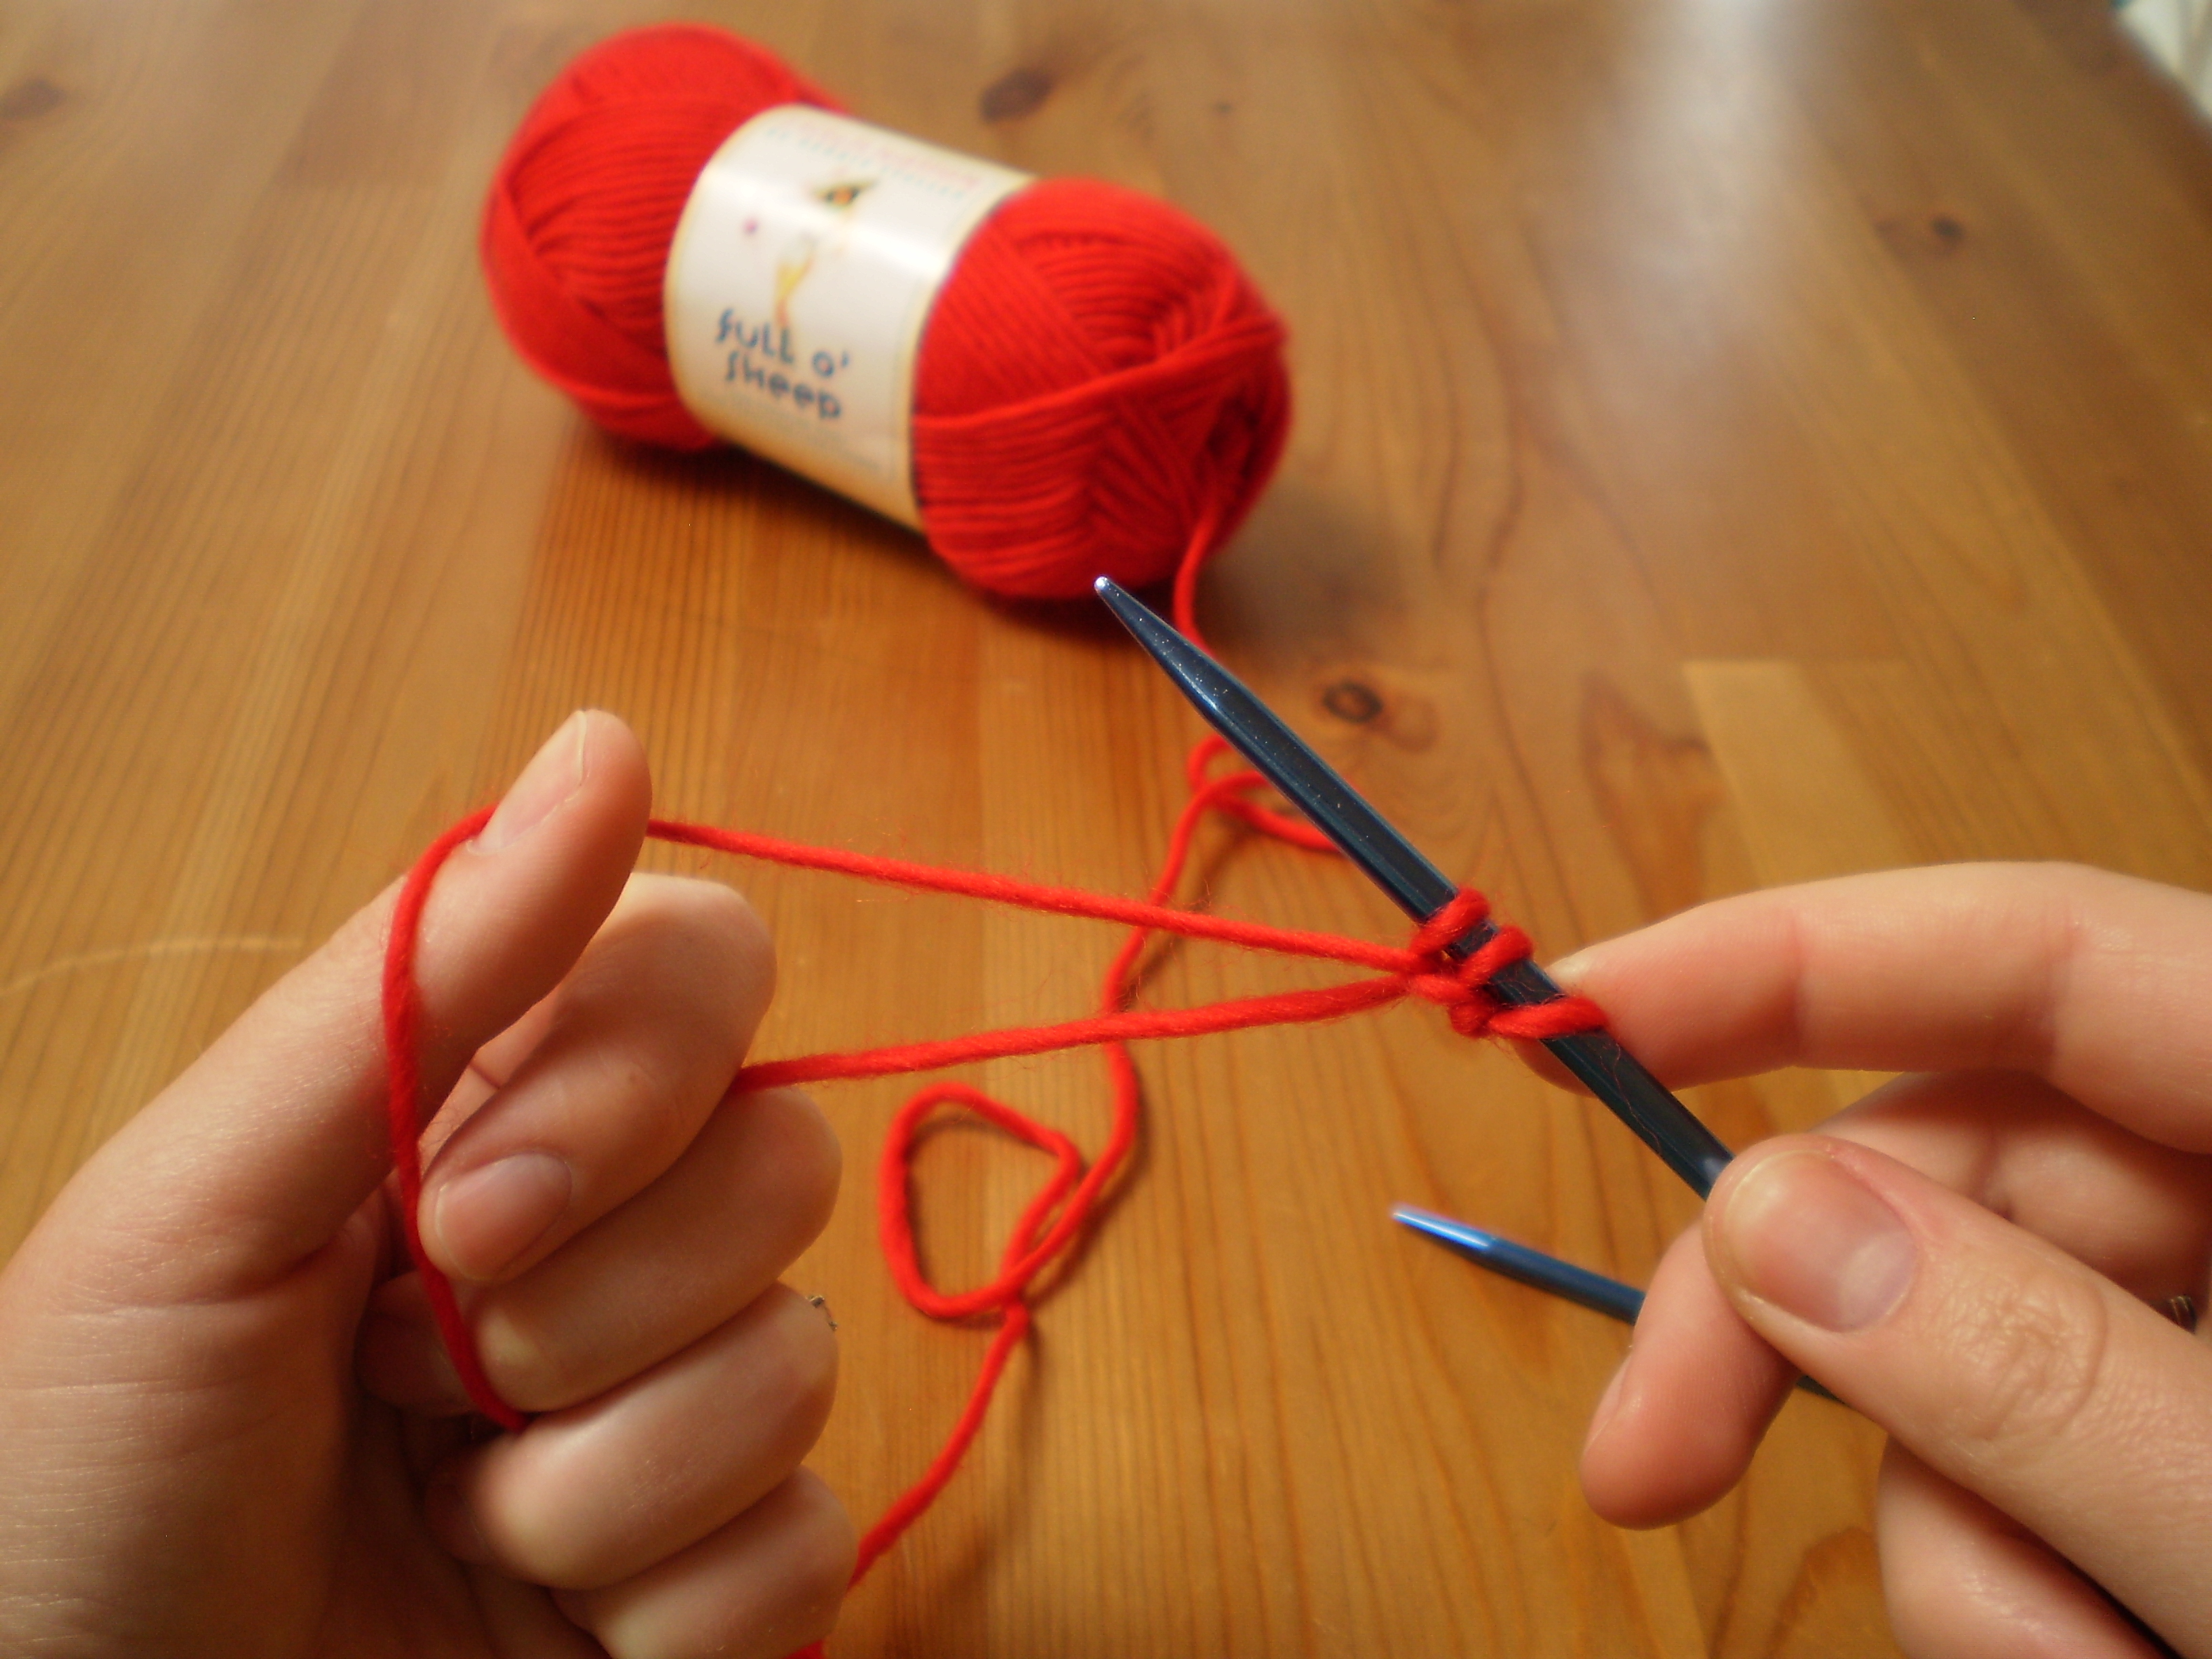
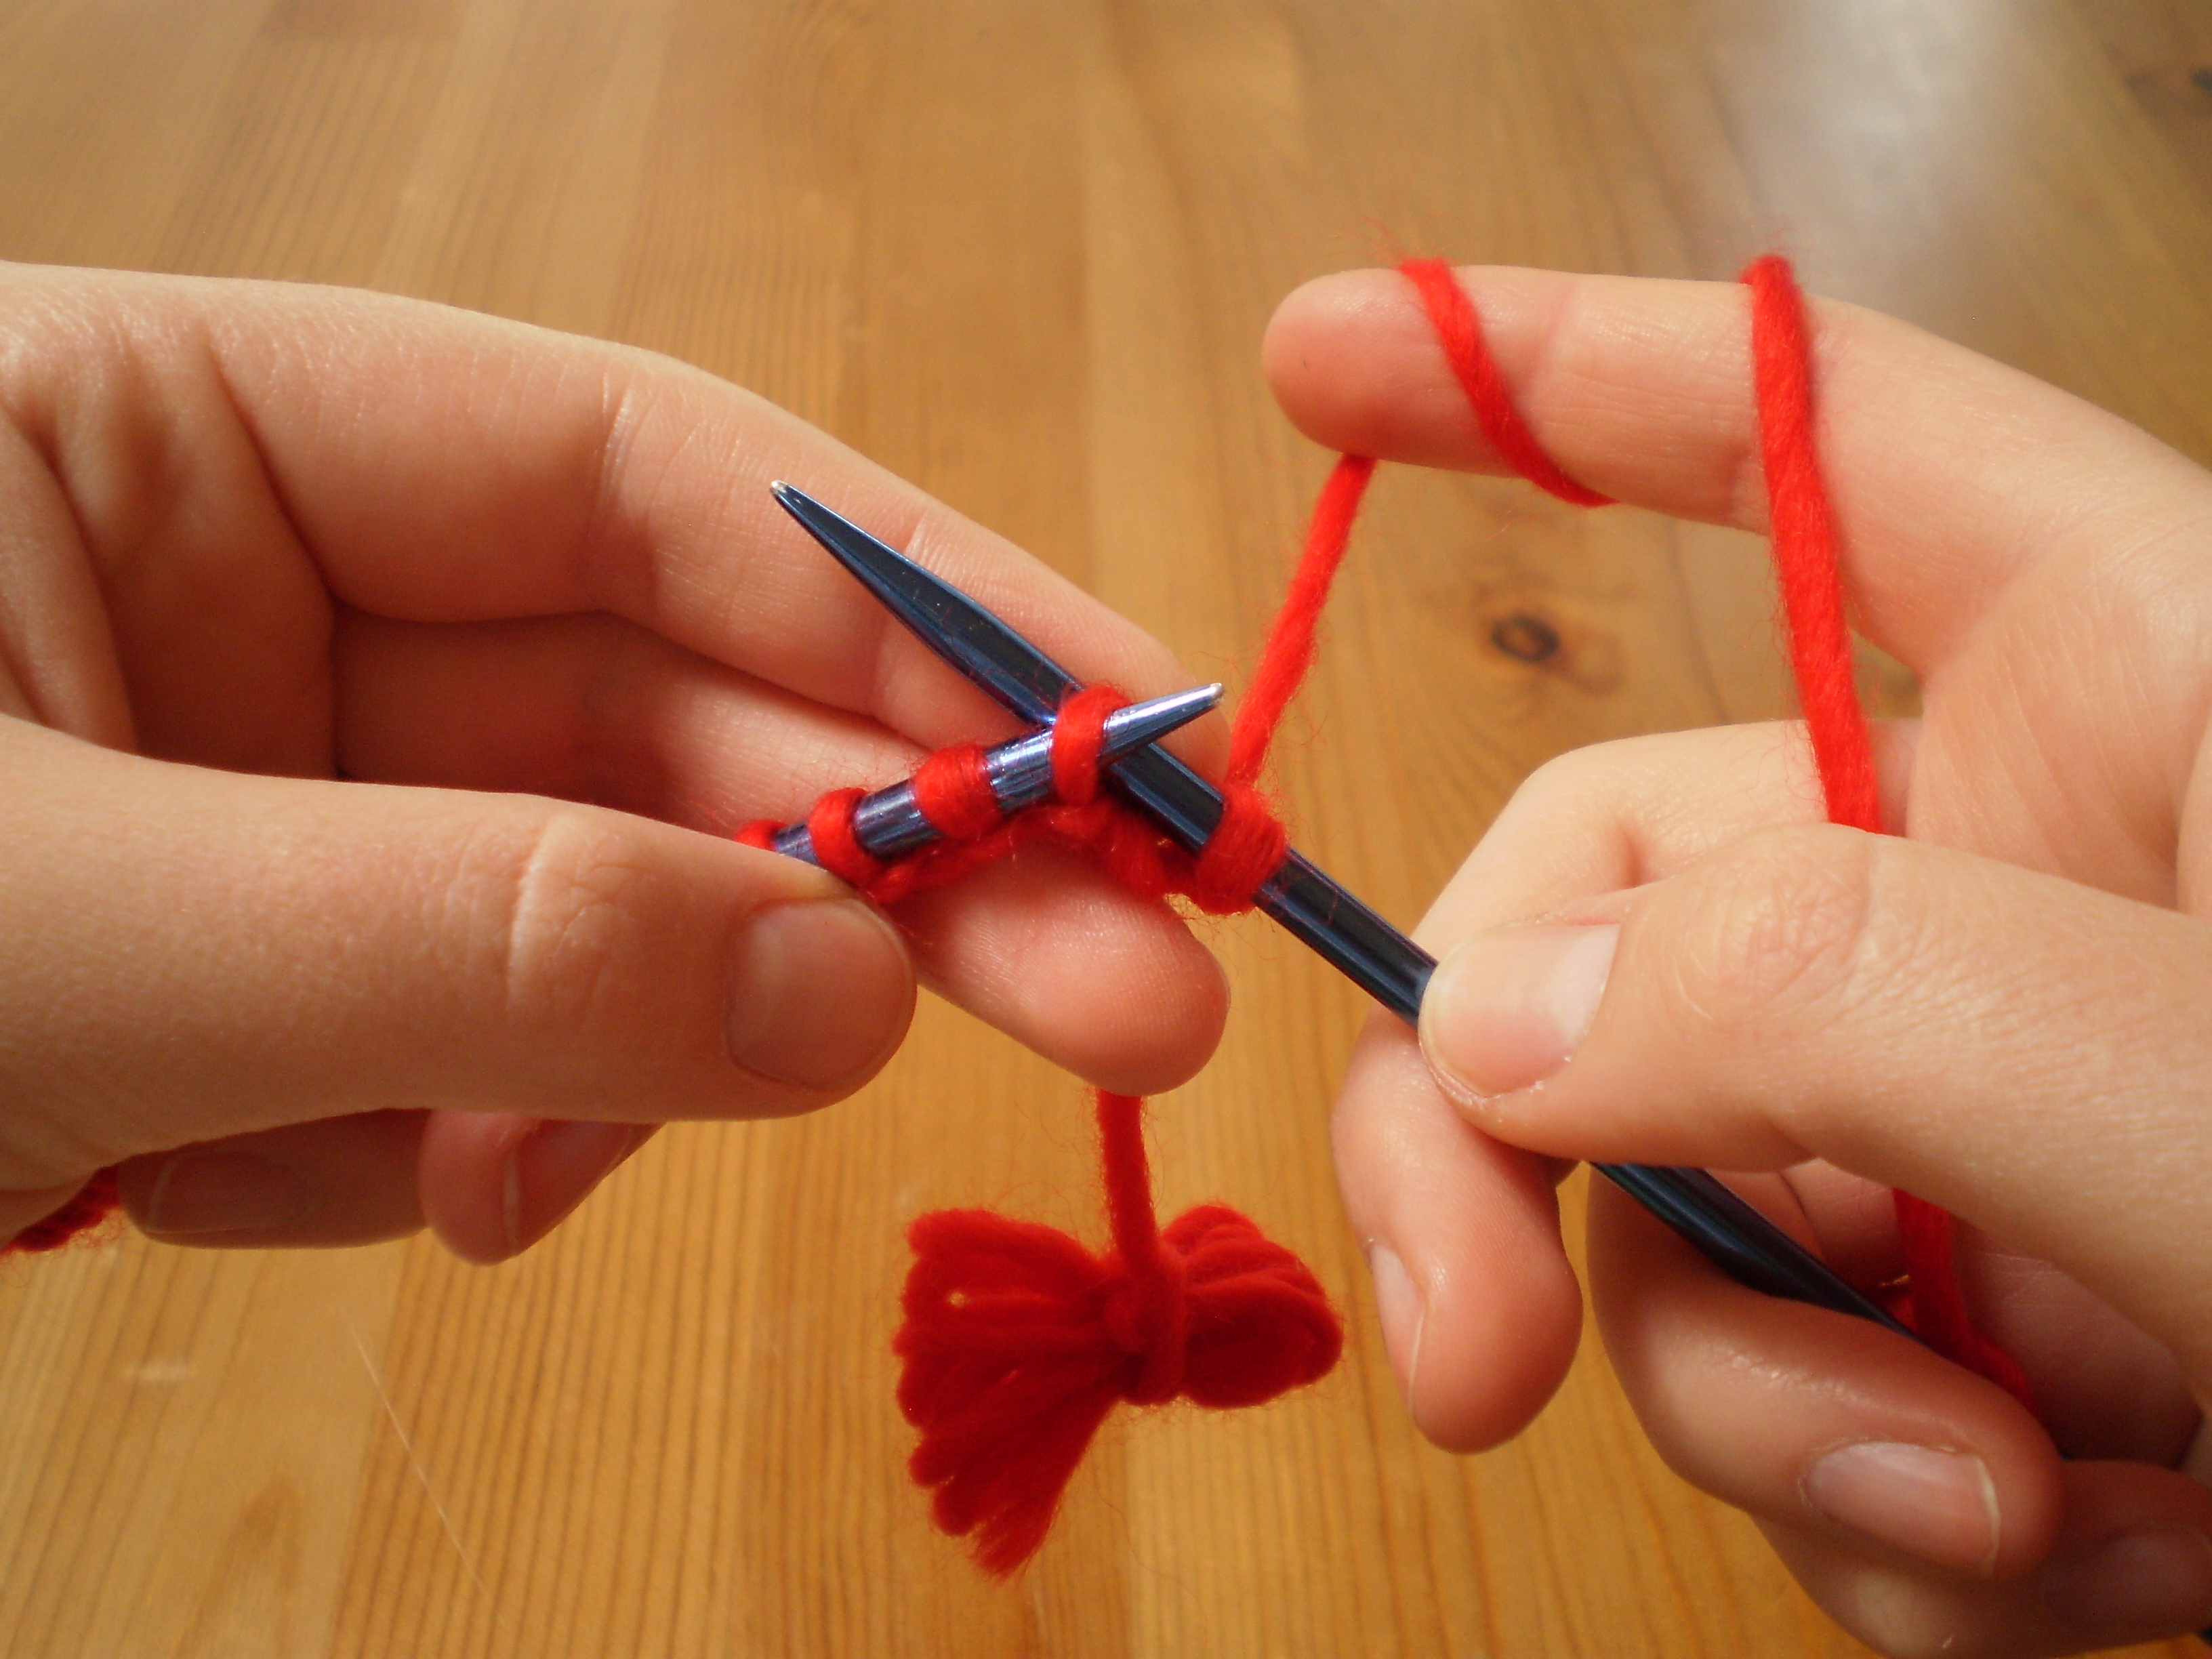
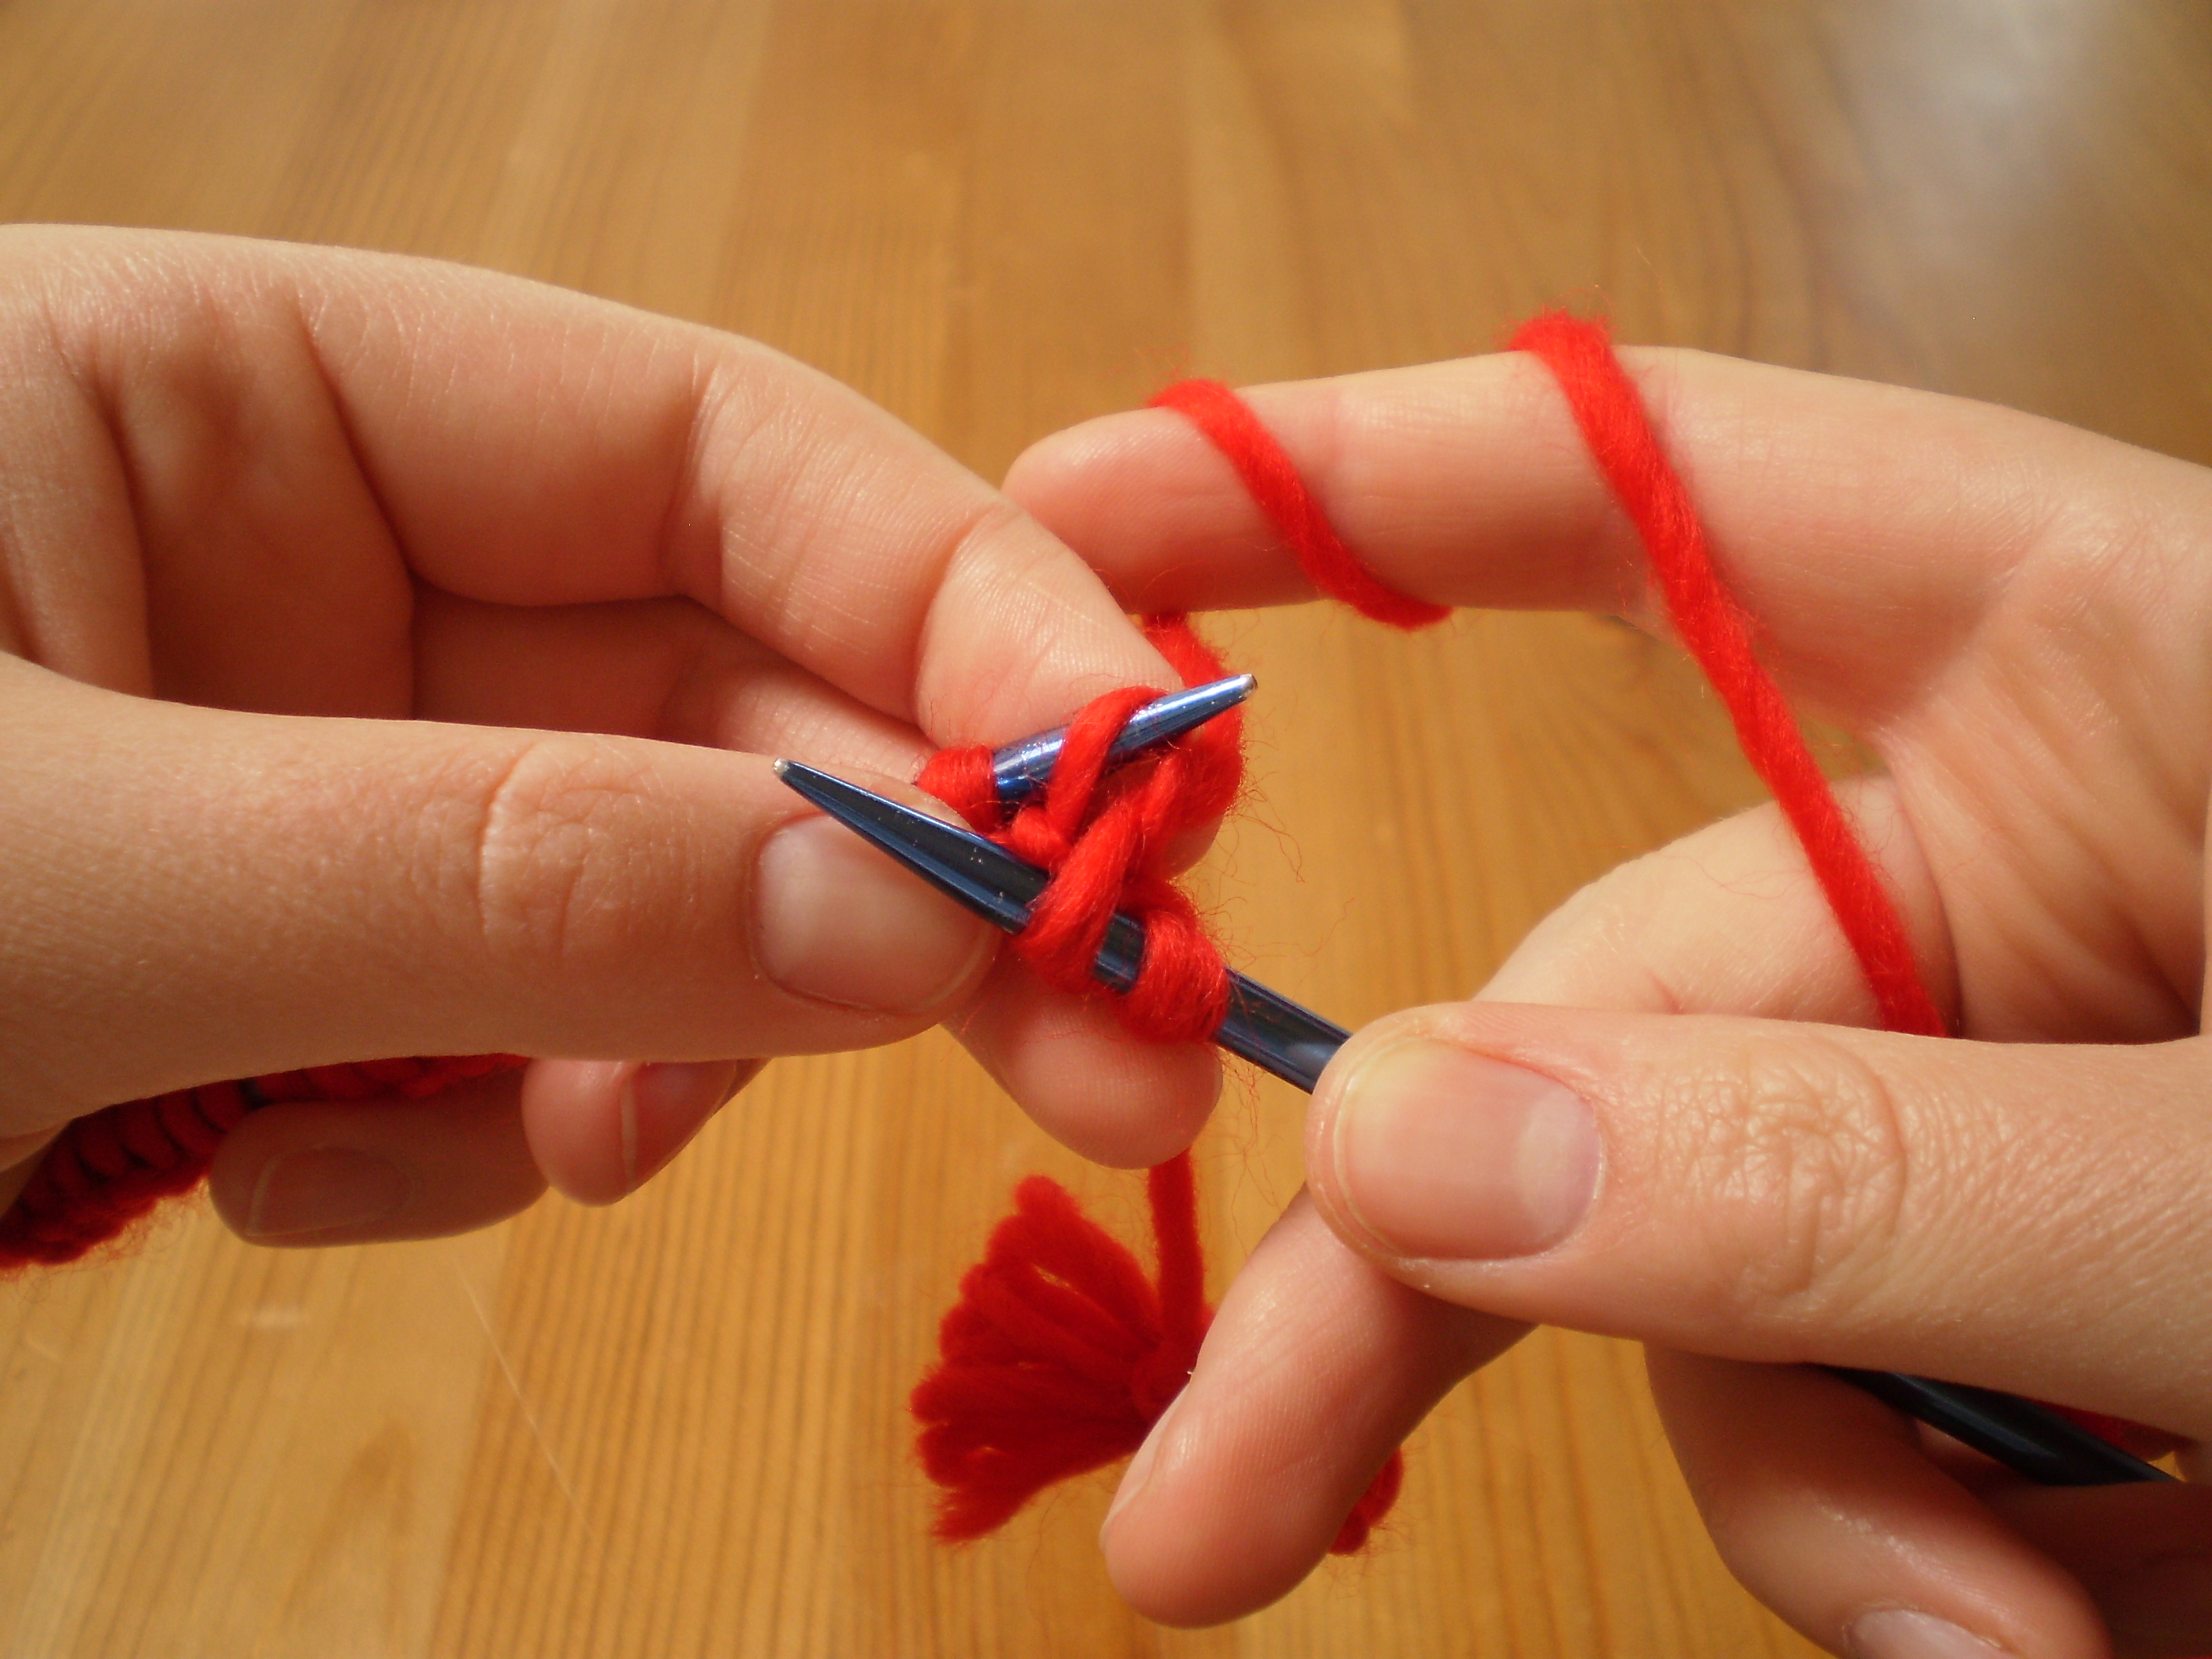
 And now, you keep going. Grab the yarn again in your non-dominant hand, with your thumb and index finger between the tail and the ball yarn. Use the tip of the needle to slide up your thumb, over to your index finger, and back down your thumb, pulling the index finger loop through the thumb loop.

 Then, drop the yarn, and tighten up your third stitch.
 Keep on going, repeating these steps until you end up with 80 stitches on your needle. (I know it seems like a lot, but practice makes perfect. You’ll be burning through them before you know it.) When you get all 80 stitches, tie up any remaining tail yarn into a little bundle to keep it out of your way. You won’t do anything else with the tail until you’re done with all the knitting on this project.
 Did you get your 80 stitches all cast on? Awesome! Now it’s time to really start knitting. Whenever you knit, you’re going to have the “old” stitches on your left-hand needle, and you will make the new stitches on your right-hand needle. So, that’s how we’re going to start. Hold your needle with the stitches in your left hand, and your empty needle in your right hand. Keep your ball of yarn on your right side.
 Are you ready to start your first knit stitch? Yes!
Insert the point of your right needle into the front of the first stitch, with your yarn held behind your knitting. (The “front” of your knitting is the side that faces you as you work on it. The “back” of your knitting is the side that faces away from you.) It should look like this: 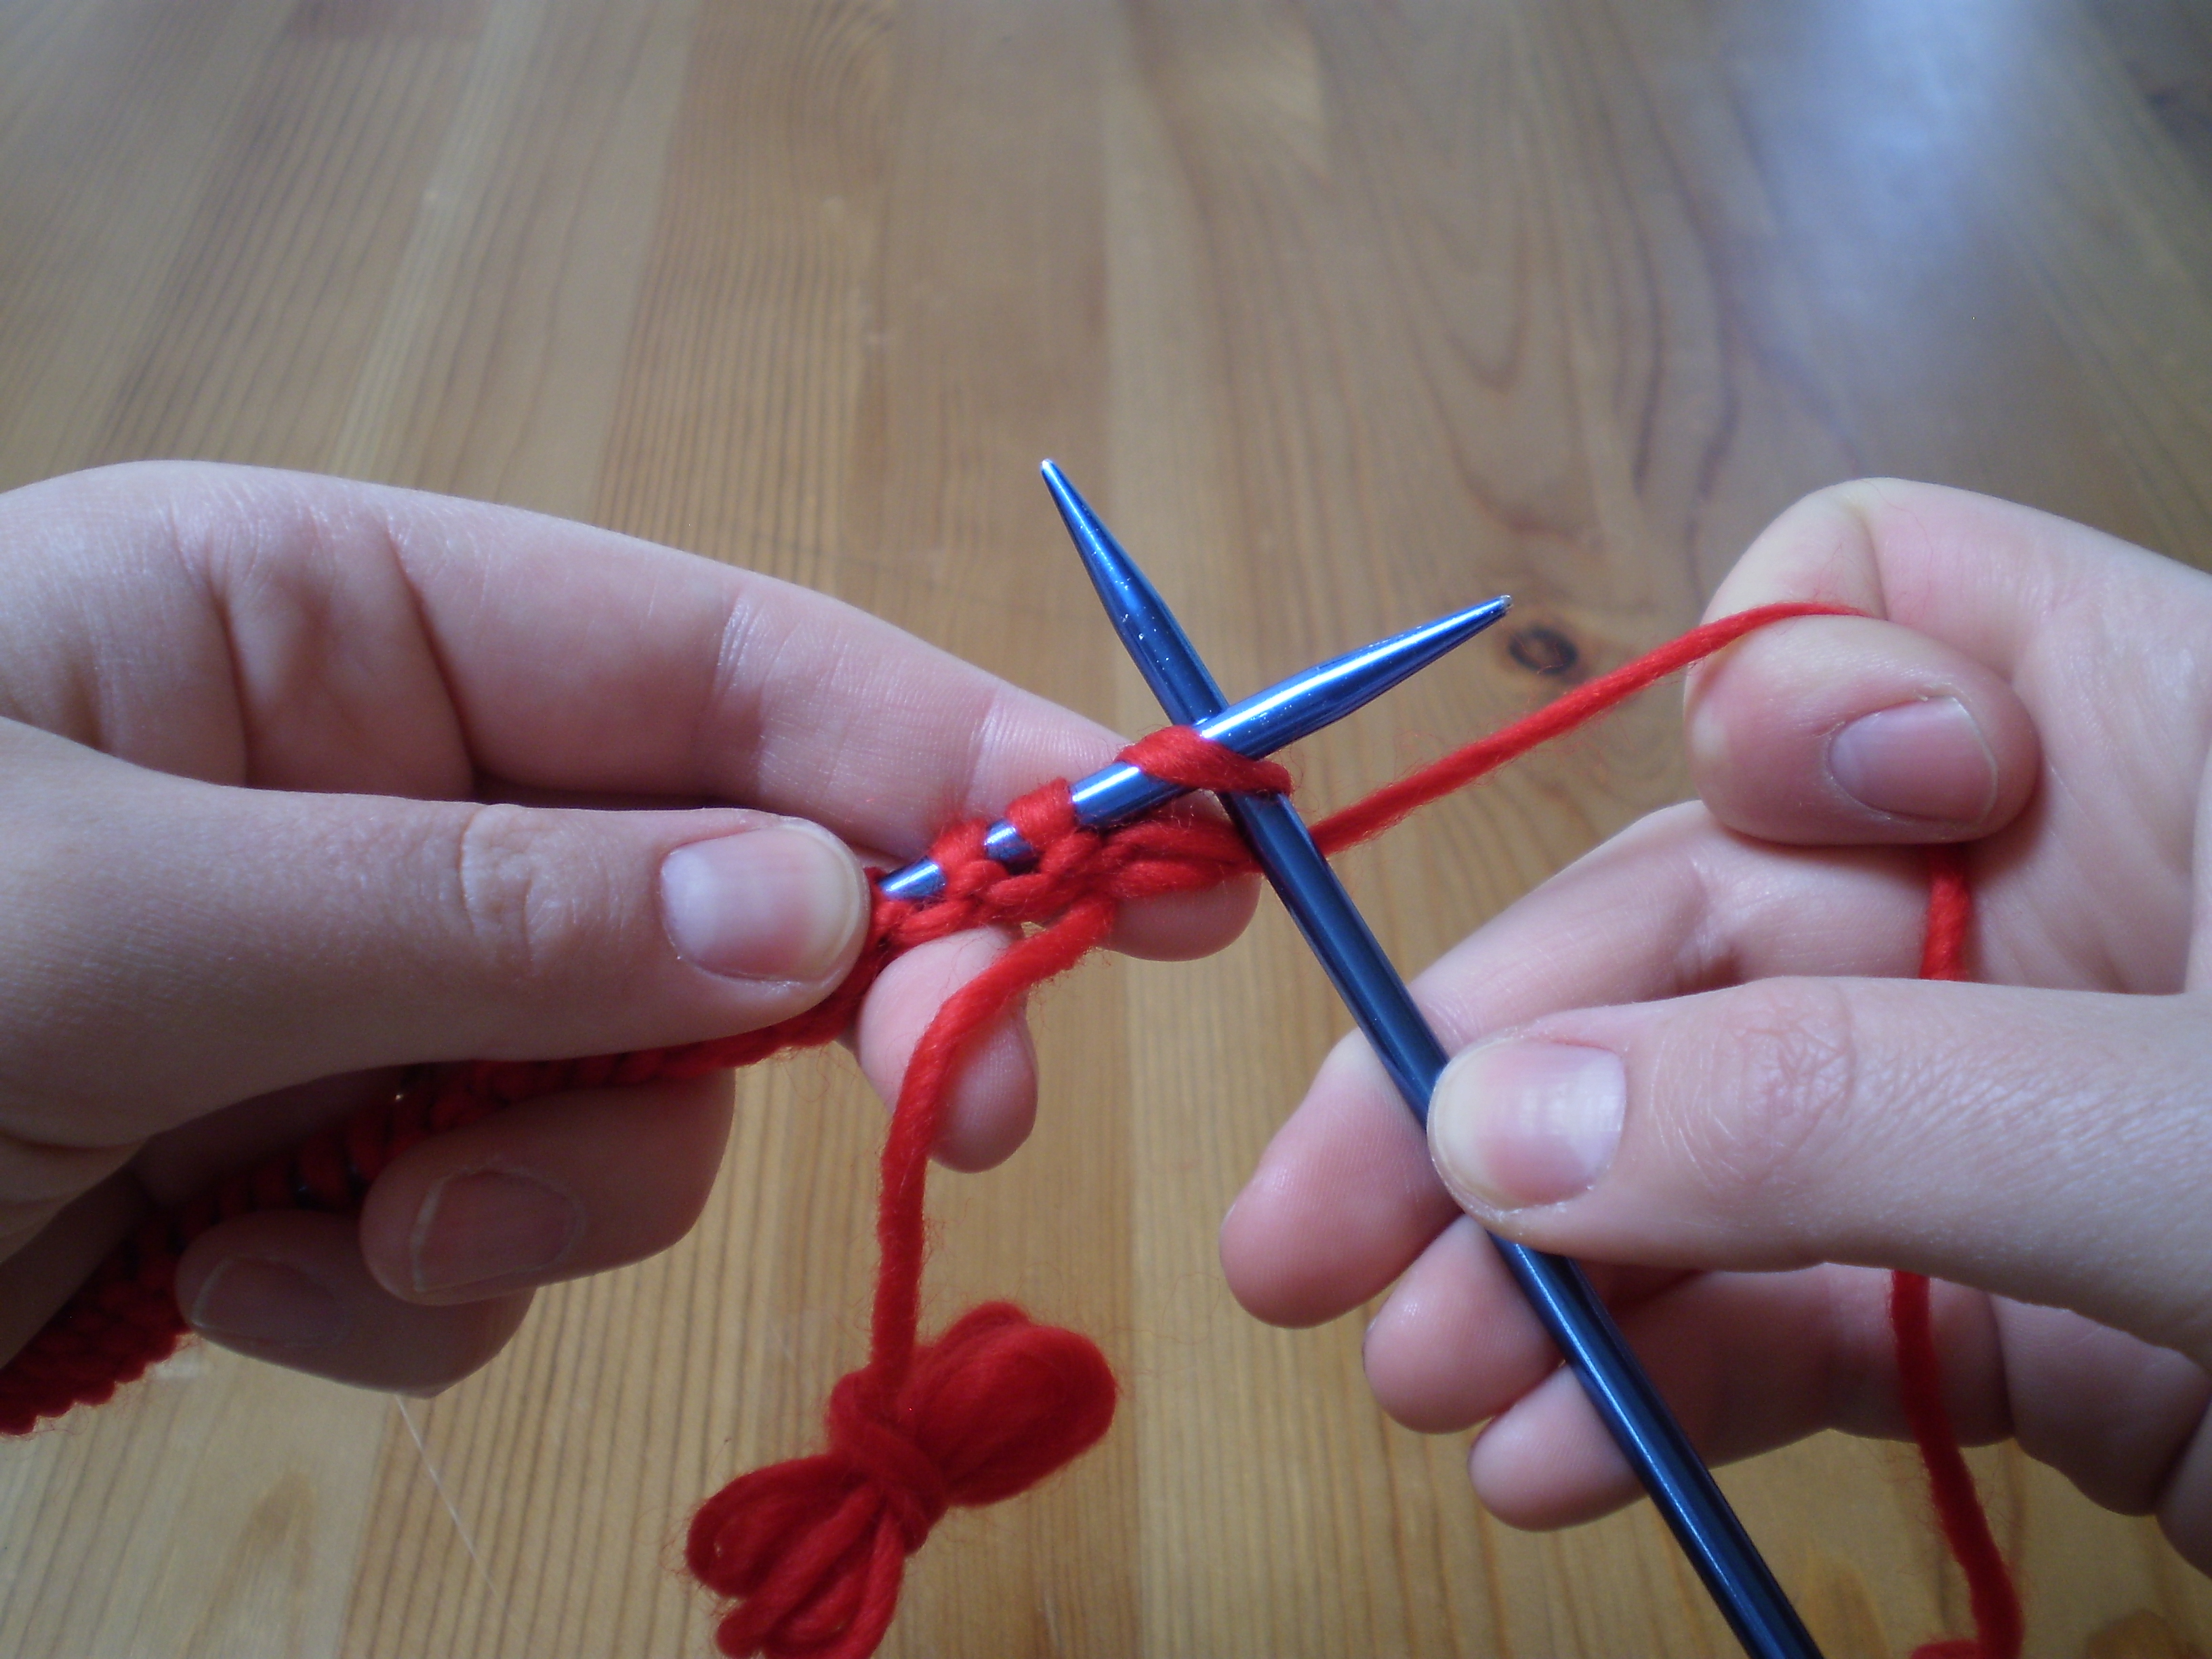 Then, wrap the yarn around the tip of the right-hand needle.
 Pull that new loop carefully through the old stitch. This is tricky at first, so keep trying. If you keep a little tension on your yarn, it makes it easier. I like to wrap the yarn around my index finger to help keep tension, but if you don’t like that, try holding the yarn between your index an thumb, or wrapping it around your whole hand. Every knitter holds their yarn a little differently. Find what feels good to you.

 You’ve made your new stitch (the loop you just made on your right-hand needle). Now it’s time to get rid of your old stitch. To do this, simply slip it off the end of the left-hand needle. Easy.
 You’ve finished your first stitch! Congrats! Now you just need to make approximately 1 billion more. (Not really. Although sometimes I wonder about how many stitches there are in a hat, or a sweater or something. I’ve never actually sat down to do the math. That would be crazy.)
Knit your second stitch: Insert your right-hand needle into the front of the next stitch, wrap your yarn around the tip of the needle, pull the new stitch through, and then drop the old stitch off the end of the left-hand needle.

 Two stitches done! Keep going like this until you reach the end of the row.
 When you get to the end, swap your needles, so that your empty needle is in your right hand, and your needle with stitches on it is in your left hand. Then, keep knitting away!
 Keep knitting, switching your needles around at the end of each row, and soon enough you’ll see some awesome squishy fabric start growing off your needles. (If your stitches aren’t as even as mine, that’s OK. It adds character! And, if you think it’s too bad to actually wear, you could frame the finished hat as a piece of modern art or something.)
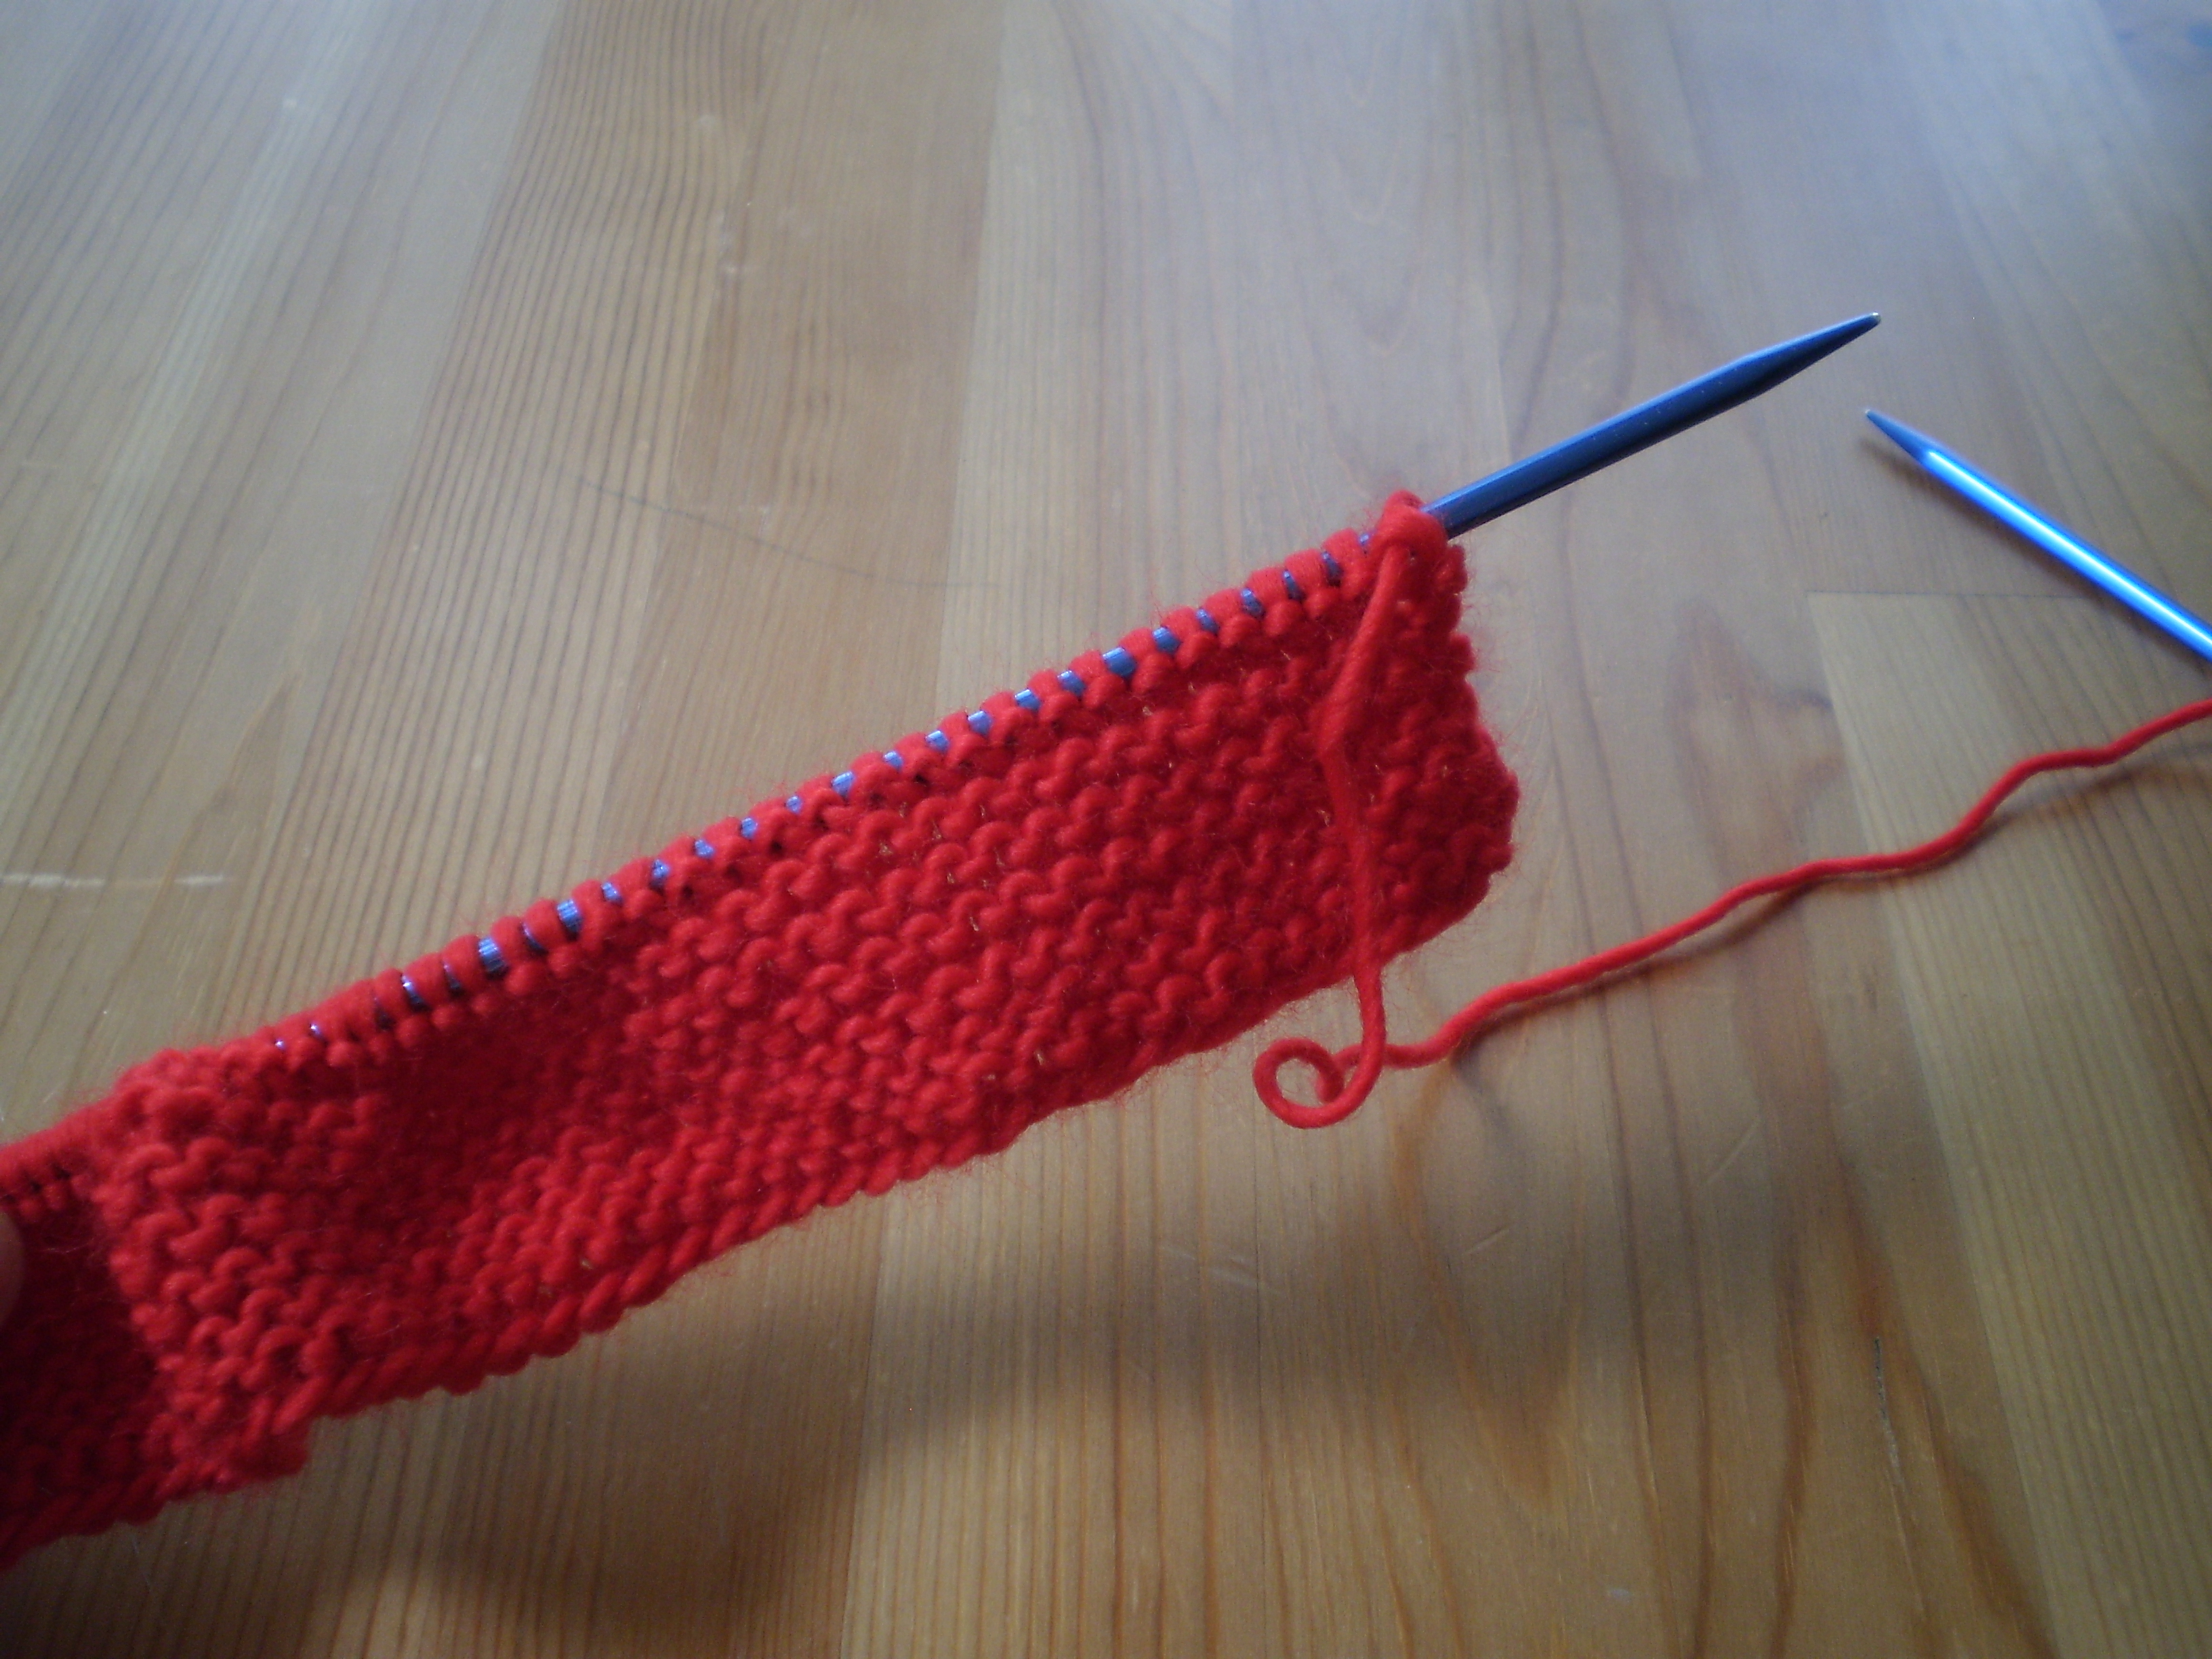 This pattern is called “Garter Stitch.” It’s made when you knit every single row. This is the brim of the hat we’re working on. I worked my garter stitch for about 2 inches. You can make your garter stitch brim wider or narrower by knitting more or fewer rows.
Next week, we’ll make the body of the hat, and I’ll show you how to work the purl stitch. Happy knitting!
![MV5BMTM0OTE3MTYxMV5BMl5BanBnXkFtZTcwMDQ0OTE2Ng@@._V1._SX640_SY427_[1]](https://ontheneedles.com/wp-content/uploads/2013/09/mv5bmtm0ote3mtyxmv5bml5banbnxkftztcwmdq0ote2ng-_v1-_sx640_sy427_1.jpg)


![skullhoodie_2_medium2[1]](https://ontheneedles.com/wp-content/uploads/2013/09/skullhoodie_2_medium21.jpg?w=445&h=640) Los Muertos: Slouchy Day of the Dead Hat for Samhain
Los Muertos: Slouchy Day of the Dead Hat for Samhain![IMG_8337_medium2[1]](https://ontheneedles.com/wp-content/uploads/2013/09/img_8337_medium21.jpg?w=432&h=576) Skull Tea Cosies
Skull Tea Cosies![2909529269_90de11a0e8_z[1]](https://ontheneedles.com/wp-content/uploads/2013/09/2909529269_90de11a0e8_z1.jpg)