OK, so you know how I finished my hat for myself last week? And I was so proud of myself/of my hat? Well, my children have fully stolen it. And I don’t know if they have weirdly large heads, or if that’s just how kids are made (I know I certainly don’t have a small head), but my hat fits both of them pretty perfectly… even the 2-year-old.
So this is kind of a good news/bad news situation. The bad news is that I have to go back to my old, sun-faded hat while the children fight over my new “Rainbow hat.” But the good news is that I don’t have to figure out a new pattern for their Christmas hats!
Because the yarn they dyed the other day was the same base as my “rainbow yarn”, I don’t even have to re-do the math. So great!
So I’m already diving in, because Christmas is closer than I’d like to admit, and I have a feeling that the one-week timeline for my hat isn’t likely to be repeated.
And, I’ve got to say, it’s cool seeing the kids’ yarns getting knit up- I actually really like this color combo! I didn’t think it was going to look that good, but I’m really enjoying it! Now, can I get both hats done in a month? Time will tell.
And now, as is my tradition, after taking approximately one million years to finish my kid’s sweater, I now want to do something completely different.
So I’m not even getting out my yarn. (Well, mostly… I did use a little yarn, but still.)
My Instagram feed has been full of people doing natural dying, lately. Not sure if natural dying is suddenly trendy, or if I just follow enough homesteading, gardening, and sewing accounts that the algorithm has decided that dying my own fabric is the next logical step. Not that I’m mad. Sometimes the algorithm works.
So, my big hesitation about dying my own fabric/yarn is that:
1. I don’t want to ruin any pots or have to go buy specific ‘dye pots.’
2. I wanted this project to be something that my kids can help with. I’m more than happy to make a mess, but I’d rather they not mess with any nasty chemicals.
I looked around, and found a tutorial for Botanical Bundle Dying and it fit all the criteria that I had: I didn’t need to buy anything else, my kids could help, and it looked “relatively” simple. (I realize “relatively” is a relative word in dying.)
We got our materials together: some scrap muslin, my husband’s old brew kettle from when he made his own beer, a whole bunch of pennies, most of the vinegar in the house and a whole mess of flowers and greenery from the yard.
We followed the tutorial pretty closely, using the “pot as mordant” technique (basically just boiling the fabric in water with a big handful of pennies. Supposedly the copper from the pennies interacts with the fabric and makes the dye more colorfast.)
We let it cool overnight, then soaked the fabric in a 1:4 dilution of vinegar in water for an hour. Meanwhile we walked through the yard picking basically anything that seemed interesting (cosmos, marigolds, purple kale, roses, rose leaves, arugula that had gone to seed, fuchsia flowers…) and threw them in the leftover mordant water.
Once the hour was up, we laid out the fabric and carefully sandwiched the flowers in a “pattern” (the kid tossed them in handfuls at the fabric and I spread them out), and carefully folded/rolled them up.
Then the rolled-up fabric steamed in the brew kettle for a couple hours, before being left to sit overnight. (It ended up having a very particular (and not particularly nice) smell.)
The next day it was time for the big reveal, and… voila la!
So, kinda fun! I learned a lot. The marigolds and the purple cosmos came out the best. I think the black splotches were either from the fuchsias or the nasturtiums, but it was kind of hard to tell. After all that steaming, the more delicate flowers almost dissolved. The kale and arugula didn’t show up even a little bit (and steamed kale is gross). The rose petals fully dissolved and didn’t dye the fabric at all, but the leaves left a very faint trace.
I ironed the fabric to “set” the pattern, and then, since I was curious to see what would happen, I threw it into the washer to see how colorfast it was. Answer: not colorfast at all. A little of the cosmos pink stayed, and maybe a hint of the marigold yellow, but for all intents and purposes, the color all washed away.
While this was kind of a bust (or at least I didn’t get beautifully dyed fabric at the end), I learned a lot, and it was a fun activity to do with the little ones. I guess I’m going to have to try it again- and this time, I think I’ll do a little bit more research.
I love knitting stripes. Changing colors back and forth keeps my interest, even when making a super simple project like this beanie. But, as you know, I am utterly lazy. I absolutely detest stopping my flow of knitting to attach and reattach new balls of yarn. And weaving in all those thousands of tiny ends at the end of a project is pretty much the worst. The Lazy Susan Beanie avoids both of these issues by working both colors at the same time, knitting them in a spiral pattern that ends up looking like perfect one-row stripes (get it? Lazy Susan? Because it spins and is for lazy people… like me).
Also, this pattern is a great way to experiment with color and dying your own yarn. I knit the sample with a turquoise variegated yarn and a dark purple/black semi-solid which I dyed using food coloring. (You can readmyposts for more information about dying yarn with food coloring.) Try using different color combos for different results!
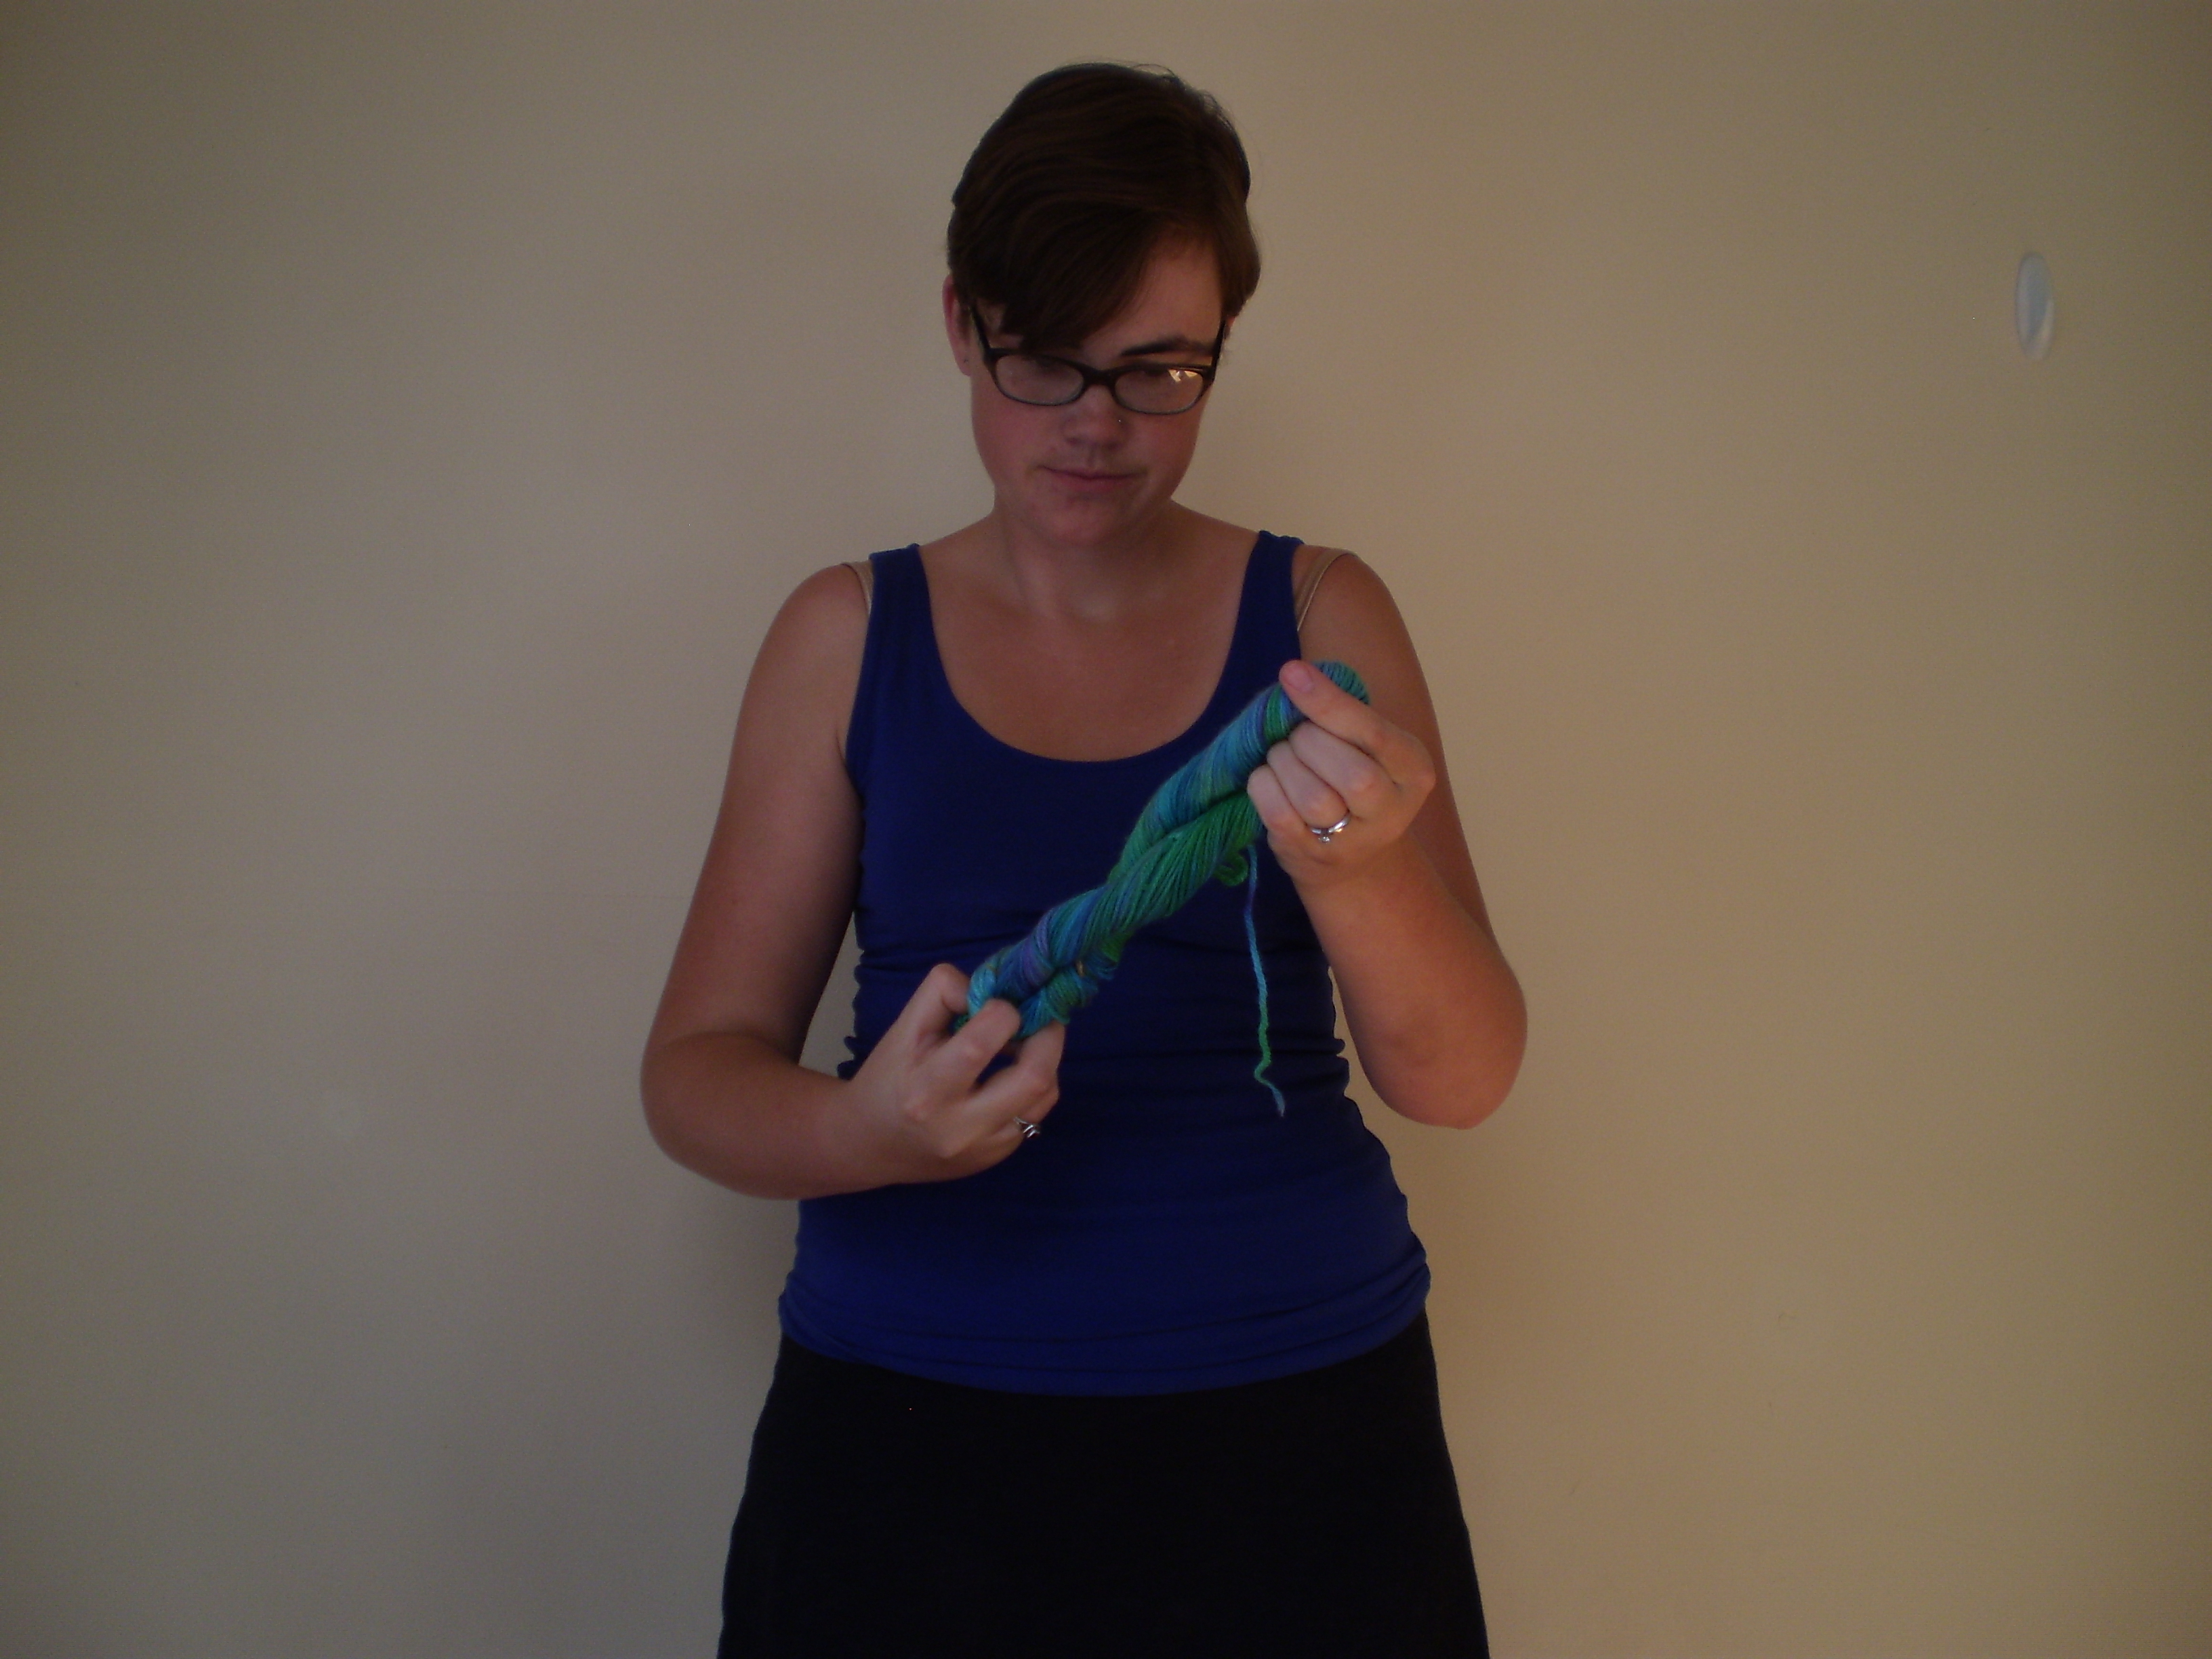
So, you’ve got your pretty yarn all died and dry. It’s in a big skein, but the threat of tangles still looms. What’s a girl to do?
Here’s what to do to get your yarn into a pretty little twist. It’s not terribly practical, but it’ll keep your yarn tangle-free until you get a chance to ball it up. (Also, skeined yarn looks pretty, so if you’re giving your yarn away as a gift, this might be the way to go.)
Step 1: Loop the yarn around your hands.Step 2: Twist, twist, twist. Twist until you can’t any more.
Step 3: Fold the yarn in half. I either hold the middle of the yarn in my mouth or under my chin. Don’t gag. Ew.
Step 4: Tuck one end of the skein through loop at the other end.
Step 5: Futz with the skein to even out the twists.
Before we get started dying your yarn, we need it in a skein. A skein of yarn is basically a nice neat loop of yarn held together in a couple spots by scrap yarn. It’s good for dying , since it lets your dye get to every little bit of your yarn, but prevents your yarn from becoming the world’s biggest knot.
Sometimes you can buy yarn already in a skein (usually from knitting specialty stores), but usually it comes in balls when you buy it from JoAnn’s or something like that. Putting it in a skein is a bit of a pain, but it’s worth it.
So, how’s it done?
First, wrap your yarn around something. I’m using the backs of two chairs sitting next to each other. You could use a really big book, or the hands of a very patient friend. Keep wrapping until you have it all wrapped up. (I’m actually splitting my ball of yarn in half, and making two even-ish skeins of wool. This way, I can dye them separately and have two different colors of yarn.) Tie the ends of your yarn together to keep everything neat.
Then, using scrap yarn or embroidery floss, add a couple ties around your skein. Hold the embroidery floss behind the yarn, while it’s still wrapped around the chair back (or whatever). Split the yarn in half with your thumb.
Take the bottom end of the floss, and loop it behind the middle of the floss, in between the two halves of the yarn.
Knot the ends of the floss together. Make sure the tie is secure, but loose around the yarn. If it’s too tight, you’ll end up with white spots in your dyed yarn. And no one wants that.
Add a couple more ties around the skein.
Slip the skein of yarn off the chair back, and you’re ready to start dying. (The yarn, that is. Don’t actually die. That would suck.)
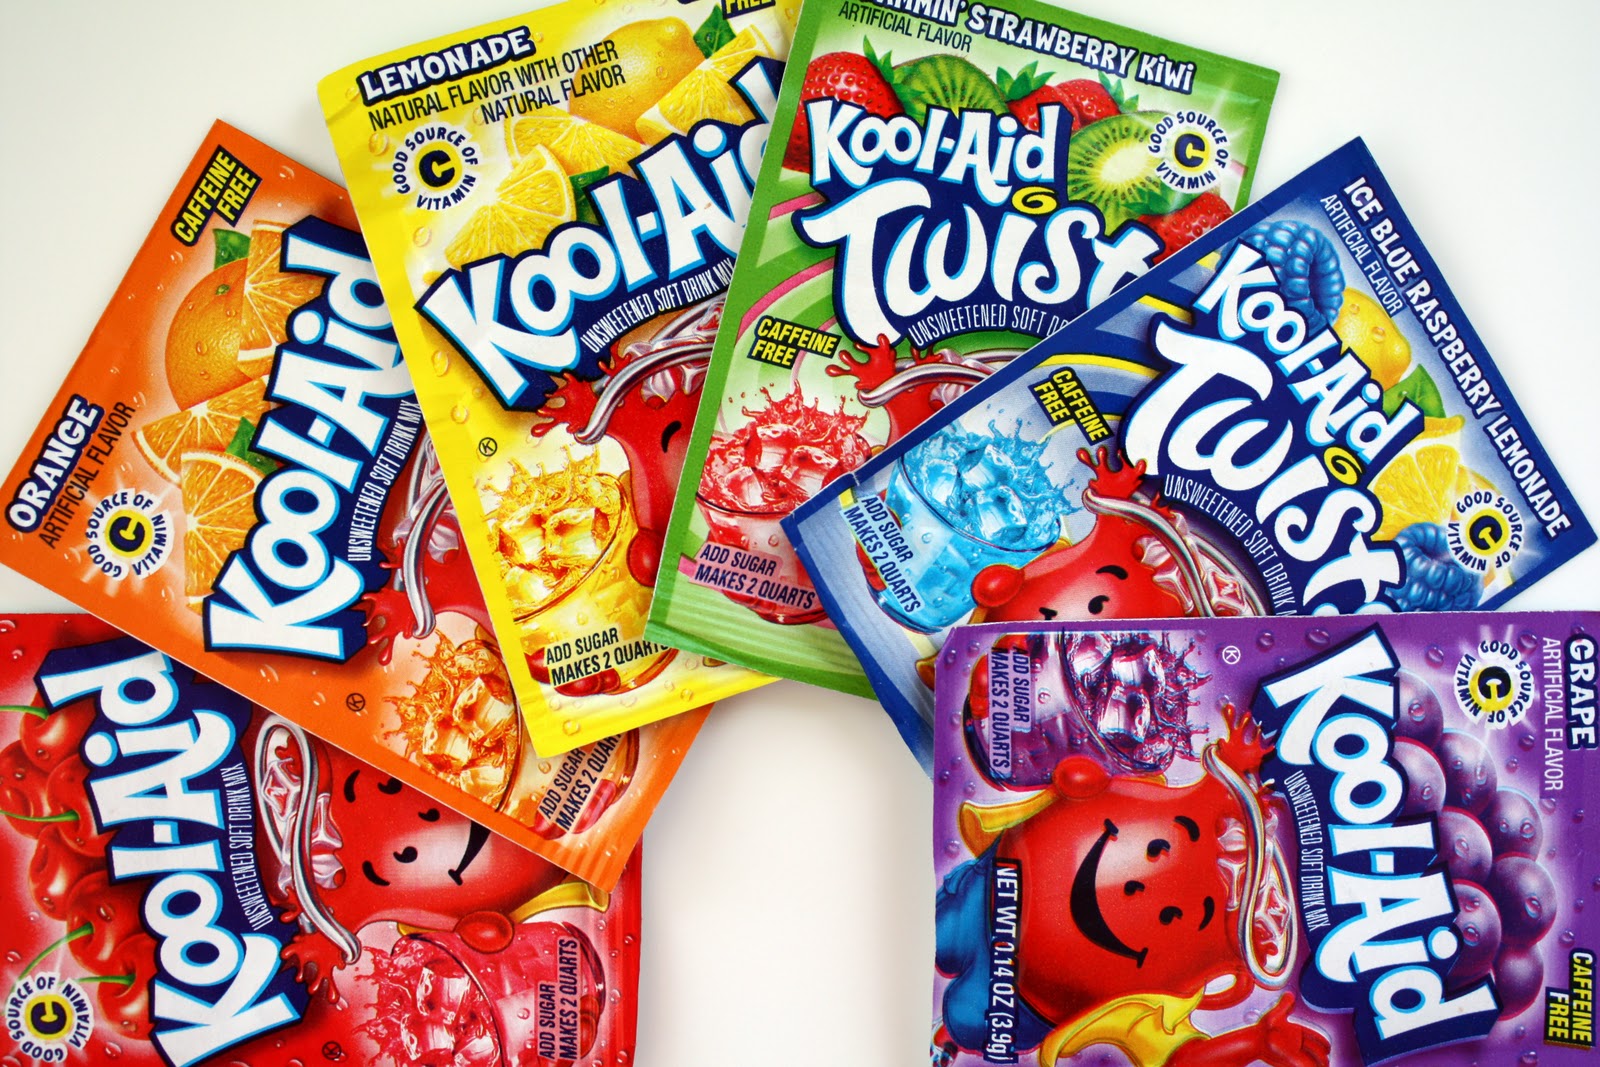
I’ve been getting requests to do a dying with food coloring tutorial for a while now (Hi Mom!), so let’s do it. Dying with Kool-Aid is fun and all, and leaves your knitwear smelling fruity fresh, but there is a very limited color selection with it. And, unless you’re six years old, you probably don’t want a “Blastin’ Berry Cherry” colored sweater.
Here’s what you need:
-Food Coloring. I like the gel concentrate stuff from Wilton. It’s super concentrated, so you can use just a little bit and still get really bright colors. And, it comes in approximately a million shades. I bought this box of 12 colors for about $10 (with a coupon from JoAnn’s), and it’ll last me years. You can use the regular liquid colors from the grocery store, but you’ll have to use a lot more volume to get brightly colored yarn.
-Vinegar. To set the color into your yarn, you have to add an acid, and plain white vinegar works best. It’s dirt cheap, and you probably have a bottle of it in the back of your cupboard. (We didn’t use vinegar when dying with Kool-Aid, since it already has citric acid added to the powder, so you don’t have to add any more. Science!)
-Yarn. Just like with the Kool-Aid, this kind of dying only works with animal fibers (wool, alpaca, angora, silk). It has to do with the protein makeup of the yarn, but I don’t know all the science behind it. I just know that if you try it with acrylic or cotton, it’ll never take up the color. I’m using Paton’s Classic Worsted. It’s a 100% wool yarn, and it’s easy to find at your local Jo-Ann’s/Michael’s/Hobby Lobby.
-Water. Duh. From the tap is fine.
-A non-reactive vessel. (Just like with dying with Kool-Aid) Stainless steel, enamel, glass or non-stick/Teflon work well.
Collect up your gear, and meet me back here next week when I’ll show you how to dye semi-solid and variegated yarn. And (if the time management gods smile upon me), I’ll give you a pattern to use your newly dyed yarn!
Dying is super fun and rewarding (and surprisingly easy). It’s a great way to play with yarn when it’s too hot to sit around with a big pile of sweater on your lap.
There are a million ways to dye yarn, but this is the easiest one I’ve found. You probably have everything that you need in your kitchen right now. I’ll do further yarn dying posts about more complicated dying processes later, but this should get you started (and you end up with a whole bunch of fruity-smelling yarn).
Please note, this will only work with wool or animal fibers (cashmere, angora, silk, etc.). Dying other fibers (cotton, linen, anything synthetic etc.) takes a lot more effort as well as some fairly toxic chemicals, so I don’t bother with that. But doing this is super easy and fun. It’s a little like making magic potions, and you can do it with kids, if you’ve got some around that want to help.
You’ll only need a couple things to dye your wool:
Wool. Duh. You can use a wool blend, but know that the wool fibers and the acrylic (or whatever) fibers will take up the dye differently, which can give you a heathered look. Superwash wool works well, and you won’t have to worry about your yarn getting felted in the process. You can dye colored yarn or white yarn, just know that if you start with dark yarn, you’ll never dye it so that it ends up lighter. If you’re trying to get bright or pastel colors, start with white.
Kool-Aid (in the color of your choice) I’m using “Ice Blue Raspberry Lemonade”. Get the kind in packets, not the kind in the big tubs with sugar pre-added.
Water-From the tap. Nothing fancy.
A non-reactive pot in which to do your dying. A stainless steel, enamel or non-stick pot works well if you’re trying to get a solid (or mostly solid) color. Copper or cast iron pots can cause weirdness when you try to dye in them.
So how do you do it?
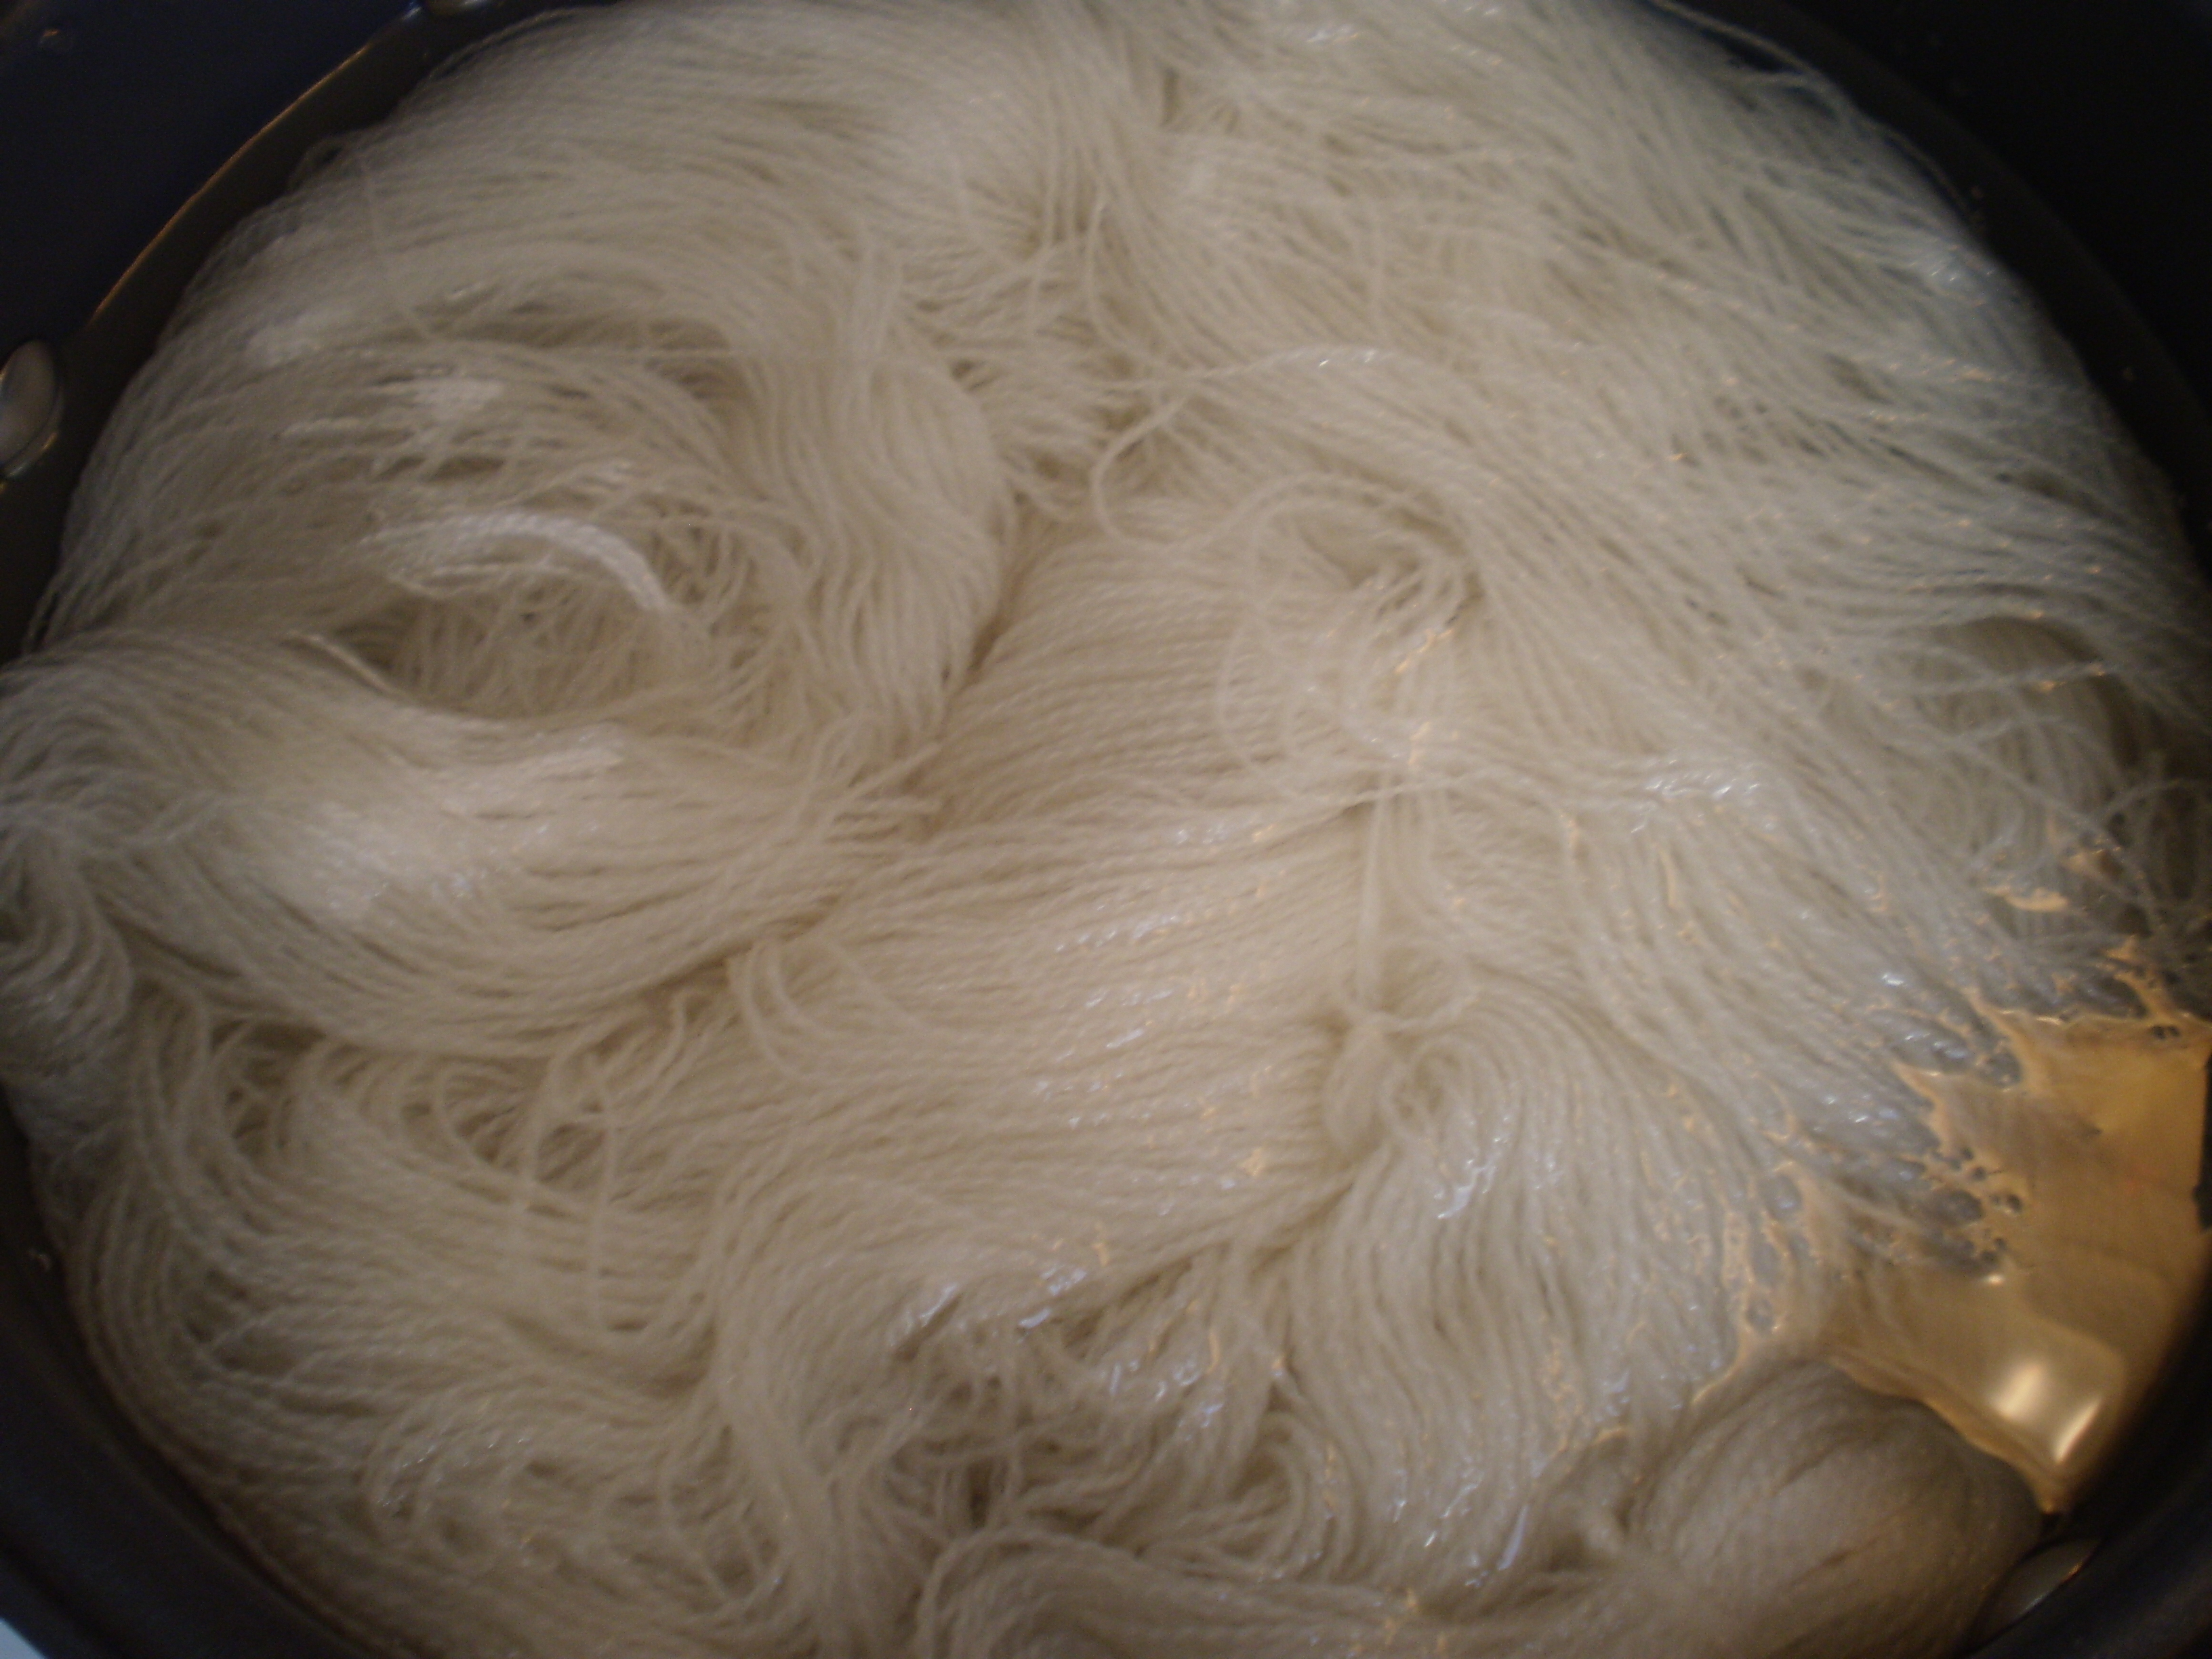
Soak your yarn in warm water. Make sure it’s nice and wet through. If the yarn is wet to start with, it will take up color more evenly.
Mix up your dye. Just add a packet or two (or three or four) of Kool-Aid to a pot full of water. It’s better to err on the too light side than the too dark side, since you can always add more color, but you can’t remove it. I’m going for a pastel blue color, so I’m going with just one packet of color. Heat up your dye until you just barely start to see little bubbles. Don’t actually boil the water, but get it close.
When your dye is steaming hot, and just about to start simmering, turn the heat way down and throw in your yarn. Submerge all your yarn at once, and poke it around a little bit, so that each strand of yarn gets plenty of exposure to the dye.
Set the color. Keep your dyepot nice and hot, until the color transfers from the dye water to the yarn. You know you’re done when the water is no longer colored. Adjust the temperature to make sure that the dye stays nice and hot, but make sure not to burn or boil the yarn. (Most Kool-Aid flavors will end up turning totally clear. I picked one of their lemonade flavors, which they put something in to turn the water cloudy. You’ll never get lemonade colors totally clear, but as long as the water turns white instead of blue (or yellow or whatever), you’re good to go.)
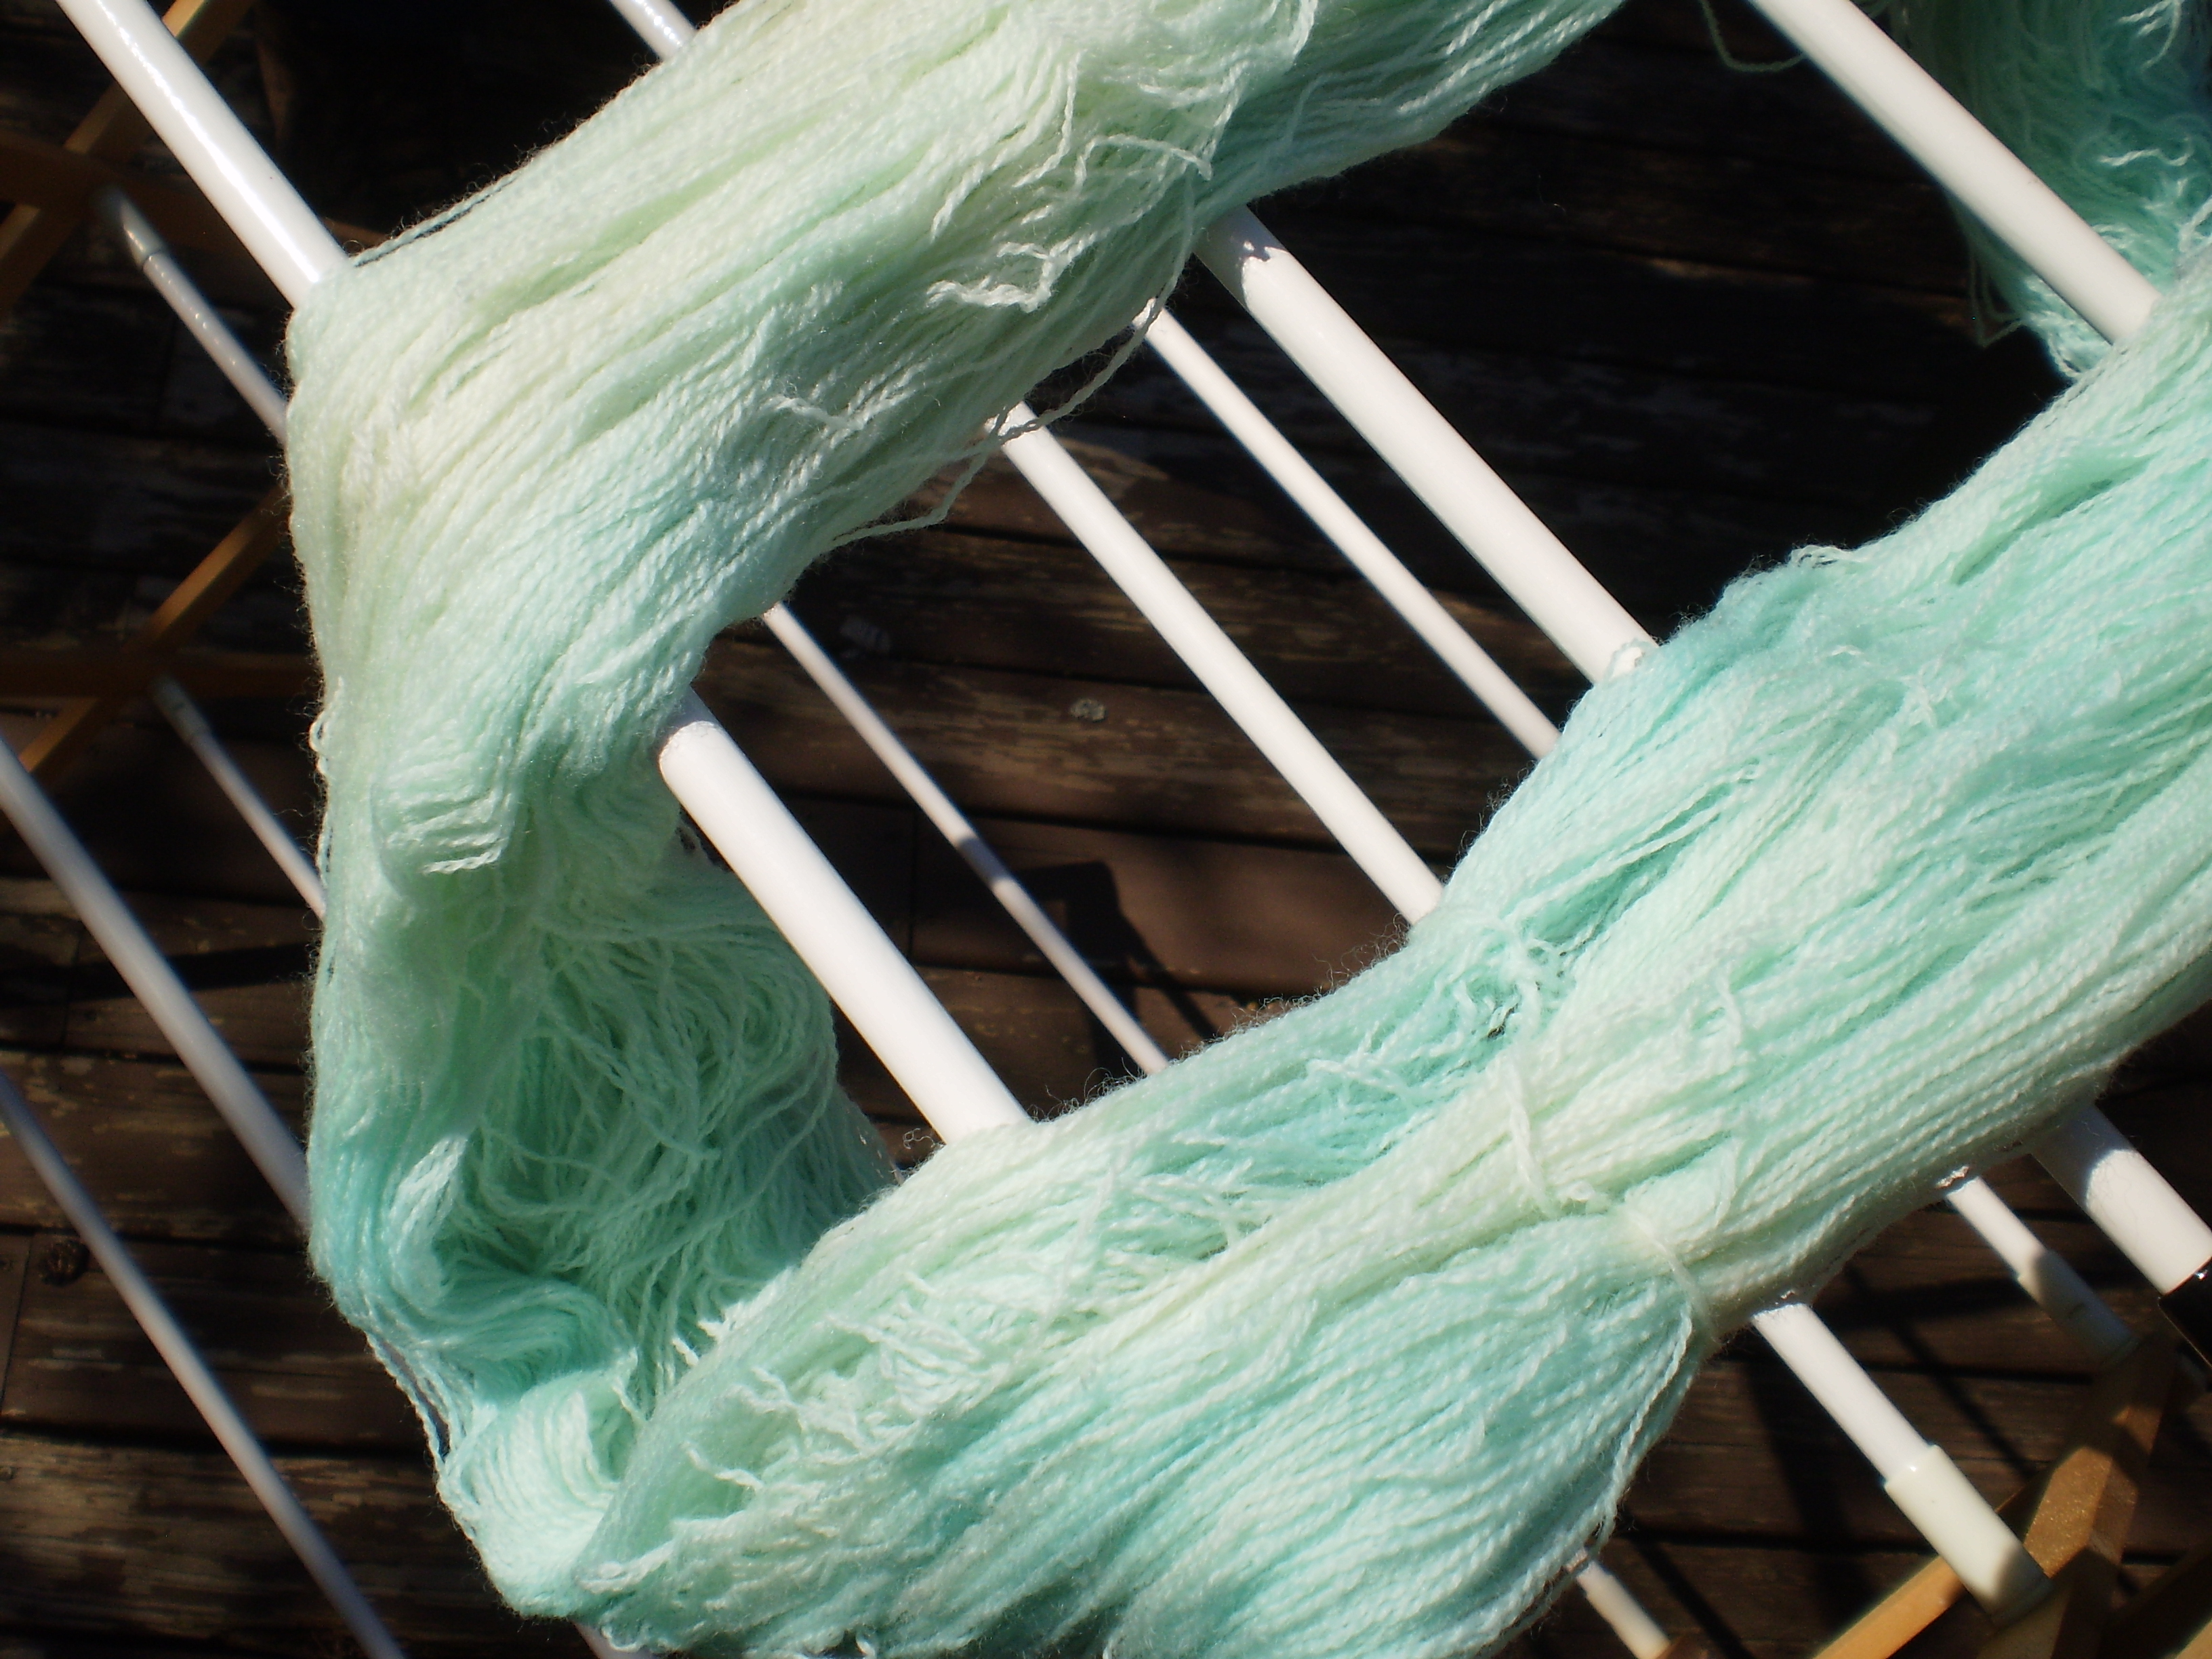
Carefully (without burning yourself) move the yarn to a colander, and rinse the yarn under hot water from the tap. Slowly lower the temperature of the rinse water until you can touch it without burning yourself. Don’t immediately shock the yarn with cold water, because it can damage the yarn and cause felting. Once you can touch the yarn without screaming in pain, keep rinsing out the yarn, gently flipping and turning it until no more color rinses out of the yarn.
If you are happy with your color, hang up the yarn to dry. If you want to add more color (this is called over-dying) go through the steps again with more dye.
Knit something fabulous with your new hand-dyed yarn.