Tag Archives: how-to

Tutorial: Reading Charts- Repeats

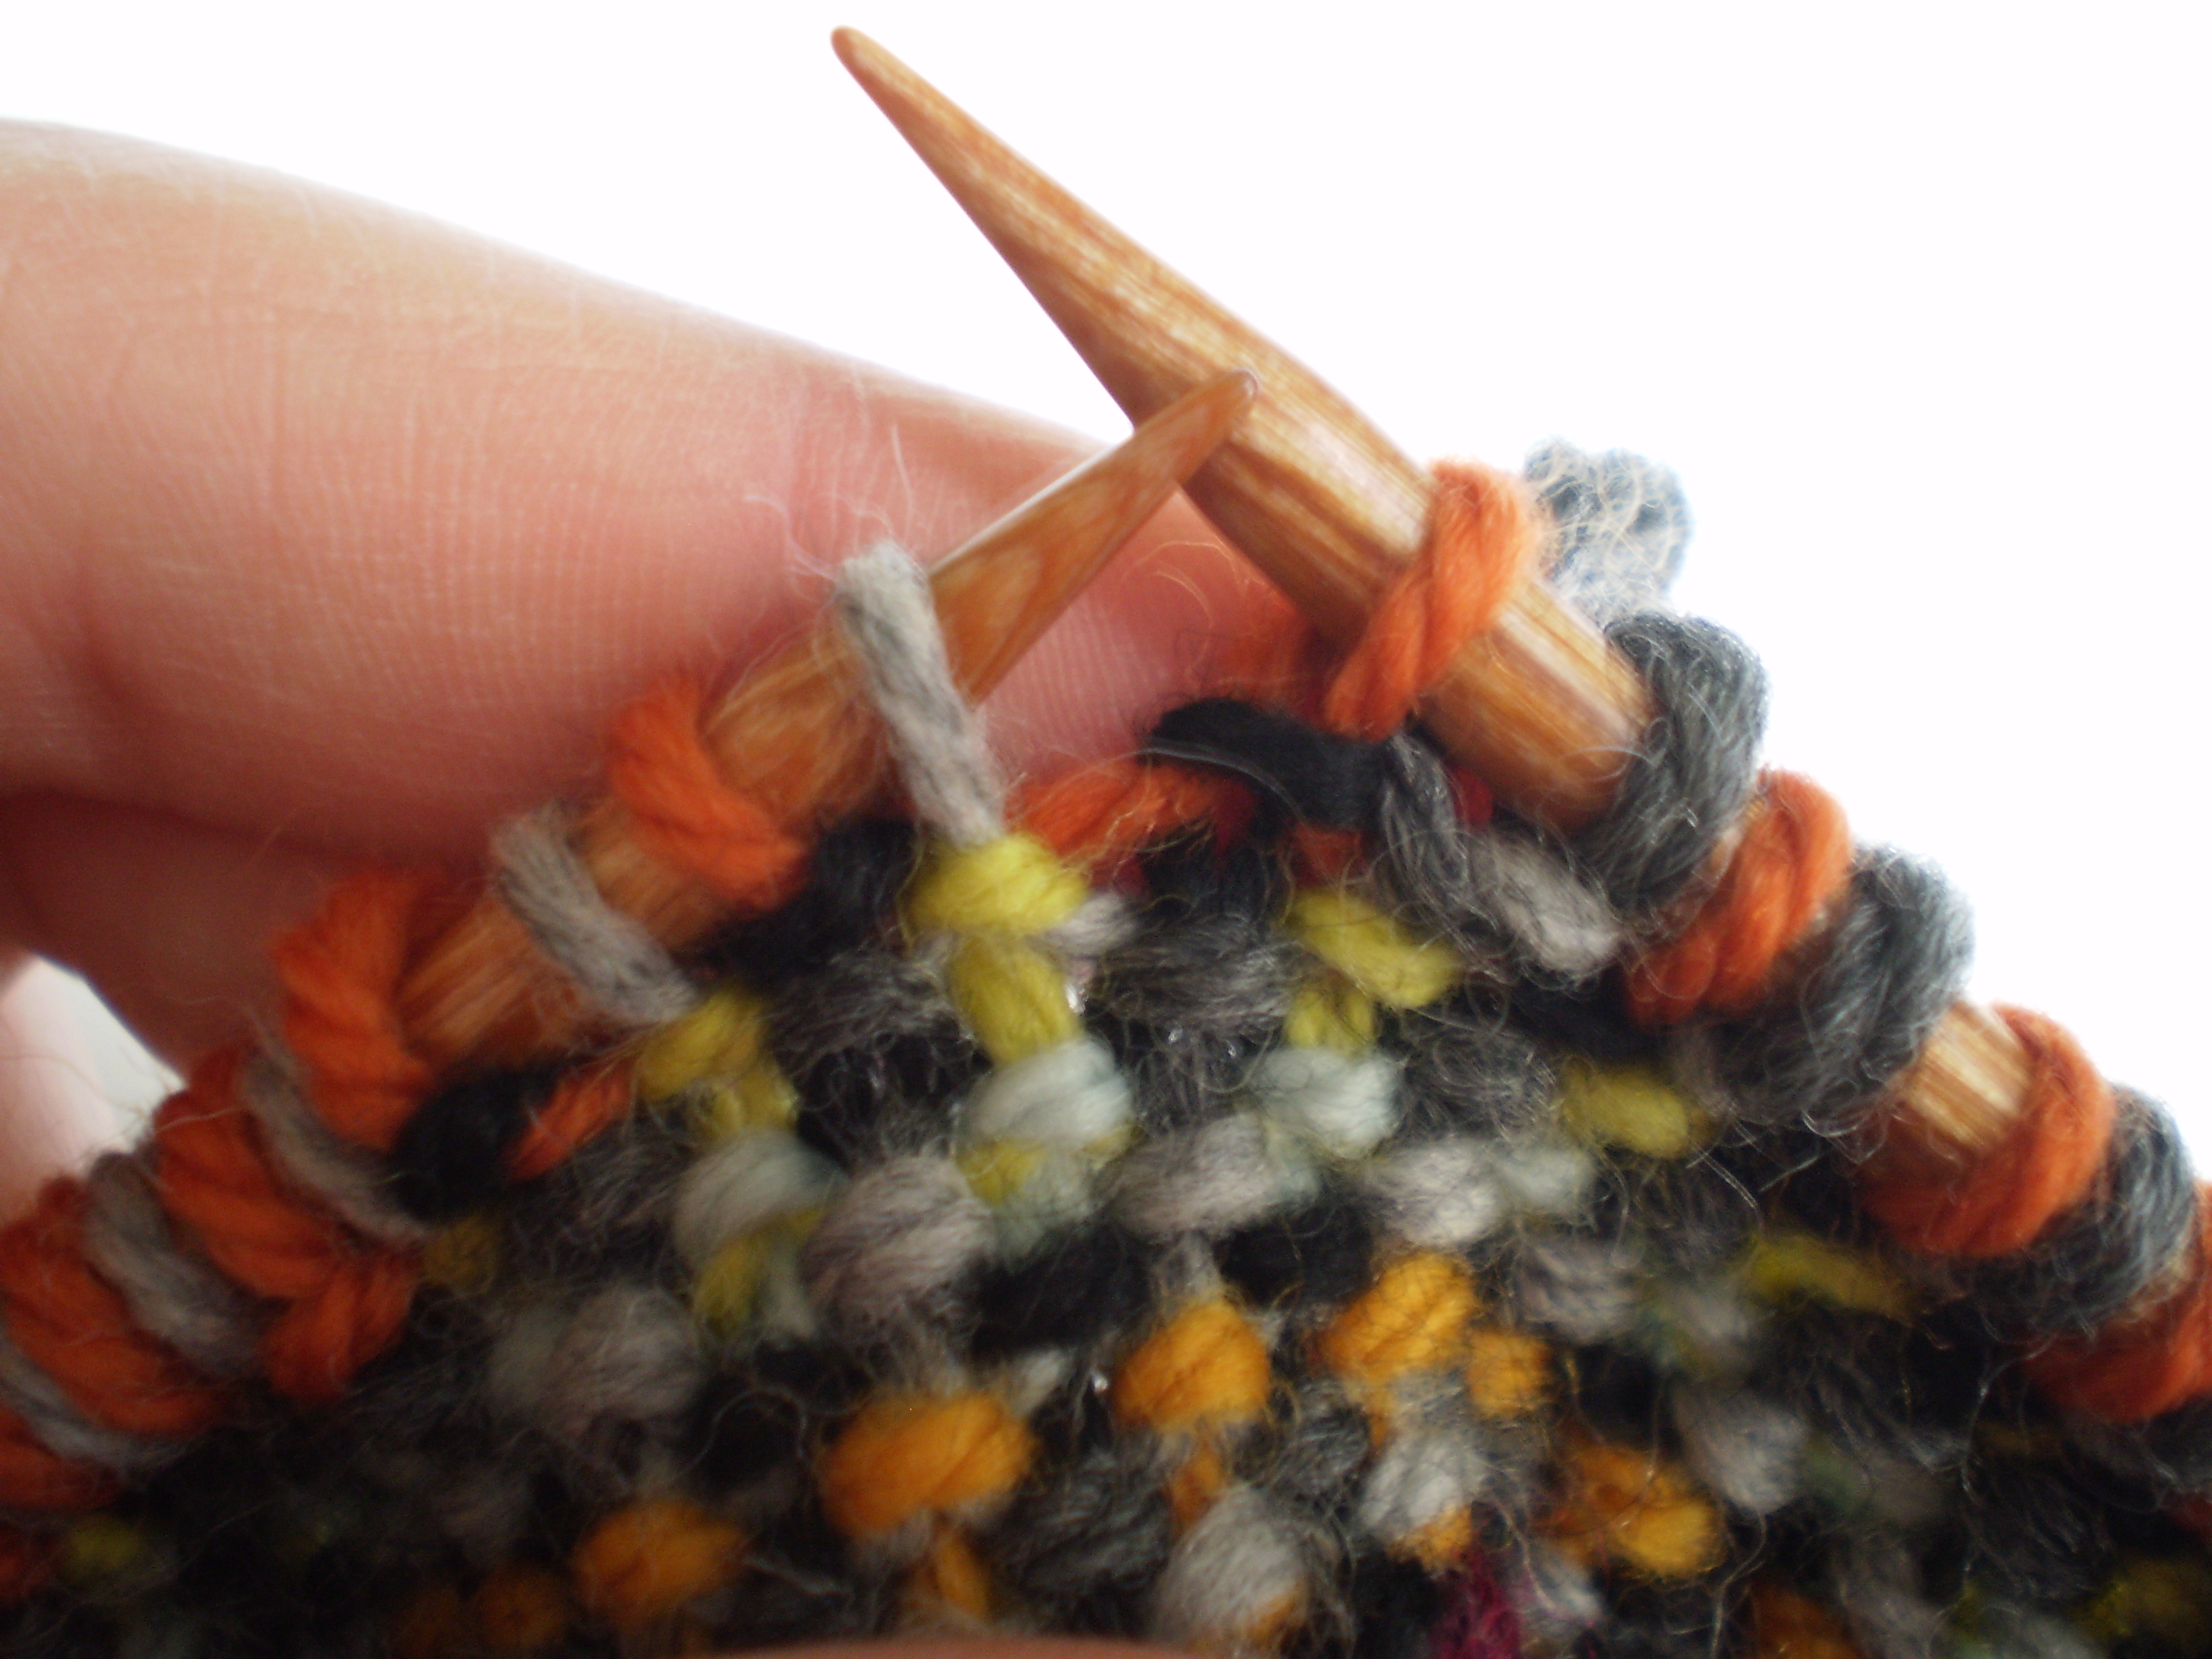
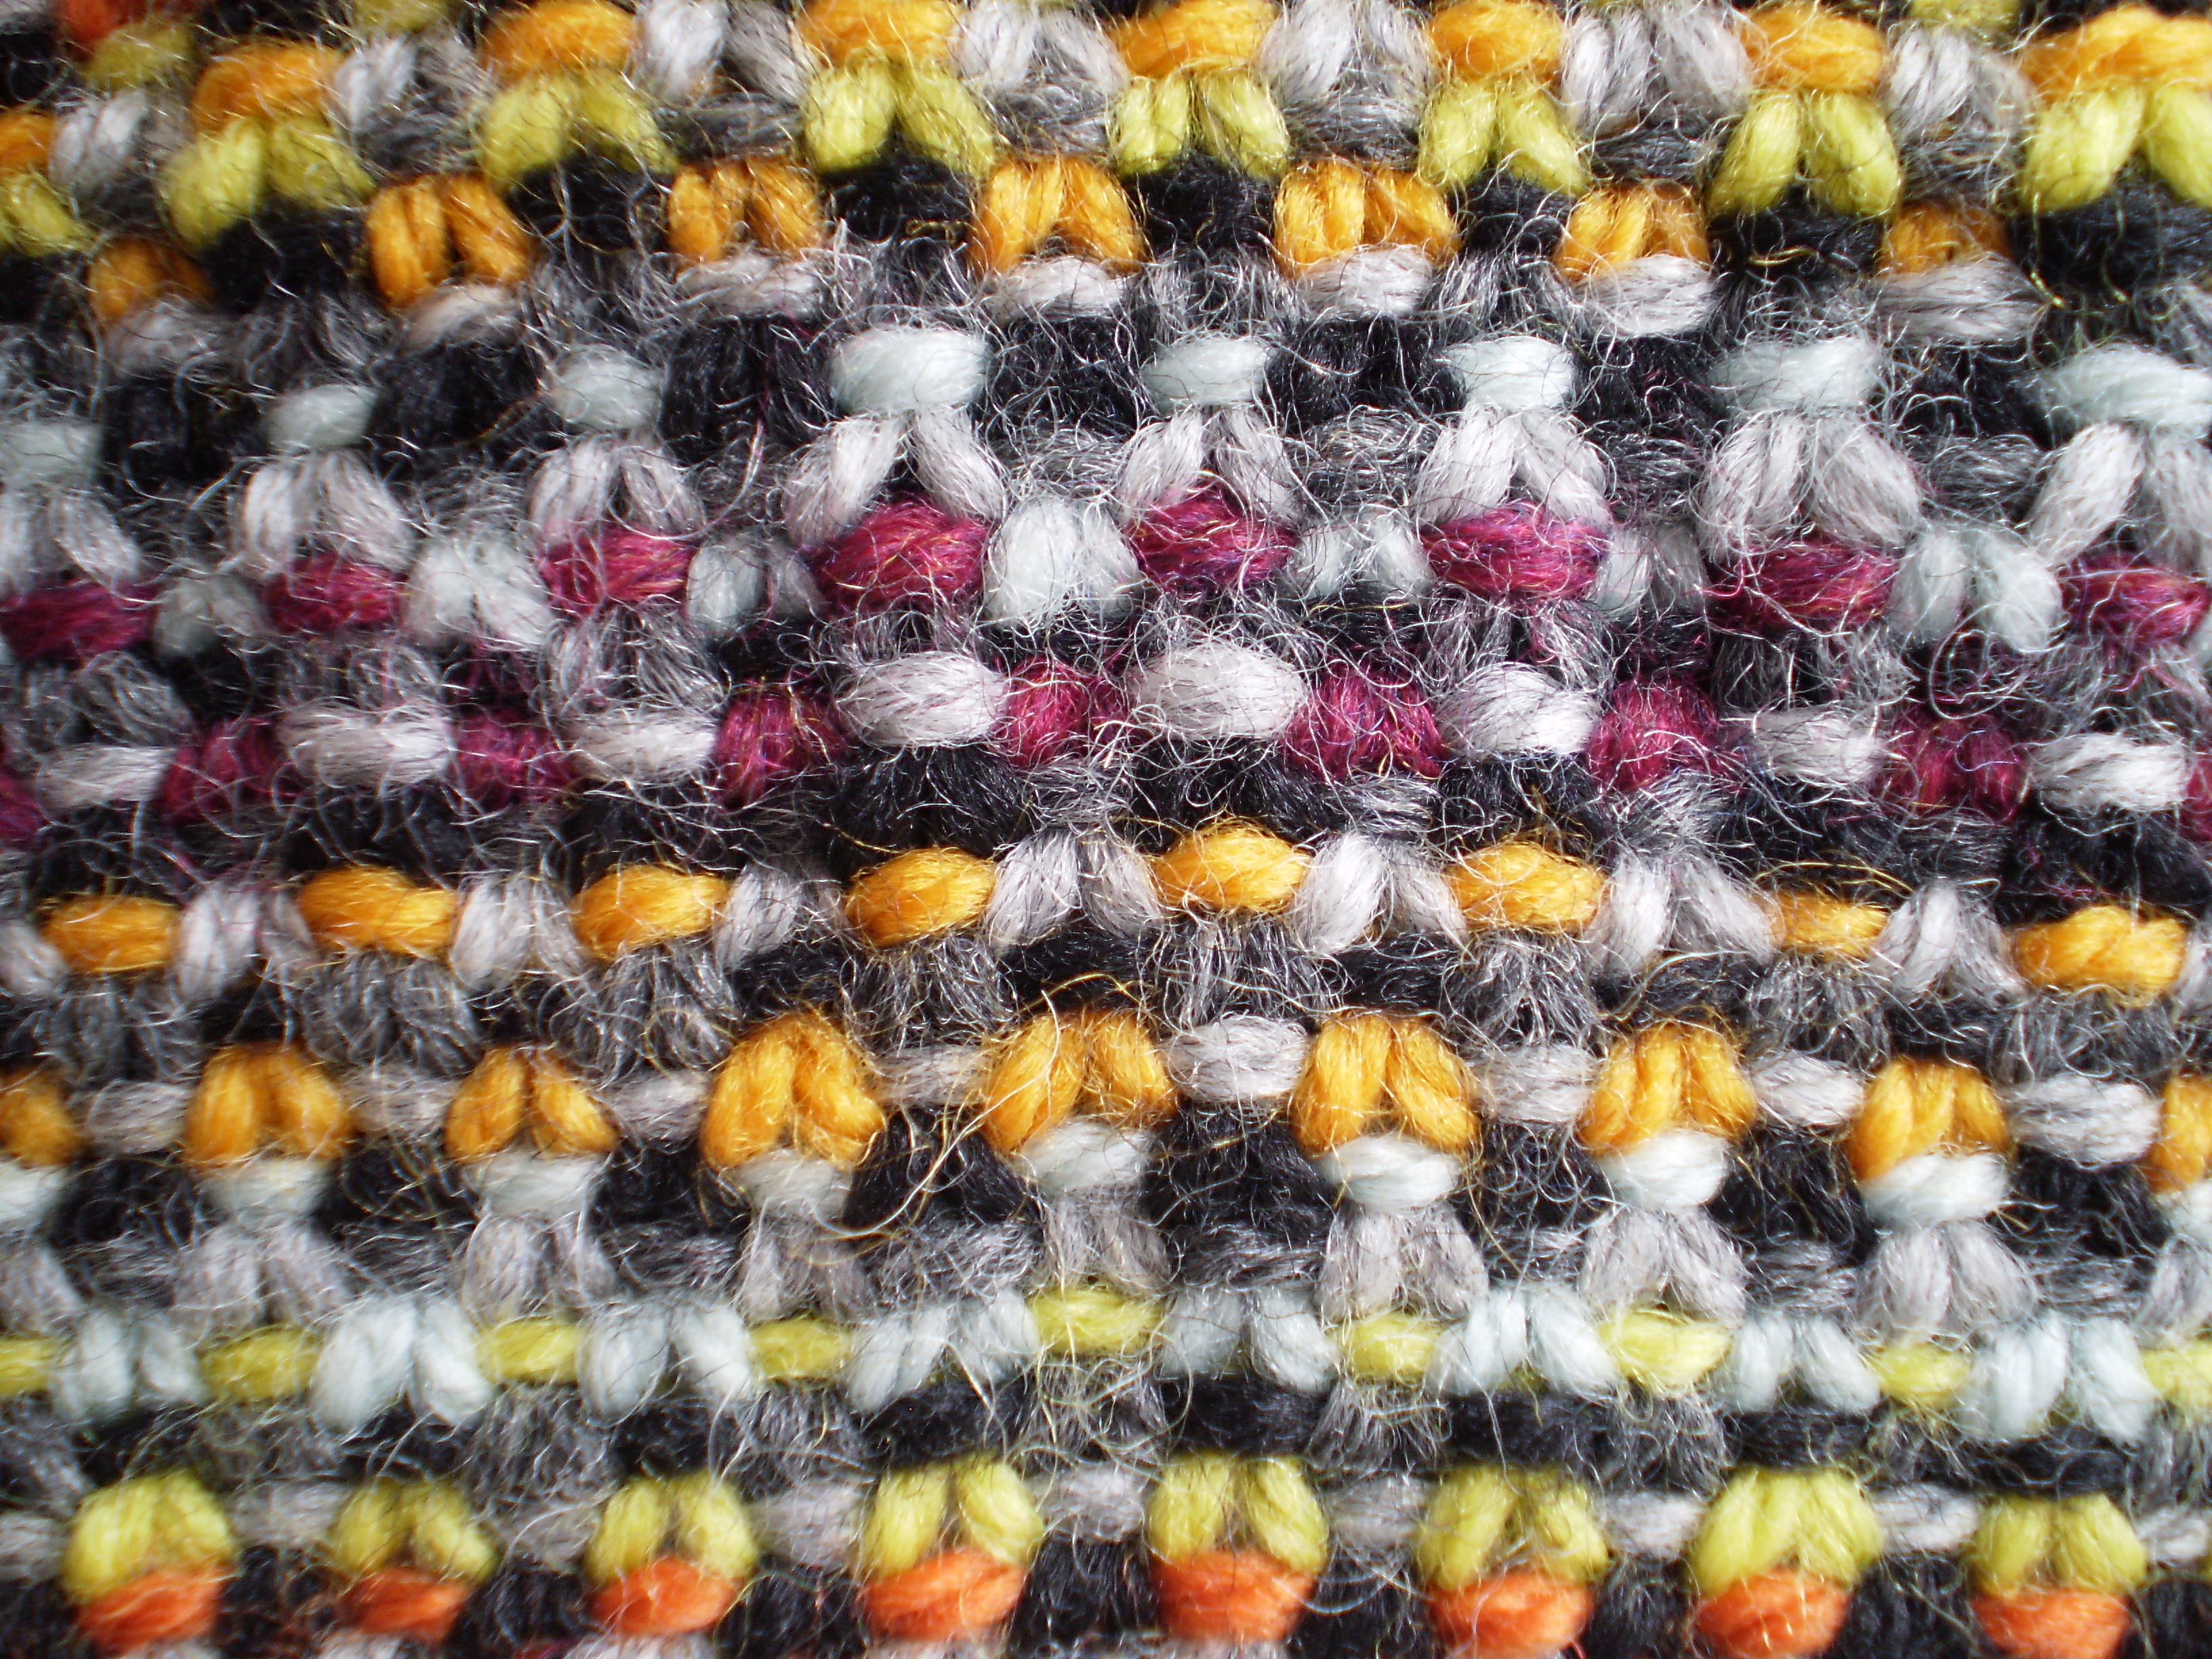
Now we all are experts in reading a chart while knitting back and forth, and we’re experts in using charts in the round.  But charts aren’t always that simple.  Sometimes your project has more stitches in a row than there are on your chart.  You can imagine that this could happen with projects that have a wide, repeating pattern (like a dish cloth, a blanket, or sweater).

If you have to repeat the whole chart, that’s easy enough- knit across the chart row, then work it again (and again), until you get to the end of your row of your knitting.  Simple.

But sometimes you have to repeat only some of the stitches in a row.  When you need to do that, your chart will look like this:laura-chart-c-repeats
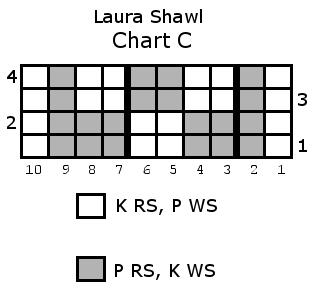
Do you see the change?  (It’s subtle, so I’ll help you.)laura-chart-c-repeats-highlight
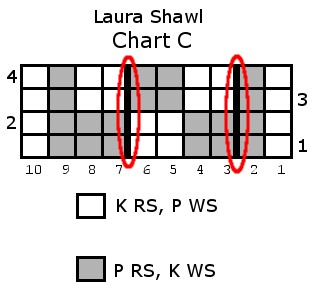
See those highlighted vertical lines?  Those are your repeat marks.  OK, honestly, I’m not sure what they’re technically called, but they mark out the stitches that you have to repeat.

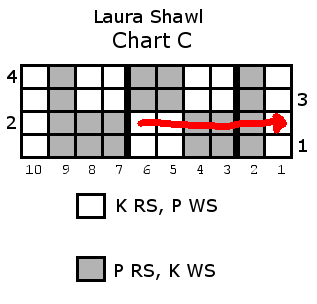
So, let’s make an imaginary project- a scarf maybe?  We’ll cast on 18 sts, and use this chart, repeating the 4 sts in-between the repeat marks 3 times.

Start at row 1 st 1, and knit straight through to st 6 (just before the second repeat mark).  (You’ve worked 6 sts)

laura-chart-c-repeats-order-1Then, go back to st 3 (just after the first repeat mark), and work back through st 6.  (10 sts total)laura-chart-c-repeats-order-2Then, you’ll repeat sts 3-6 once more, and continue on to the end of the row.  (18 sts total)laura-chart-c-repeats-order-3On the next row you do the same thing, but reverse the way you read the chart (because we’re pretending to knit back and forth).

So, start at row 2, st 10, and work across to st 3 (just before the second repeat mark).  (8 sts)laura-chart-c-repeats-order-4
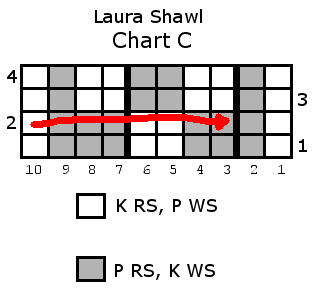
Then repeat the middle 4 sts.  (12 sts)laura-chart-c-repeats-order-5And finish by working sts 6-1 once more.  (18 sts)

laura-chart-c-repeats-order-6Make sense?  Of course, for a wider project, you might be required to repeat the middle section more times, but the concept is the same.  Just keep going across the row, looping back as needed when you get to a repeat mark.  Simple!

Any more questions?  Let me know if anything else is confusing to you, I’m happy to help!

Tutorial: Reading a Chart

I’ve had a rash of people emailing me lately who don’t know how to read a chart- and that blows my mind!  Not only are charts the best way (in my mind) to understand a complicated pattern, but I think they’re head-and-shoulders easier to read than a 100% written-out pattern.  So, without further ado- let’s look at a chart.

laura-chart-c-plainThis is a little chart from my new pattern, the Laura Shawl!  (It’s the narrow, textured stripe, in-between the big cables.)52162220_21Let’s look at the main parts of this chart.  At the top, you’ll see the chart name- this is important if you’re working a project that uses several charts.  For example, the Laura Shawl uses 5 separate charts, this is the third (C) one.  And, at the bottom (or sometimes to the side), you’ll find a key which explains what the symbols mean (I’ll explain that in more detail later).laura-chart-c-title-and-keyThen, along the left and right sides, you’ll find row numbers.  And, on the bottom, you’ll see the stitch numbers.laura-chart-c-rows-and-stsYou’ll notice that the row numbers go from bottom to top (ie.  1 is on the bottom).  This is because you’re going to knit from the bottom to the top.  That way, when you finish knitting the chart, you’ll be able to hold up your knitting next to the chart and you should see something that looks similar to the chart (in other words, it shouldn’t be upside-down or mirrored).laura-chart-c-knitting-directionThis chart is meant to be knit flat, and I can tell that because the row numbers alternate sides.  (1 is on the right, 2 is on the left, etc.)  laura-chart-c-rowsThe beginning of your row is marked by the row number.  So, Row 1 starts at the right and goes to the left.  Row 2 starts at the left and goes right.  (Just like your knitting!)laura-chart-c-row-directionNow you’ve got your bearings, it’s time to start knitting.  But what do all those little squares mean?  Each square is a stitch, and the symbol (or in this case, the color of the square) tells you how to work that square.  Do you see down in the key?  Each symbol has instructions, which include what to do on the Right Side and the Wrong side.  On odd-numbered rows (unless your pattern says otherwise), you’ll work the RS instructions.  So, for Row 1, you’ll K1, P3, K2, P3, K1.laura-chart-c-rsThen, on the even rows, you’ll use the Wrong Side instructions.  So, Row 2, you’ll P1, K3, P2, K3, P1.laura-chart-c-wsAnd, that’s basically it!  See?  It’s not so bad!  You can totally use a chart!

Next week I’ll walk you through knitting in the round using a chart (Spoiler- it’s even easier!), and how to work charted repeats.

Do you like using charts, or do you prefer written-out patterns?  Why?

Tutorial: Three-Needle Bind Off

I’m still jazzed about the three-needle bind off I did on my cabled sweater this week.  It’s just such a neat (in both senses of the word) technique that doesn’t get used enough.  It’s a great way to join shoulders on a pieced sweater, or pieces of a scarf, or squares of an afghan.  Is it kind of weird that I want to design something that uses the three-needle bind off, just so I can do it some more?  Possibly.

Anyhoo, if you haven’t done it before, it might feel a bit tricky- after all, you have to wrangle two pieces of knitting and three needles.  But, trust me!  It’s super simple.OLYMPUS DIGITAL CAMERAFirst, hold your knitting with good sides together in your left hand.OLYMPUS DIGITAL CAMERAThen, insert your third needle (in your right hand) into the first stitch of each piece of knitting.  OLYMPUS DIGITAL CAMERAWrap your yarn, and pull it through, dropping the two stitches off the left needles, just like you’re doing a k2tog.OLYMPUS DIGITAL CAMERAThen, do it again. (Work a K2tog using one stitch from each needle.)OLYMPUS DIGITAL CAMERAYou’ll have two stitches on your right needle.  So, now it’s time to do a plain ‘ol bind off, pulling the first stitch over the second.

OLYMPUS DIGITAL CAMERAJust keep going!  Work a K2tog using one stitch from each left hand needle, then pull the old stitch over the new.

When you’re finished, you’ll end up with a lovely neat row of bound-off stitches.  OLYMPUS DIGITAL CAMERAAnd, when you open up the piece and look at the right side- Ooh!  So pretty!OLYMPUS DIGITAL CAMERAHave you ever used a three-needle bind off?

Blocking: The Basics

OK, so if you’ve blocked before, this’ll be a refresher for you.  If you haven’t tried wet blocking before, you’re in for some excitement (but maybe it’s just me that’s excited about blocking…).

I’m using a little bitty swatch for this example, but you can use this technique for just about any shape for basic blocking.  This swatch is a little piece of stockinette.  Stockinette is super curly when it’s unblocked, so I definitely need to block it.OLYMPUS DIGITAL CAMERAThis is a tiny little project, so I’m just using a little cereal bowl to soak my knitting.  I’ve filled it with warm (think bathwater) water, and I let the swatch hang out for a bit (about 20 minutes) or until its completely soaked through.  If I’m in a hurry, I’ll squeeze the knitting gently to get all the air out and really soak the fibers.

OLYMPUS DIGITAL CAMERANext, I’ll get out a clean towel and roll up my wet knitting, squeezing it to get out the extra water.  You want your knitting to be damp, but not dripping.  Sometimes, I’ll even step on the rolled-up knitting (like squishing grapes for wine), especially if it’s a really big project.OLYMPUS DIGITAL CAMERAOnce most of the water is squeezed out, I’ll break out my foam blocks (or your carpet, if you have carpet) and lay a new, dry, clean towel on top.

OLYMPUS DIGITAL CAMERAThen, I’ll take the damp knitting and pin out the corners to the dimensions I want.  I want this square to be nice and, well, square.  So I’ll start here.  The sides will pull in at first, but that’s OK.  We’ll fix that in the next steps.

OLYMPUS DIGITAL CAMERANext, I’ll grab more pins and tack down the center points of each side. OLYMPUS DIGITAL CAMERAAnd then I’ll add another pin in-between each existing pin.  Since this swatch is so small, I’ll stop here.  If I was blocking something larger (like a scarf), I’d keep adding pins until I had surrounded the whole item and gotten rid of the little swoopy edges.

OLYMPUS DIGITAL CAMERAYou’ve finished the hard part! (If you can even call it hard.)  Let your knitting dry completely (if you’re in a hurry, point a fan at it or put it in a sunny window), and remove the pins.

And, voilà la! A perfectly finished project! (Or at least an almost perfectly finished project.)OLYMPUS DIGITAL CAMERANext time, we’ll talk about blocking something a little more complicated- sweaters!

More Linen Stitch!

I’m kind of in love with the linen stitch.  It’s haunting my dreams and dancing through my head.  I may have a problem.  It’s so fiddly and such slow going, but I absolutely love how it looks.

And, even though it takes a while to work up, it’s a really simple pattern-so easy to memorize!

Cast on an even number of stitches and follow these 2 rows:

RS rows: (K1, bring yarn to front, slip 1, bring yarn to back) repeat to end.

WS rows: (P1, bring yarn to back , slip 1, bring yarn to front) repeat to end.

Easy!  Let’s do it together.

On the right side, start with the yarn in back.OLYMPUS DIGITAL CAMERAKnit 1OLYMPUS DIGITAL CAMERABring the yarn to the front, between your two needles.OLYMPUS DIGITAL CAMERASlip 1 stitch from the left needle to the right.OLYMPUS DIGITAL CAMERABring the yarn back to the back, and do the whole thing again (and again and again).OLYMPUS DIGITAL CAMERAOnce you finish your row, flip your knitting to work back and forth.  Start this row with your yarn in front.OLYMPUS DIGITAL CAMERAPurl 1.OLYMPUS DIGITAL CAMERABring the yarn back, between your needles.OLYMPUS DIGITAL CAMERASlip 1 stitch.OLYMPUS DIGITAL CAMERABring the yarn in front again, and keep repeating until you reach the end.OLYMPUS DIGITAL CAMERAAfter a while, your right side will start to look like this (which people say looks like woven fabric.  I don’t know if I agree with that, but it does look cool.)

OLYMPUS DIGITAL CAMERAAnd your wrong side will look all cool and bumpy and textured.  I almost like it more than the right side.

OLYMPUS DIGITAL CAMERAI’ve made these samples using a different, random color each row, but the linen stitch looks great in one color, knit with variegated yarn or using two or three repeating colors.  The linen stitch is a great way to play with color mixing!

Have you ever used the linen stitch before?  What did you make with it?

Casting On: Picking Up Stitches

I’m going to say something that might be controversial (or it might not be):  Picking up stitches is one of my favorite ways of casting on.

I know, radical stuff.  Let me explain.

If “casting on” is essentially a way of beginning a knitting project, making the initial row of stitches, then why can’t we count picking up stitches as a way of casting on?

I  think it’s pretty fun, easy, and results in a more polished finished product than knitting two separate pieces and sewing them together later.

Of course picking up stitches isn’t an any-time cast on.  You have to have an already-finished piece of knitting from which to pick up the stitches (obviously).  But I love using it to add button bands on sweaters, turning the heel on socks, and it’s essential for modular knitting projects (like this blanket).

So how do you do it?

Naturally, you start with a piece of knitting to form the base of your project.  I’m using a little swatch of stockinet, but you can pick up stitches off of any piece of knitting.  On this swatch, I slipped the first stitch of every row.  It leaves a nice, smooth edge that makes picking up stitches that much easier.  But, if I need to pick up a lot of stitches, I’ll knit all edge stitches.

OLYMPUS DIGITAL CAMERAThen, I’ll poke my needle through the spot where I want my first picked-up stitch to live.  See how I go through both “legs” of the stitch?  If you only go through one leg, you end up with a flimsy piece of knitting. No bueno.

OLYMPUS DIGITAL CAMERAWrap your yarn around the needle, just like every other knit stitch you’ve ever done.

OLYMPUS DIGITAL CAMERAAnd pull the new stitch through.  You’ve picked up one stitch!

OLYMPUS DIGITAL CAMERAKeep picking up stitches until you have the number that your pattern requires.  See how nice and neat the picked-up stitches look?

OLYMPUS DIGITAL CAMERAThey even look nice and neat from the back.  See that horizontal row of red V’s?  Those are the edge stitches that we picked up.  Prettier than a sewn seam!

OLYMPUS DIGITAL CAMERAThen, keep on knitting your project.  Your new knitting will grow off the side of your old knitting and be magical and wonderful!

OLYMPUS DIGITAL CAMERA

Tutorial: Shawl Pins

I’ve got shawls on the brain. When I wear a shawl, especially if it’s a particularly oddly-shaped one, I like to break out a shawl pin.  You can find super fancy ones, but basically a shawl pin is a stick of some kind that you use to hold knitwear in place (I’ve been known to use pencils, chopsticks and knitting needles in a pinch). There are as many kinds of shawl pins as there are shawls, all gorgeous, most expensive.

So, in the name of DIY Cheapskate-y-ness, let’s make some functional, fashionable, and simple shawl pins.  An accessory for your accessory… what’s not to love?

Here’s what you’ll need:

  • A ¼-inch dowel
  • Small hacksaw (or other dowel-cutting implement)
  • Pencil sharpener
  • Sandpaper (I used 120-grit)
  • Acrylic paint
  • Paintbrush

OLYMPUS DIGITAL CAMERAStart by cutting your dowel into pieces. I made my pins about 5 inches long, but you could go longer or shorter, depending on what you like.

OLYMPUS DIGITAL CAMERAThen, sharpen one end of each pin with the pencil sharpener.

OLYMPUS DIGITAL CAMERAGrab a piece of sand paper and sand your shawl pin until it’s nice and smooth (get rid of anything that could catch on your shawl and make a hole. No bueno). Sand the point down a little bit so that it isn’t dangerously pointy, and don’t forget to smooth out any corners on the other end, too.

OLYMPUS DIGITAL CAMERABrush off any sawdust, and break out the acrylic paints. I like how they look when they’re mostly wood with just a pop of color on the end, but feel free to experiment. How about stripes? Polka dots? Let the paint dry, and you’re ready to go.

OLYMPUS DIGITAL CAMERAGrab a shawl (or scarf, or cardigan) and pin away.

OLYMPUS DIGITAL CAMERA

I’m a Baller: Part 2

Two weeks ago, I talked about how to roll a ball of yarn the traditional way.  A regular old ball of yarn is plenty useful, but sometimes they can be a pain.  You could be working somewhere with a less-than-sanitary floor (at a bus stop), or somewhere where going after a runaway ball of yarn would be difficult (on an airplane), or perhaps an ill fate would befall your yarn if it left your vicinity (maybe you have a vicious house cat or sticky toddler?)

A traditionally wound ball of yarn can get itself rolling (and unraveling).  But, a center-pull ball doesn’t have that problem, and it’s almost as easy to wind as a regular ball of yarn.

It starts exactly the same way.  Wind a good amount of yarn into a figure-8 around your thumb and forefinger.OLYMPUS DIGITAL CAMERARemove the figure-8 from your fingers and wind your yarn around one end of the figure-8 until it gets nice and puffy. OLYMPUS DIGITAL CAMERAKeep winding and turning around that initial puff of yarn, just like you did the regular ball of yarn.  Change directions every so often, and keep a finger or two caught in the loops to keep the yarn from getting too tight.   Just remember that the end of the figure-8 is poking out the top of the ball, like a strange little tuft of hair.

OLYMPUS DIGITAL CAMERAThen, when you’ve finished winding all the yarn, tuck in the end  so that it won’t unravel itself when you throw your ball in your knitting bag.  When you’re ready to start knitting, pull out the whole tuft from the top of the ball, and get to work!

OLYMPUS DIGITAL CAMERA

Don’t ever stop knitting: Joining part 2

As with everything in knitting (and I suppose, in life), having options is always a good thing.  Don’t like knitting English style?  Try continental.  Think wool is itchy?  Try acrylic.  Don’t care for aluminum needles?  Try wooden ones.

Last week we did a join where we held the new yarn double with the old yarn.  I have since learned that this is called an Overlap Join.  (Learning new things every day…)

Today, we’ll do another kind of join, sometimes called a Back Join, and sometimes called a Russian Join.  Whatever you call it, it’s pretty neat.

OLYMPUS DIGITAL CAMERAEssentially, you fold both the new and old yarns creating two 4-6 inch loops.  Then, hook the too loops around one another, like in the picture above.  And, holding the yarn carefully, you knit with the looped yarn.

OLYMPUS DIGITAL CAMERASee how you get a couple stitches of doubled-up old yarn, and a couple stitches of doubled-up new yarn?  When you knit a couple more rows, you’ll see nothing but a clean transition from old yarn to new yarn.

OLYMPUS DIGITAL CAMERAPros: Easy (although slightly trickier than the Overlap Join).  If you are careful to knit at least three stitches on either side of the join with the yarn held double, there’s no weaving-in of ends.   If you’re trying to do some sort of cool avant-garde color-work where you want crisp color definition, but don’t care exactly where the color changes go, this would be the join to use.

Cons: Doubled yarn is slightly thicker than single yarn (obviously), so if consistency is a priority, this might not be the join for you.  Yarn ends will poke out the back of the knitting, so if you need a perfect double-sided join, you’ll want to try something else.


Don’t ever stop knitting: Joining part 1

From the first time you make a project bigger than a washcloth, you realize that yarn is finite (which is sad).  When you get to the end of your yarn, you have to join another skein to keep knitting.  It’s annoying, and if you don’t do it right, it will ruin your beautiful scarf/hat/sweater/sock.

Some people just tie the old yarn to the new yarn.  I think that looks terrible.  And, it leaves you with a icky bumpy knot in the middle of your knitting.  No bueno.

Yes, tying on a new ball of yarn is easy, but there are such better options. So, over the next couple weeks I’m going to do a series of posts about joining, with pros, cons, and how-tos.

Let’s jump right in and get started!  Here’s one of my favorite super basic joining techniques.  I’ll call it Holding the Yarn Double, because I don’t think it actually has a name.  That’s how basic it is.

OLYMPUS DIGITAL CAMERAAll you do is hold the new yarn (orange in this picture, but usually you’d just use the same color yarn.  I’m using two colors here so you can see what I’m doing) next to the the old yarn (gray).  Then, using both strands, you’ll knit a few stitches (three or four is usually plenty).

OLYMPUS DIGITAL CAMERALeave an inch or two of tail from both the new and the old yarn.  Once you’ve knit a couple stitches with both strands, drop the old yarn and continue knitting like normal with the new yarn.

OLYMPUS DIGITAL CAMERAPros: Super easy.  Almost invisible (especially in stockinet and ribbing).  No weaving in of ends when you’re done with your project (just trim the ends to 1-1.5 inches when you’re done).

Cons: The joining stitches are thicker than your regular stitches, so if you’re doing any sort of openwork it can slightly mess up the look of your project (but only on a couple stitches, so as long as you put the join in a hidden spot, like an armpit or close to an edge, you won’t really notice it).  You are left with ends peeking out the back side of the project.  If you’re doing something which has two public sides (like a scarf), this might not be the joining technique for you.  If you’re making something with an obvious back side (like a sweater), this isn’t a problem.