Tag Archives: knitting

What’s On Your Needles?

The blog’s been a little thin lately, unfortunately.  I’ve been working on some really cool patterns for you guys, but unfortunately, I can’t share them with you yet.  (Actually, I signed a contract that said I have to keep them secret.  I’m really excited about this, but I realize it makes me sound a little like a tool.)  Soon enough, you’ll get to see what I’m working on.

But what I can show you is my progress on my Persistence is Key sweater.  Remember, I accidentally-on-purpose ended up with a box full of camel-colored wool, and needed a sweater pattern?IMG_2928_medium2[1]

Well, I’ve been knitting away, between other projects, getting a few rows done every day, and the sweater is growing.  It’s a top-down sweater, and I’ve gotten the shoulders and body done down to right around the belly-button.  It’s an extremely detailed pattern, a little more complicated than I usually pick out, but the sweater is coming along marvelously.

OLYMPUS DIGITAL CAMERA
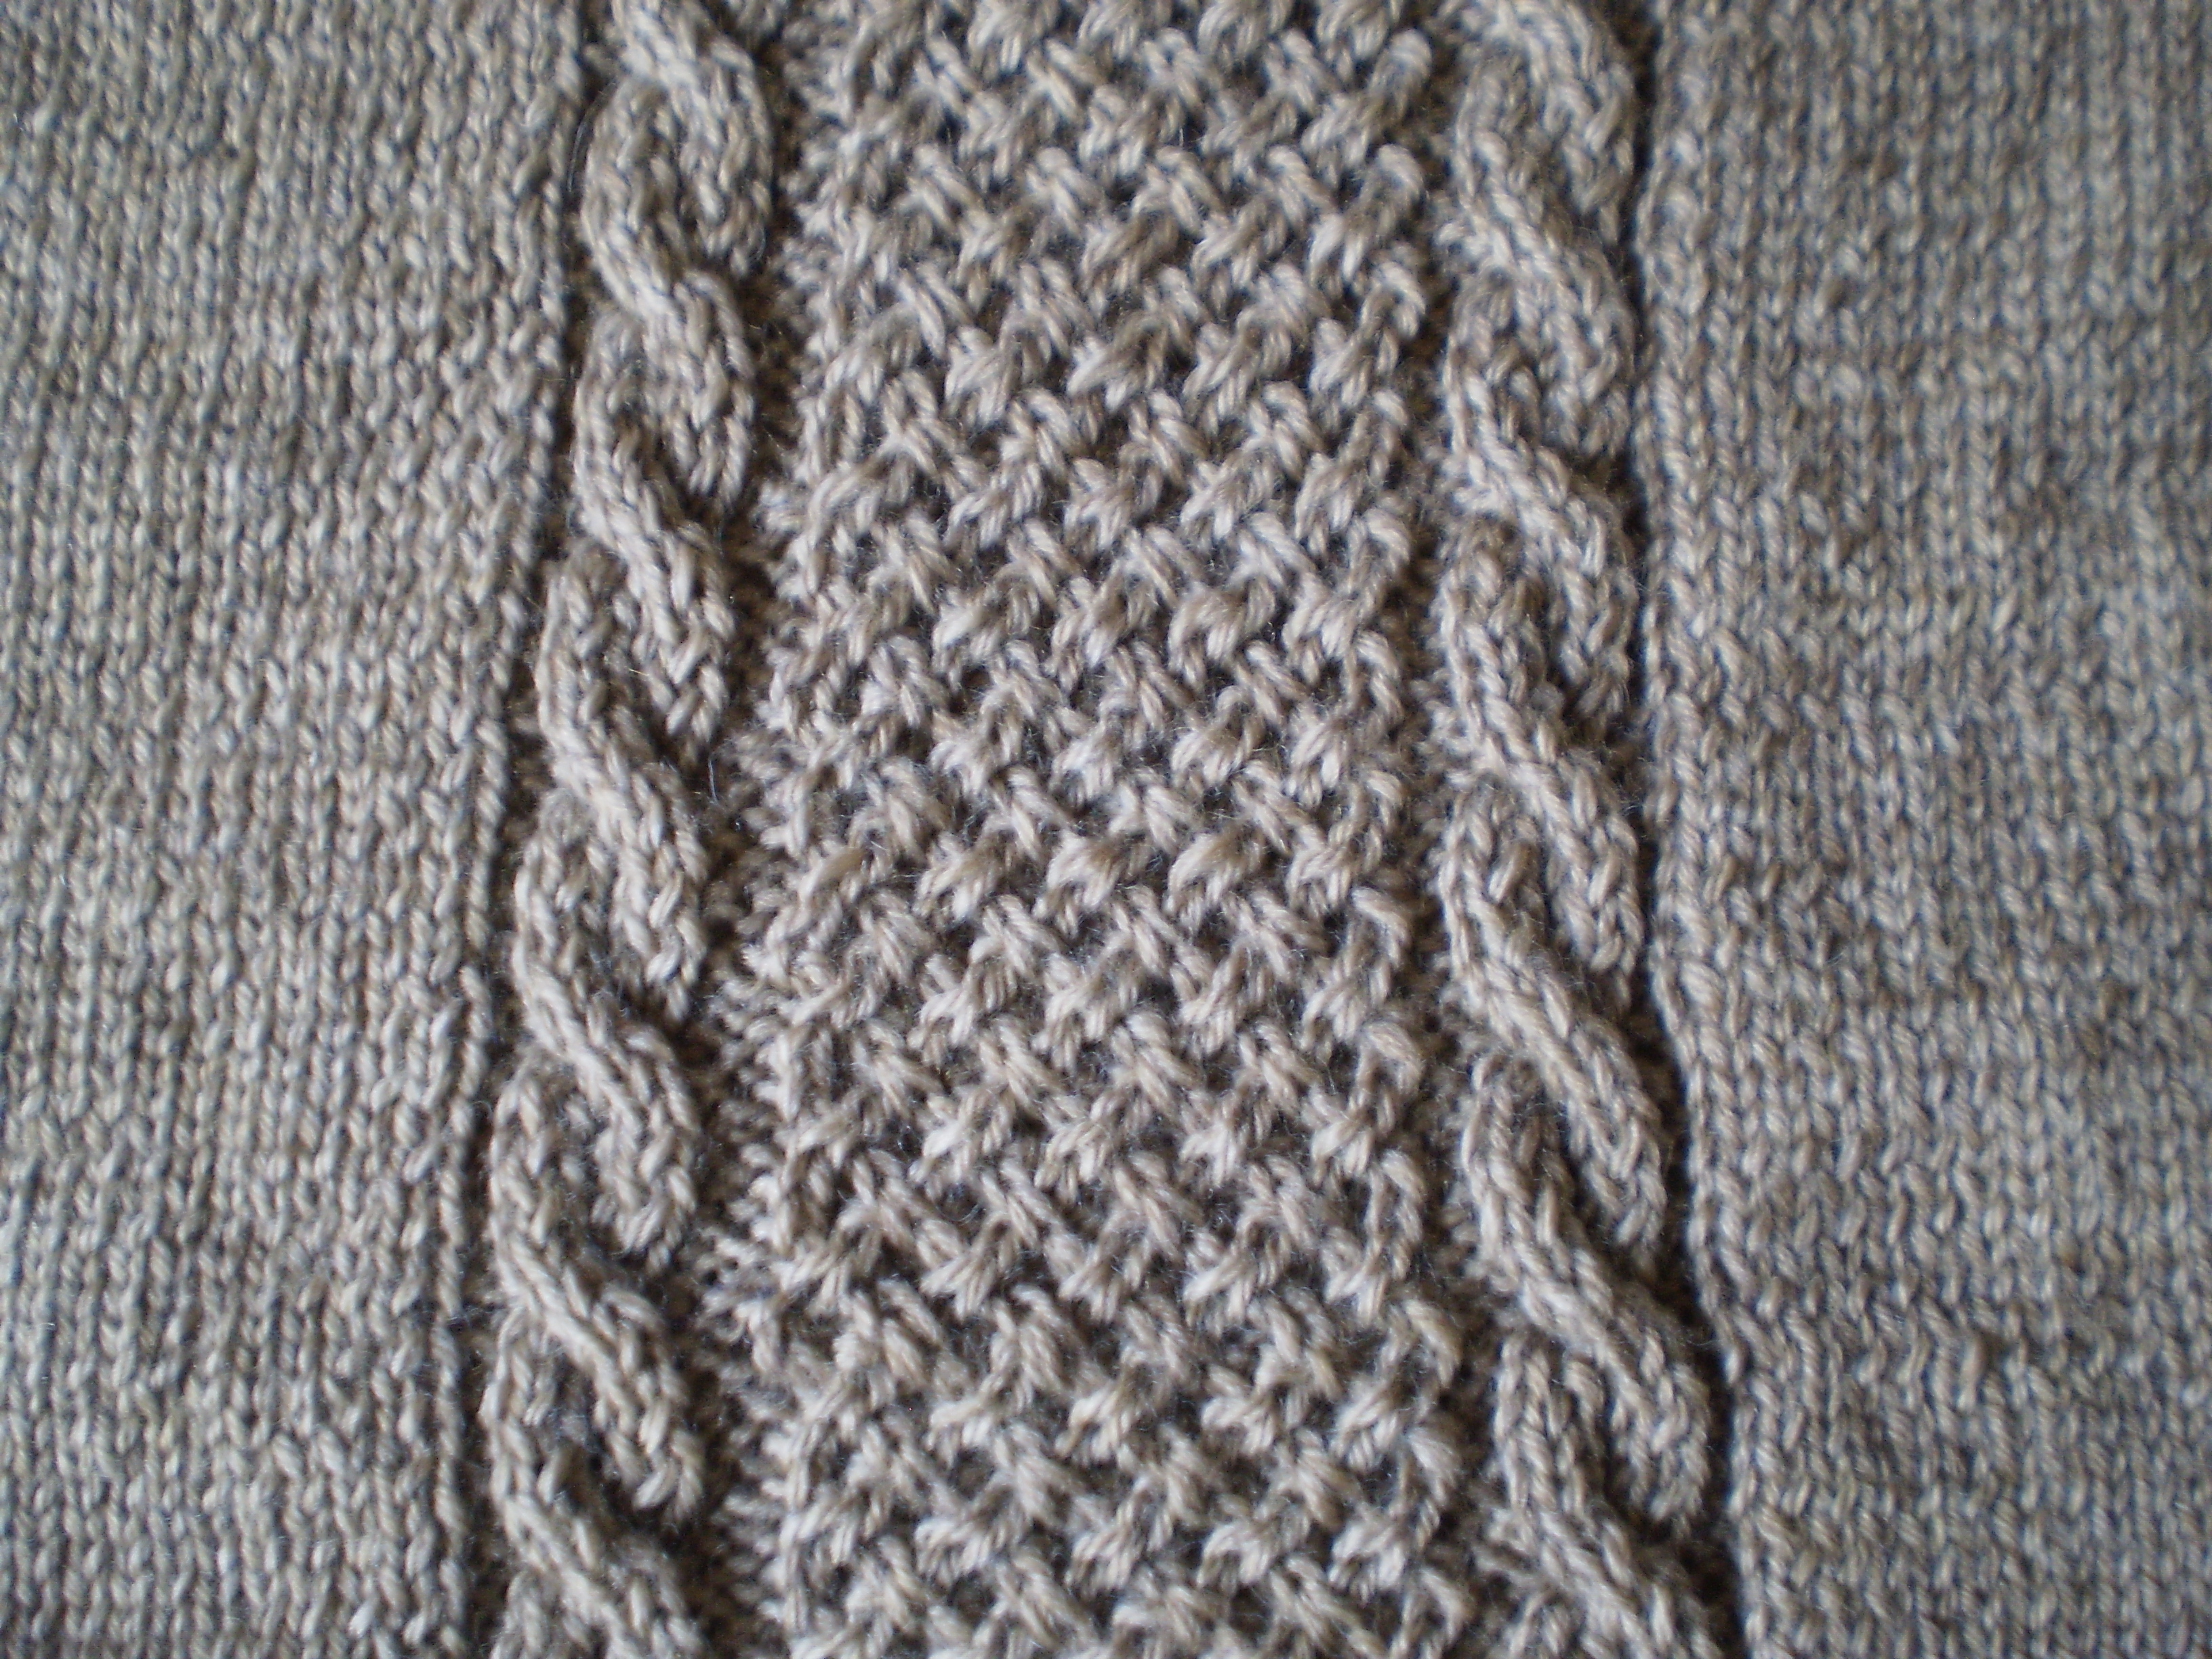
I’m absolutely in love with the cable that runs down the back of the sweater (even though it’s a huge pain in the butt).  And the yarn I’m using (Knit Picks Wool of the Andes Superwash) is doing a fantastic job of showing the cable at its best.

(Oh my god!  Just now, looking at the two photographs, I realized that I did the surrounding cables wrong!  See how the two surrounding cables on the yellow sweater twist in different directions?  Mine both twist in the same direction.  Shoot!  I guess I’ve got some thinking to do.  Should I let it go, and just live with the cables the way they are, or should I pull out the cable, and reknit it the other direction?  What do you think?)

So, that’s what’s on my needles.  What are you working on?  I’d love to hear about your projects.  And, if you want to send me a photo (knittingontheneedles@gmail.com), I’d love to share your knitting with everybody  else on the blog.

Knitter Aboard

Last week, I was a little bored (OK, a lot bored).  My friends had all left after our long weekend at PAX, my husband was at work, and I was sitting at home, twiddling my thumbs.  My day job is on a little break right now, between the end of summer and the beginning of the fall semester, so I have lots of time to sit around and watch TV.

Maybe too much time to sit around and watch TV.

So, I picked myself up off the couch and said, “Enough!” I decided to have a day down on the water, and the easiest way to do that here is to go for a ride on the ferry.   I know this isn’t something that everyone can do (I lived in the Illinois for most of my life… I understand “landlocked”), but if you have a chance to get away from your usual venue with a cup of coffee and a skein or two of yarn, I highly recommend it.  (If the ferry isn’t an option for you, try a train, bus, or just going down to a favorite park or local coffee shop.)WP_20140905_002There’s something refreshing about getting away from your house (and your dirty laundry, and the floors that need vacuuming) .  It always opens up my mind for fresh ideas, and makes my projects seem even more fun than usual.  (Getting away from a speedy internet connection doesn’t hurt, either.)

WP_20140905_008Expanding my horizons (literally) always helps me get out of a rut.  And, there’s no better place for people-watching than public transportation.  You never know what you’ll see that might inspire your next project.

WP_20140905_002So, get out there!  Explore the world, and enjoy some knitting on the water (or on the road, or on the rails).

Casting On: Picking Up Stitches

I’m going to say something that might be controversial (or it might not be):  Picking up stitches is one of my favorite ways of casting on.

I know, radical stuff.  Let me explain.

If “casting on” is essentially a way of beginning a knitting project, making the initial row of stitches, then why can’t we count picking up stitches as a way of casting on?

I  think it’s pretty fun, easy, and results in a more polished finished product than knitting two separate pieces and sewing them together later.

Of course picking up stitches isn’t an any-time cast on.  You have to have an already-finished piece of knitting from which to pick up the stitches (obviously).  But I love using it to add button bands on sweaters, turning the heel on socks, and it’s essential for modular knitting projects (like this blanket).

So how do you do it?

Naturally, you start with a piece of knitting to form the base of your project.  I’m using a little swatch of stockinet, but you can pick up stitches off of any piece of knitting.  On this swatch, I slipped the first stitch of every row.  It leaves a nice, smooth edge that makes picking up stitches that much easier.  But, if I need to pick up a lot of stitches, I’ll knit all edge stitches.

OLYMPUS DIGITAL CAMERAThen, I’ll poke my needle through the spot where I want my first picked-up stitch to live.  See how I go through both “legs” of the stitch?  If you only go through one leg, you end up with a flimsy piece of knitting. No bueno.

OLYMPUS DIGITAL CAMERAWrap your yarn around the needle, just like every other knit stitch you’ve ever done.

OLYMPUS DIGITAL CAMERAAnd pull the new stitch through.  You’ve picked up one stitch!

OLYMPUS DIGITAL CAMERAKeep picking up stitches until you have the number that your pattern requires.  See how nice and neat the picked-up stitches look?

OLYMPUS DIGITAL CAMERAThey even look nice and neat from the back.  See that horizontal row of red V’s?  Those are the edge stitches that we picked up.  Prettier than a sewn seam!

OLYMPUS DIGITAL CAMERAThen, keep on knitting your project.  Your new knitting will grow off the side of your old knitting and be magical and wonderful!

OLYMPUS DIGITAL CAMERA

Casting on-Tubular Cast On (with bonus Tubular Bind Off!)

A couple months ago, I told you about one of my favorite cast-ons, the Tubular Cast On.  It’s still one of my favorite techniques, so I figured that I would tell you about my favorite aspect of the tubular cast on:  the Tubular Bind Off.

I know, that’s a cheater’s answer. How can a bind off be my favorite part of a cast on?  Let me explain.  The tubular bind off and cast on look identical when they’re finished.  I love using the tubular cast on/bind off on sweaters, because it means that my cuffs (cast on) and my collar (bind off) can have the exact same finished edges.

I’ve already linked you to a really good tutorial, so I won’t waste my (or your) time with showing you again.  But, I will show you how to do the Tubular Bind Off.

Start with a piece of knitting (it looks best with a bit of 1×1 ribbing, which is why I particularly love it for cuffs and collars).

OLYMPUS DIGITAL CAMERARepeat the following to the end of the row: (Knit 1, bring yarn to front, slip 1, bring yarn to back).  Then turn the work and do the same thing on the next row.  This seems weird, but think about it this way:  you’re knitting all the knit stitches on the right side of your work, then you’re knitting all the knit stitches on the wrong side of your work.

Then, here’s the cool part.  Grab an extra needle (try to use the same size that you’ve been knitting with, but if it’s a little smaller, it’s not a problem.  Don’t go buying extra needles for this).  Now you have two stitch-less needles and one needle attached to your work.

Slip the first knit stitch onto one of your needles.  Slip the first purl stitch onto the other needle.  OLYMPUS DIGITAL CAMERA

Then continue, slipping all the knit stitches onto the first needle, and all the purl stitches onto the second needle.  When you’re done, your knitting will look like this:

OLYMPUS DIGITAL CAMERAThen, cutting a tail at least three times as long as your knitting is wide, use a tapestry needle and the Kitchener stitch to join the two needles’ stitches together.

OLYMPUS DIGITAL CAMERAYou end up with a lovely, seamless, super-stretchy bind off that looks identical to the Tubular Cast on.

OLYMPUS DIGITAL CAMERA

Stellar’s Jay Sweater: Progress!

Hey!  Look what I managed to get done last week!   It’s an almost-finished Stellar’s Jay Sweater!

OLYMPUS DIGITAL CAMERAIsn’t it amazing what you can get done when you only bring one project on a week-long car trip?

My husband and I spent the week driving up the Oregon Coast.  Well, mostly he drove, and I knit (because I’m a rather nervous driver, especially on those twisty-turny roads).  The Oregon coast is absolutely gorgeous!  If you live within a three-state radius of Oregon, make sure you visit.  There are lush redwood forests, beautiful rocky cliffs teeming with sea birds, gray whales and sea lions frolicking in the ocean, and tide pools full of neon green sea anemones.  It’s a magical place.

Unfortunately, right about when we made it back up to Portland, I ran out of yarn!  That’s why there’s a rather large chunk missing between my left elbow and shoulder.  It’s not me being avant-garde, it’s me being bad at ordering enough yarn to finish a project.

I’ve put the order in, and you’d better believe that as soon as that package hits my front door, I’ll grab my needles and finish up my soon-to-be favorite sweater!

Knitting with Kids

Almost a month ago, I spent the week teaching a beginning knitting class to a group of 10 school-aged girls (ages 7-11).   I couldn’t wait to see what would happen.  I’ve taught people to knit before (but always grown-ups), and I’ve taught kids before (I teach sewing lessons as my day-job).  But, this would be an interesting new experience.  I was excited, but also oddly nervous.  Would they be able to do it?  Would they like it?  Would they get too frustrated?

Here are some things that I learned:

1.  Fine motor skills are definitely needed for knitting.  I don’t think any of the girls under 8 really “got” knitting, which is too bad.  I just hope they remember that knitting is fun, the next time they try it.  It also makes me wonder about those stories you hear of girls in Ye-Olden-Times, who learned to knit at the age of 4 to help their mothers with keeping the family clothed.  Maybe olden-time-y girls had better dexterity, but that seems unlikely.

2.  Focus isn’t really a problem, when the kids are excited about what they’re making.  My girls complained and whined when they had to leave class for recess!  It kind of made my day to hear them all go, “Just let me finish this row!”

3.  Except when focus is a problem.  Sometimes the chatting got a little too much for the girls, and that’s when they’d start adding extra stitches, dropping stitches and otherwise causing themselves problems.  But that’s not really a kid problem.  Everyone messes up their knitting when they get distracted.

4.  Nothing is better than when a difficult, new skill “clicks” with a kid.  They get all excited and giggly and proud.  One girl had never picked up knitting needles at the beginning of the week.  Her first project was more hole than knitting, and her second project looked sort-of like knitting, albeit a little wonky.  But halfway through her third project, you could actually look at her knitting and see the row where she finally figured out  knitting.  It was amazing.  She got so excited, and told me that she had even gone to JoAnn’s the night before to pick out her first pair of knitting needles and her first ball of yarn.

5.  Knitting is a slow process, and sometimes kids need someone to push them a little bit.  I didn’t force anyone to work on a project that they didn’t want to do, but there were definitely a couple times when one of my girls wanted to stop halfway through a project, and I gently suggested that they kept going.  Once they got back in the swing of things, they’d invariably finish the project.  When kids are used to instant-gratification, working on a single project for a whole day (or two or three), can be a test of their patience.

6. The best part of knitting, whether you are a kid or a grown-up, is sitting around with your friends and shooting the shit.  I ran my class like a knitting circle, helping one kid at a time with their projects, while everyone chatted.  I had a few super-basic projects for everyone to start with  (a garter-stitch book mark, a garter-stitch headband, a garter-stitch bracelet…see a pattern?).  But, everyone worked on their favorite pattern at their own speed, chatting and helping each other out.

I hope that I sparked at least a couple of the girls to take up needles and do some knitting on their own.  But even if they never knit again, I think everyone had a fun week, and at least walked away from class thinking that knitting is pretty neat.

Pattern Spotlight: Saartje’s Bootees

A quick post today about a lovely quick pattern: Saartje’s Bootees.

This pattern for the most adorable pair of baby bootees is available for free through Ravelry and through Saartje’s website (on the right side of the page).

These tiny bootees are the perfect quick project for when the weather is too hot for anything mentally taxing or large and woolen.  These bootees are worked on two needles, with only a few dozen yards of sock yarn and knit up in only a couple hours.  (If you want to make slightly larger bootees, break out larger needles and thicker wool.)

You could knit them to match a favorite outfit, or a new hand-knit sweater.  Or, go crazy and knit a whole rainbow of bootees.

4378860925_ae64bf0fb0_m[1]In two-tone neutrals, these bootees are perfect for a classy little gentleman.

5734631958_4d97759e70_m[1]And, they are a great excuse to buy those adorable novelty buttons you’ve had your eye on for months.

ldb_small[1]Knit up a whole herd of bootees to keep in your “just-in-case” gift box.  Throw a pair in with a pack of onesies and a card for a perfect gift for any new parent.

Casting On- The Provisional Cast On

I want to introduce you to my friend, the provisional cast-on.  It’s a nifty little technique that can be completely invaluable.  It lets you cast on (and knit), then come back and knit in the other direction.  The finished product is insanely stretchy and totally unnoticeable.  It’s perfect for top-down sweaters (so you can knit the entire sweater, then knit the collar).  It’s also great for lace shawls and scarves, where you don’t want an unsightly cast-on edge.

So, how do you do it?

Grab some scrap yarn and a largeish crochet hook and chain several stitches more than you want to cast on.  Don’t worry about making the crochet look pretty, it’s all going to be removed before you finish the garment.

OLYMPUS DIGITAL CAMERAThen, use your knitting needle to pick up and knit one stitch in each chain.

OLYMPUS DIGITAL CAMERAKeep going until you have the number of stitches that your pattern calls for.

OLYMPUS DIGITAL CAMERAThen, just knit your pattern as you normally would.  Ignore the ugly neon green crochet stitches at the collar of your sweater, they will be gone soon enough.OLYMPUS DIGITAL CAMERAHere comes the cool part.  Carefully undo the crocheted chain one stitch at a time (or a few stitches at a time).

OLYMPUS DIGITAL CAMERAAnd slip your needle into the newly freed stitches.  (In knitter’s lingo, these are now “live stitches.”)OLYMPUS DIGITAL CAMERAKeep going, until you’ve picked up all the live stitches.OLYMPUS DIGITAL CAMERANow you’re ready to keep going.  Join your yarn and start knitting the other direction!

OLYMPUS DIGITAL CAMERA

Inspiration: Freedom

Happy 4th of July, everyone!

Instead of talking about fireworks, flags and red, white and blue, I wan to talk about freedom.   And free-form knitting.

Free-form knitting is knitting without a pattern, without a plan (or at least without much of a plan).  It’s playing with stitches, colors and textures.  And it’s super interesting.  Pick a coordinating color palette, cast on a few stitches, and start playing!

Here are a couple tutorials:

Freeform wrapper OMG by Colleen Davisomg_wrapper_medium[1]

Tips for Freeform Knit & Crochet Garments, Prudence’s Way by Prudence Mapstone2041214197_4929516023_z[1]

Basic Introduction to freeform knitting and crochet by Janice Rosema

2740000828_88b9886d25_z[1]

So, go celebrate your freedom with a little free form knitting (and maybe a backyard barbecue).

Casting on- Long Tail Cast On

The Long Tail Cast On is the most basic cast on. The white bread of cast ons. The Ford Taurus of cast ons.  Not flashy, but totally functional.

The Long Tail Cast On is used about 90% of the time (at least by me), and is absolutely serviceable. It’s probably the cast on that your mom taught you how to do back when you were a kid. It’s moderately stretchy, and fairly easy to use. It’s not exactly beautiful, and not as stretchy as some cast ons, but we still love it.

There are a few ways to perform the Long Tail Cast on, but this is my favorite:

Measure out your long tail (make it about 4 times as long as you want your cast on to be).   Start by making a slipknot and (ahem) slipping it onto your needle.OLYMPUS DIGITAL CAMERA Then, hold the yarn in your left hand, slipping your index finger and thumb between the two strands of yarn. Like this:OLYMPUS DIGITAL CAMERAUse the point of your needle to catch the thumb loop of yarn.OLYMPUS DIGITAL CAMERA  Then, slip the point of the needle over to your index finger and grab the loop of yarn over there. OLYMPUS DIGITAL CAMERAAnd pull the index finger loop through the thumb loop, like this:OLYMPUS DIGITAL CAMERA
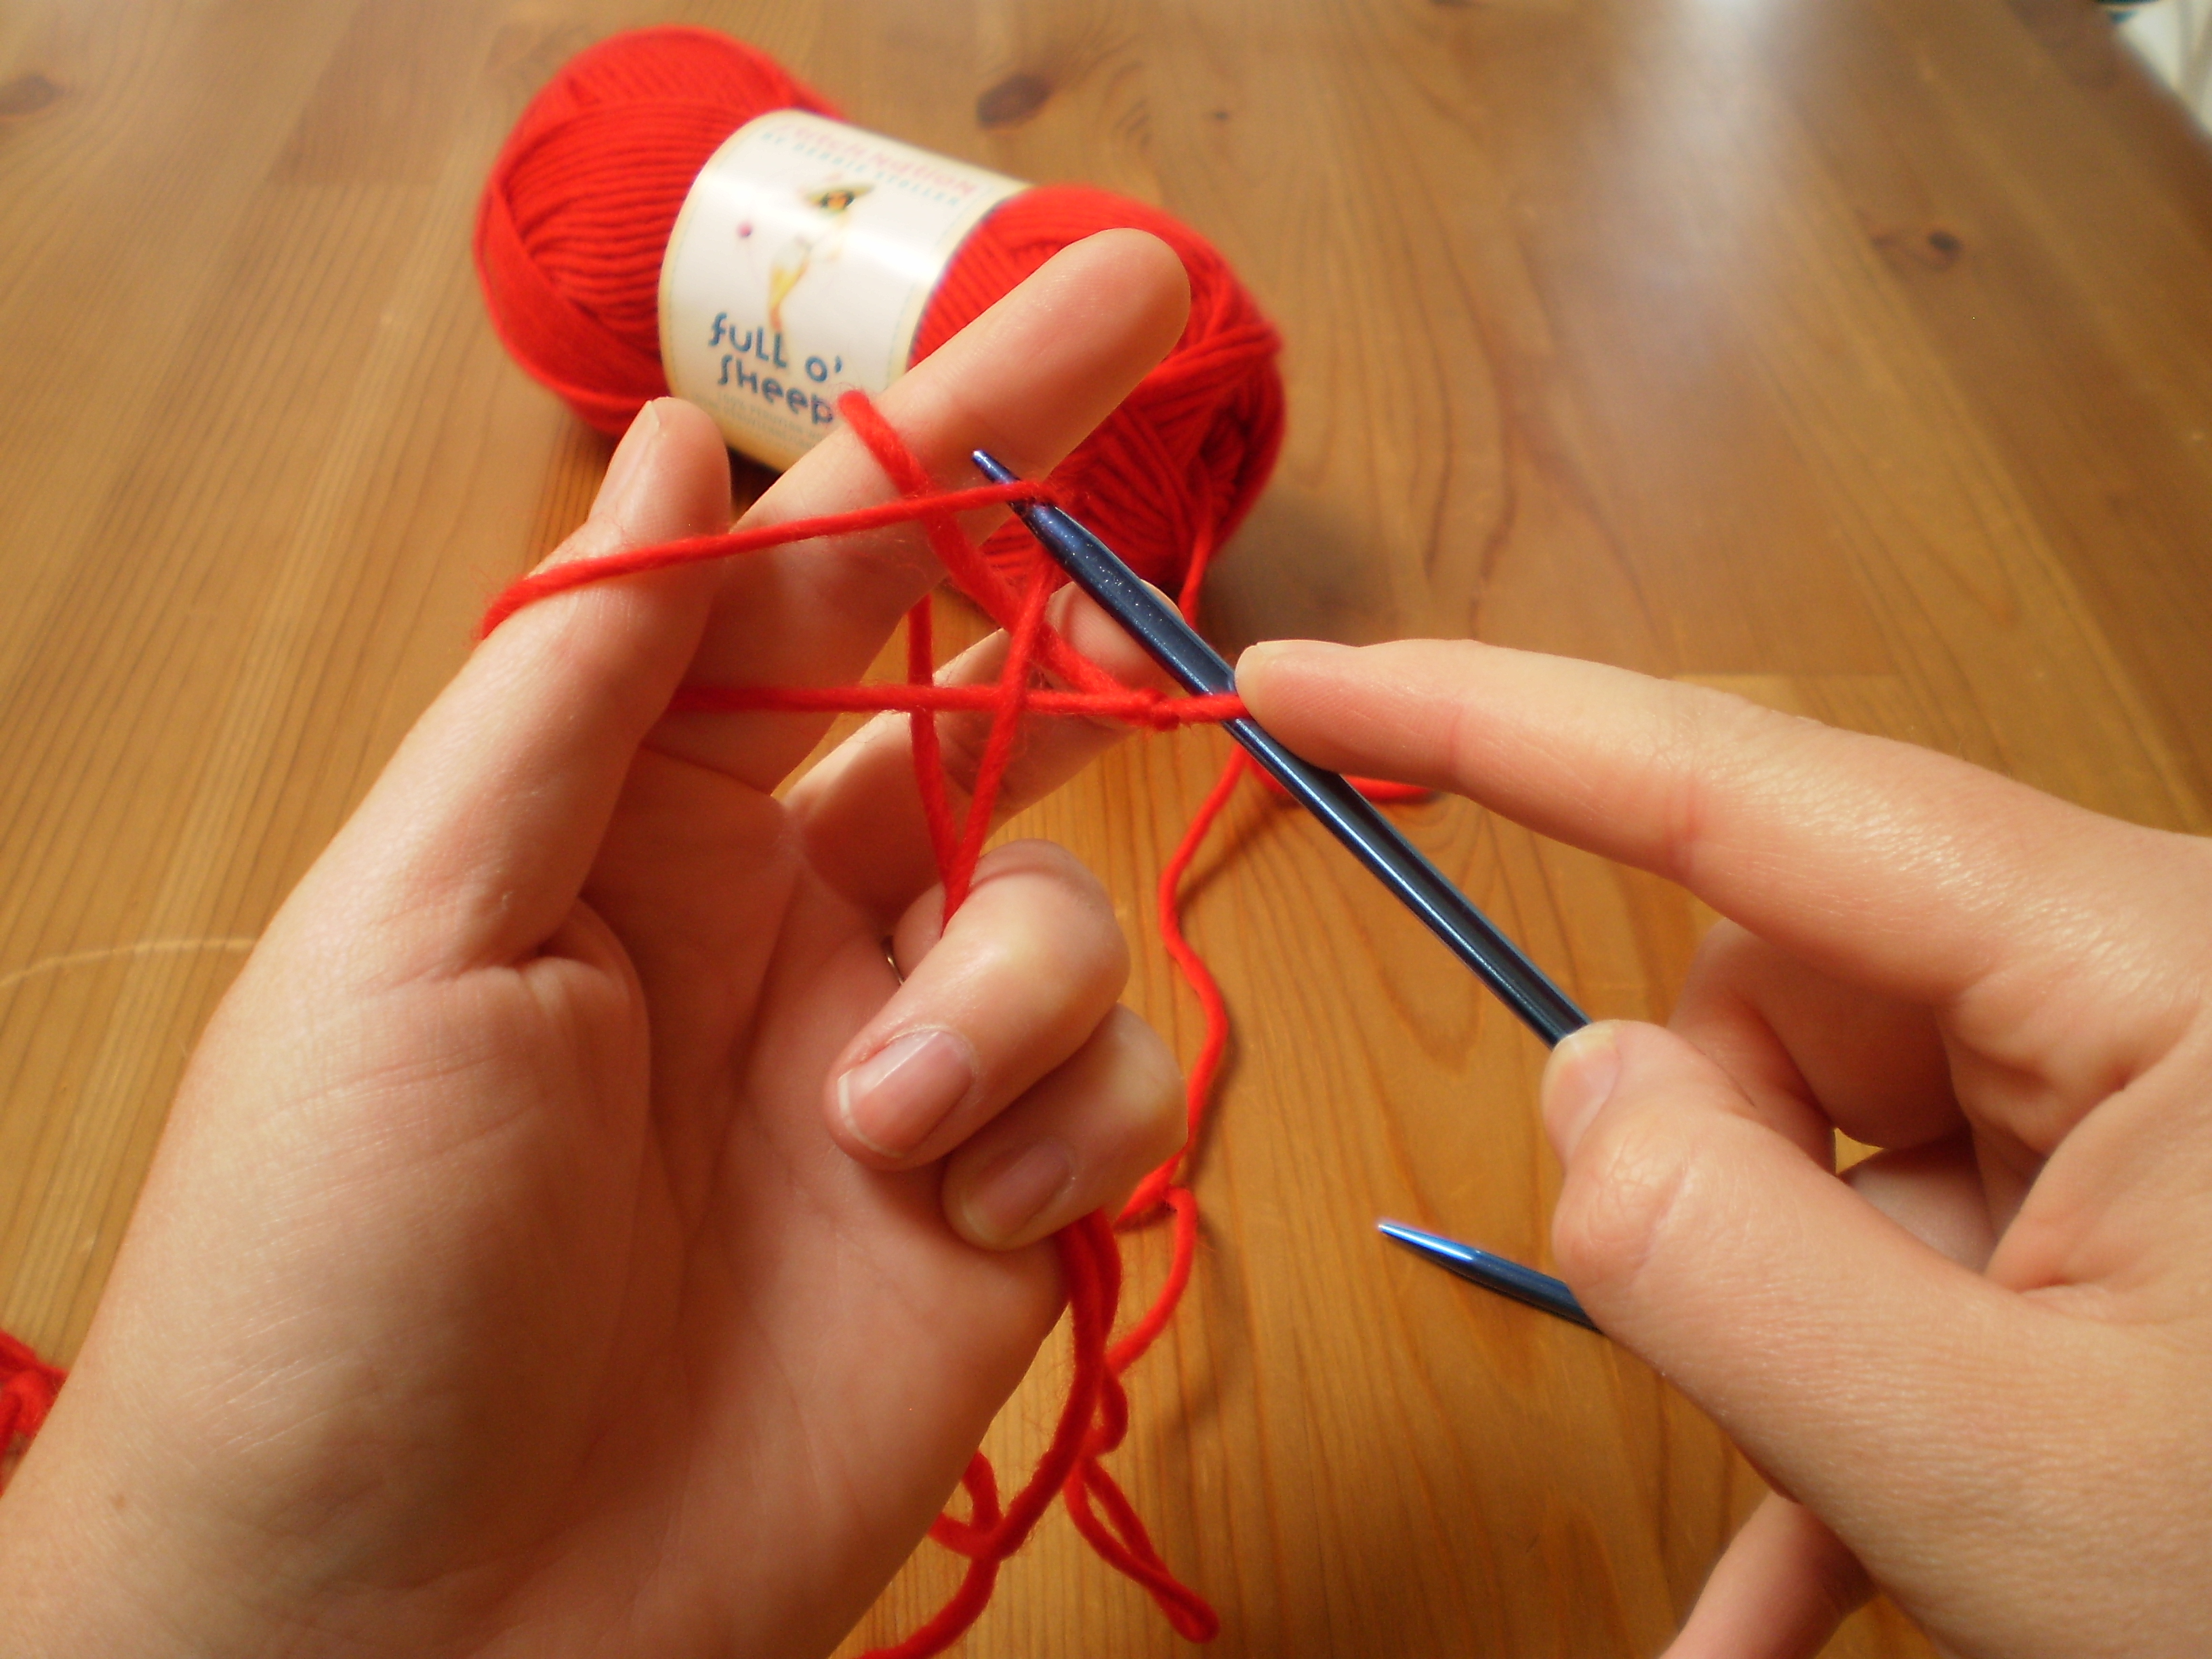
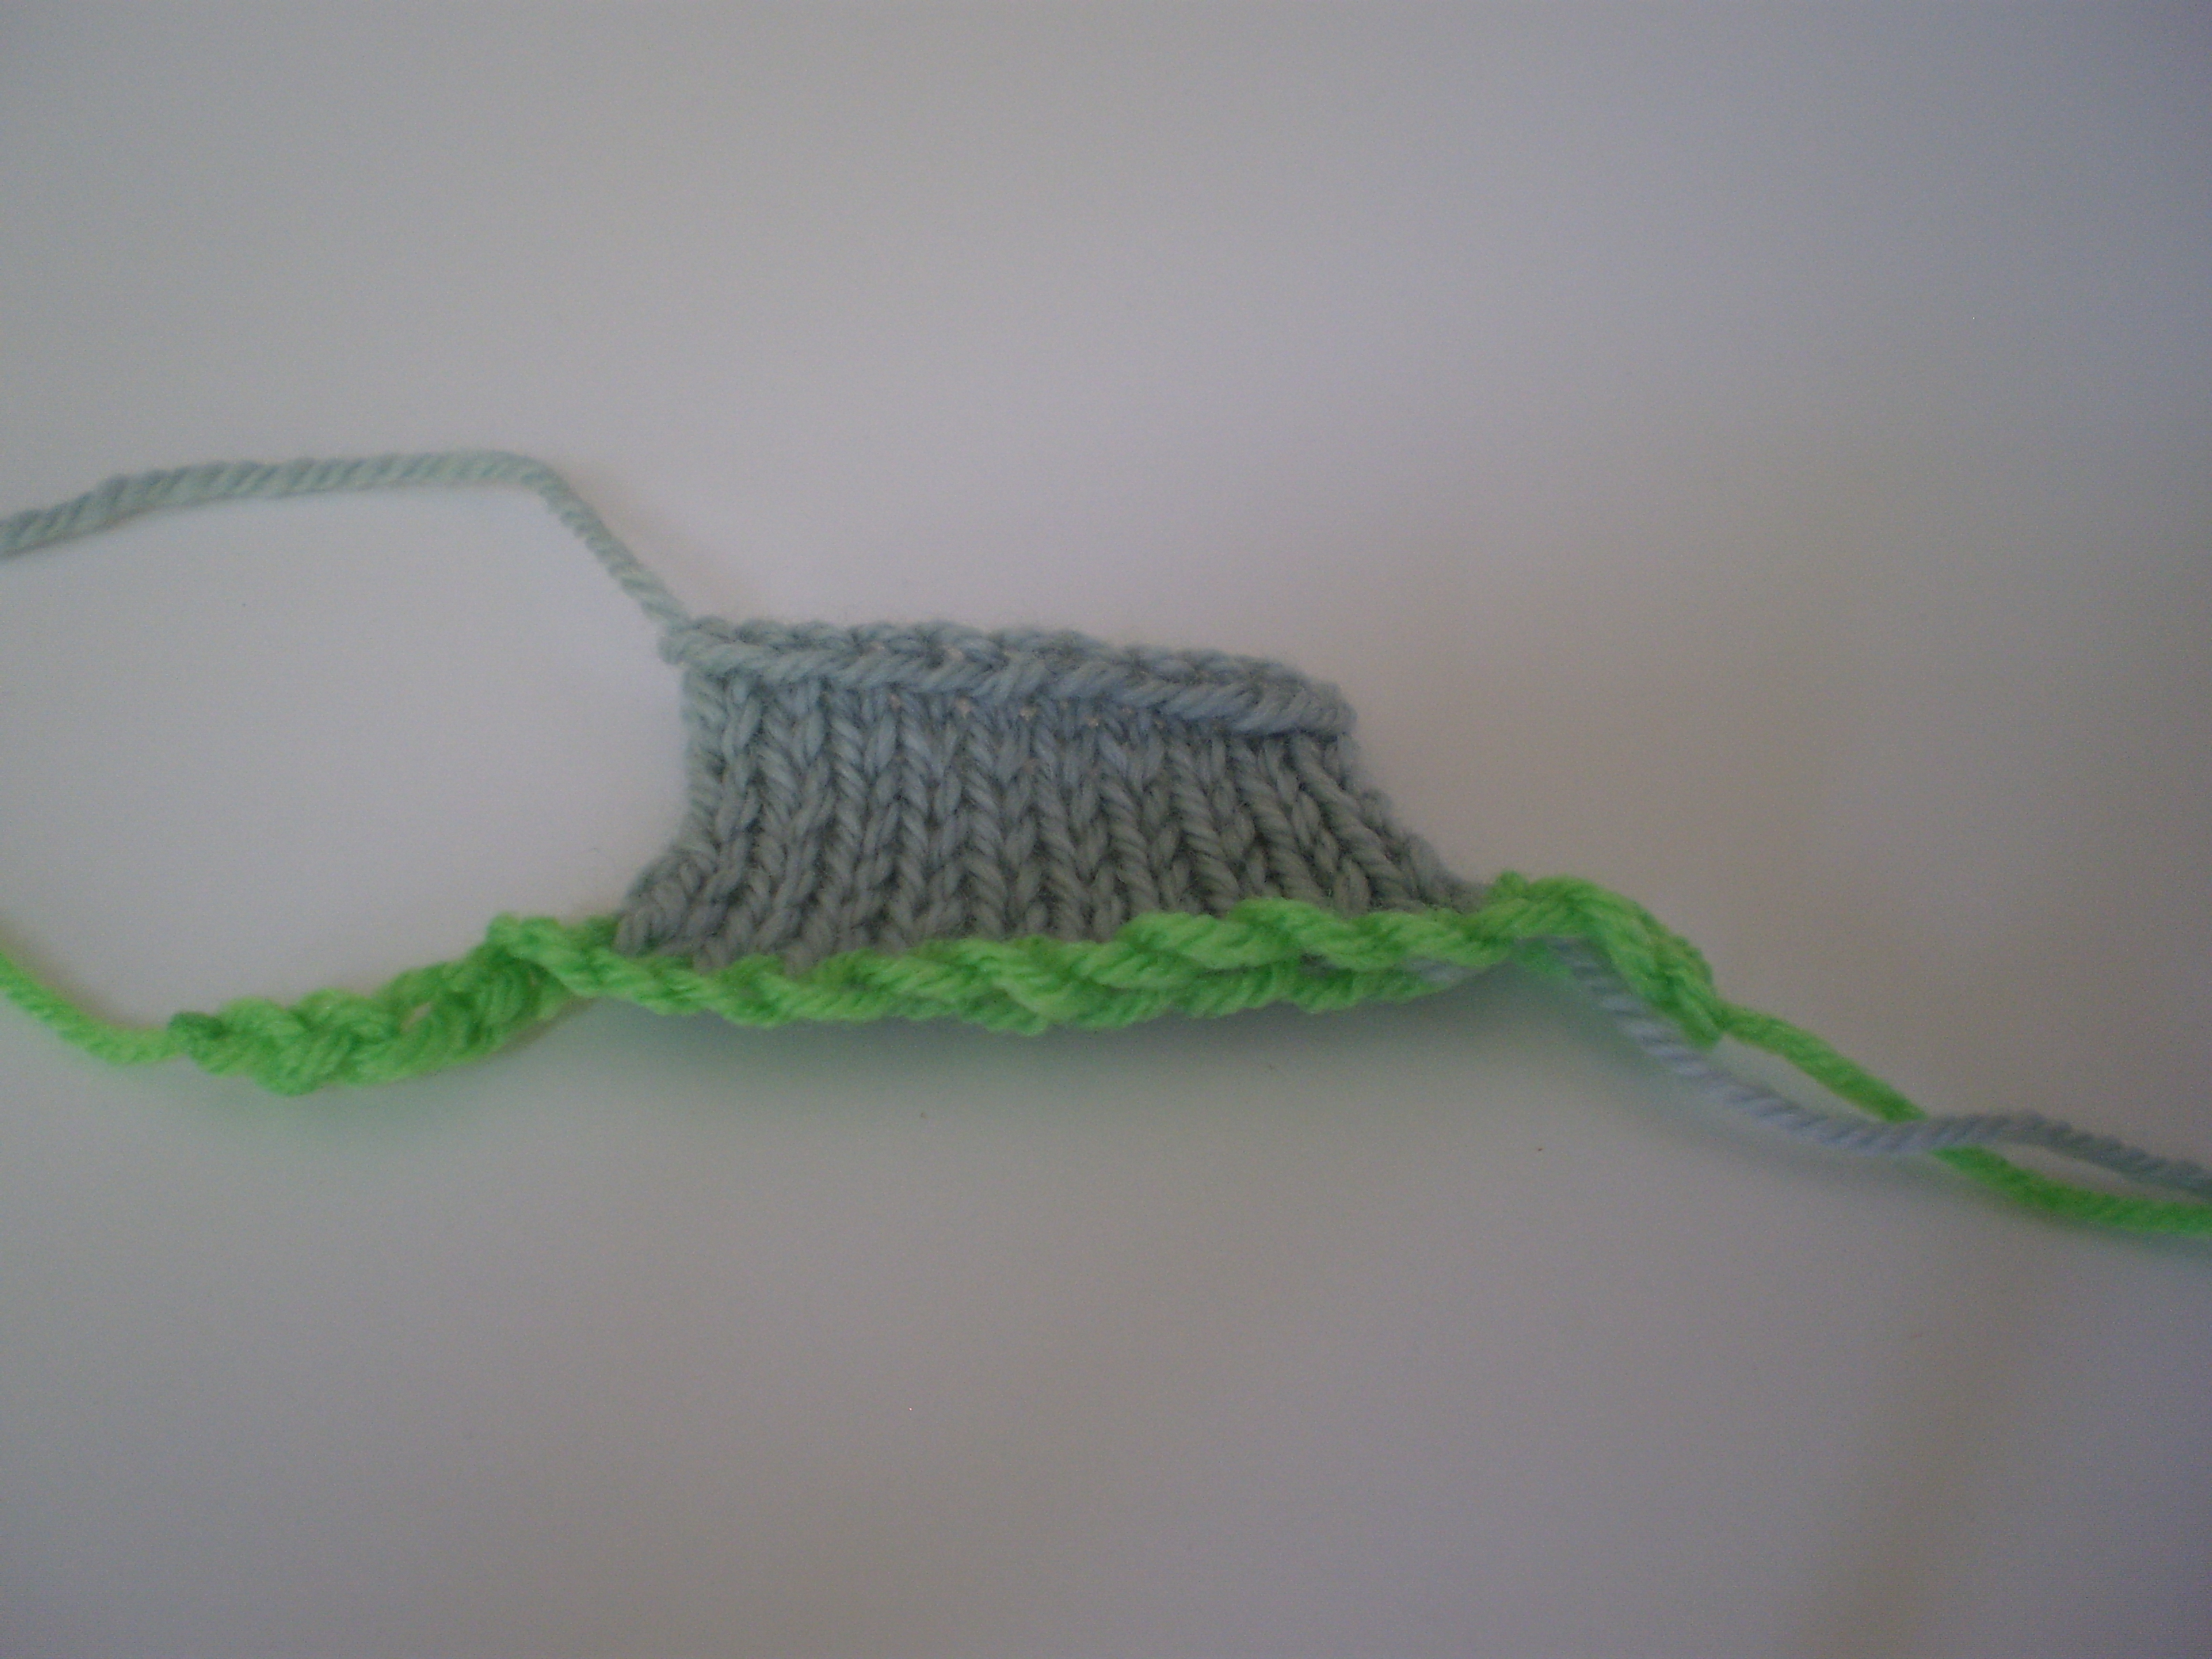
Then drop the yarn from your left hand, and snug up your stitch.    OLYMPUS DIGITAL CAMERA Keep repeating these steps until you have all your stitches, turn your work and start knitting. OLYMPUS DIGITAL CAMERA