Tag Archives: bottom up

What?! More Patterns?

That’s right, knitters!  I’ve got another brand-spanking-new pattern, just for you!

(Actually it’s kind of 4 patterns in one!  I know!  Crazy!)

Last week, Knit Picks published another great collection, Knits for Everybody.  It’s such a smart book- I know I’ll be keeping my copy close at hand.330131
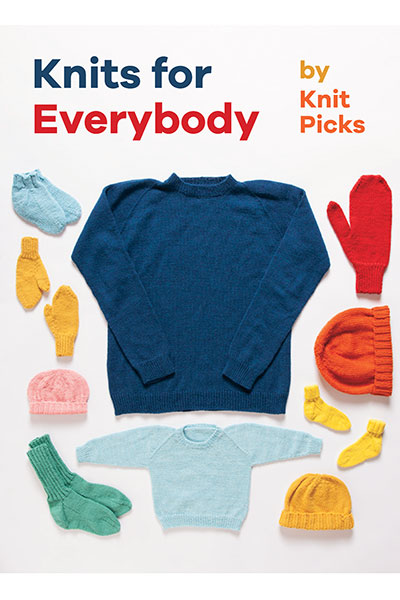
Knits for Everybody is a collection of four super simple patterns (hats, sweaters, socks and mittens), useful staples that everyone can use (and make customize, if that’s how you roll).  But here’s the awesome part:  They are literally for everybody.  The sweater sizes go from a 3-month-old baby all the way up to a Men’s XXL.  The hats fit everyone from a preemie to a big-headed adult (like me).  And, my socks go from a 4″ foot circumference all the way up to a 10.5″ circumference.330131071My sock pattern is a super simple knitted sock with a heel flap in literally every size.  But here’s the cool part:  You can follow the directions to knit from the top down (my favorite), or from the toe up (my second favorite), and end up with virtually the same sock.  That way you can use whichever method feels right for you.330131081And, I’ve provided two slightly different variations: Socks (knit in sock weight, with a long ribbed cuff) and Slippers (knit in super-squishy worsted with a shorter cuff).

Of course, you can jazz up these socks and slippers whatever way you like.  Add stripes? Yes.  Change the ribbing? Why not!  Work some cables? Sure!  You can customize these socks (or any other pattern in the book) with no problem for socks that are truly your own!330131091
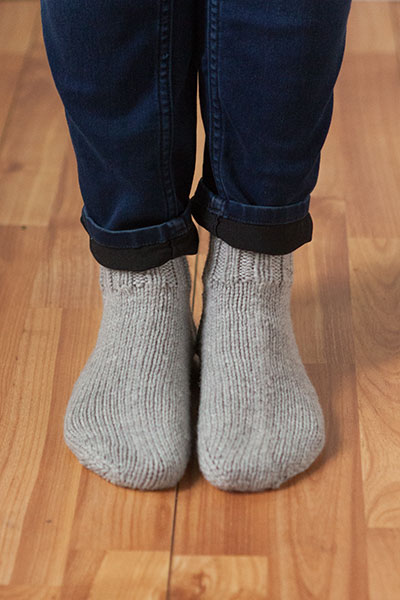
Want to win a copy of Knits for Everybody?  Tell me which pattern you would make, and who it would be for. Socks for your auntie?  A hat for your nephew? A sweater just for you?

Pattern: Evergreen Cap

Hey, guys!  I’ve got exciting news!

Who’s got two thumbs and is one of Knit Picks’ newest pattern designers?

This gal.

Totally exciting, right?  As of Monday morning, my first official Knit Picks pattern went up, and, I have to say, it’s one that I’m pretty proud of.  (I’m actually wearing the prototype as I write this.  But that has more to do with the fact that my house is very cold, and less to do with how proud I am.)

This design has been bouncing around in my head for over a year and was finalized months ago.  I’ve been dying to share it with you, and now I can!  Woo hoo!

Also, look:  they even took professional photos with a real-life model (instead of me taking weird-angled shots with my tiny point-and-click camera that eats its battery after five pictures).

55670220_4Ooh… Aah…

55670220_3And, if you want to read the blurb from the website:

“The Evergreen Cap is an exceptionally cozy unisex hat, perfect for everyone on your Christmas list. A richly cabled beanie knit in thick Wool of the Andes Superwash, this hat keeps out even the coldest winter wind. Inspired by the tall cedar trees of the Pacific Northwest, wide cables climb smoothly from the cap’s brim up to the crown. Carefully arranged decreases allow the cables to continue uninterrupted to the very top of the hat.The Evergreen Cap is a quick and lovely accessory for men and women.”

55670220_6Fun, right?!

And, the best part?  It’s free, and just in time for last-minute Christmas knitting!

Get the pattern here:

Evergreen Cap Pattern

Stellar’s Jay Sweater-Shoulders

Indulge me in a little “do as I say, not as I do.”  The first time I made an EPS sweater, I ignored a step in the shoulders.  It was a vague little instruction where Elizabeth Zimmerman said to “work a few short rows across the shoulders”.  I was so close to being finished, and anyway, I didn’t know what “short rows” were, so they couldn’t be that important.

I ended up with a perfectly fitting sweater, except that if felt like it was trying to choke me.  Constantly.  With Icelandic Wool.

Ha!  That showed me.  I’ve never skipped the short rows on a sweater again.

So, where do short rows come into play for a bottom-up (or a top-down) sweater knit in the round?

It turns out, that, if you look at your neck from the side, it actually points a little forward, instead of pointing straight up.  (It points even further forward if you’re a sloucher, like me.)  See?

??????????????????????????????????????????????????????????????????????????????????????????????????So, if you make a sweater without any short rows, the neckline will sit parallel to the floor.  This will pull uncomfortably on your throat and make you want to burn your sweater.  Also, it looks kind of dumb.

??????????????????????????????????????????????????????????????????????????????????????????????????What you want, to be comfortable, is a sweater that is higher (by an inch or two) at the back of the neck than the front.  Like this:

??????????????????????????????????????????????????????????????????????????????????????????????????Looks better, right?  So how do you do it?  Usually three or four short rows in the last couple inches of the shoulders are enough to raise the back of the neck enough to make it comfortable.  I am a big fan of doing a simple wrap and turn.

I like to make my first short row go all the way to the points of my shoulders (or a little past).  Then, each short row after the first gets progressively shorter by 8 or so stitches.  It requires a tiny bit of math, but it works out pretty well.

??????????????????????????????????????????????????????????????????????????????????????????????????All I know is, I will never leave out the short rows on a sweater like this again!

Stellar’s Jay Sweater: Joining the Sleeves

Once I had my sleeves (and body) all knitted up, it was time to join the whole thing together.  On first glance, this seems like it would be difficult to do, cumbersome and fiddly, but it’s not too tricky, actually. Just go slow, and make sure you count your stitches correctly!

The goal is to end up with the sleeves arranged on either side of the body, with active stitches all the way around (so that you can keep  knitting the shoulders).  If you are imagining looking at your sweater from the top down, it would look something like this:

SchematicStart knitting at the beginning of your round (usually the center back of a pullover, or the center front for a cardigan).  Make sure to use a great big circular needle, or you’ll run into trouble in a few minutes! Work your way across the body of the sweater until you reach the armpit.

Schematic 1Then, pick up your sleeve and knit around the outside of the sleeve, leaving its armpit unworked.  Leave the active armpit stitches on a piece of scrap yarn or a stitch holder.

Schematic 2Switch back to knitting the body, and work your way all the way across the back (or front) of your sweater.

Schematic 3Then, repeat the process for the other sleeve, knitting around the outside of the sleeve, while leaving the armpit alone.

Schematic 4The final step is to close up the armpits.  Attach the sleeve armpit stitches to the body armpit stitches on either side.  I like to use the Kitchener stitch, but you could also use a 3-needle bind-off, if that’s your favorite.

Schematic finalNow you’re all set up for the knitting the shoulders on your bottom-up sweater!  Just keep going in the round (if you’re making a pullover), or turn the work and go back the other direction (if you’re making a cardigan).  Simple!

Stellar’s Jay Sweater: Changing Plans

I’ve been hard at work on my Stellar’s Jay sweater.  The body is almost up to the armpits!

I’m following my pattern as I wrote it, except for a couple (sort-of) minor details.

First, I decided that I didn’t like doing the scallop rows the way I had planned it out, so I modified it a little.  Now, it is slightly shallower (worked over two rows, instead of three), and I think it looks much better.  I’m probably the only one who would ever notice, but I’m picky that way.

Second (and this is a larger change), my pullover had turned into a cardigan.  I don’t know what happened- I was casting on and some knitting spirit whispered in my ear that I needed a cardigan, not a pullover, and one thing led to another.  I’m still following the pattern as I designed it, but instead of working the sweater in the round, I’m knitting it flat.  When I finish up the sweater, I’ll pick up stitches along the selvedge edges and knit on some button bands.  It should look pretty good (I hope!).

OLYMPUS DIGITAL CAMERAIt’s important to remember that regardless of how much planning goes into your knitting, it’s still possible to change plans as you work.  You’re in charge of your project, and being flexible when you don’t like how something is working up will end up giving you a better finished project.

What changes have you made to projects as you knit them?