As with everything in knitting (and I suppose, in life), having options is always a good thing. Don’t like knitting English style? Try continental. Think wool is itchy? Try acrylic. Don’t care for aluminum needles? Try wooden ones.
Last week we did a join where we held the new yarn double with the old yarn. I have since learned that this is called an Overlap Join. (Learning new things every day…)
Today, we’ll do another kind of join, sometimes called a Back Join, and sometimes called a Russian Join. Whatever you call it, it’s pretty neat.
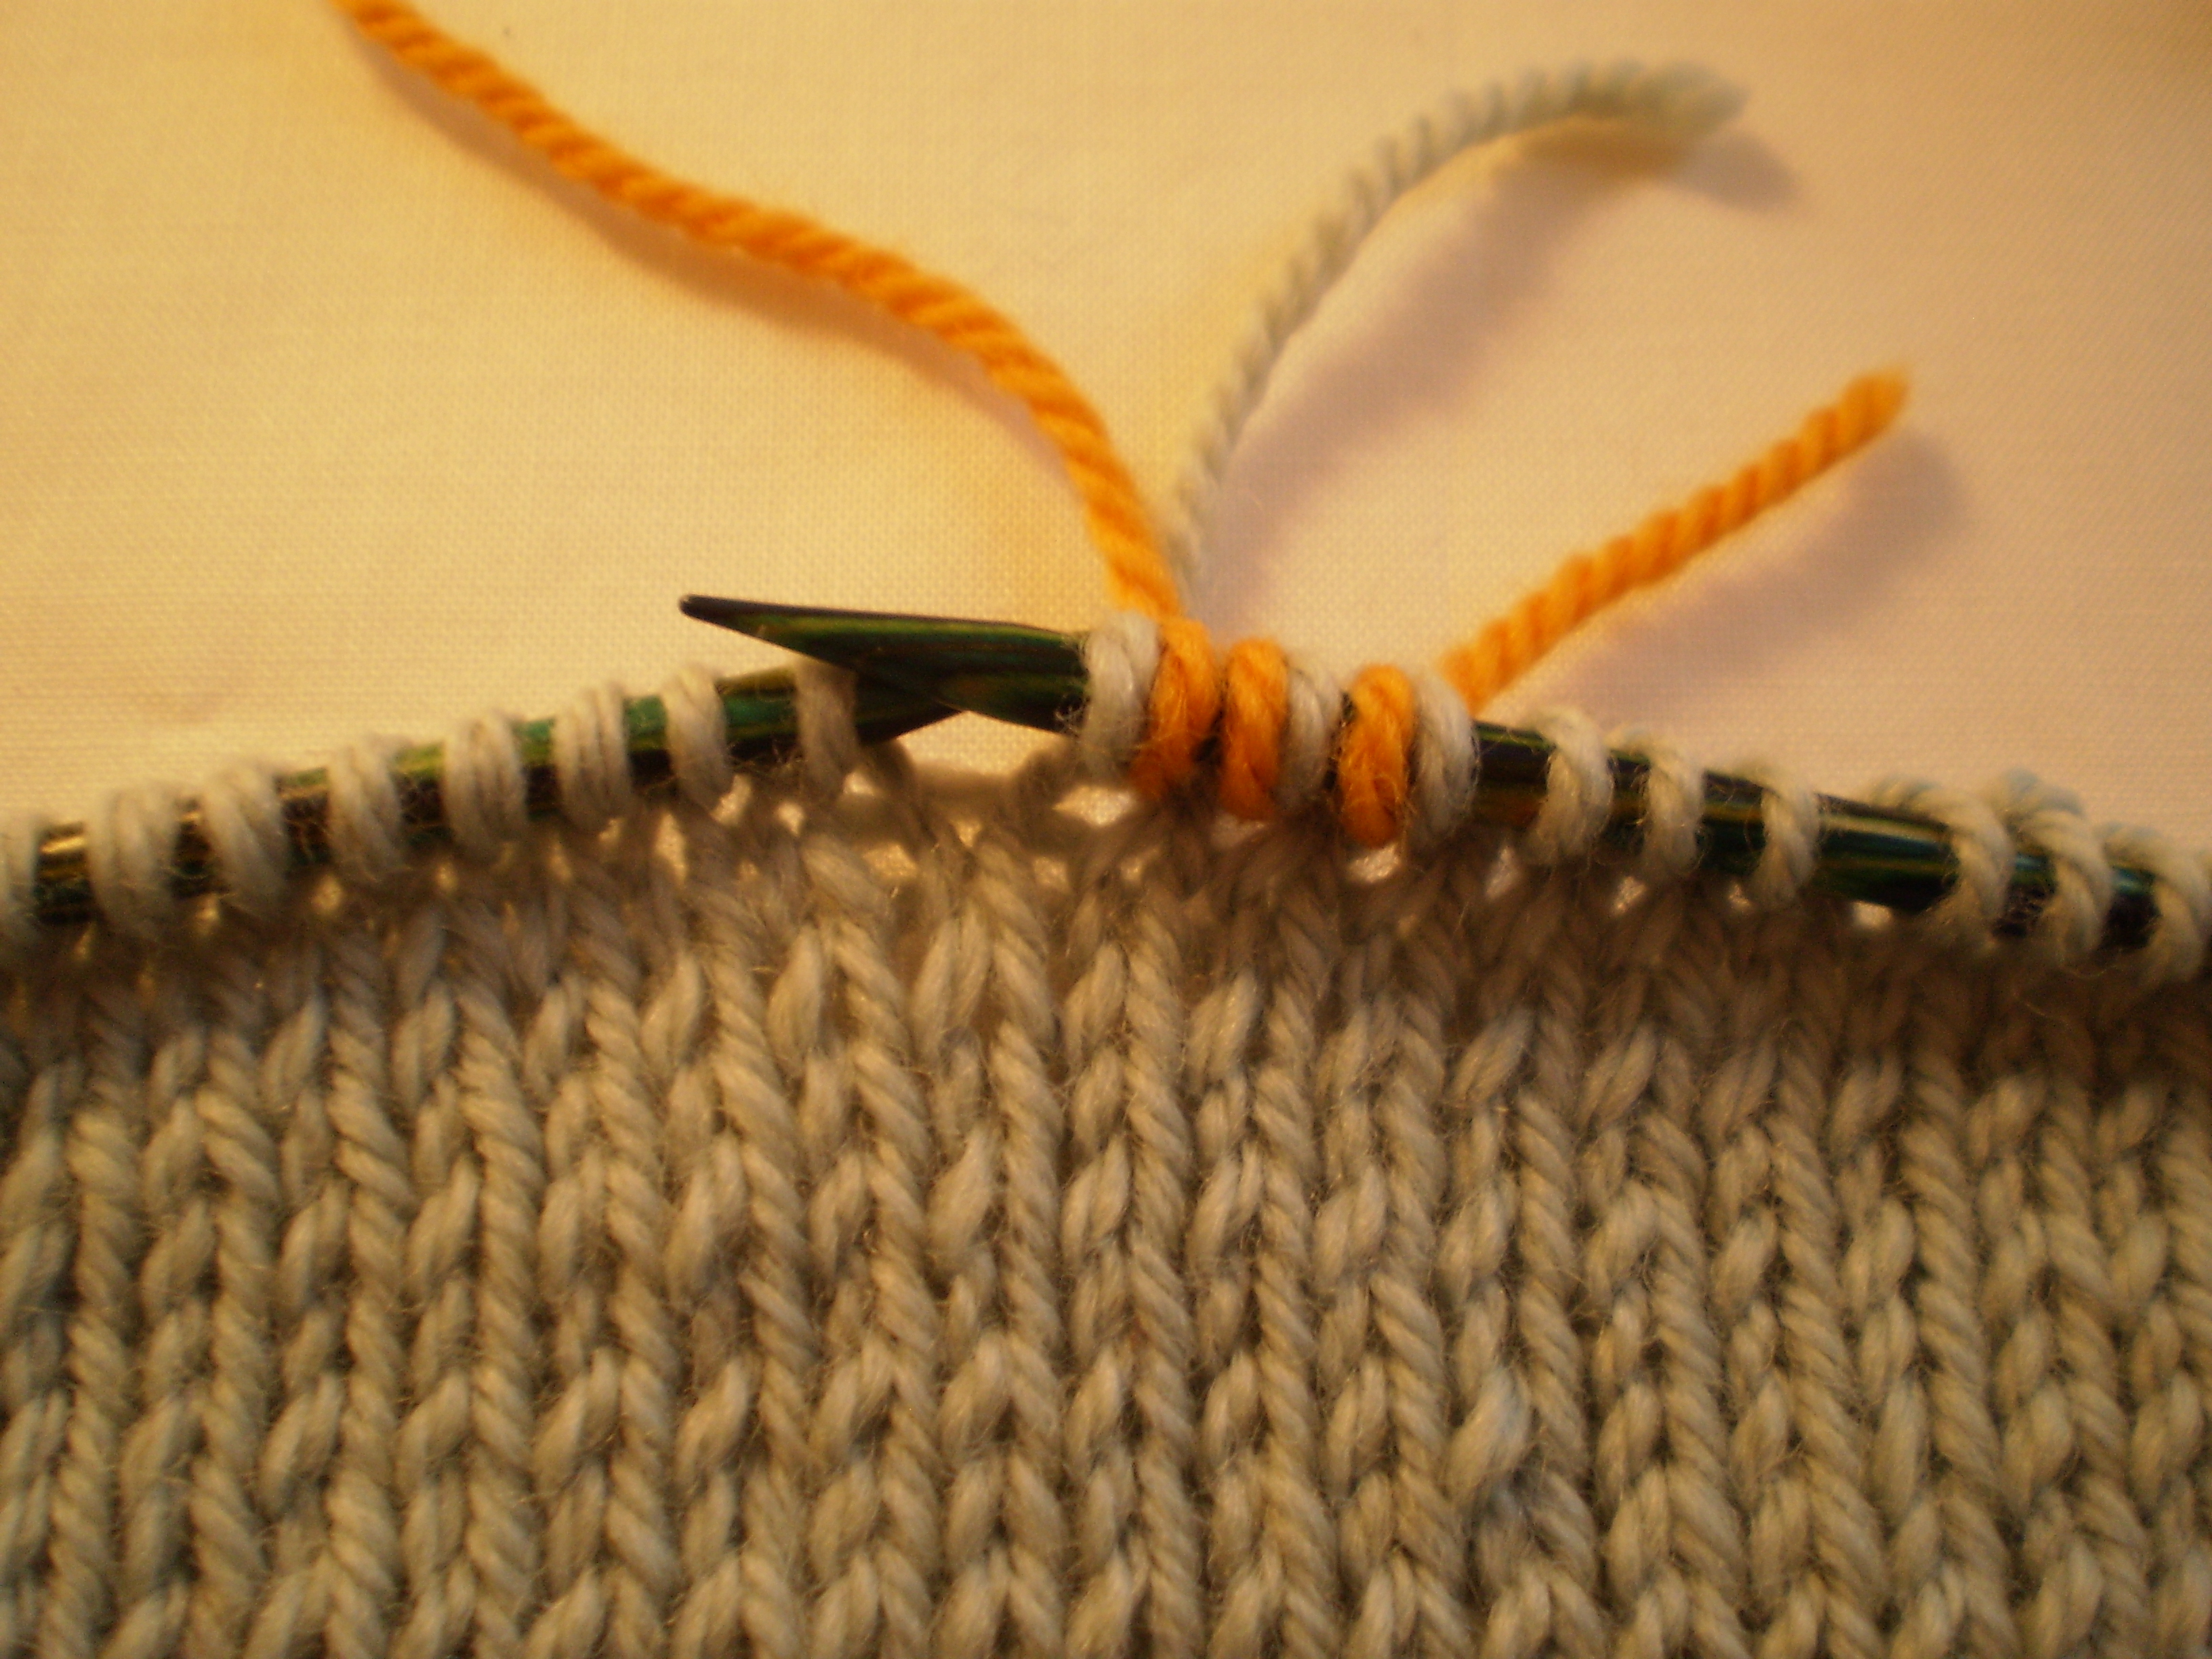
 Essentially, you fold both the new and old yarns creating two 4-6 inch loops. Then, hook the too loops around one another, like in the picture above. And, holding the yarn carefully, you knit with the looped yarn.
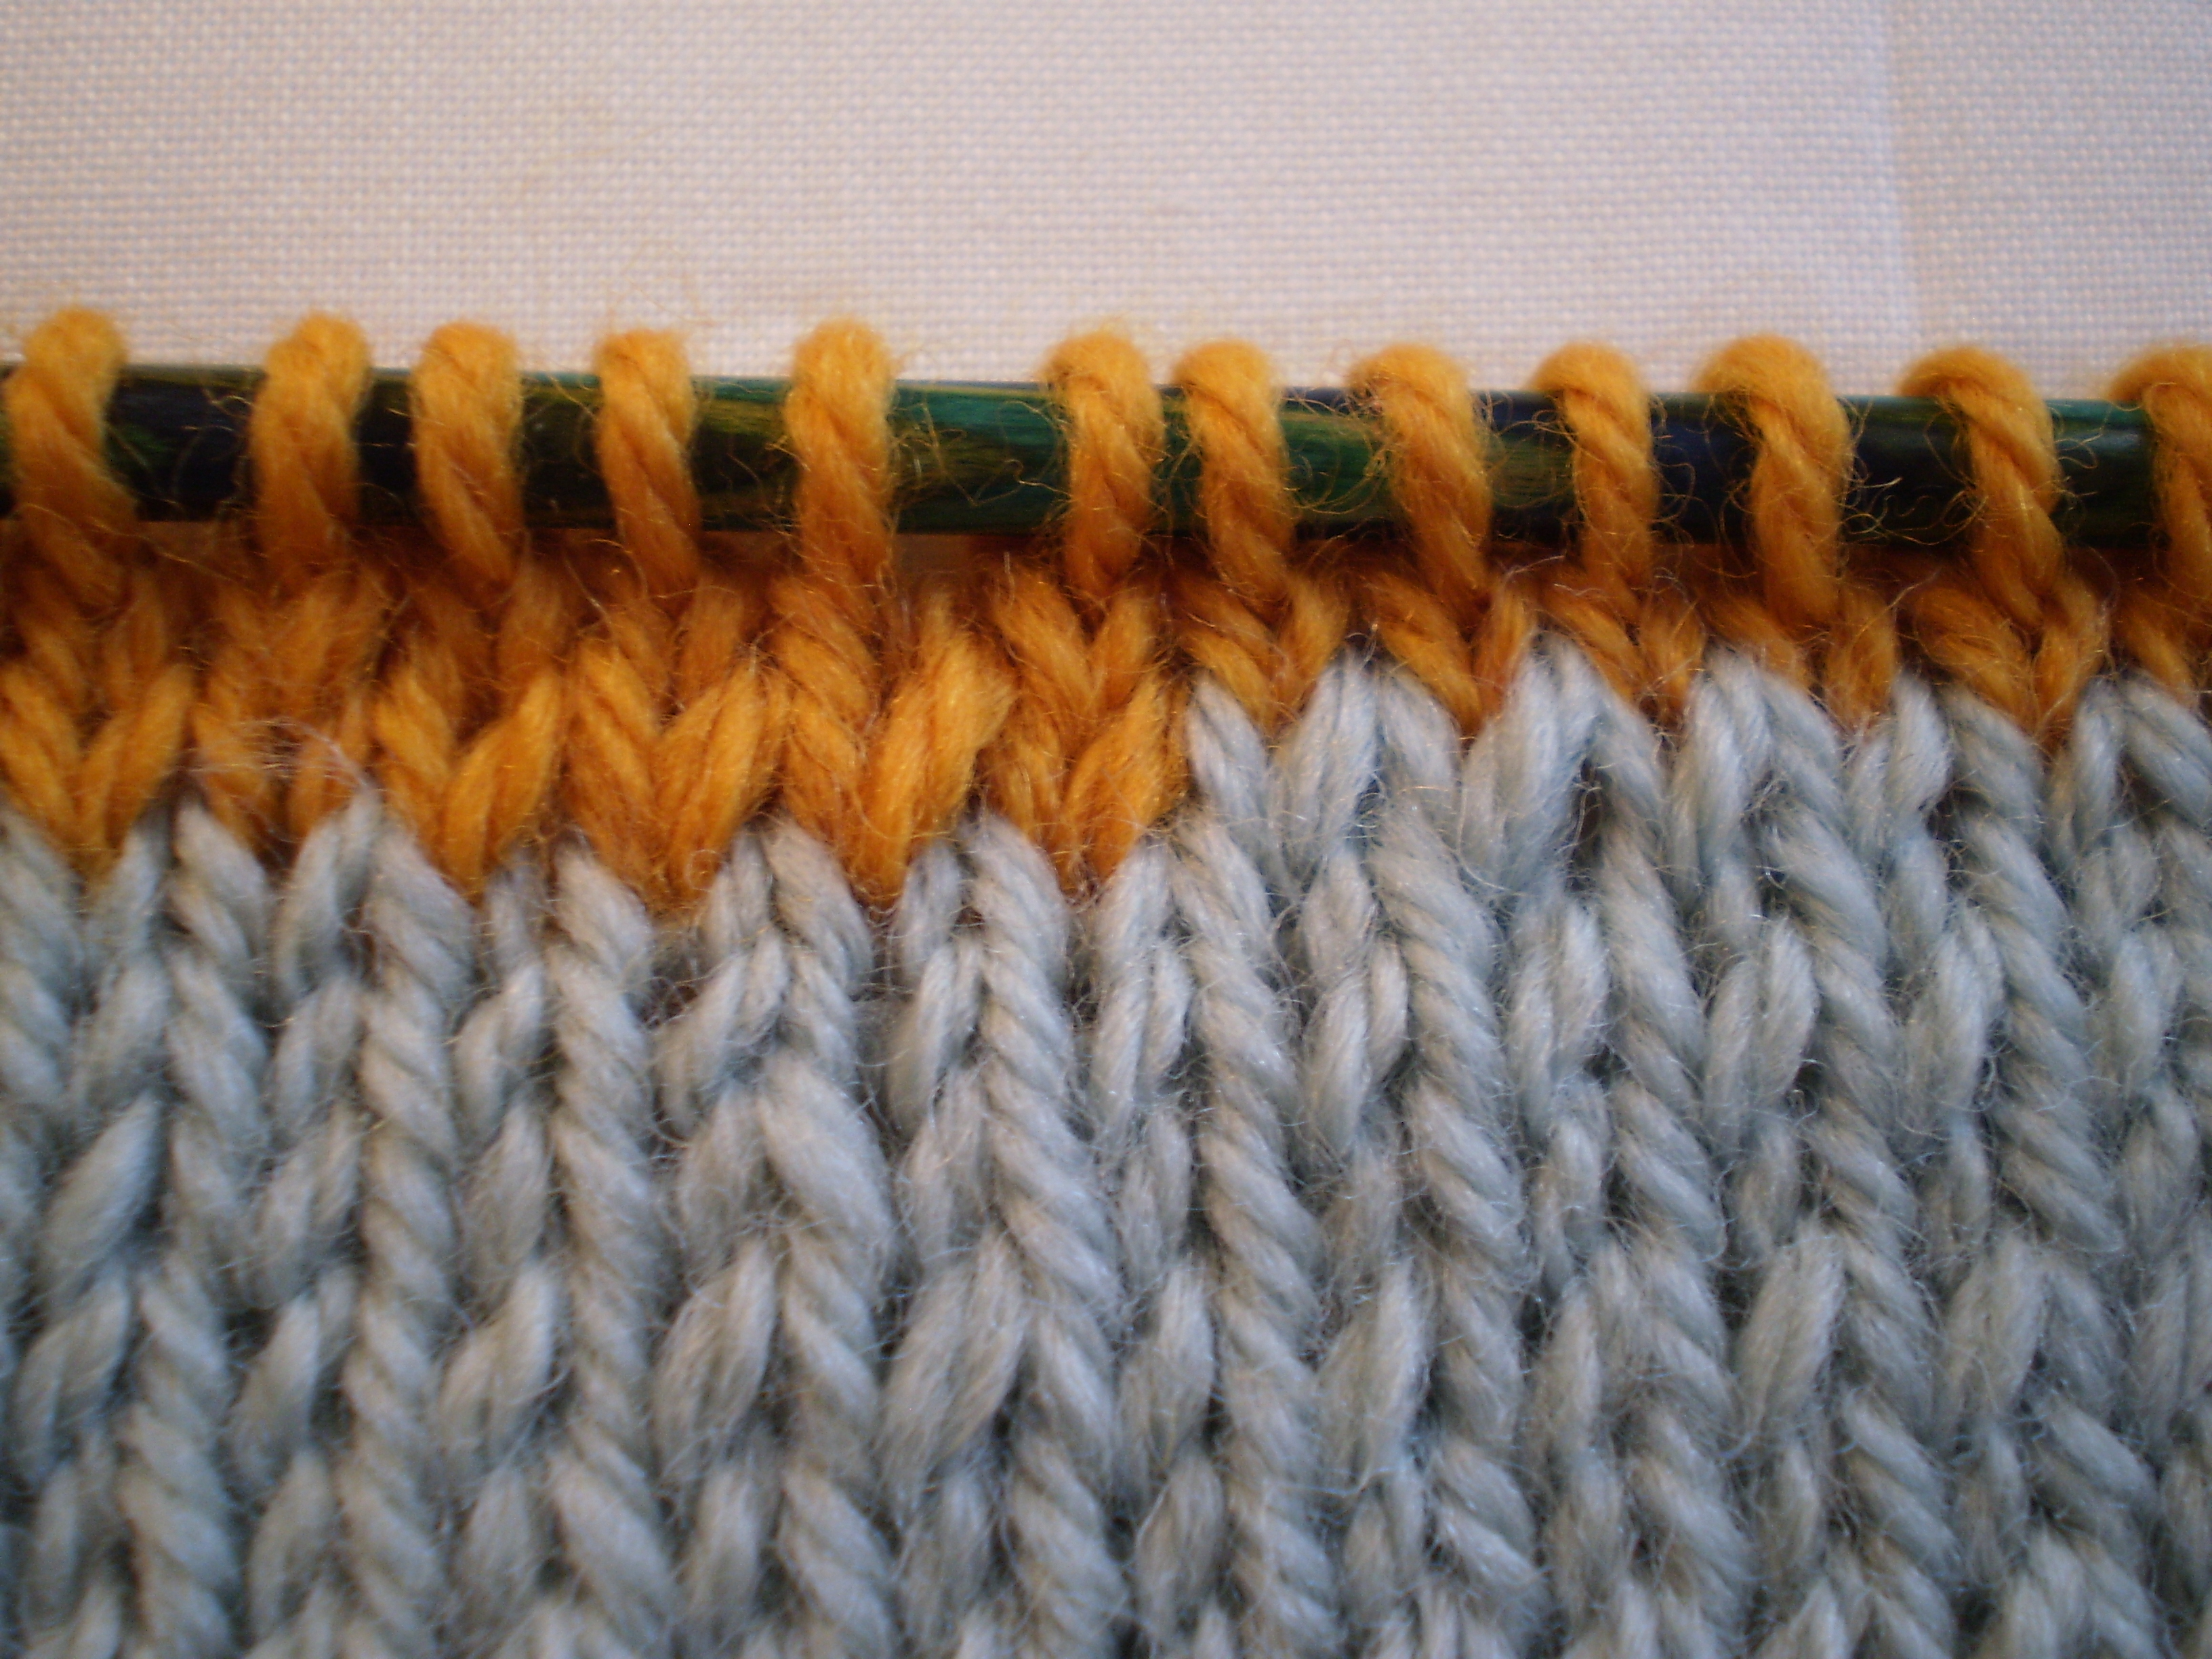
 See how you get a couple stitches of doubled-up old yarn, and a couple stitches of doubled-up new yarn? When you knit a couple more rows, you’ll see nothing but a clean transition from old yarn to new yarn.
 Pros: Easy (although slightly trickier than the Overlap Join). If you are careful to knit at least three stitches on either side of the join with the yarn held double, there’s no weaving-in of ends. If you’re trying to do some sort of cool avant-garde color-work where you want crisp color definition, but don’t care exactly where the color changes go, this would be the join to use.
Cons: Doubled yarn is slightly thicker than single yarn (obviously), so if consistency is a priority, this might not be the join for you. Yarn ends will poke out the back of the knitting, so if you need a perfect double-sided join, you’ll want to try something else.