Category Archives: Tutorial

Itty Bitty Faces

As I’ve said before, I’m a big fan of all things tiny.  And when I make tiny stuffed animals, I need to make tiny faces, too.

Because of the way knit fabric is created, often teeny tiny embroidered faces end up looking kind of dumb and stretched out.

So that’s where this cool face technique comes in.  I’d pretend that I came up with it myself, but alas, I’m not that clever.  Julie at Little Cotton Rabbits came up with it, and generously included the tutorial with her instructions for her teeny tiny toys.

It’s so simple, and so perfect, I’m kicking myself that I didn’t come up with it on my own.

6a00d83451d24769e200e5520787618833-800wi[1]Simply cut out a little piece of felt and hold it behind the doll’s face before you stuff the critter.  The felt is dense enough to allow you to embroider to your heart’s content without worrying about the sewing into knit stitches, and it is soft enough that you don’t even notice it once you’ve finished the little guy.

Genius!

I used her technique on my tiny teddy bears, and they turned out perfectly!

OLYMPUS DIGITAL CAMERAIt worked so well that I think I’ll probably use the same technique on my Mother Bears, too!

Have you ever come across an insanely-simple-but-totally-perfect technique before?

Zzzzzzip

Sorry, Folks! I totally promised you that I’d tell you about adding the zippers to my husband’s sweater… and then I didn’t. My husband has been wearing his sweater almost every day for the past month or so, so it’s starting to look a little lived-in, but it’s still holding up pretty well.

Anyway, here’s the zipper. (I think it turned out pretty well.)OLYMPUS DIGITAL CAMERA

I don’t really have a secret to zipper installation, or any magic techniques. I just pin them very carefully and make sure that both sides match up well.OLYMPUS DIGITAL CAMERA

Then, I use a needle and thread to carefully sew the zipper to the knitting, trying my best to make the stitches on the outside of the sweater hidden. That means the inside stitches end up being a little messy, but the inside isn’t the important part.OLYMPUS DIGITAL CAMERA

Easy, right? Sort of, anyway.

Have you ever used a zipper for your sweater?

Stoichiometry and Knitting

calculator[1]I don’t get to use my college degrees very often (they’re in a couple fairly impressive-sounding branches of biology and chemistry), but sometimes I get to use a technique I learned in school.  It always makes me happy to use to use things my professors never would have expected.

For example:  Stoichiometry.

Never heard of it?  Not a problem.  Stoichiometry is a fancy chemistry word for a really useful way to do conversions.

If you’ve ever figured out how many stitches there are an inch of sweater or how many rows you need to knit to make a  foot of scarf, you’ve probably done stoichiometry without even knowing it.

Here’s the idea:

You know how if you divide a number by itself, it equals 1?  (Like:  2/2=1)  Stoichiometry tells you that you can do the same thing with words, units, and variables (remember x from high school algebra?).

So what does that mean?  Let’s take a really simple example:

1We can cancel out the “sts” from the top and bottom, so the answer (1) doesn’t have any units.

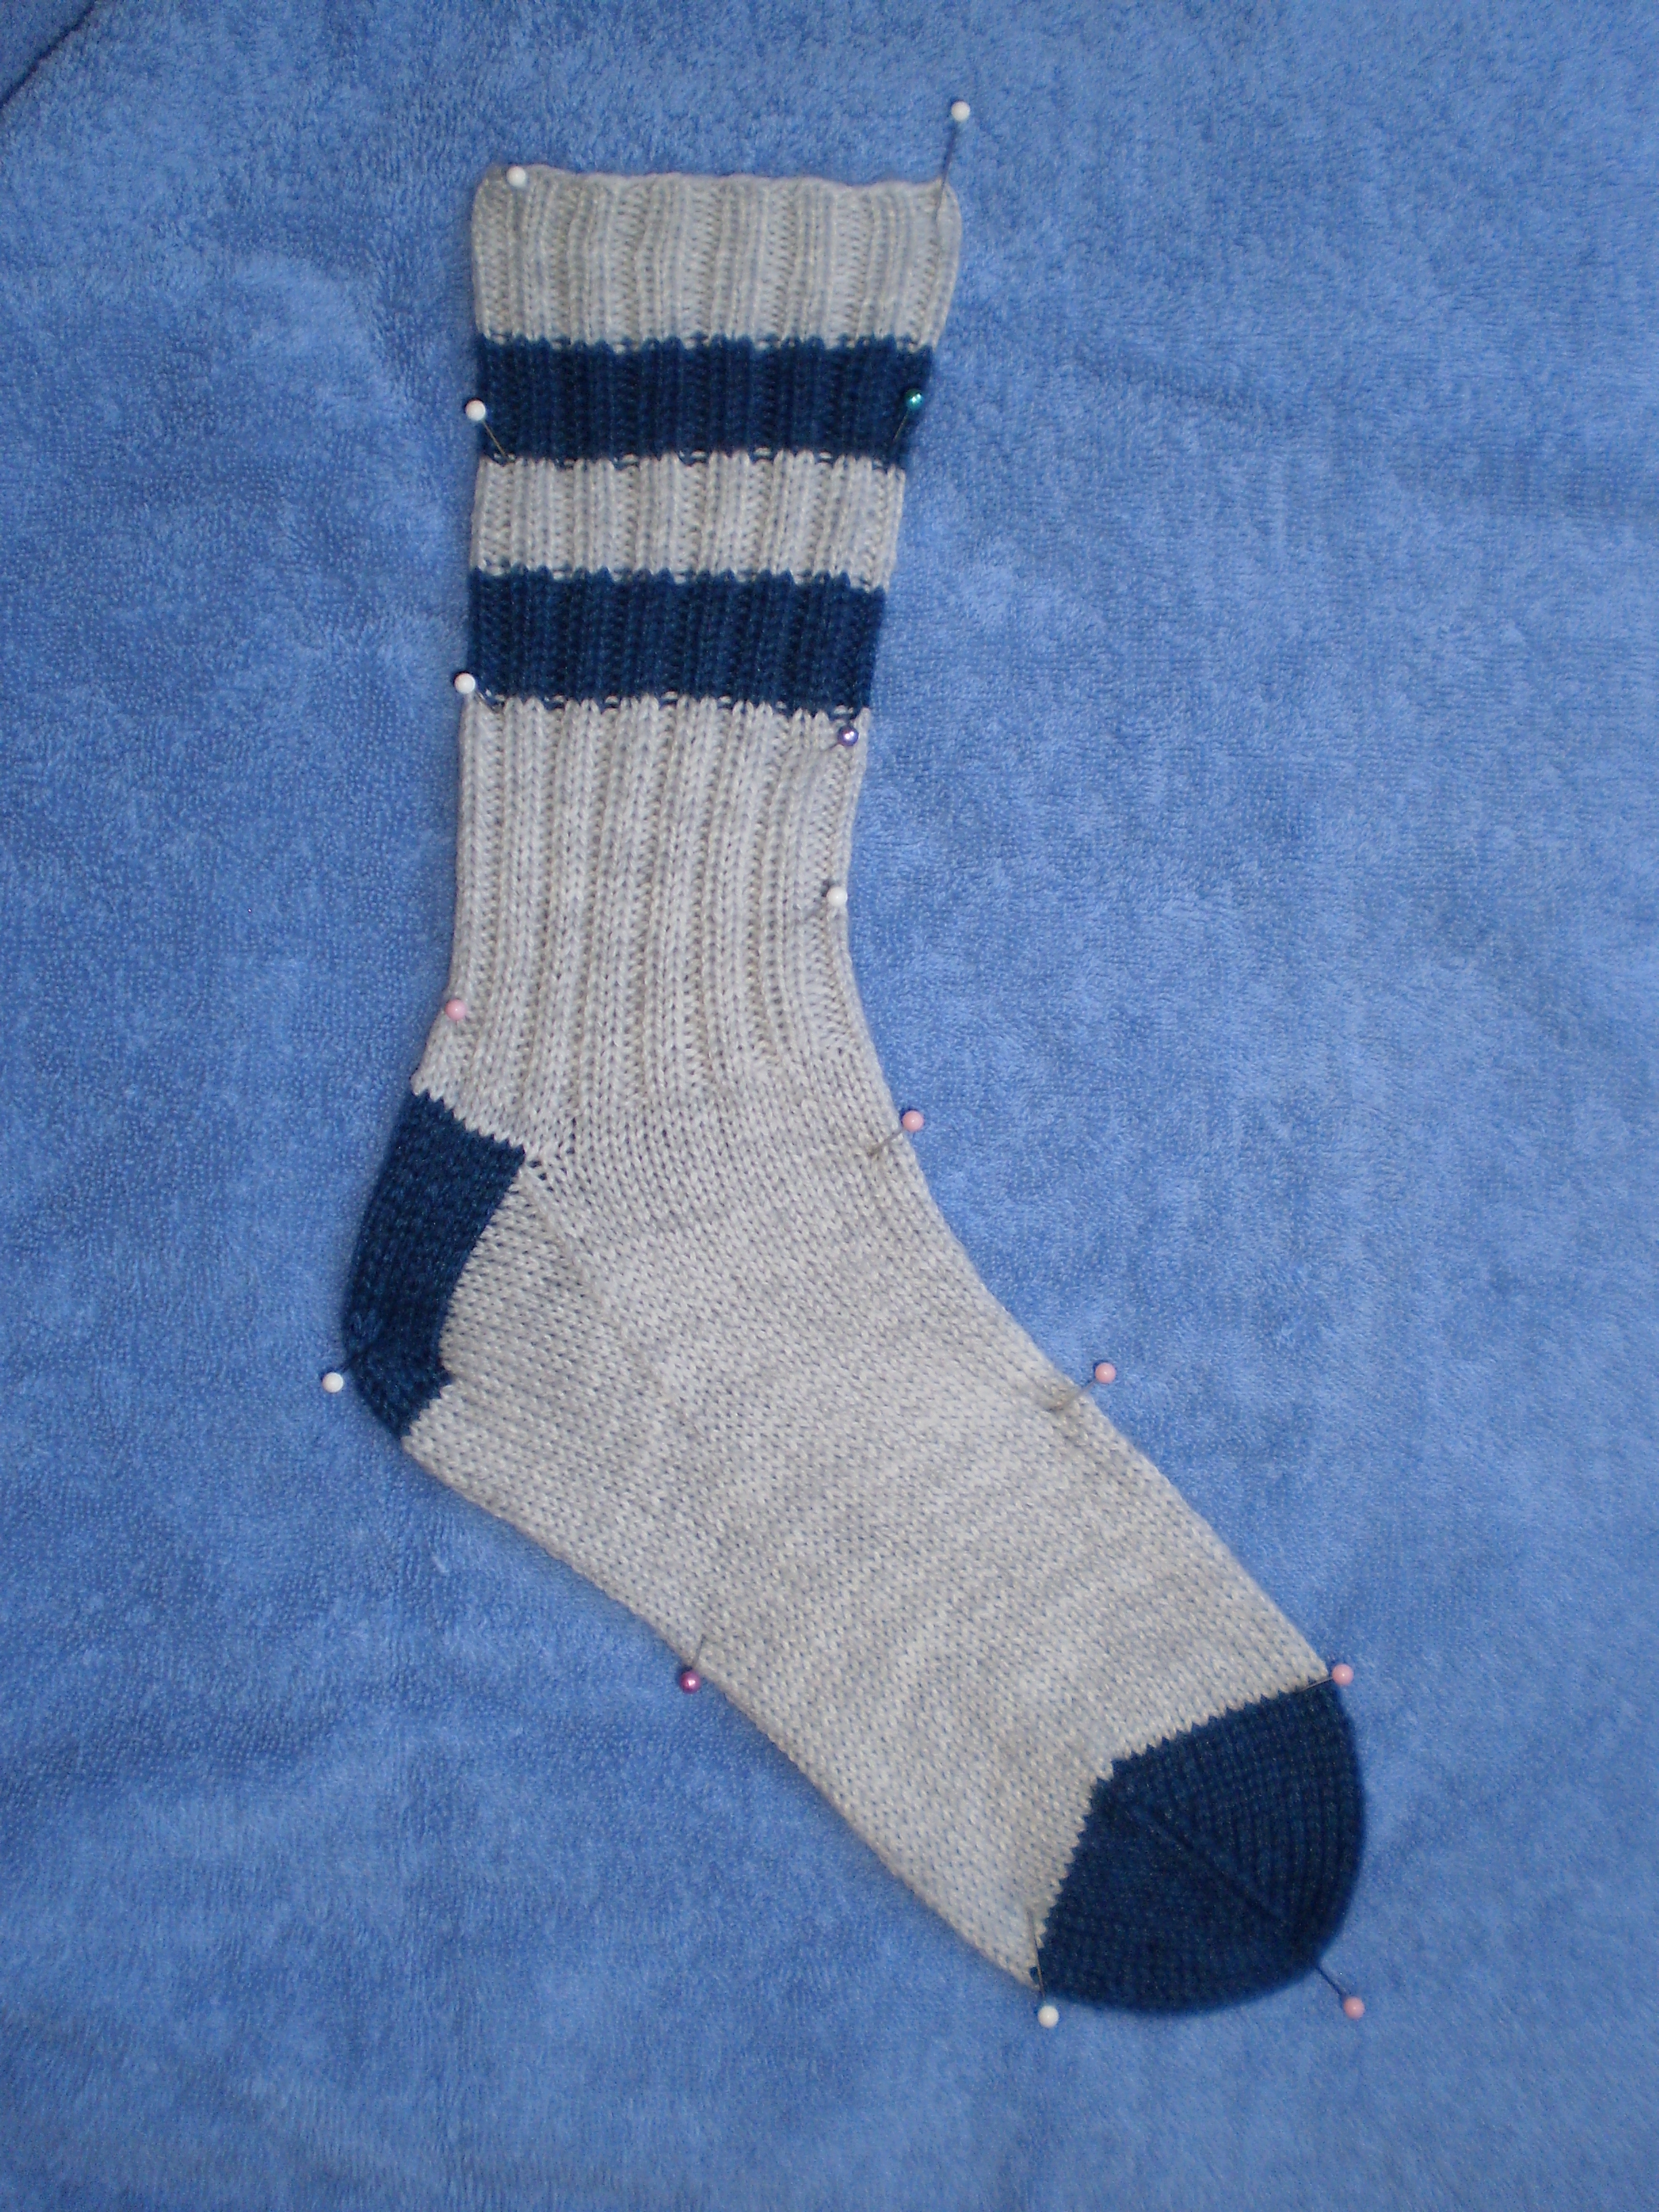
Now, that example is kind of useless to us, right?  So let’s use stoichiometry to do something that really is useful.  Figuring out how many rows we need to knit to get a 7 inch-tall sock.

Start by making a list of everything you know:

  • Our gauge is 12 rows/inch.
  • We want a 7 inch sock.

You could probably figure this one out in your head (or just on a calculator), but let’s do it the long way for example’s sake.

Start with the number that has a single unit (in this case the “7 inch” finished length) then, build your equation, multiplying across, and making sure that you cancel out your units as you go:

4 
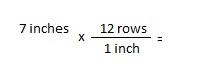
We can cross out the units that appear on the top and on the bottom (in this case, the “inches”).

Then we just multiply across, and the answer to the problem gets whatever unit is left (in this case, “rows”)3

So, in this example, if you have a 12 row/inch gauge and you want to knit a 7 inch sock, you have to work 84 rows.

Does that make sense?  Want to do one more (slightly complicated) example?

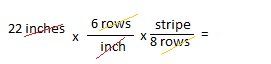
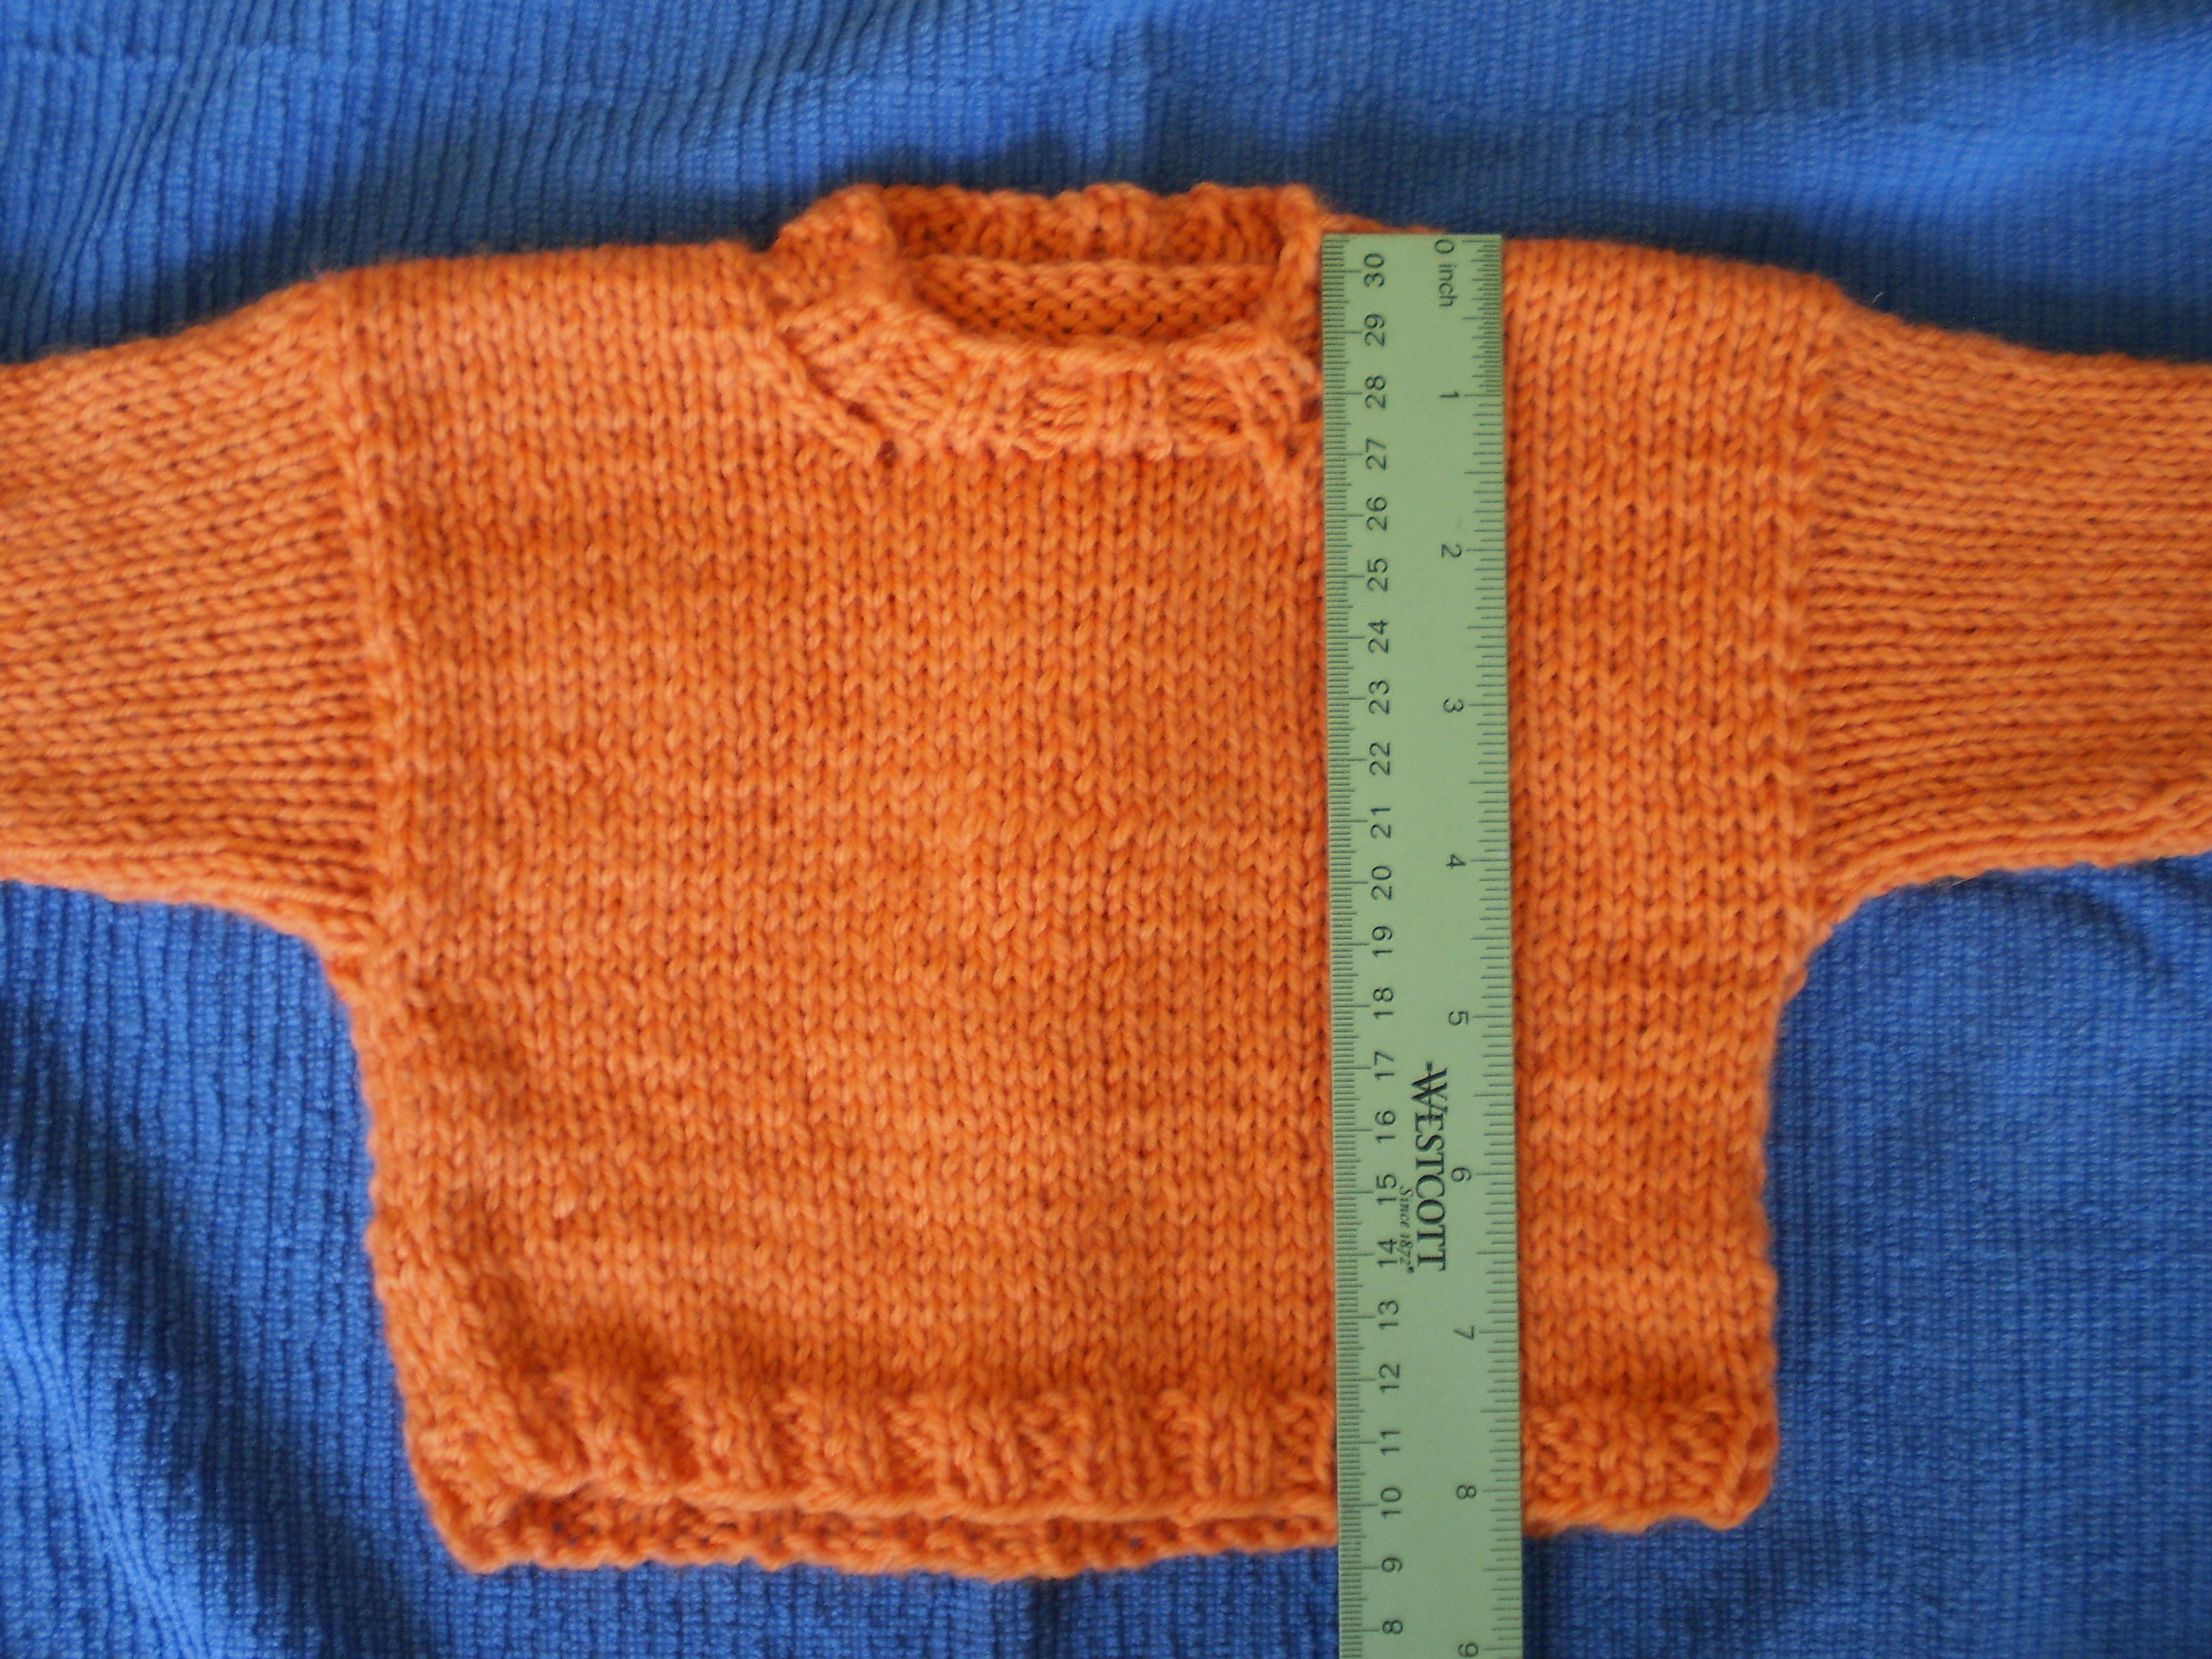
OK:  Imagine you’re designing a sweater pattern.  You want the front to be covered with fair-isle patterned stripes that are 8 rows tall.  You want to calculate how many stripes you will need to work to cover the front.

Here’s what we know about your sweater:

  • Gauge: 6 rows/inch
  • Sweater length from hem to shoulder: 22 inches
  • Stripe width: 8 rows/stripe

So, let’s set up the formula (starting with the sweater length- remember, begin your calculation with the number with the single unit.)

5(See how I flipped the 8 rows/stripe upside down, so it’s 1 stripe/8 rows?  That’s totally OK!  And, actually really important.  Flip any/all of your numbers, if it makes the units cancel out correctly.  Just remember, if you flip your the number, make sure you flip your units, too.)

Once everything is lined up correctly, start crossing out units that cancel:

6Then multiply across:7And then divide the top by the bottom.8So, in this example, you’d need to work 16.5 Fair Isle stripes to cover the entire front of your sweater.

Cool right?  (Or maybe that’s just me being a math nerd.)

Of course, you don’t have to use stoichiometry to work these things out, but it’s a great tool to have in your pocket- you never know when it will come in handy.

Do you think you’d ever use this technique to calculate bits of your pattern?  Do you have a different technique for calculating things?  Or do you avoid math completely?

Blocking: Lace

Nothing makes me happier than finishing a big lace project- a shawl, a scarf, or a fancy-pants sweater, and stretching it out across my blocking boards.  There’s something alchemical and transformative about blocking lace.  It’s kind of magical.

You start with a little blob of knits, purls and yarn overs, and toss it in some water to soak.

OLYMPUS DIGITAL CAMERA

It stretches, and changes, and I think I’m going to accidentally rip it in half (especially if it’s something particularly delicate).  But, then, I get it pinned out, and hey, presto!  You can suddenly see all the lovely stitch detail.OLYMPUS DIGITAL CAMERAEven when you remove it from the board, the fabric is totally transformed from the ugly knot you started with.  Now, it’s flat, beautiful and incredibly drape-y and wonderful.

OLYMPUS DIGITAL CAMERAAnd, of course, pinning out scallops and points on finished lace shawls always makes them look even better!  (Remember how we tried to avoid stretching the knitting so much that it made points on scarves and socks?  You can do it on purpose now!)

Here are a couple shawls I’ve made over the years with interesting borders:

Panache by Lankakomero

OLYMPUS DIGITAL CAMERA

Aeolian Shawl by Elizabeth Freeman8176172544_3cfd6827e5_z[1]

Knitting lace can be a tedious and slow process, but there’s nothing more satisfying than pulling out the last pin from your dried shawl and looking at your beautiful creation.

Blocking: Socks

I think my favorite thing to block might be socks.  This is pretty silly, since you really don’t have to block socks.  (I suppose, technically, you don’t have to block anything, really.  But some projects, like lace, you kind of have to block.)

Since socks are worn skin-tight, they look like they’ve been blocked while you’re wearing them.  But, if you’re giving someone a pair of socks as a gift (or you’re just making them for yourself), there is nothing prettier than a nicely blocked pair of brand-new hand-knit socks.

And the process couldn’t be easier.

Just soak your finished socks in clean, warm water for 10 or 20 minutes (like usual), and slip them onto your sock blockers and let them dry.  (Mine hang dry from the ugly chandelier in my kitchen.) Easy!

OLYMPUS DIGITAL CAMERA

What’s that?  You haven’t heard of sock blockers?  Well, let me tell you about them, because they’re basically magical, especially if you make a lot of socks.

Sock blockers are rigid, sock-shaped frames that will produce professionally-finished and identically-shaped socks every time.  They come in lots of sizes and are made with many different kinds of materials (wood, acrylic, and metal are common.  Mine are made from wire).  You can even make your own, though I think they’re totally worth the 15 or so bucks they cost.

OLYMPUS DIGITAL CAMERA

You’re not convinced?  OK, I get that.  Why spend money on a unitasker that you’ll only use now and then?  If you don’t have sock blockers, and don’t plan on buying them, you can always block with foam and pins, just like normal.

OLYMPUS DIGITAL CAMERATwo things are very important to keep in mind.  First: make sure you are blocking both socks to the same dimensions.  You wouldn’t believe the number of lopsided pairs of socks I made before I got my sock blockers.

And second:  Do your best to avoid puckers and points from your pins.  They’re really obvious on socks.  To avoid points, I use lots and lots of pins to spread out the tension around the edge of the sock, and I stick the pins in away from the edge.

OLYMPUS DIGITAL CAMERA

Not good

Good

Better

Either way you do it, blocking socks takes something that looks like a lame, wrinkly snake, and changes it into a beautiful, professional-looking accessory.OLYMPUS DIGITAL CAMERAOLYMPUS DIGITAL CAMERAHow do you block your socks?

Blocking: Sweaters

You understand how to block something simple (a scarf, a coaster, or maybe even a blanket).  Now, it’s time to do something more complicated.  Something with sleeves.

Let’s block a sweater!  (In this case, a baby sweater, but the same process works for a grown-up sweater, too.)

We’ll start by soaking the sweater in a bowl of warm water for 10-20 minutes.  Make sure it’s nice and soaked through.OLYMPUS DIGITAL CAMERAThen, just like last time, roll it up in a nice clean towel and squeeze out most of the moisture.  Put out your foam tiles and cover them up with a new clean, dry towel.

Lay out your sweater as best you can  to roughly the right proportions.  When you’re working with a grown-up sized sweater, it can be kind of tricky.  Don’t worry if you don’t get it right away-we’ll rejigger everything in a minute.  Just eyeball it.

OLYMPUS DIGITAL CAMERA

Now, it’s time to measure the sweater and make sure it ends up the size you want it.  Begin with the chest measurement.  Now, since this is a baby sweater, I want the chest to be 9 inches across.

OLYMPUS DIGITAL CAMERA

Close enough.

Now that the chest measurement is about right, I’ll stretch out the body to the right length,  double-checking that the chest measurement doesn’t get stretched out of shape.

OLYMPUS DIGITAL CAMERA

(Did you notice how I’m not using pins for this sweater?  That’s on purpose.  I try not to use pins on sweaters, because they can create little points and weird bumps on a garment like this.  And, in the case of this particular sweater, I’m not far off from my desired size, so I can just stretch the sweater a little bit and count on the friction between the yarn and the towel to keep it in shape.  If I was trying to use blocking to fix something, I would use pins.  For example, if I needed to add more than an inch to the body length, I would stretch the wet sweater out with pins.)

The body is all arranged correctly, so now let’s do the same thing with the sleeves.

OLYMPUS DIGITAL CAMERA

These sleeves should be about 6 inches long. With the sleeves, it’s really important to make sure both sleeves match one another- no one likes lop-sided sleeves.

Once your sweater has the right measurements, stop fussing with it!  Just leave it!  (And make sure any kids/dogs/cats/gremlins you have running around your house don’t mess with it, either.)

Something small, like this baby sweater, won’t take long to dry, but big, adult sweaters can take a while (especially if you live somewhere humid).  So, to speed the process along, try pointing a fan at it for a day or two.

Once the sweater is completely finished, put it on and do a twirl in front of the mirror, admiring your awesome work!


Blocking: The Basics

OK, so if you’ve blocked before, this’ll be a refresher for you.  If you haven’t tried wet blocking before, you’re in for some excitement (but maybe it’s just me that’s excited about blocking…).

I’m using a little bitty swatch for this example, but you can use this technique for just about any shape for basic blocking.  This swatch is a little piece of stockinette.  Stockinette is super curly when it’s unblocked, so I definitely need to block it.OLYMPUS DIGITAL CAMERAThis is a tiny little project, so I’m just using a little cereal bowl to soak my knitting.  I’ve filled it with warm (think bathwater) water, and I let the swatch hang out for a bit (about 20 minutes) or until its completely soaked through.  If I’m in a hurry, I’ll squeeze the knitting gently to get all the air out and really soak the fibers.

OLYMPUS DIGITAL CAMERANext, I’ll get out a clean towel and roll up my wet knitting, squeezing it to get out the extra water.  You want your knitting to be damp, but not dripping.  Sometimes, I’ll even step on the rolled-up knitting (like squishing grapes for wine), especially if it’s a really big project.OLYMPUS DIGITAL CAMERAOnce most of the water is squeezed out, I’ll break out my foam blocks (or your carpet, if you have carpet) and lay a new, dry, clean towel on top.

OLYMPUS DIGITAL CAMERAThen, I’ll take the damp knitting and pin out the corners to the dimensions I want.  I want this square to be nice and, well, square.  So I’ll start here.  The sides will pull in at first, but that’s OK.  We’ll fix that in the next steps.

OLYMPUS DIGITAL CAMERANext, I’ll grab more pins and tack down the center points of each side. OLYMPUS DIGITAL CAMERAAnd then I’ll add another pin in-between each existing pin.  Since this swatch is so small, I’ll stop here.  If I was blocking something larger (like a scarf), I’d keep adding pins until I had surrounded the whole item and gotten rid of the little swoopy edges.

OLYMPUS DIGITAL CAMERAYou’ve finished the hard part! (If you can even call it hard.)  Let your knitting dry completely (if you’re in a hurry, point a fan at it or put it in a sunny window), and remove the pins.

And, voilà la! A perfectly finished project! (Or at least an almost perfectly finished project.)OLYMPUS DIGITAL CAMERANext time, we’ll talk about blocking something a little more complicated- sweaters!

Blocking: Gear

A lot of people love shopping.  To them, there’s nothing more exciting than starting a new project and collecting all the gear they’ll need.  They enjoy dropping a couple hundred bucks on top-of-of-the line tools and professional-grade materials.

I am not one of those people.

It’s probably because I was raised in the Midwest, that most pragmatic portion of the country.

I like to get the bare minimum, and, if I can use stuff I already have around the house, all the better.  (After all, the money I save can go to buying more yarn!)

Sure, you can go buy fancy blocking wires, specialty blocking pins and expensive, nice-smelling blocking detergents.  I’m sure they’re all nice to have, but when you’re just beginning to block your knitting, do you really need these things?  No.  (And, frankly, even now, I use these materials for 90% of my projects.)

Here’s what you really need:

(And, FYI, these are all materials for wet-blocking projects.  It’s what I do for almost all my projects, and so far it’s served me well.)

1. Something to put water in.  Do you have a sink, a bowl, a bathtub?  Is it clean?  That’s all you need.  If it can hold warm water, and isn’t gross, you’re good to go.stainless-steel-bowls[1]2.  Pins.  I just use regular sewing pins.  They’re dead cheap, and you probably already have a little box of them squirreled away.  If you don’t, you can get a pack of a couple hundred for a few bucks at your local fabric store.  Some people will tell you that sewing pins will rust and discolor your knitting.  But, I haven’t seen that happen; the amount of time a pin is in contact with moisture is too short for rust to develop.  Of course, I wouldn’t use a rusty pin to block my knitting, but that’s just common sense.sewing-pins-new[1]3.  Something squishy to stick pins in.  For years, I actually used a clean towel, spread out over the Berber carpet in our attic.  The carpet held pins in place nicely, and was free.  But, our new house is unfortunately all wood and tile.  I know some folks block on a spare bed, or the back of a couch, but that’s a pain.  Instead, I went to the kids’ section of Target and got a $20 pack of foam tiles (the kind you’re supposed to put out on the floor so kids don’t crack their head when they fall).  They lock together into whatever shape you need, and work great.  You can get foam tiles that are specifically made for blocking, but they cost a bunch more.

81xrtGJjGNL._SL1500_[1]4. Your knitting.  Obviously.  FYI, wet blocking works best with animal fibers (wool, alpaca, etc.).  I have blocked some cotton things, which works a little, but blocking plant and man-made fibers never has the same amazing results.OLYMPUS DIGITAL CAMERANow that we’ve gathered the things you need from around your house (or maybe a quick trip to the store), next week we’ll start with blocking something simple!

Blocking!

I’ve gotten a few questions recently about blocking.  And it is kind of mysterious, so I understand the confusion.  It actually took me several years of serious knitting before I started regularly blocking my projects.  And let me tell you, it was amazing how much nicer my projects looked once I started blocking them.

OLYMPUS DIGITAL CAMERA


Think of blocking like adding a squeeze of lemon or a dusting of powdered sugar to your project.  It’s a flourishing touch that turns a good project into a great one.  Sure, your sweater will fit, even unblocked, but it will be so much better if you do.  Blocking makes your stitches more even, straightens out any little pulls and makes your knitting look more professional.  And (and this is a huge bonus), it lets you cheat a little bit on the size of your finished project.  Did the scarf turn out a little too small?  Are your sweater’s sleeves a little too long? Blocking can fix (or at least kind of fix) it.

Over the next couple weeks, I’ll talk about how I block (of course there are as many ways to block projects as there are knitters),  what you need to block a project, and what blocking can do for you.

Stay tuned!


More Linen Stitch!

I’m kind of in love with the linen stitch.  It’s haunting my dreams and dancing through my head.  I may have a problem.  It’s so fiddly and such slow going, but I absolutely love how it looks.

And, even though it takes a while to work up, it’s a really simple pattern-so easy to memorize!

Cast on an even number of stitches and follow these 2 rows:

RS rows: (K1, bring yarn to front, slip 1, bring yarn to back) repeat to end.

WS rows: (P1, bring yarn to back , slip 1, bring yarn to front) repeat to end.

Easy!  Let’s do it together.

On the right side, start with the yarn in back.OLYMPUS DIGITAL CAMERAKnit 1OLYMPUS DIGITAL CAMERABring the yarn to the front, between your two needles.OLYMPUS DIGITAL CAMERASlip 1 stitch from the left needle to the right.OLYMPUS DIGITAL CAMERABring the yarn back to the back, and do the whole thing again (and again and again).OLYMPUS DIGITAL CAMERAOnce you finish your row, flip your knitting to work back and forth.  Start this row with your yarn in front.OLYMPUS DIGITAL CAMERAPurl 1.OLYMPUS DIGITAL CAMERABring the yarn back, between your needles.OLYMPUS DIGITAL CAMERASlip 1 stitch.OLYMPUS DIGITAL CAMERABring the yarn in front again, and keep repeating until you reach the end.OLYMPUS DIGITAL CAMERAAfter a while, your right side will start to look like this (which people say looks like woven fabric.  I don’t know if I agree with that, but it does look cool.)

OLYMPUS DIGITAL CAMERAAnd your wrong side will look all cool and bumpy and textured.  I almost like it more than the right side.

OLYMPUS DIGITAL CAMERAI’ve made these samples using a different, random color each row, but the linen stitch looks great in one color, knit with variegated yarn or using two or three repeating colors.  The linen stitch is a great way to play with color mixing!

Have you ever used the linen stitch before?  What did you make with it?