Tag Archives: Embroidery

On YOUR Needles

We’ve got some crafty folks up in here!

You guys sent me your current WIPS, and I’ve got to say I’m impressed!

My mom (who’s always got something fun in the works), sent me a picture of her newest knitted doll from Arne and Carlos’s book.  We took the doll class together last year at the Nordic Knitting Conference, which was super fun!  Mom says that this doll is going to be the brother of the doll she made in the fall.A reader, Yhenny, is making this pair of adorable lace gloves.  She made the Poison Ivy Wrap from Rilana Riley-Munson.  And, since she had a little yarn left over, she adapted the lace pattern to make matching mitts.  How clever (and beautiful)!And, one of my old friends, Jenny, is working on a little “Nevertheless, She Persisted” embroidery.  She’s a great embroiderer (is that a word… it doesn’t look right)- last Christmas she stitched a really adorable portrait of a family member’s cat.  So far, she’s done the outline of her letters, and then she’s going to fill in the lines with satin stitch.  I think it’s going to be really great.Thanks for sharing your projects!  I love seeing what you’re all working on!

Are you working on anything else?

Mama Bear Update: Faces

Bears! Bears! Bears!  They’re everywhere!

And, now, they’re looking at me!

OLYMPUS DIGITAL CAMERA

Look at them with their little noses, and their little beady eyes.  Watching.

Although, I suppose I’m really the only one to blame.  I did add the faces after all.

Want to see how these little faces came to be?  I thought you’d never ask.

I’m usually a big fan of safety eyes, which, ironically are not safe for kids under 3 years old.  Since I don’t know who the dolls are going to (and the instructions specifically asked for no safety eyes, and I follow rules), I made these faces with embroidery floss and little bits of felt.  I think they turned out pretty cute!

I started by gathering my materials:  1 un-stuffed bear,  2 eyes (cut out of felt), 1 triangular nose (also felt), a big rectangle of felt, about the size of the bear’s face (something happened with the photos, but the green felt and the green yarn are much closer in color than these pictures would have you believe), a needle and coordinating embroidery floss.

OLYMPUS DIGITAL CAMERA

I used the same technique from when I made those teeny-tiny bears from Little Cotton Rabbits.  I slipped the face backing into the bear’s head, and arranged the eyes and nose on the front.  Then, I carefully sewed through the backing and the knitted face to attach the features.  OLYMPUS DIGITAL CAMERAI used a back stitch to sew down the eyes and nose  quite firmly.  I want to be sure that the faces don’t fall off while the bear is being played with!

Then, I made two long stitches slanting away from the bottom of the nose to create the mouth.  I like to give my dolls/stuffed animals as neutral expressions as possible, that way the kid playing with them will be able use their imaginations more freely.

Unfortunately, this bear ended up looking a little judgy.

OLYMPUS DIGITAL CAMERA

Oh well.  He’s still cute.

Then, to give the bear a little life, I added a couple tiny stitches in white to add a ‘shine’ to the eyes.OLYMPUS DIGITAL CAMERAWeird how something so little can make such a big change!

How are your bears  coming along?  Do yours have faces yet?

Wait- what’s that?  You haven’t knit any yet!  Get the pattern here!

Itty Bitty Faces

As I’ve said before, I’m a big fan of all things tiny.  And when I make tiny stuffed animals, I need to make tiny faces, too.

Because of the way knit fabric is created, often teeny tiny embroidered faces end up looking kind of dumb and stretched out.

So that’s where this cool face technique comes in.  I’d pretend that I came up with it myself, but alas, I’m not that clever.  Julie at Little Cotton Rabbits came up with it, and generously included the tutorial with her instructions for her teeny tiny toys.

It’s so simple, and so perfect, I’m kicking myself that I didn’t come up with it on my own.

6a00d83451d24769e200e5520787618833-800wi[1]Simply cut out a little piece of felt and hold it behind the doll’s face before you stuff the critter.  The felt is dense enough to allow you to embroider to your heart’s content without worrying about the sewing into knit stitches, and it is soft enough that you don’t even notice it once you’ve finished the little guy.

Genius!

I used her technique on my tiny teddy bears, and they turned out perfectly!

OLYMPUS DIGITAL CAMERAIt worked so well that I think I’ll probably use the same technique on my Mother Bears, too!

Have you ever come across an insanely-simple-but-totally-perfect technique before?

Yarn + Electricity = Winning

This weekend MakerFaire is happening in San Francisco!  I am so excited to finally get to go after years of reading about it.  MakerFaire is a super cool craft fair/creative festival that  celebrates innovation and ingenuity.  Anyone who has a cool idea is welcome to share it with other fair-goers.

You made a bicycle-powered sewing machine?  You developed a robot that tends your garden for you?  You used scrap metal to build a car?  You have a spot at MakerFaire. People at MakerFaire are especially known for taking two things that don’t usually go together, combining them and making something amazing.

Like fiber arts and electronics.

E-textiles (aka soft circuits) are a really cool way to try your hand at electronics and create some amazing projects.

The basic idea is that you use conductive thread (nylon thread, coated in a conductive metal) instead of wires to connect your electronic components (like leds, batteries, sensors and tiny computers).

You could go super simple, and make a pair of texting gloves.  The conductive thread woven through the fingertips allows you to use a touchscreen  without removing your gloves.  (Handy in the Great White North in February.)

Teknika Gloves by Laura Nelkin

6437487283_bc44cb9a7d_z[1]Or you could get your embroidery on, and make a little sampler, including LEDs, a battery and an on/off switch.

SANYO DIGITAL CAMERAOr, if you have more tech experience than I do, you could get your hands on a LilyPad Arduino.  It’s a tiny computer that you can plug into your computer, program, and use to make LEDs blink in cool patterns.

SANYO DIGITAL CAMERAWhat would you use soft circuits for?

Mashed Potato Crafting

I heard one of my friends talking the other day, and she used a term I had never heard before, but totally understood the moment she used it.  She was talking about how, when she had a crummy day, she would “watch Monk or Psych or something… you know, one of my mashed potato shows” and immediately feel better.  I thought that was a great way to put it.  Mashed potatoes are tasty, comforting and easy to digest.  They might not be as fancy as a gourmet meal, or as trendy as sushi, or as luxurious as lobster, but they totally will make you feel better after a long day.

mashed-potatoes-su-1673101-l“OK,” you’re thinking, “so the girl has a thing for potatoes.  What does that have to do with knitting?”  After all, you’re here for the crafting, not to hear me natter on about food.  My answer to you is: “It has nothing to do with Knitting!”  Ha! Fooled you, didn’t I?

Actually, I wanted to give a shout out to my favorite mashed potato craft, counted cross stitch.  When I’m stressed, or blue or just feeling lazy, and don’t want to do math, plan a new project, or dig out the right pair of knitting needles, I love to do some counted cross stitch.  There’s something comforting about it.  It serves no purpose, it doesn’t challenge my brain, and it is so totally easy.  It’s like coloring in a coloring book or doing a paint-by-numbers, but with thread.

OLYMPUS DIGITAL CAMERAI’m especially a fan of those little kits you’ll find in the bargain bin at Jo-Ann’s.  They’re always dumb stuff, like butterflies, or hearts, or little cutesy sayings, but they’re still fun and silly to make.  They give you everything you need (except scissors, because for some reason scissors are never included in kits), so you really and truly don’t have to think.  It’s the perfect mashed potato craft.

OLYMPUS DIGITAL CAMERAWhat is your mashed potato craft?

I’m So Lazy…

I’m totally lazy.  I love trying to find  shortcuts and easy ways to do things.  Unfortunately with knitting, there often isn’t an easy way.  (There’s no shortcut for knitting the acres of stockinet for a sweater… you just have to do it.)

Sure, knitting is an effort-heavy process, but don’t lose all hope!  I’ve got a great little trick for making color work super easy.  Let’s imagine that you want to put a nice little fair isle border on the cuffs of your new sweater, or maybe knitting an intarsia heart on a little girl’s hat.  Your project would end up really cute, but it would be a total pain to do.  I don’t know about you, but I like just making plain old stockinet stitch garments (easy!).  So, what’s a girl to do?

That’s where the duplicate stitch comes in.  The duplicate stitch is technically an embroidery technique that you can use to decorate knitted fabric after it has already been knitted so that it looks as if the decorative pattern was worked as the project was knit up.  I like using it for projects that have only a little bit of fair isle (which can be a pain to do for only a row or two at a time), or any pattern that wants you to do intarsia in the round (which is almost impossible).

And, I’ve even made a video for you.  Enjoy, and let me know if you have questions!

Spheroid and Oblong

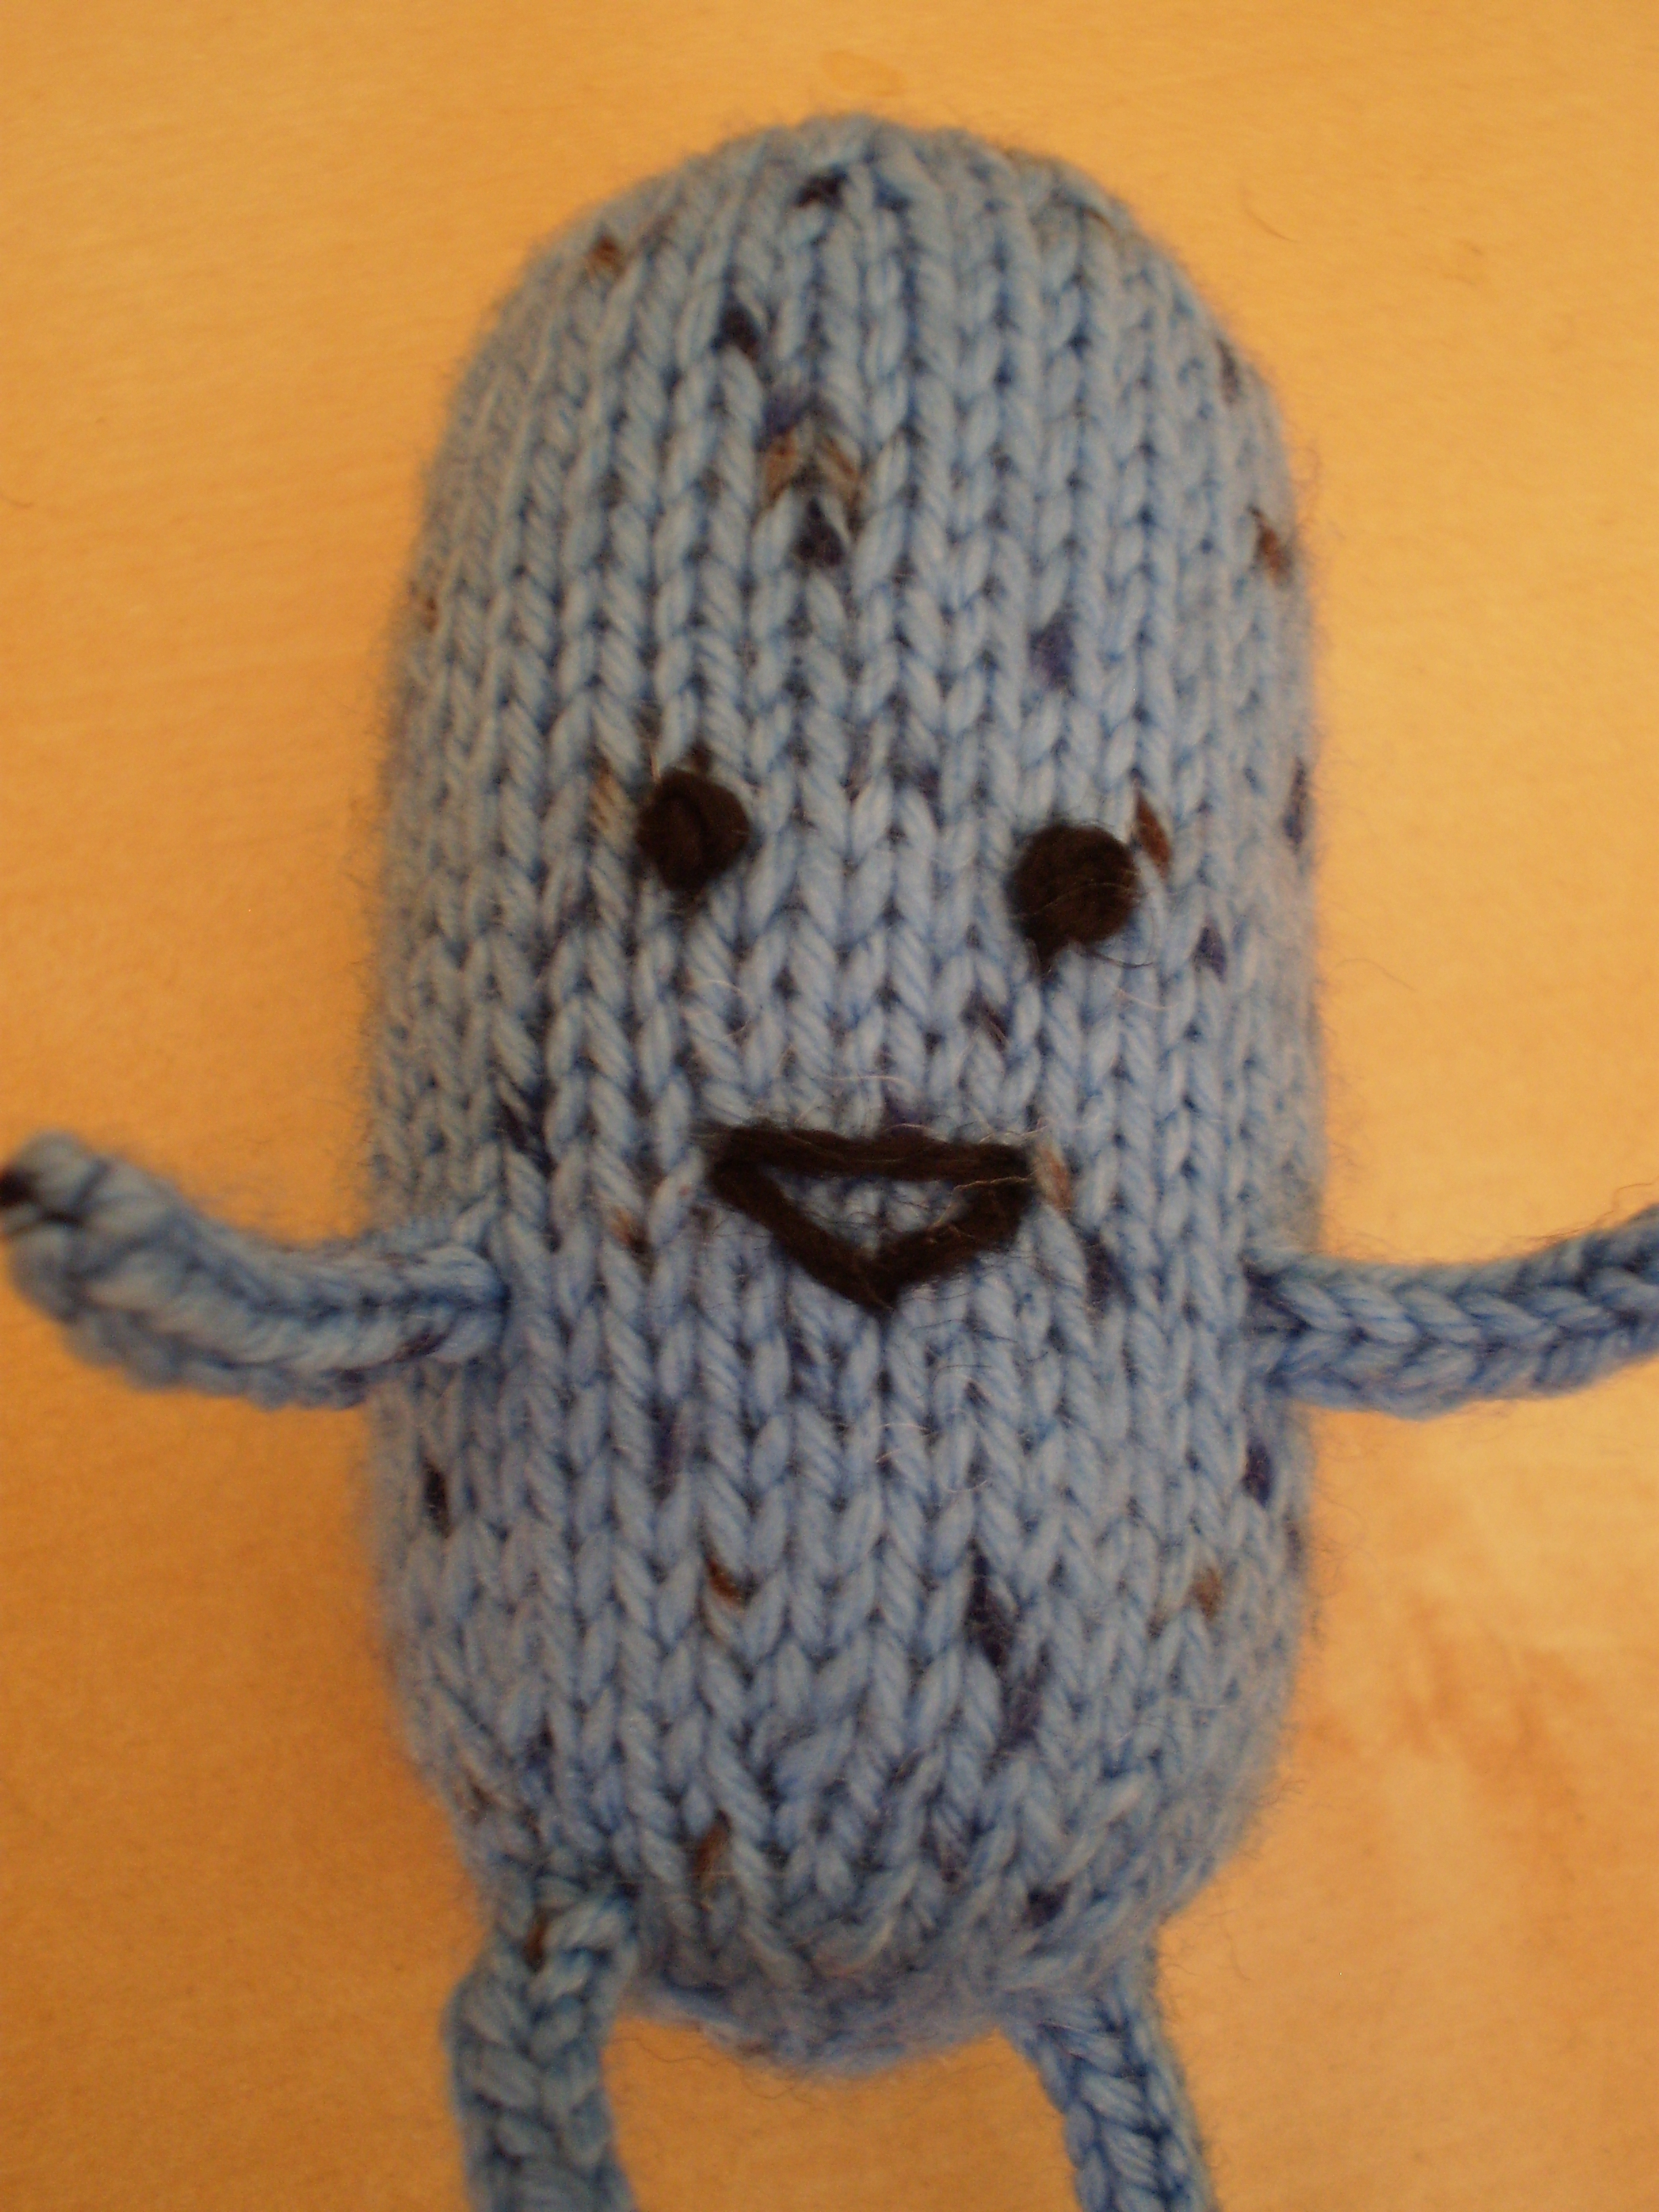
So, now you know about the Toy Society, eyeballs and I-cord.  What to do with your new knowledge?  How about making a cute, round(ish) little creature to brighten someone’s day?

I like making these little guys with sock yarn on tiny little needles.  That way they can ride around in a pocket or purse.  But, using bulky yarn and larger needles, you’ll end up with a bigger, more huggable critter.

Feel free to play around with the shape of your Spheroid, too.  Adding more even knit rows between the increase and decrease rows will make your guy more oblong.  Removing the knit rows will make him more UFO-shaped.

Remember, if you’re making this little guy for a kid under the age of 3 (or anyone who is dumb enough to eat buttons) forgo button or beaded eyes.  Safety eyes, while they’re safer than buttons, are still not 100% for little kids.

Materials:

A few yards of scrap sock yarn.  A ball about the size of a Ping-Pong ball should be plenty.

Size 2 double-pointed needles

Polyfill or wool roving for stuffing

Safety eyes, buttons, beads, or contrasting-color thread for the face

Scissors and a tapestry needle

Gauge:

7 sts/inch, but it really really doesn’t matter

Instructions:

Spheroid:OLYMPUS DIGITAL CAMERA

Cast on 8 stitches, and join to work in the round

1. k

2. [k1, inc 1] around(16 stitches)

3. k

4. [k2, inc 1] around(24 stitches)

5 and 6.  k

7. [k3, inc 1] around(32 stitches)

8-10. k

11. [k4, inc 1] around(40 stitches)

12-15. k

16. [k3 k2tog] around(32 stitches)

17-19. k

20. [k2 k2tog] around (24 stitches)

21-22. k

23. [k1, k2tog] around(16 stitches)

24. k

25. [k2tog] around (8 stitches)

Cut a 1 foot long tail.   Using the tapestry needle, pull the tail through the loops.  If you’re using safety eyes, add them now.  Stuff the body, and close up the top.

Oblong:OLYMPUS DIGITAL CAMERA

Complete rows 1-7 of Spheroid.

Knit 20 rows even.

Complete rows 20-25 of Spheroid.

Cut a 1 foot long tail.   Using the tapestry needle, pull the tail through the loops.  If you’re using safety eyes, add them now.  Stuff the body, and close up the top.

Limbs:

Using double-pointed needles, cast on 3 stitches, leaving a 1-foot tail.  Work as an I-cord for 8 rows.  Cut a 1 foot tail, and use your tapestry needle to pull the tail through the loops, and tie a knot so the leg doesn’t unravel.  Hide the end of the tail in the middle of the limb and trim.  Leave the cast-on tail to use to sew the limb to the body.

Repeat until you have enough limbs.  (Usually this is 4.  But, if you want to make an octopus, 8 would be more appropriate.  Or of you wanted to add antennae, you should make 6)

When you have enough limbs, carefully sew them onto the body, using the remaining cast-on tails.  Weave in the ends and trim.  Hide the ends in the body of your little guy.

If you haven’t already added a face, do so now.

OLYMPUS DIGITAL CAMERA

Face it

You have spent hours and hours and hours working on a teddy bear, doll or other plushie, and you are just about done, when you realize it doesn’t have a face.   While a faceless doll can be cute on occasion (although they are usually creepy), you probably at least want some eyes.  You have a couple options, but the easiest is usually an embroidered face.

If you are making your plushie for kids under 3, animals, or particularly dumb adults, embroidered faces are best, sinc there is nothing for them to swallow or choke on.  Using an eye-colored yarn or embroidery floss, sew through the back of the head, make a stitch or two for each eye, and sew back through the back of the head.  If your doll has hair or a hat, it the ends will be hidden.  If you don’t have hair, try making a tiny little knot at the back of the head, and then burry the tail in the head, trimming off any excess yarn.  stitched eyes can be very expressive:

OLYMPUS DIGITAL CAMERA

OLYMPUS DIGITAL CAMERA

OLYMPUS DIGITAL CAMERA

OLYMPUS DIGITAL CAMERA

OLYMPUS DIGITAL CAMERA


All of these faces were made with these super simple stitches:

French Knots

Running Stitch

Now, go fourth and give things faces.  I don’t know about you, but I feel like I’m being watched or something.  Eep!