Tag Archives: how-to

Sock Week: Tootsies

We’re so close, I can taste it!  Only a few short rows until you get to be done!  (And then you get to make another one… unless you’re an amputee.  In which case I’m jealous that you don’t have to make two socks, but I’m also sorry for your loss.)

So, there are a bunch of ways to do toes, just like there are a bunch of ways to do heels.  You’re welcome to use whatever method you like, but here’s what I do.  It’s easy, and gives me a nice result.

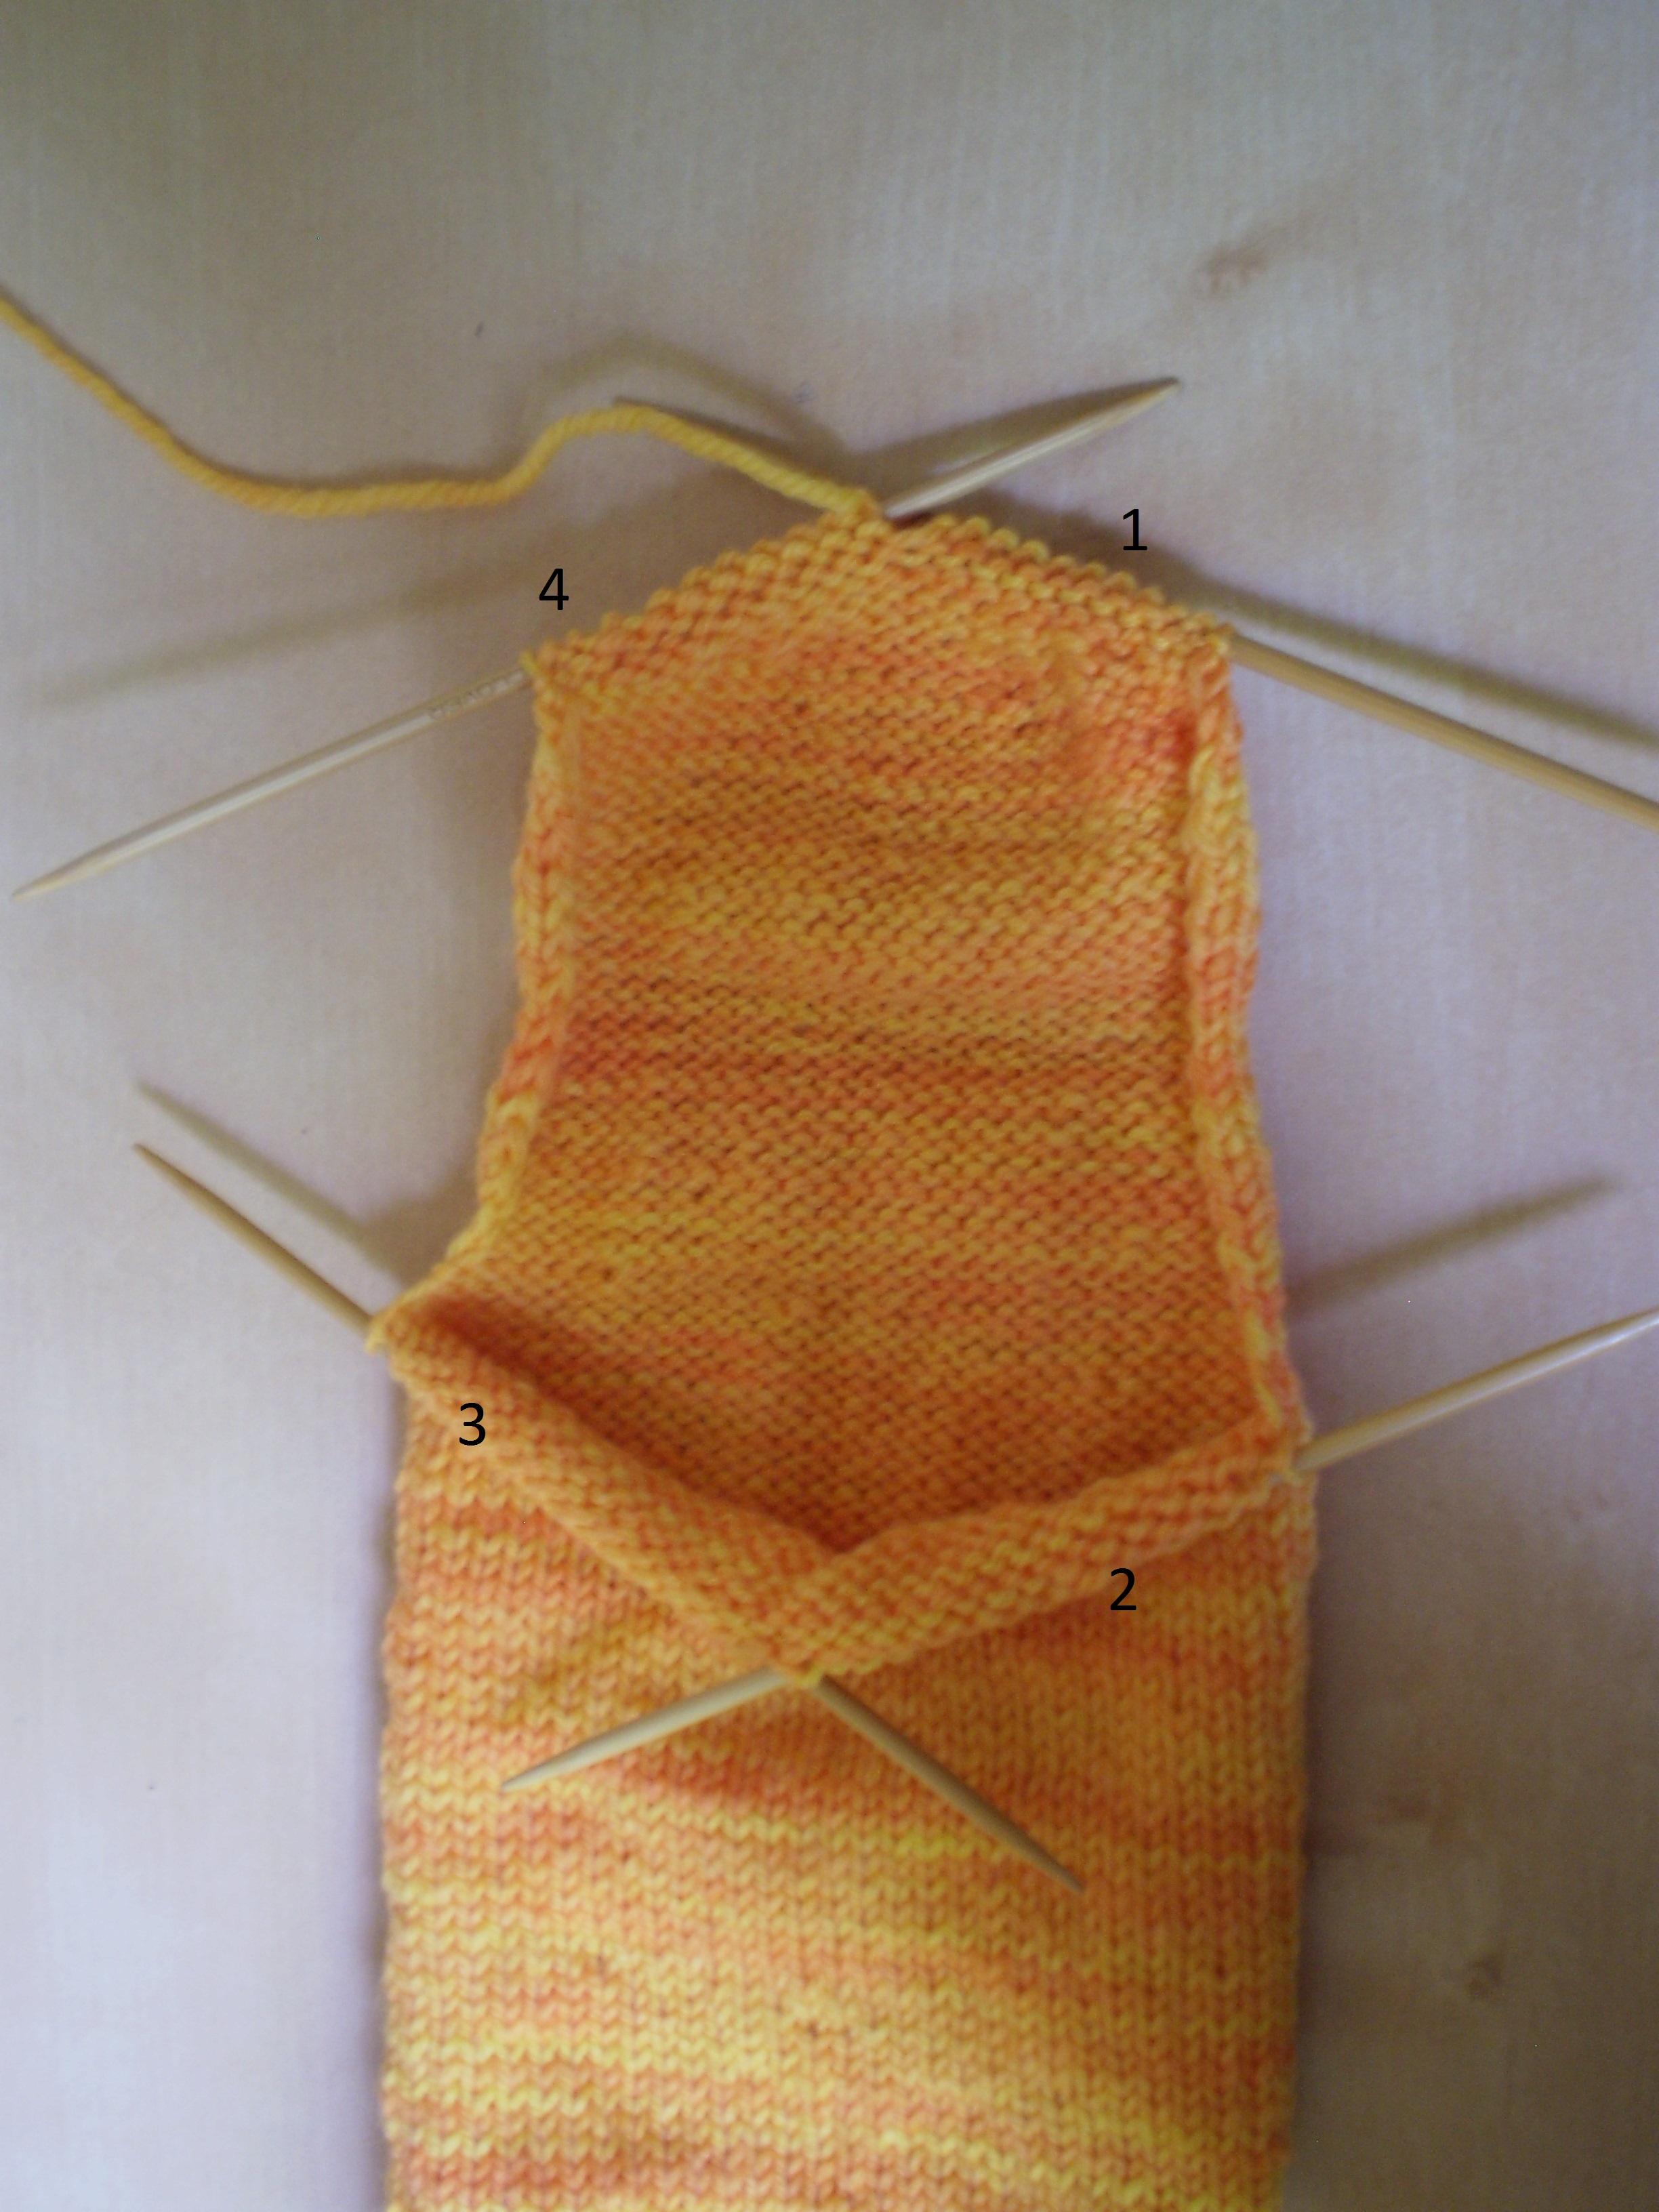
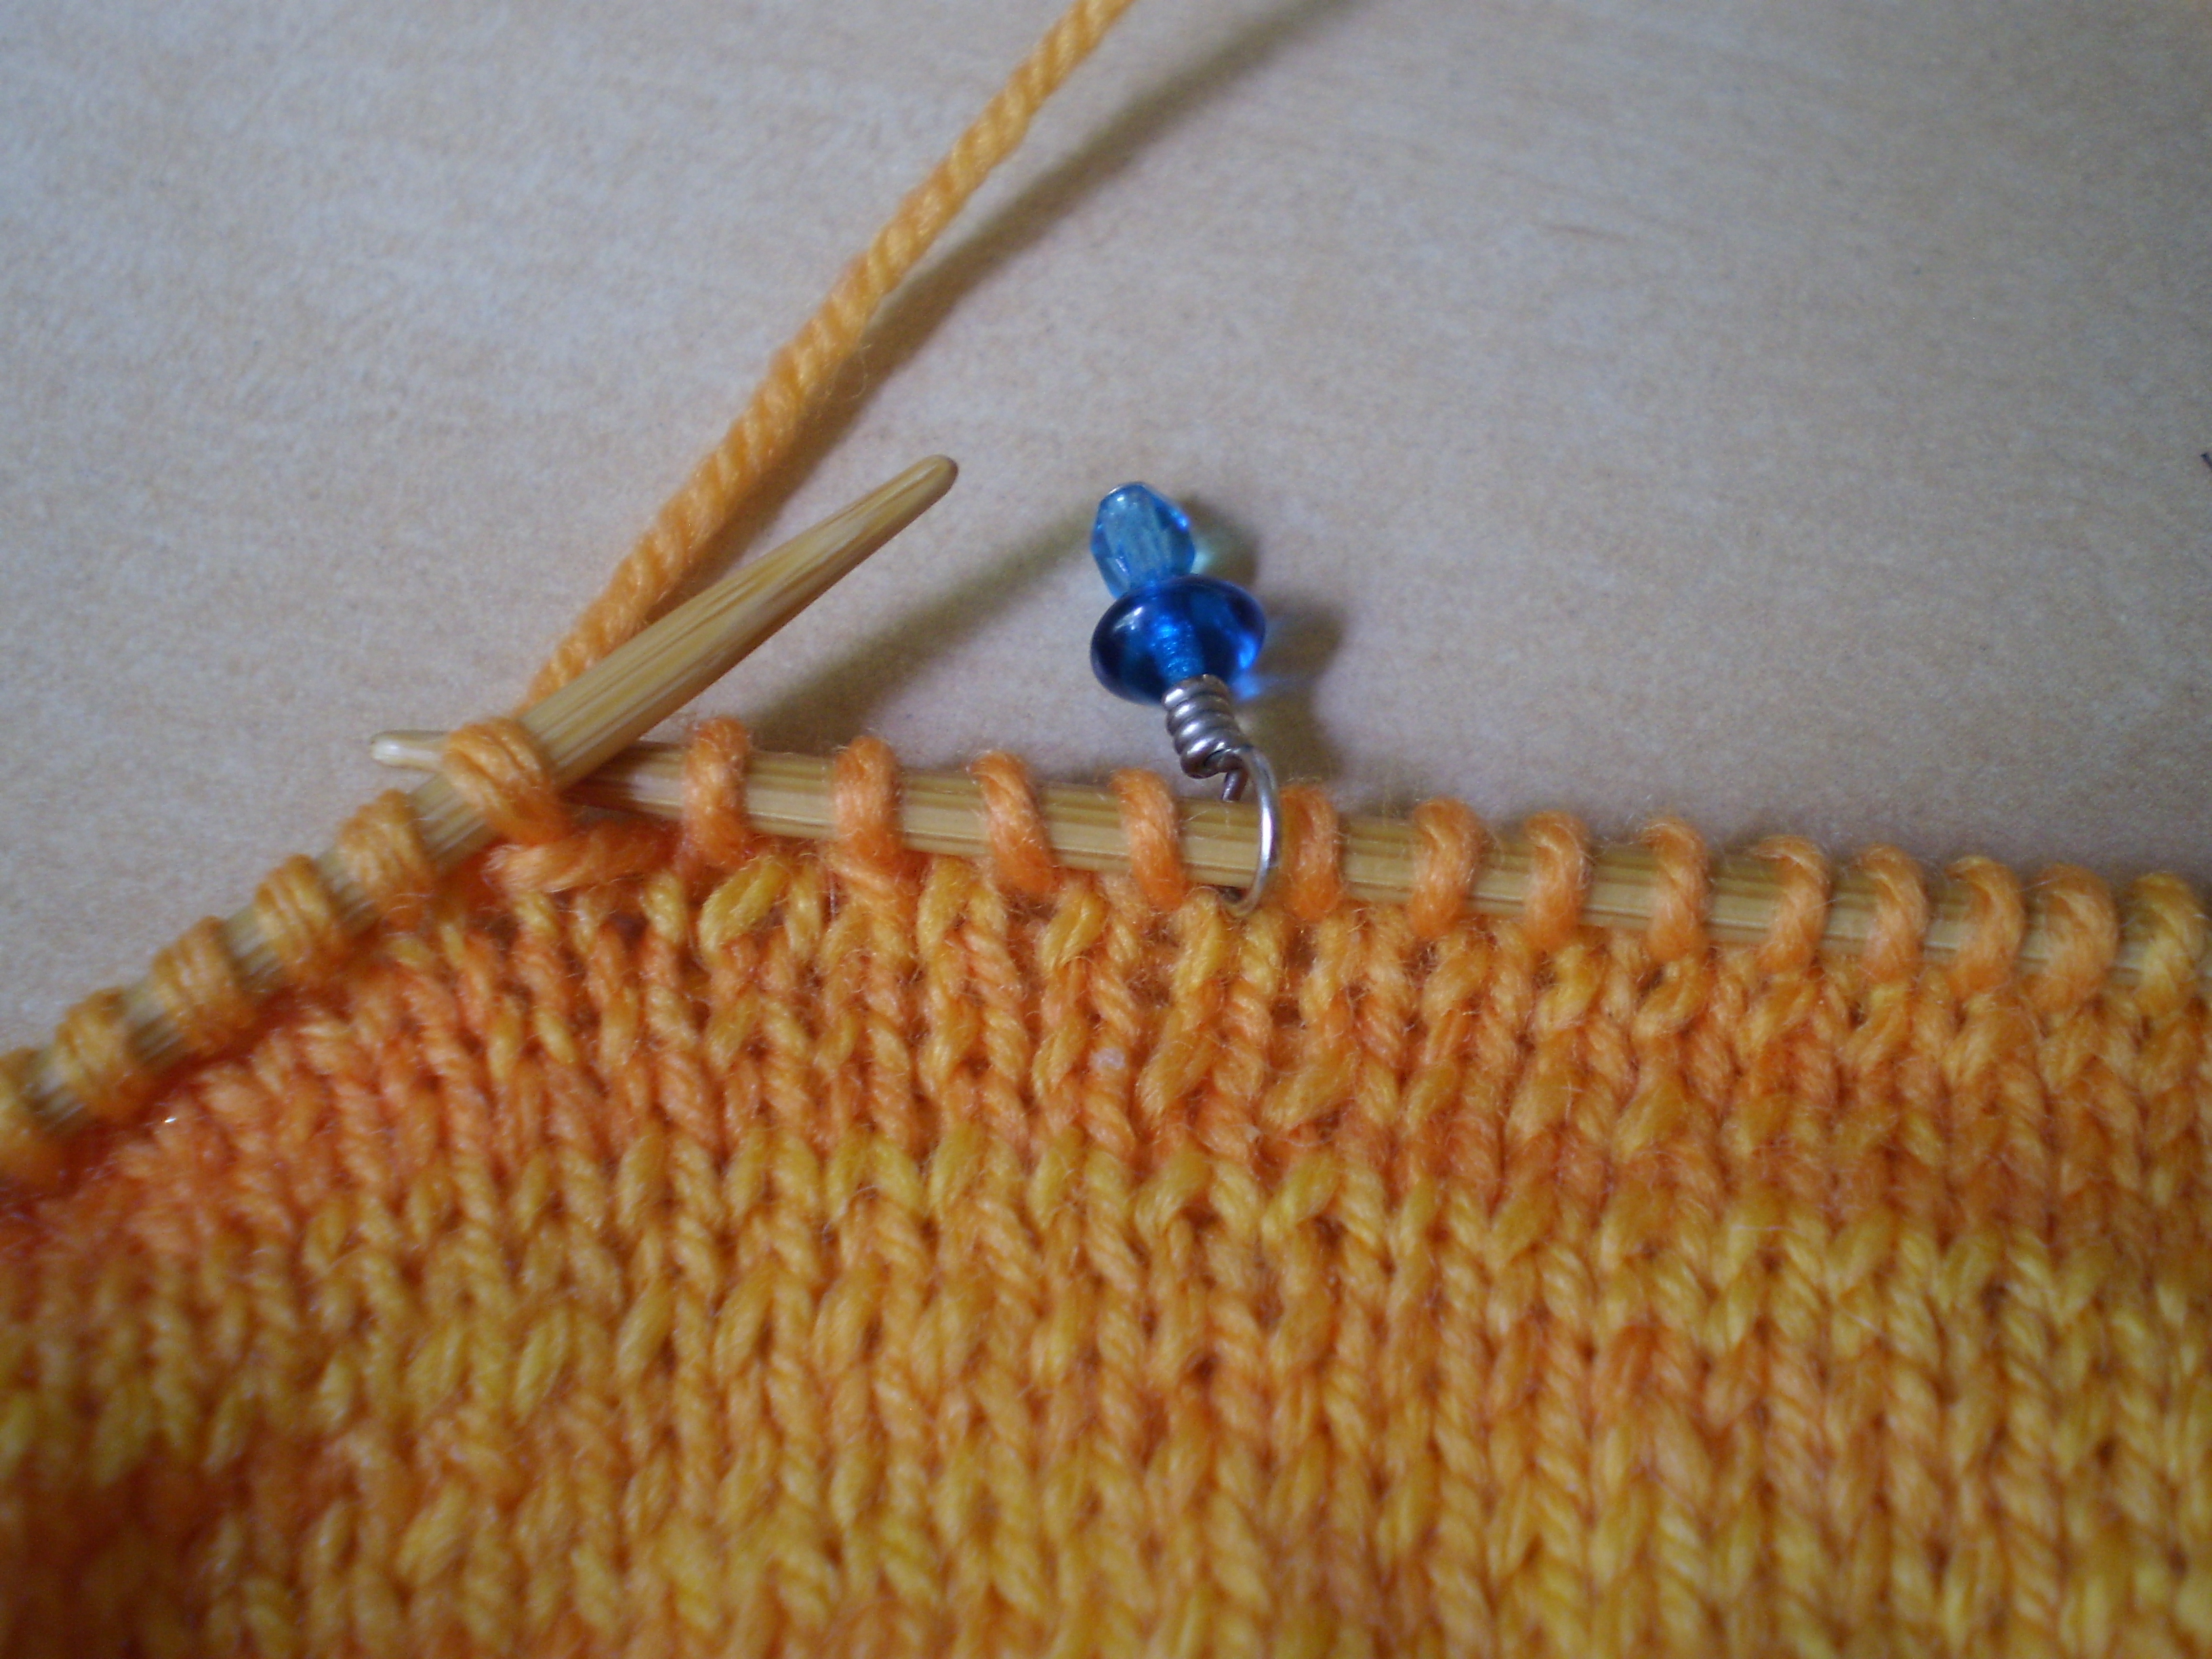
Starting at the middle of the sole of the foot (between needles 4 and 1), work the toe in the round by repeating the following two rows:

Row 1:  Needle 1: knit to 2 stitches before the end of the needle.  K2tog (right leaning decrease).  Needle 2: ssk (left leaning decrease), then knit to the end of the needle.  Needle 3: knit to 2 stitches before the end, k2tog.  Needle 4: ssk, knit to end of needle.

Row 2: Knit evenly (no decreases).

Repeat these two rows until you only have 5 stitches left on each needle, finishing with Row 1.  (Note: if you’re using this recipe to make tiny kids’ socks or doll socks, you’ll want to keep decreasing until there are 2 or 3 stitches left on each needle.)  You should have 20 stitches total.

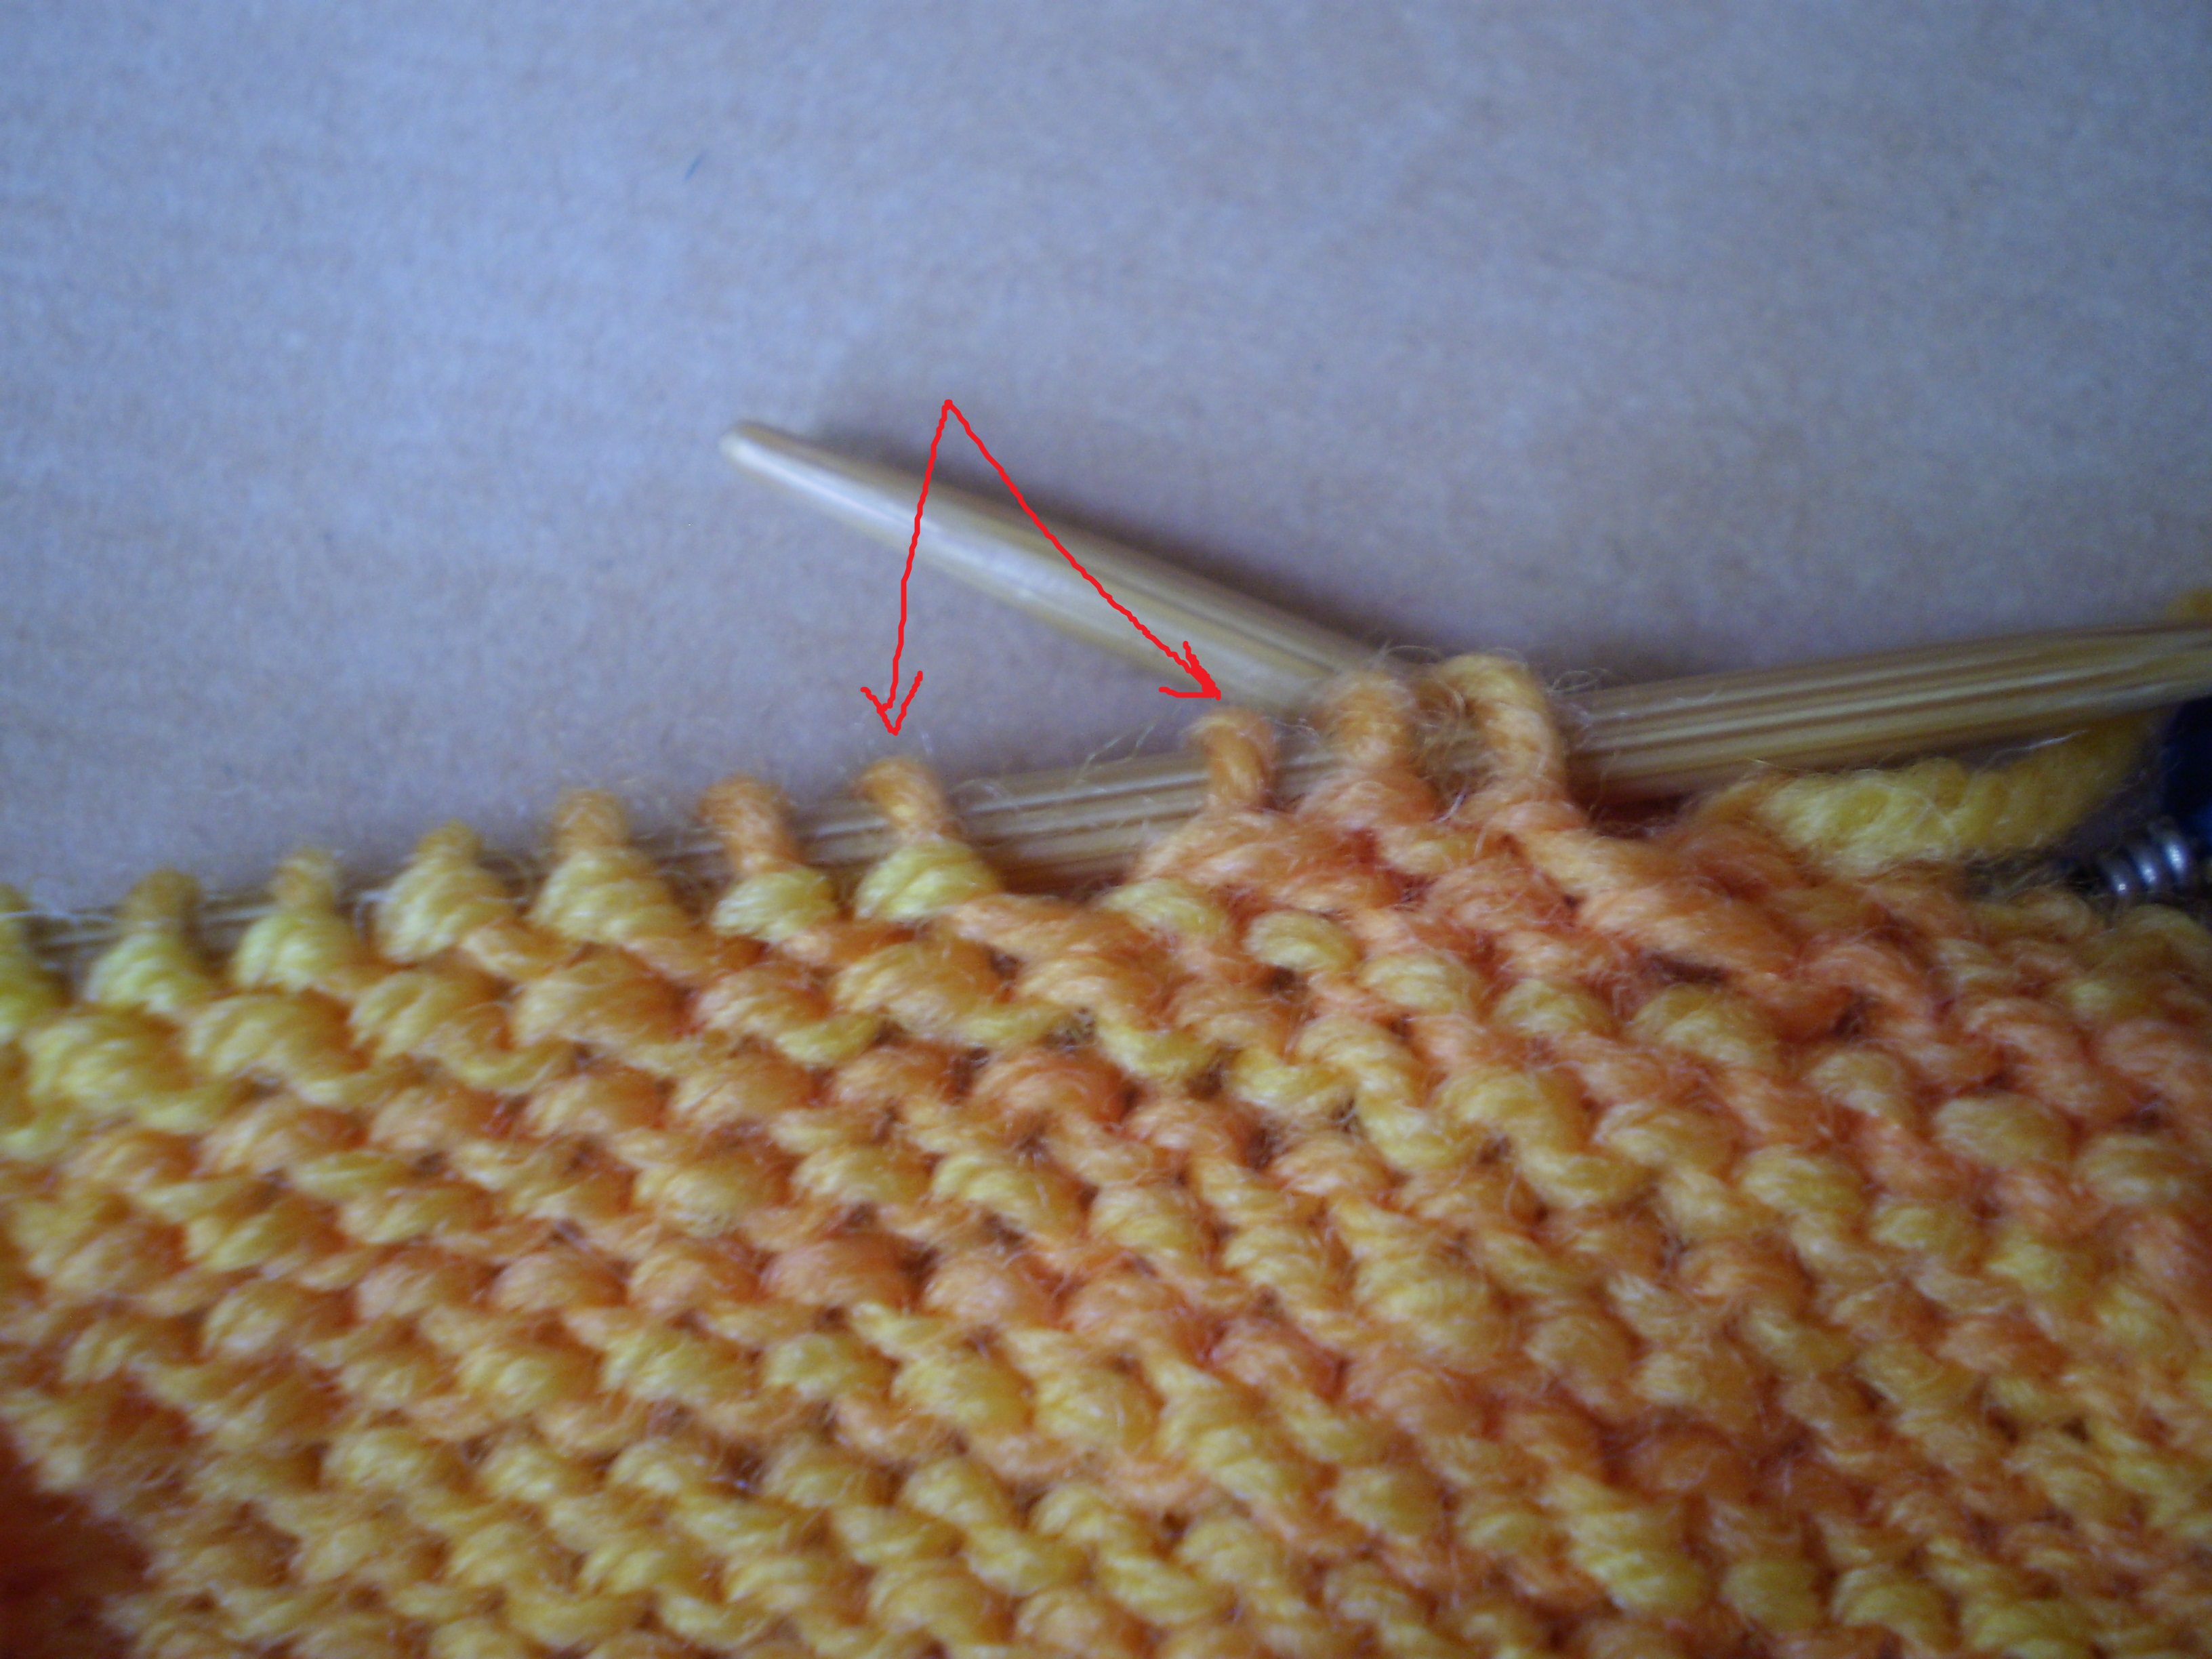
Here’s what your toe should look like.  See how the decreases end up lining up nicely?

OLYMPUS DIGITAL CAMERA

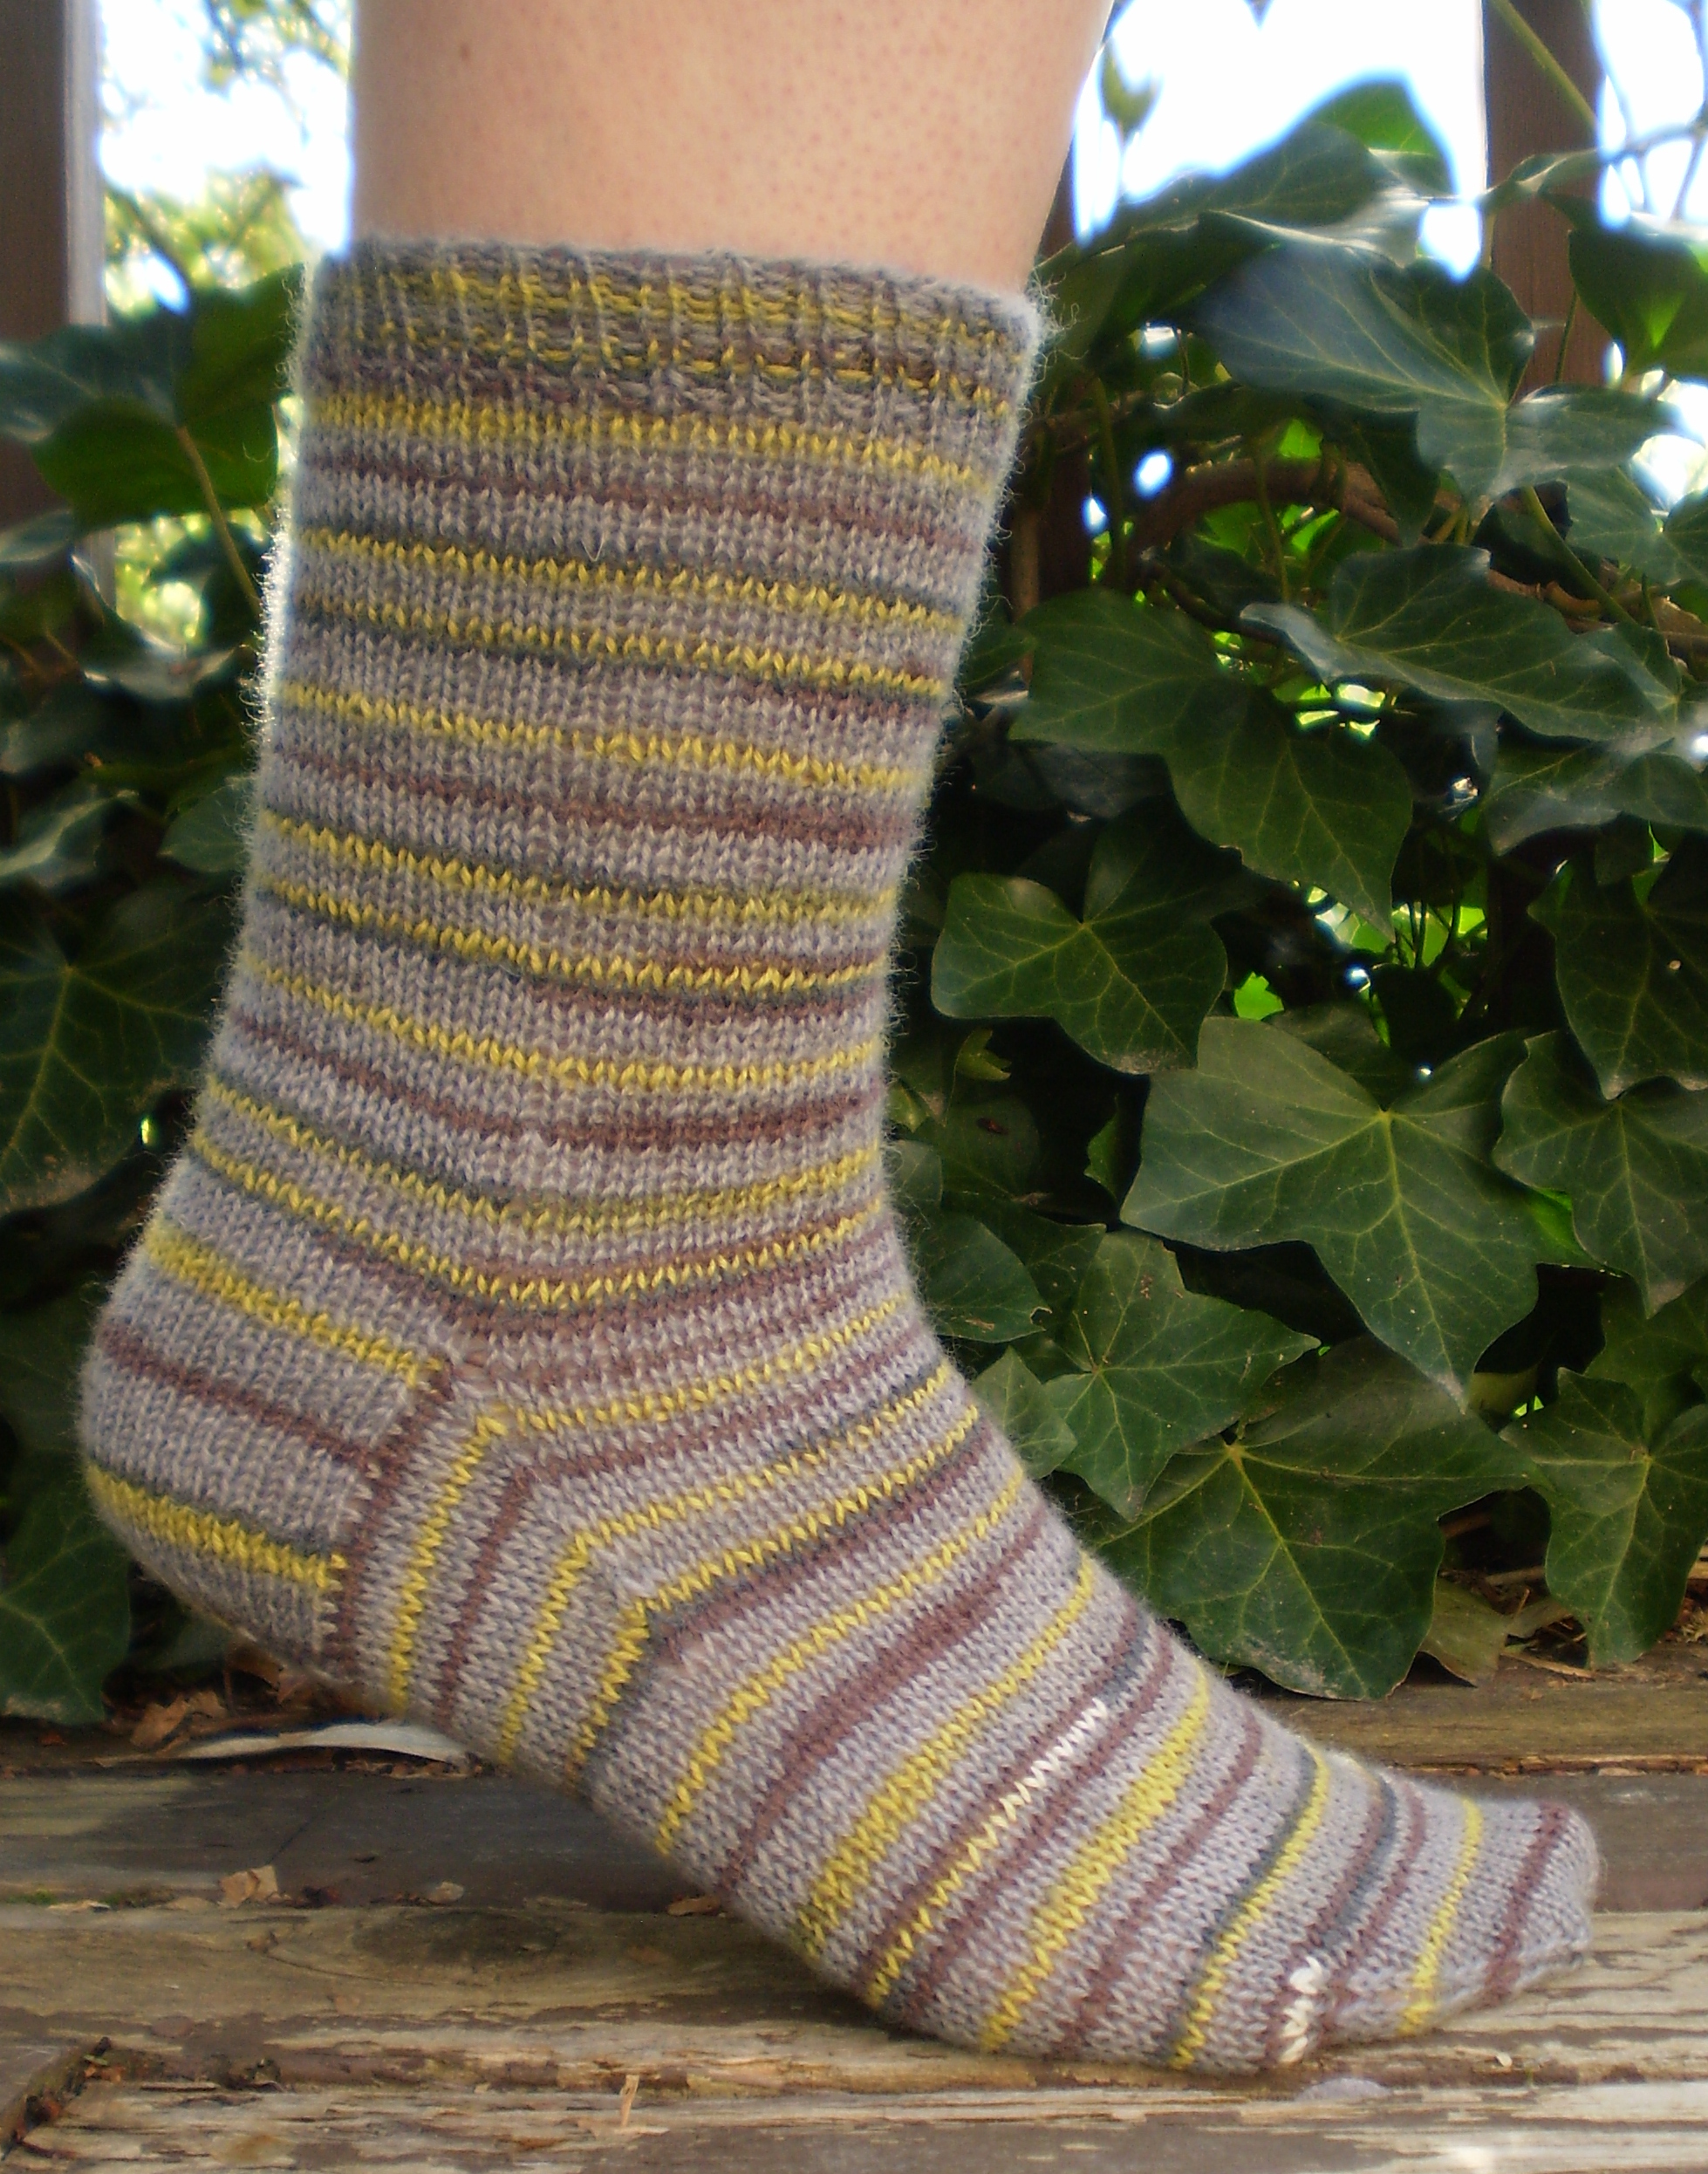
Have a fantastic weekend!  We’ll finish the sock on Monday!!

Sock Week: Instep

So, I’m kind of running out of funny ideas for sock post titles.  Also, I now realize that this has taken WAAAY more than a week.  So perhaps I should have called it Sock Month.

But, I suppose it’s too late for all that.

Anyway.  Today’s step is stupid easy.  We’re going to make this “instep” of the sock.  The folks that write books about knitting call this the instep.  But I think it should more accurately be called the “foot-part.”  Basically, it’s the part of the sock between the gusset and the toe decreases.  And it’s really simple to do.

You knit.   That’s all.  No fancy decreases or increases, no picking up stitches, no dropping stitches, no short rows, no ribbing (unless you really want to for decorative reasons) or anything else.  Just knit a tube until your sock is 1 1/2 inches shorter than you want your finished sock to be.

How long do you want your sock to be?  As long as your foot (see, I told you this step was easy).  Measure your foot from the back of your heel to the tip of your big toe (or whatever toe is longest).  Subtract 1 1/2 inches.  Knit your sock instep until the sock measures that length from the back of the heel to the needles.  For example, my bare foot is 10 1/2 inches long.  So I knit my instep until the sock measured 9 inches long from needles to the back of the heel when laid out flat.  In my opinion, it’s better to err on the side of making your sock a smidge too big.  No one wants socks that are too small.

OLYMPUS DIGITAL CAMERA

See?  I realize I forgot to include a ruler in this photo, so you’ll have to take my word on the length of my sock.

If you don’t have a ruler hanging around, just keep trying on your sock until only 1 1/2 inches of toe poke out the end.  If you’re knitting socks for someone whose feet you don’t have access to, this website has some good sizing charts.

And, because I feel like this is a rather short post today, and because I’m getting a little sock-crazy, here’s a weird video I found on the internet today.  You’re welcome.

(Warning.  He swears a tiny bit, so don’t watch if you’re not into that.)

http://www.youtube.com/watch?v=r_A71jVpGSQ

Sock Week: Gussett

Today we’re going to do the sock gusset.  I don’t know why, but I always feel like “gusset” is a vaguely dirty word.  I don’t know why though.  I  guess I’m just being weird.

Anyway, the sock gusset is the part of the foot right next to the heel.  To make the gusset, you’ll decrease two stitches every other row, until you’re back down to your Sock Number of stitches.  It’s super easy, and kind of fun watching your little decreases line up nicely.

So, remember how your needles were numbered last week?  Starting at the back of the heel/bottom of the foot, and working your way around in the knitting direction like this:

OLYMPUS DIGITAL CAMERASo, needles 1 and 4 are the bottom of the foot, and needles 2 and 3 are the top of the foot.

See how there are approximately a billion stitches on needles 1 and 4?  And see how there are only stitches equal to 1/4 of your Sock Number on needles 2 and 3?  We want to decrease stitches on needles 1 and 4 until they have the same number of stitches as needles 2 and 3.  Does that make sense? (I can’t actually see your response, since this is the internet, but I’m going to assume you are nodding or at least giving me a blank look.)

OK, so here’s what we’re going to do:

Row 1: Knit to two stitches before the end of needle 1.  Knit these two stitches together (k2tog).  Knit needles 2 and 3 with no decreases.  On needle 4, slip, slip knit (ssk) to work the first two stitches together, then knit to the end of the row.  You will have decreased 2 stitches on this row.  If you need a reminder about the difference between k2tog and ssk, try this video.

Row 2: Knit even (no decreases).

Repeat Rows 1 and 2 until all of your needles have the same number of stitches.  See how the decreases line up nicely, and make cool triangle-y shapes on both sides of your sock?  That’s your gusset.

OLYMPUS DIGITAL CAMERA

Next time:  Instep (the stupid-easy part…. yay!)

Sock Week: Pick-up artist

So, sorry dear readers, but today’s episode of sock week is going to be short and sweet.  I have to go make some emergency cakes*, so my knitting and blogging time is going to be cut short today.  (I know… woe is me, I have to go bake cakes.)

Anyway, today we’re going to do the set-up row for the foot part of the sock.  It’s a little fiddly, but not too difficult.  Much like the rest of making socks.

So, after turning the heel, your sock should look like this:

OLYMPUS DIGITAL CAMERA

I’ve numbered the needles again, for your reference.

Knit to the end of needle 1

OLYMPUS DIGITAL CAMERA

Then, still using needle 1, pick up and knit stitches equal to one quarter of your Sock Number from the side of your heel flap.  My Sock Number is 60, so I will pick up 15 stitches.  If you were careful with slipping the first stitch of each of your heel flap rows, you should actually have the proper number of spaces in which to pick up stitches.  (It’s hard to explain, but once you try it, it will make sense.)

Picking up stitches is just like knitting, only you don’t need live stitches to start with.

OLYMPUS DIGITAL CAMERA

Insert your needle where you want the stitch to go.

OLYMPUS DIGITAL CAMERA

Wrap the yarn around your needle, just like you do when you knit.

OLYMPUS DIGITAL CAMERA

And pull the stitch through.

If you haven’t done tried picking up stitches, this is a pretty good video.

When you get to the last picked-up stitch, pick up both the usual slipped stitch as well as the stitch below, then knit it as normal.  This will prevent your sock from having a little hole on the side.  If you skip this step, it’s not a big deal, but it makes a nicer finished product.

OLYMPUS DIGITAL CAMERA

Knit needles 2 and 3 normally:OLYMPUS DIGITAL CAMERA

Then, using your fifth needle, and continuing in the same direction around your sock, pick up and knit the same number of stitches up the other side of the heel flap.  If you want to do the fancy-pants no-holes pick-up, like on needle 1, do it at the beginning of this needle.

OLYMPUS DIGITAL CAMERA

Then, using the same needle, knit the stitches from needle 4 as normal.

So, what you should end up with is:

Needles 1 and 4: A bunch of stitches, but both should have the same number of stitches.

Needles 2 and 3: Both of these should have stitches equal to a quarter of your Sock Number.

OLYMPUS DIGITAL CAMERA

If you fold your sock in half, it should look kind of like this (quite sock-like, I think):

OLYMPUS DIGITAL CAMERA

Next time, the gusset!

*Emergency Cakes-Cakes that one has to make at the last minute when your friend begs you to bring desserts for a fund raiser that is happening this evening.  Stressful, but tasty.

Sock Week: The Turn of the Heel

So, I don’t know about you, but my heel isn’t square-shaped, so we probably shouldn’t make our socks square-shaped, too.  To do this we’re going to “Turn the Heel.”  I got completely confused the first time I did this, so I’m going to do my best to help you through.  We can do it together!  Solidarity!

Anyway, “turning the heel” involves making short rows across the heel flap and throwing in some decreases as we go, to make the heel… well… heel-shaped.  The goal is to end up with a little round, cup-shaped heel.  “Short rows” are rows that are knit only partway across.  This lets you start building up 3-D structures, instead of just flat pieces.  Some people use short rows for things like puffy sleeves or fitted bust lines on sweaters, or faces on teddy bears etc.

OK, so get out your sock and follow along.  You’ll be starting from the marker at the back of the sock.

First, do this:  Knit 2, K2tog (left leaning decrease), knit 1, wrap and turn. (This video is a good tutorial for wrap and turn.  Ignore the part where she talks about hiding your wraps, though.  That’s more for sleeves or other things.  That doesn’t matter so much with heels.)

Your first row should look like this:

OLYMPUS DIGITAL CAMERA

Turn the work and Purl to the marker.  Purl 2, P2tog, Purl 1, wrap and turn.

It should look like this:

OLYMPUS DIGITAL CAMERA

Turn the work back to the knit side.  See where there is a gap from where you wrap and turned?  Knit until one stitch before the gap.  Knit the two stitches on either side of the gap together.  Knit 1, wrap and turn.

OLYMPUS DIGITAL CAMERA

See how the k2tog closes up the gap so nicely?  (I haven’t done the last k1 or the wrap and turn yet):

OLYMPUS DIGITAL CAMERA

Then, do the same thing on the purl side.  Purl until one stitch before the gap and purl the two stitches on either side together.  Purl 1, wrap and turn.

OLYMPUS DIGITAL CAMERA

Keep on repeating these two rows:

-Knit to 1 before the gap, k2tog, k1, w&t

-Purl to 1 before the gap, p2tog, k1, w&t

You’ll work more and more stitches each row that you work.

When you get to a point where you can’t do another full repeat of the pattern, stop when you’re back at the marker, on the knit side.  Your heel should look like this:

OLYMPUS DIGITAL CAMERA

We’re getting there!  Your sock is looking sockier and sockier!  (sockier [sok-EE-er]: adj. more like a sock)

On Friday we’ll pick up stitches to get set up for the gusset.

Sock Week: Getting Flappy

How’s your sock looking? Pretty tubular?  Now, you could just make a big tube and close it up at one end and say “Hey, It’s a sock!”  But I think foot-shaped socks are much better than tube-shaped socks.  They are more comfortable and more interesting to knit.

Here’s what you should have so far (I’ve numbered the needles for ease of discussion later):

OLYMPUS DIGITAL CAMERA

Needles 1 and 4 are the back of the leg/heel/sole of the foot.  Needles 2 and 3 are the shin and the top of the foot.  The end of the row is between needles 1 and 4.

Set aside your fifth needle for now (don’t loose it, we’ll need it later).  Using needle 4, place a marker, and knit across needle 1.  You’ll have half your stitches on one needle, which you’ll work back and forth to create your heel flap.  It will look like this:

OLYMPUS DIGITAL CAMERA

Using just this needle, work the heel flap back and forth, following the following rules:

  1. Work the heel flap back and forth, not in the round.  Do not knit any of the stitches on needles 2 or 3.
  2. Since we’re doing stockinet stitch back and forth, make sure to knit one row and purl one row.
  3. Every time you start a new row, slip the first stitch.  This makes a nice edge that will make it easier for us to pick up stitches later on.
  4. Your heel flap is done when you’ve worked rows equal to half your Sock Number. (My sock number is 60, so I’ll work 30 rows for my heel flap).

When you’re done, work back to the beginning of the round (in the middle of the row/where you put the stitch marker).  It should look like this:

OLYMPUS DIGITAL CAMERA

Wednesday, we’ll turn the heel!

Sock Week: Starting at the top


ARE! YOU! READY!

I am.  And apparently overexcited.  Or possibly over-caffeinated.  Which is often the same thing.  Without further ado, let’s get started.

So, these are “top-down” socks, meaning that we cast on at the cuff, and work down to the toe.  Some patterns are worked “toe-up,” but it’s really just a personal preference if you like top-down socks or toe-up socks.

Since these are top-down socks, you’ll cast on your Sock Number of stitches (I hope you remember it from Wednesday).  I cast on 60 stitches, because that was my sock number.

Divide your stitches evenly among four of your  needles (15 stitches on each needles, in my case).

Then…. knit the leg of your sock.OLYMPUS DIGITAL CAMERA


For my basic basic socks, I like to do 1 inch of k1p1 ribbing, then stockinet stitch (all knits, since we’re working this sock in the round) until the leg measures about 6 inches.  BUT, you can do anything you like.  Think about this sock leg as a canvas for you to play on.  The rest of the sock is pretty standard, but you can add all sorts of fun stuff to the leg, if you like.

How about:

Ribbing?

Stripes?

Lace?

Colorwork?

Tall socks?

Short socks?

Take a look through pattern books and at pictures of socks and find something you like.  As long as the pattern you choose (ribbing, lace, colorwork etc) uses a number of stitches that divides nicely into your Sock Number, you are free to do whatever you like.   So, work on your leg over the weekend, and we’ll move on to the heel flap on Monday.

Sock Week: Your lucky number

Are you ready to get started?!  I know I am!


But, before we really start knitting, we need to get your SOCK NUMBER.  It’s super important, and getting an accurate number will ensure that your socks fit properly.  All you need to do is make a swatch, measure your foot and do a tiiiiny bit of math.  Then we can get down to the business of making your socks!


OK, so first, make a stockinet stitch swatch with your yarn and needles that you’ll be using.  You can look at this post if you need a refresher.  Come back when you know the gauge (in stitches per inch) for your swatch.  I’ll wait.

.

.

.

Cool!  What’s your gauge?  Mine is 7 stitches per inch.  You should write this down somewhere so you don’t forget.  Muy importante.


The next step is to measure your foot (or the foot of the person for whom the socks are intended).  Measure the circumference of the widest part of the ball of the foot.  I like socks to be a little snug, so I can wear them in sneakers, so I try to keep the tape measure tight when I measure my feet.

I am wearing a sock in this picture.  You should not wear socks when you measure your feet.  My feet are disgusting (I roller-skate a lot, so my feet are covered in bruises, blisters and callouses), and I like it when people read my blog, so I decided to hide my feet for your viewing pleasure.  You’re welcome.

OLYMPUS DIGITAL CAMERA

Hey, look!  I have feet that are about 9 inches around.  (I wear size US 12 shoes, for reference.  So if you have little delicate lady-feet, you haven’t measured wrong.)

If you’re making socks as a gift for someone else whose feet you don’t have access to, here’s a pretty good reference for foot sizes.


OK.  So now you have your gauge (mine is 7 sts/in) and your foot measurement (mine is 9 in).  Now we have to do a tiny bit of math.  I promise it’s not scary.

First, multiply your gauge and your foot measurement:

7 x 9 = 63

Then round this number to the nearest multiple of 4.  If you want a sock that fits snugly, round down.  If you want a sock that’s a smidge looser, round up.  I like my socks snug, so I’ll round down to 60.


That’s it!  That’s your Sock Number.  My Sock Number is 60.  What’s yours?
On Friday, we’ll actually cast on, and start knitting.  I can’t wait!

Sock Week: Gathering your troops

So, what do we need to get started on your brand new wool socks?  Not too much, actually, which is pretty great.  You don’t need any really weird buttons or anything, and you don’t need hundreds of dollars worth of yarn.  All in all, socks might be the perfect project.

OLYMPUS DIGITAL CAMERA

Materials

  • Sock yarn (duh).  I used Lion Brand Sock-Ease for the finished sock in the previous post.  In the tutorial I’m going to be using Zoe Sock yarn from Shalimar Yarns in the colorway “Melba.” (It’s a beautiful peachy-sunny yellow, despite the bland name… Melba Toast…ew.)  You can use whatever yarn you like.  When I’m buying sock yarn I look for three things:

1.  It has to be machine washable.  I am not a crazy person and am not going to hand wash my socks. That’s super dumb.  If I’m making wool socks (which are undeniably the best socks), I use yarn made from Superwash Wool.  Yarn that has a small percentage of nylon or polyester mixed with the Superwash Wool are good, because it adds strength to your socks.

2.  I need 100 grams of yarn (about 450 or so yards) to make a pair of adult-sized socks.  Most sock yarn comes in 100 gram skeins, but sometimes it comes in 50 gram skeins, in which case you’ll need to buy two.

3.  It has to say “Sock” on it, or it has to recommend using size US 1-3 needles on it.  If you use yarn that’s too thick, you’ll end up with socks that are too big to fit in your shoes.  You could do this, and use them as slippers, but that’s a personal choice.

  • A set of 5 Size 2 knitting needles.  I like short (5-inch long) wooden ones, but it’s totally up to personal preference.
  • A tape measure.  If yours has fruit on it, that’s ideal.  If not, that is acceptable, too.
  • A stitch marker (optional).
  • Scissors and a tapestry needle for finishing up.

So, go and collect your materials, and I’ll see you back here on Wednesday to get you Lucky Sock Number sorted out.

Sock Week: First Thing’s First

shark-week-discovery-channel

It’s Sock Week!  Surprise!  Sock week is a lot like Shark Week, but with less blood, more socks, and it will last more than a week.  But Sock-Fortnight doesn’t sound as good as Sock week, so you’ll just have to deal.

So what does Sock Week entail?  It’s a step-by-step knitalong to make my Basic Sock Recipe.  At the end of Sock Week, I’ll put the whole kit and caboodle up in my Pattern Library for your sock-knitting pleasure, and you’ll have a brand-new hand-knit pair of socks.

“What are we making?” you ask.

“Great question!” I answer.  “This:”

OLYMPUS DIGITAL CAMERA

“Ooh, aah” you say in wonderment.

Not really, I suspect.  But, if you get the hang of this basic sock recipe, you can easily modify it to make socks in every shape, size and style.

Get your wallets ready to go shopping for materials next week, when I give you the materials list.