Buckle in, everyone. It’s going to be a long one. A tale of mystery! Suspense! Moths!
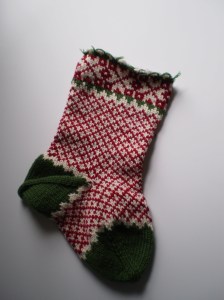
Several years ago, I knit up two lovely stockings for myself and my husband. They were fabulous, squishy, Cascade 220 in carefully-selected shades of evergreen, holly berry and cream. Perfect Christmas colors. The stockings were covered in Fair Isle color work from the cuff to the toe, and I even charted out and knit our names into the tops. They were lovely and festive.
They looked like this (although it looks like they need to be re-blocked):

Last year, we were decorating the house, and I pulled out the stockings. And horror of horrors– a silver-dollar-sized hole right in the top of my husband’s stocking.
I freaked out! My heart pounded, and I felt sick to my stomach. How could this happen? What was I supposed to do? I had worked so hard on those stockings! Now some bug had come along and ripped a gigantic hole right in the middle of his name!
I’ll admit- what happened next was not one of my smartest moments. But I panicked.
And cut the whole top off the stocking.
Just pulled out my big ol’ shears and cut off all the disgusting bug-residue, and threw it away. For a few minutes, I felt better- the offending area was now gone and it couldn’t infect the rest of the stocking (because in my mind, that’s how moths worked. Like I said, not my smartest moment).
But my good mood was short lived. Because the moment I threw away the top of the stocking, I looked at what I had left. It was not good.
Hoo boy.
I took a few calming breaths and realized that whatever I needed to do next, I had to get more yarn- after all, I had cut off a good 4 inches, and needed to get that knitting back, one way or another. I hopped in the car and drove to my favorite yarn shop with the sad, half-dead stocking and picked out the appropriate colors (and thank god they hadn’t been discontinued!). This was literally a year ago. (OK- a year and two days.)

Yarn in hand, half-dead stocking in my knitting bag, did I run home to pick up my needles and go to work?
No. I panicked some more and hid the project away in my knitting room.
And then forgot about it.
All year.
Whoops.
I pulled out the Christmas stuff this year, and when I saw my lone intact stocking in the box of decorations, it all came flooding back to me- the hole, the scissors, the bad decisions.
But, it’s still early(ish) in December, and I’ve mostly finished my Christmas knitting, so I sat down, determined to finally fix the stocking.
First, I considered picking up stitches from the cut-off edge, and knitting up. But, on second thought, I realized that knitting from the other direction would throw off the Fair Isle pattern I had worked on so carefully. I had to knit from the top down, like before, then graft the new cuff to the old stocking.
Using the intact stocking as a template, and re-charting the name panel, I worked up the cuff in an afternoon. It looked good. It looked like it was going to work. I just had to figure out how to attach it.
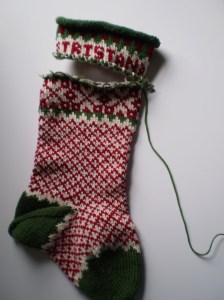
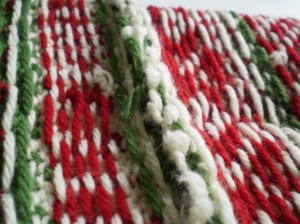
I examined the remains of the original stocking carefully. I didn’t want to have to graft the top into a row of color work (I am insane, but not that insane). Luckily, there was a solid row of green right before the snowflake panel, so that was where I decided to make my move.
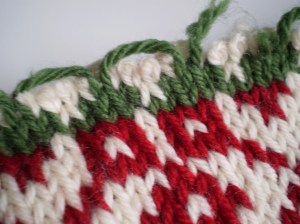
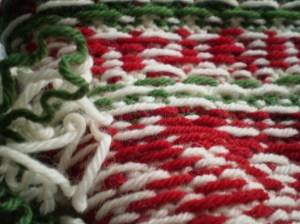
I carefully lined up the top with the rest of the stocking, and started grafting the live stitches onto the old stocking.
It went slowly, but soon enough i had made it all the way around the cuff! I did a little happy dance and let out a sigh of relief.
But that relief was short-lived, because now there was a weird giant crease all the way around the cuff where I had just finished grafting.

That picture looks like I’ve just folded the knitting for dramatic effect, but I swear that was how it was laying.
Upon further inspection I realized that since I had grafted a few rows down from where I had cut the stocking in that fit of insect-inspired rage, there was now a big ridge of unwanted knitting inside my stocking.
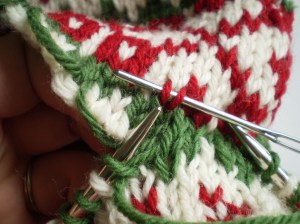
There was only one thing to do. Unravel it. (And cross my fingers that I hadn’t made a mistake in my grafting.)
I picked and pulled and before long, the ridge was gone.
I wove in the remaining ends, and held my breath as I turned the stocking inside-out.

And it was good as new! A Christmas Miracle!
The stockings are now hung by the chimney with care, and I will be sure to store them in a moth-proof container this year.
Have you ever had to do major reconstructive surgery on a knit item? How did it go?


