Tag Archives: decrease

Project Tea Cozy: The Top

All right, it’s time to close up the top!  After all, this is a tea cozy, not just a pretty rectangle with a couple weird holes.

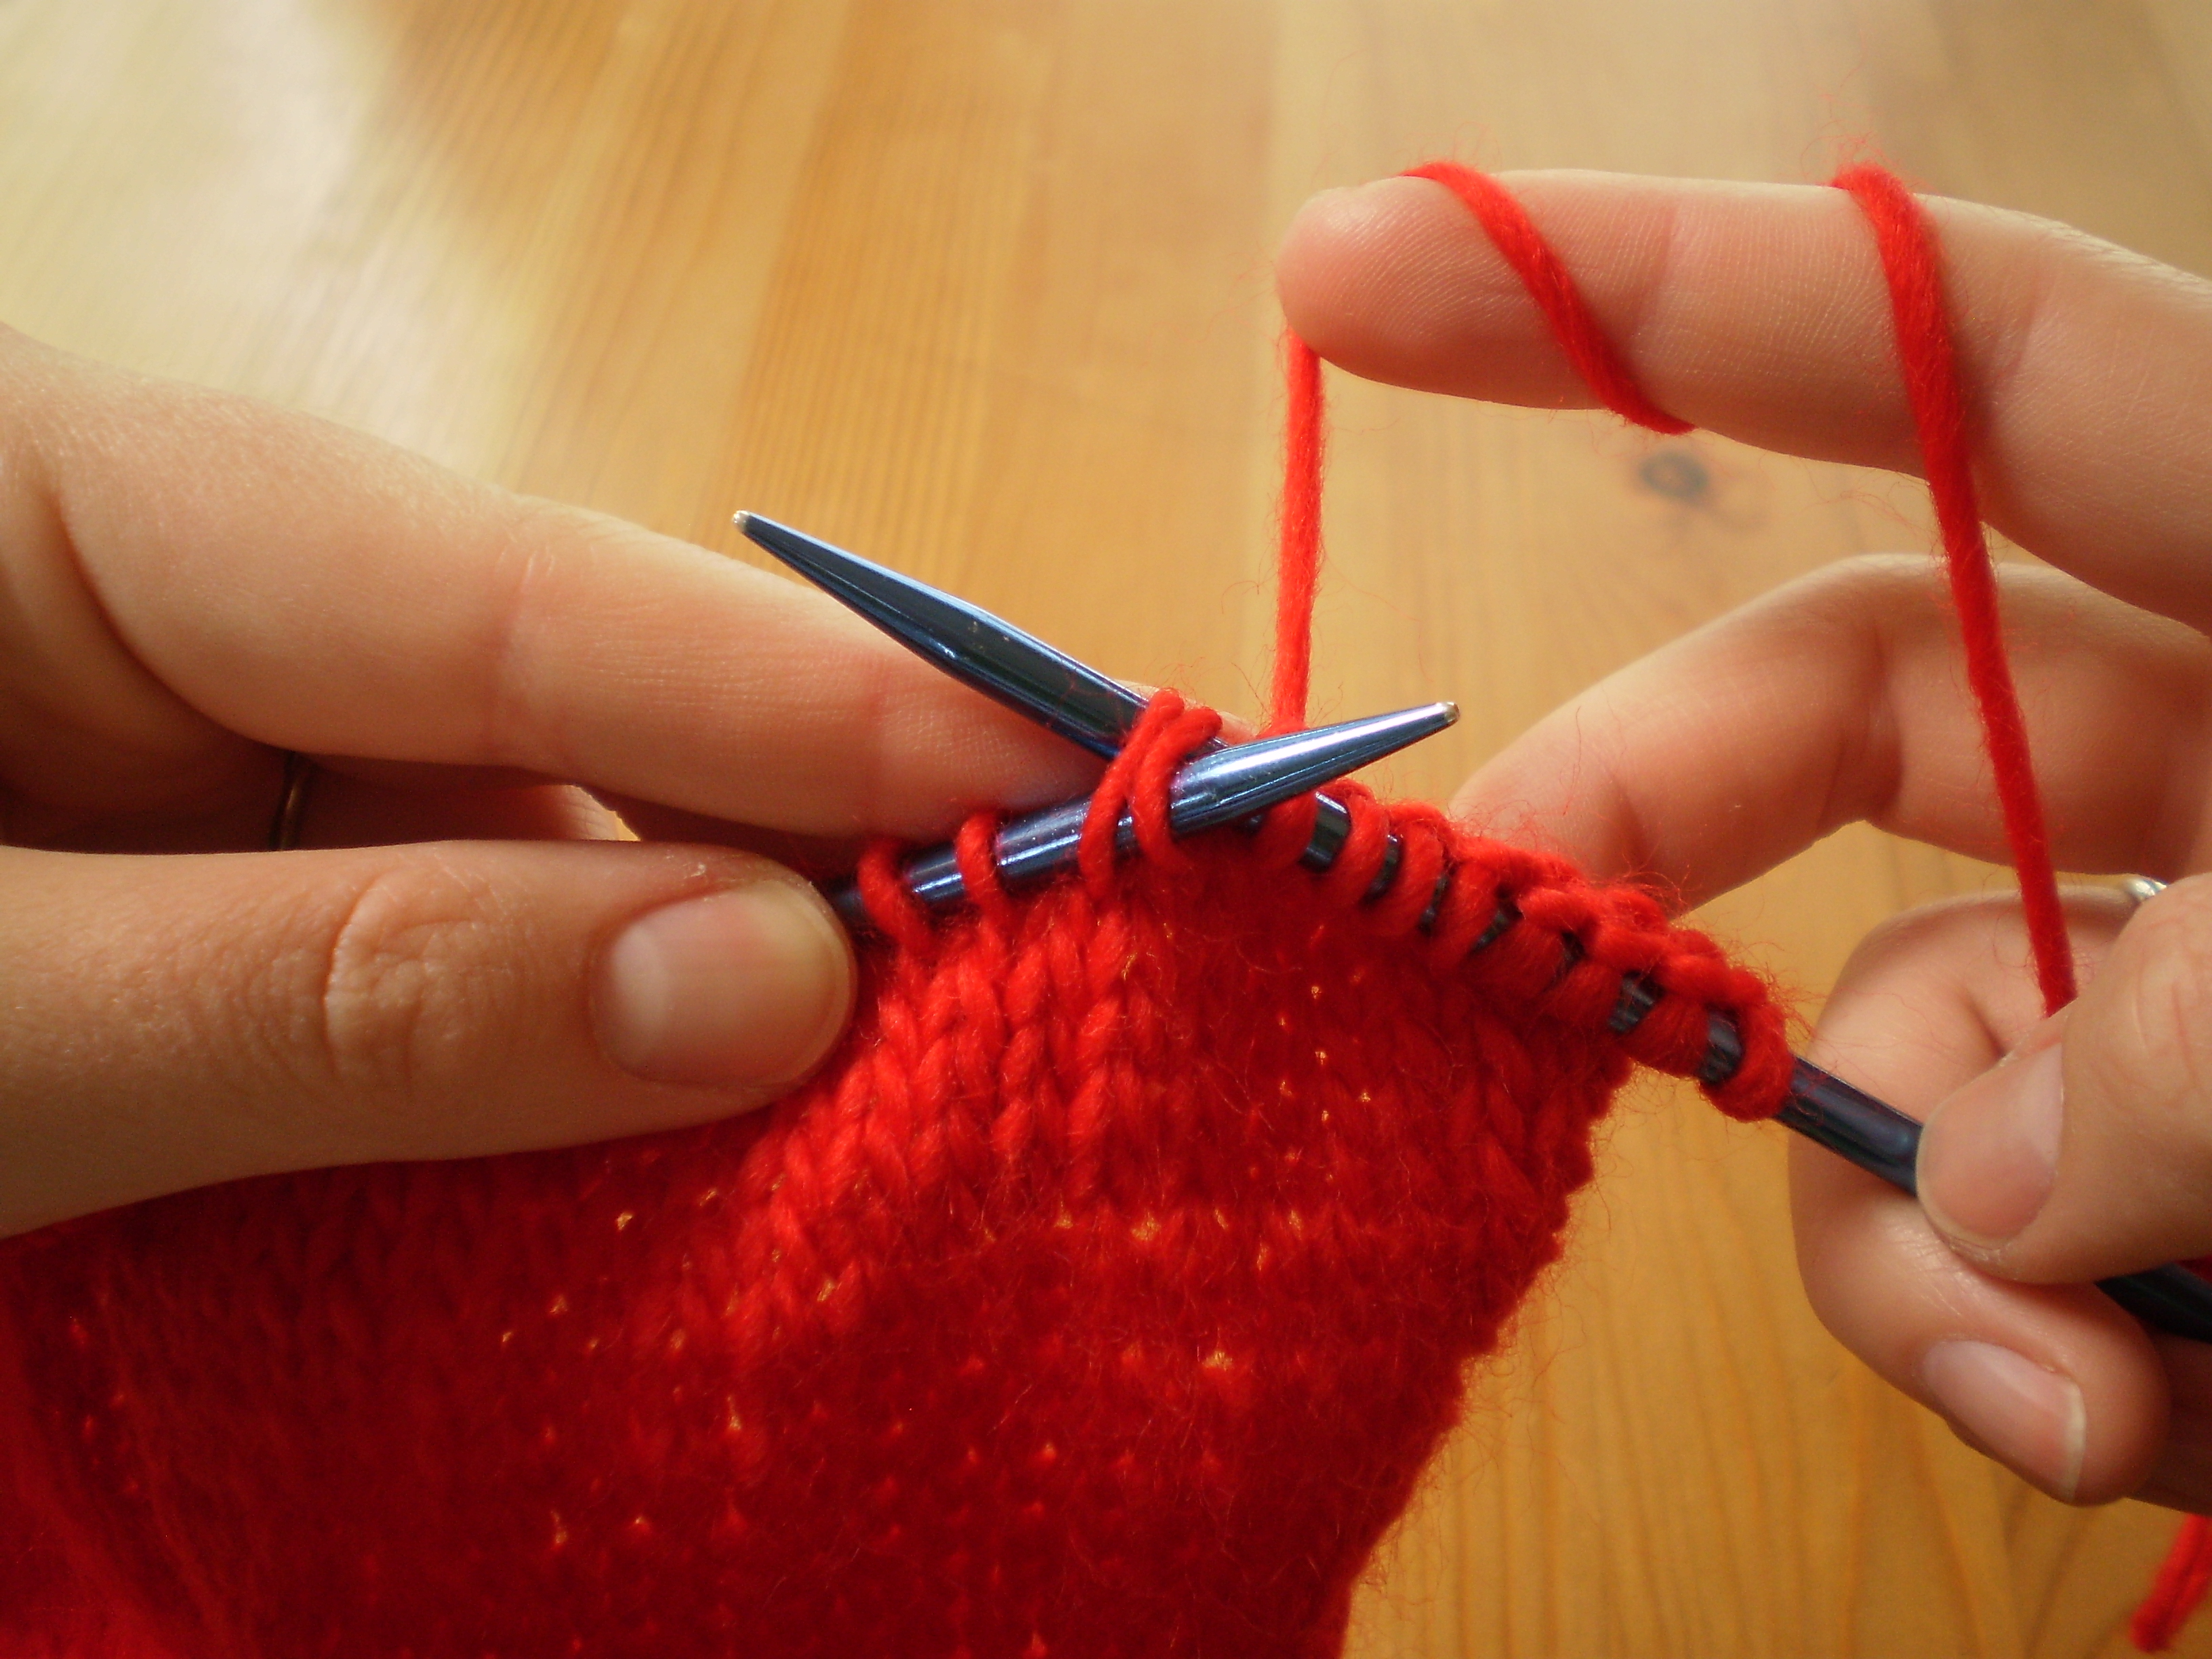
I switched to dpns (because I didn’t have a short enough circular needle in the right size), and started working in the round.img_3373I did a few rows even, then decreased all the way around, once every 8th stitch.  I kept going, knitting one row even, then decreasing in pattern, making the decreases line up.

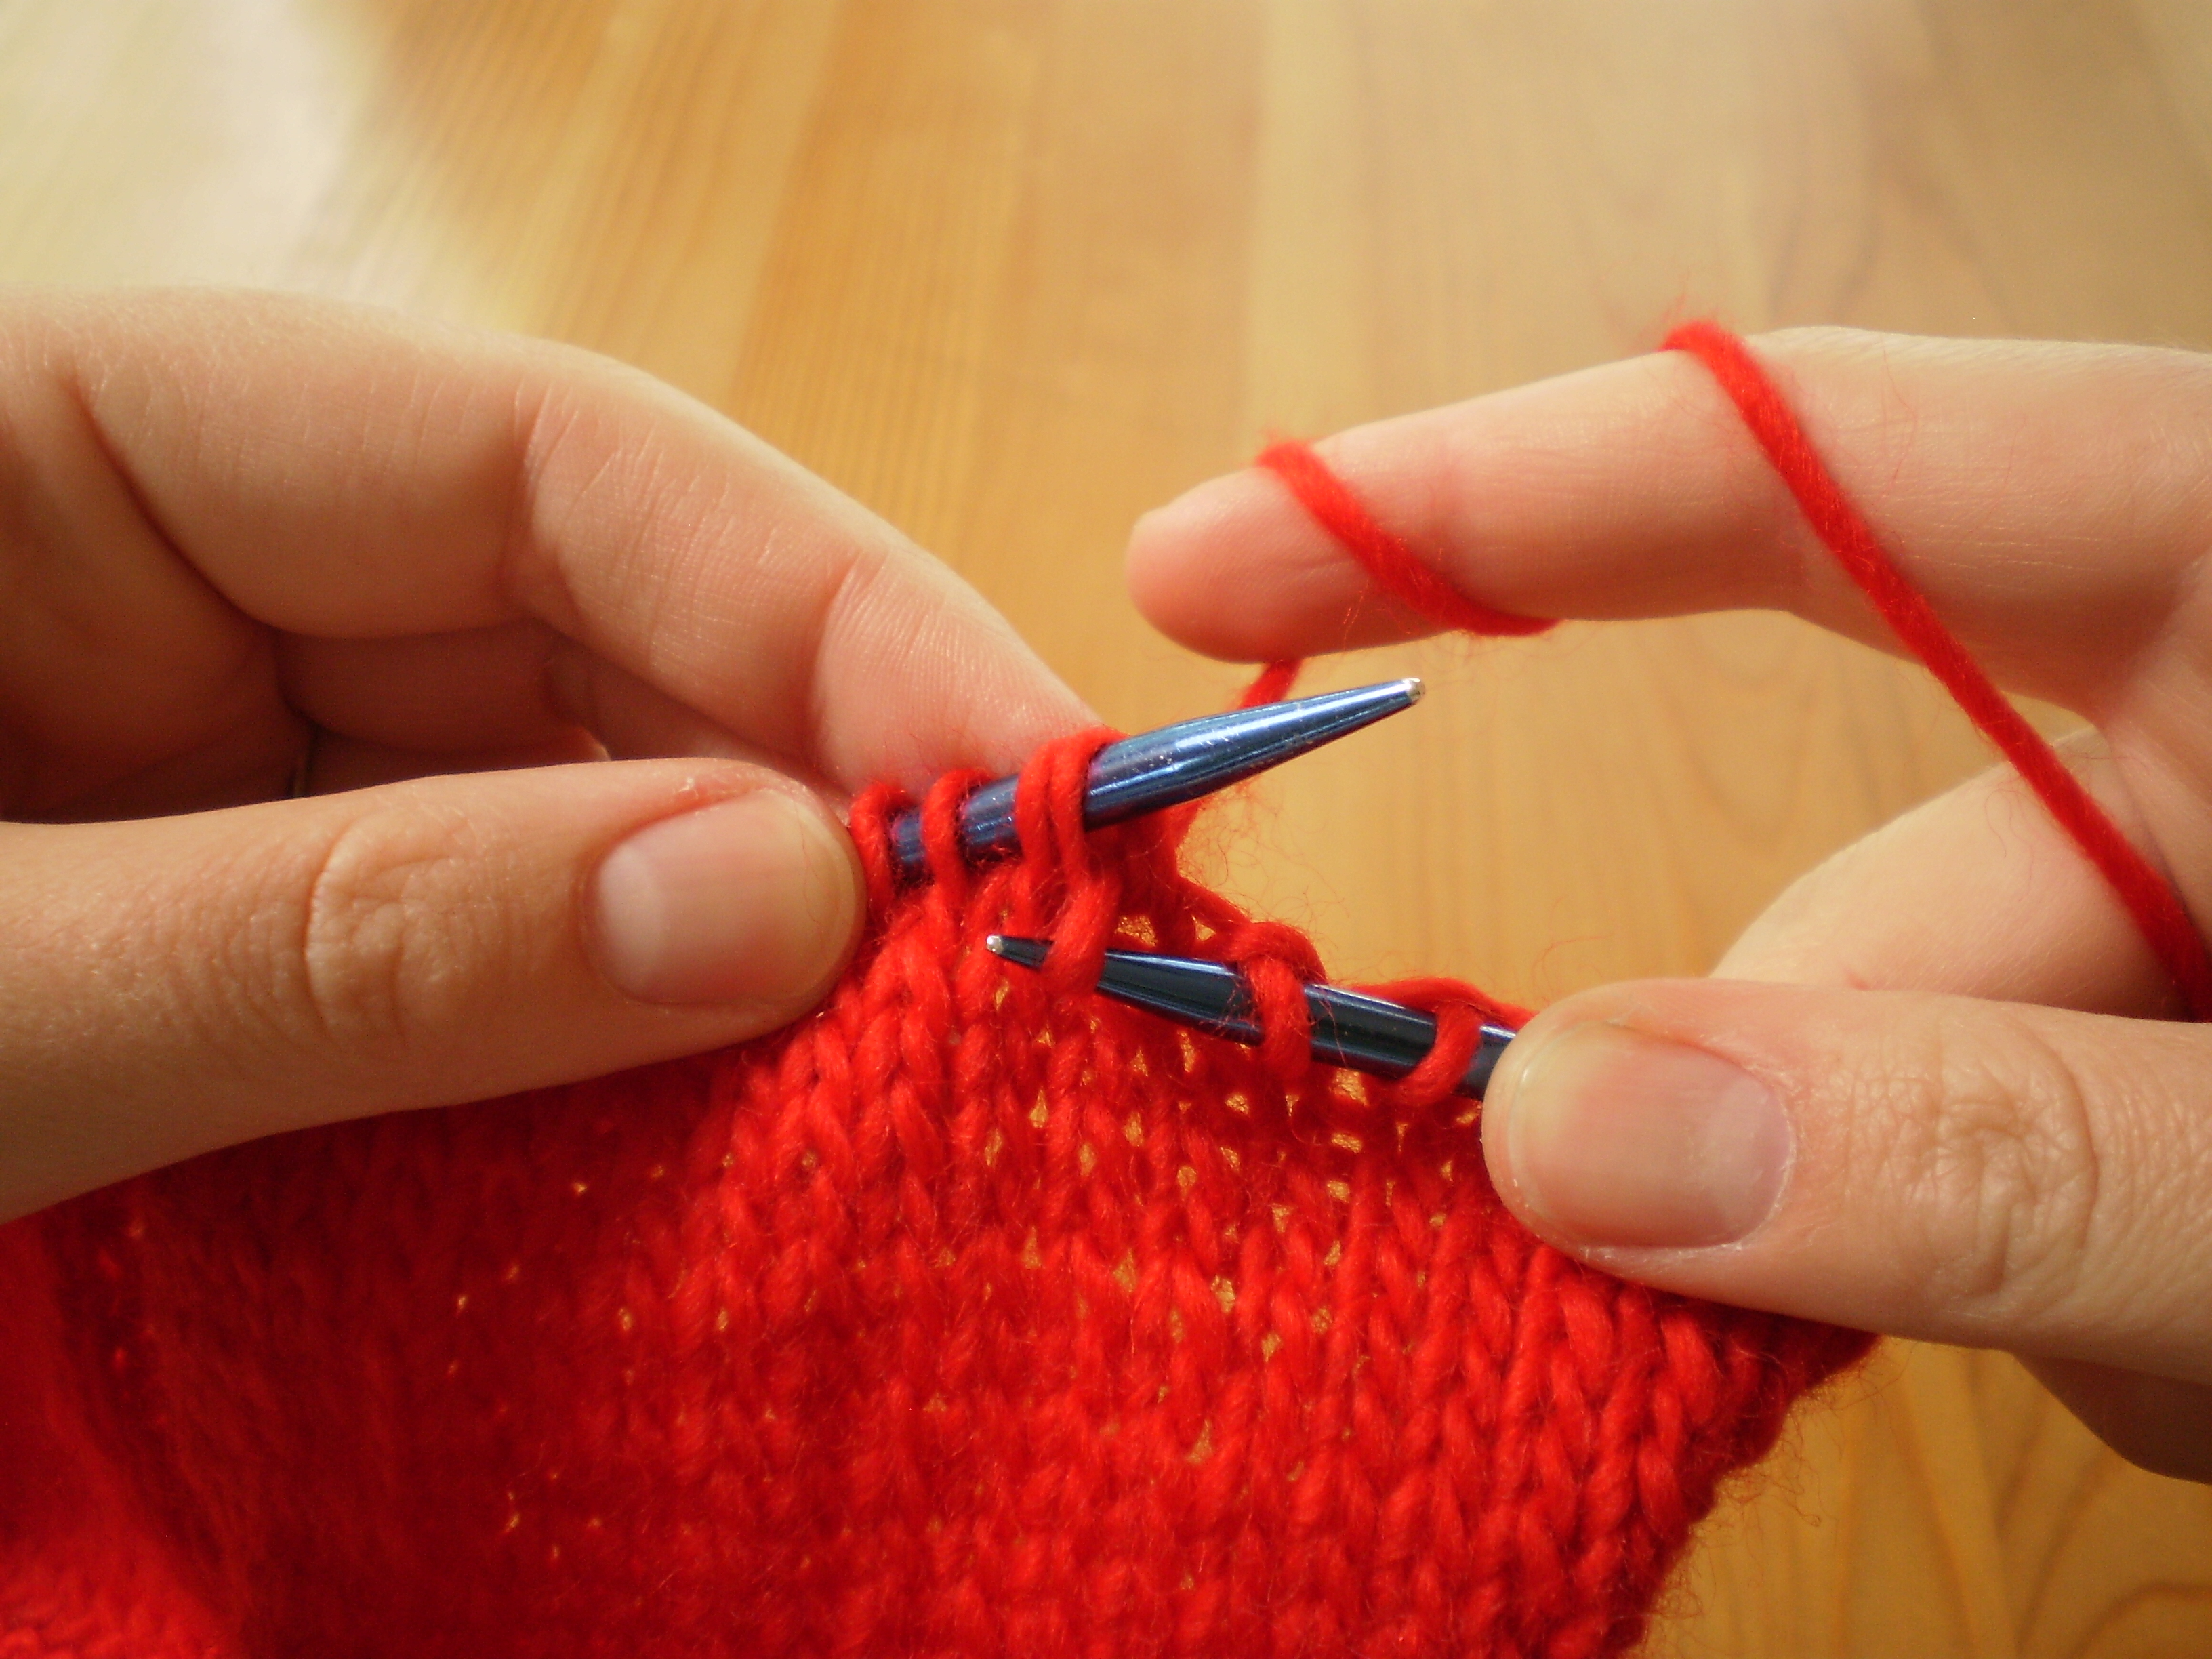
Once I got right to the top, I cut my yarn and passed the tail through the active stitches, the same way I would work the top of a hat.

img_3380Voila! closed up nicely!  If I wanted a smoother top (and less-obvious pleats around each set of decreases), I probably could re-knit it and decrease at a more relaxed rate, but I think I kind of like how the top turned out.

The spout is still pulling in what would be an uncomfortable way if this were a garment for a human, but I think that’ll be sorted out once I work the spout cuff, so I’m not worried.

img_3384
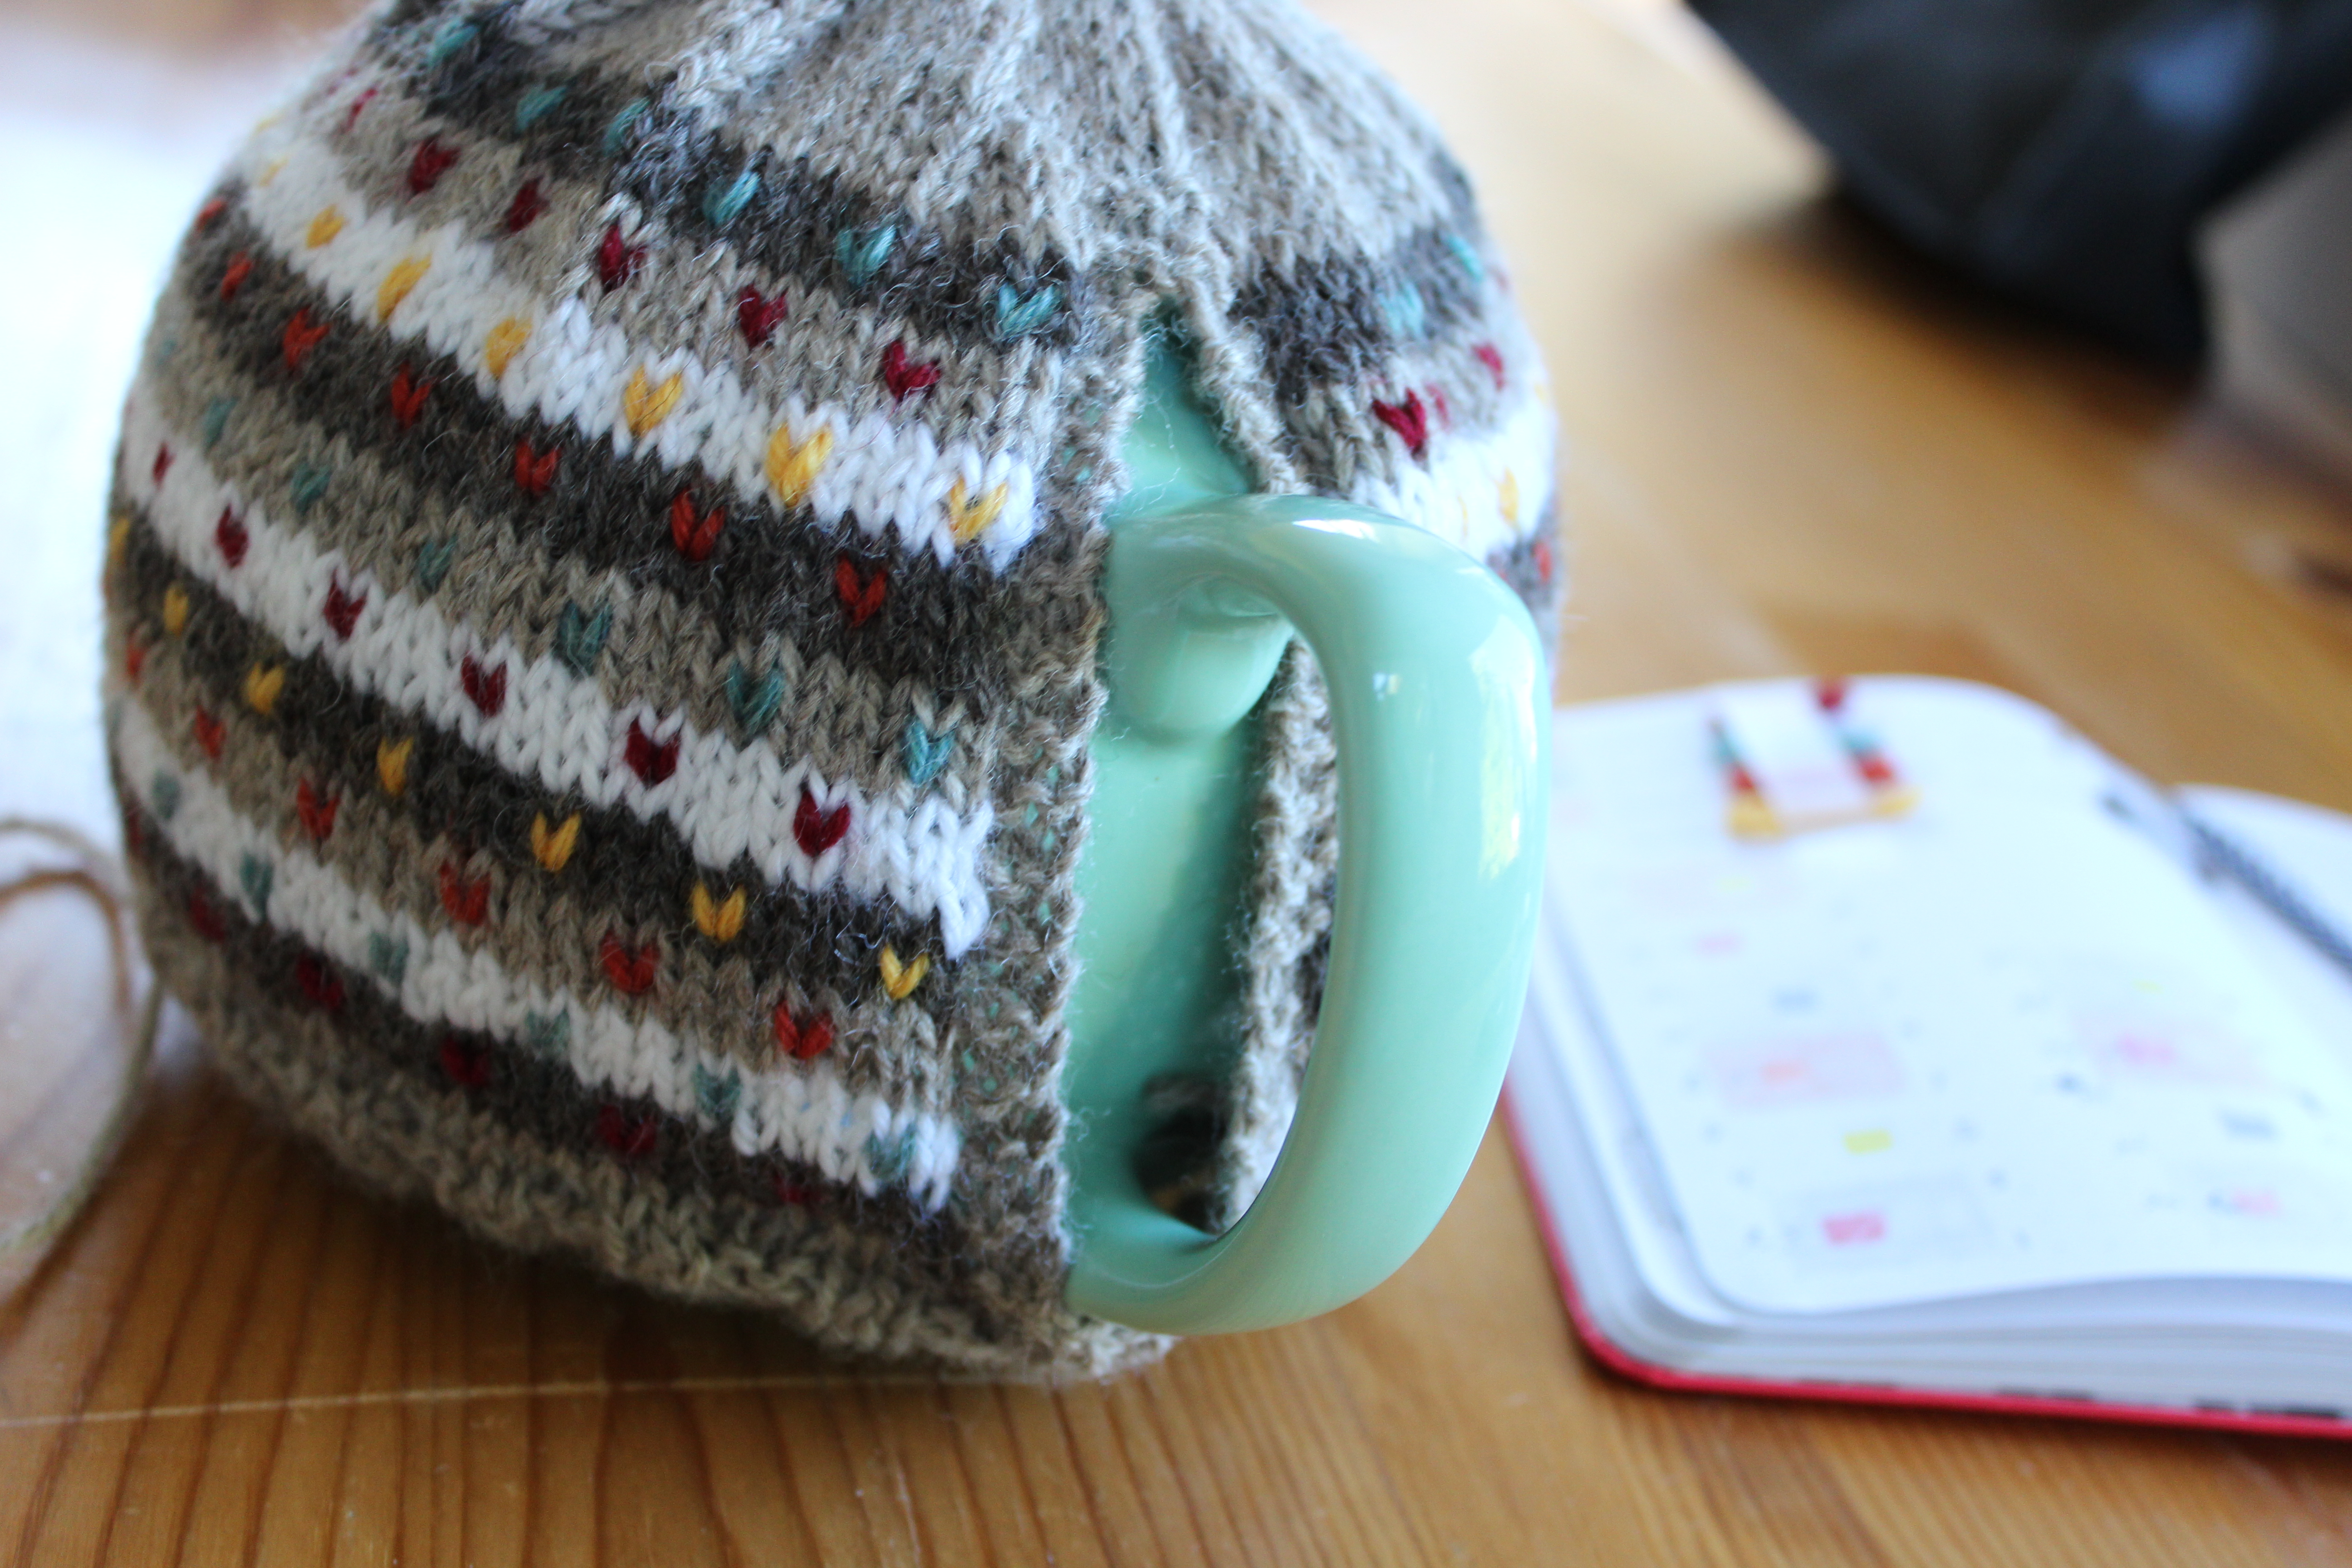
The one thing I don’t love is that the handle hole ended up a bit too big- see that gap at the top of the handle?  I’m not a fan.

I mean, not enough to fix anything, but if I were to re-knit this pattern, I might change that.  Otherwise I’m pretty happy.

Speaking of pretty, let’s talk about my notes.  Because those are not even close to pretty anymore.  Observe:

img_3385

I don’t think there’s a line I haven’t scratched out or adjusted.  I think just about every number had to be re-calculated and each measurement ended up slightly adjusted.

But that’s how designing a new pattern goes- you’ve got to be flexible and ready to find and fix any mistakes, because there will be mistakes.

What do you think of this design so far- I’m getting close to being done!

Husband Sweater: The Body

My husband’s sweater is coming along (slowly, but I’m still making progress).  It’s looking pretty good, if I say so myself.

I split off the arms a while ago and have been working on the body.

See?

OLYMPUS DIGITAL CAMERAI actually modified the body a bit from the pattern, which should make the sweater a little more fitted.  When I was measuring my husband’s favorite cardigan to pick the size for this one, I noticed that the torso was slightly tapered.  The chest measurement was 40″, while the waist was 36″ around.

I figured, why not add a little waist shaping into this sweater?  That’s why we knit, right?  To make beautiful, customized garments.

So, it was time to do some math (Yay!).

I knew I wanted to decrease 4″ (which comes to about 20 stitches, based on my gauge).  And, I wanted to arrange the decreases in pairs underneath the armpits, along the “side seams” (this sweater is knit in the round, so there aren’t seams, but you can imagine where they would be).  This means, that each time I work a decrease row, I’m decreasing 4 stitches (2 under each arm).

So: 20 decreases total / 4 decreases per row = 5 decrease rows.

I wanted the decrease rows to be spread evenly down the torso.  Based on the Emilien pattern, there are 88 rows between the armpits and the top of the hem ribbing.

So: 88 rows total / 5 decrease rows = 17.6

Because you can’t knit .6 of a row, round to 18.  So, I work a decrease row (decreasing 4 stitches under the arms) every 18th row (ish).

A couple inches doesn’t seem like it’d make a lot of difference, but you’d be surprised.  Adding just a few k2togs will change this sweater from a standard, boxy cardigan to a cool, slightly fitted one.  I hope my husband will like it!

n00b Hat, Part 4: Decreasing

How’s your hat going?  Mine’s looking pretty good, and I bet yours it too.

OLYMPUS DIGITAL CAMERABut, you’ve probably noticed, that this hat is a big flatty-flat piece of knitting.  And, I don’t know about you, but my head is not flat.  It is big and round, like a melon.

So, we probably need to make our hats a little more head-shaped.  We’ll do that by adding some “shaping” to our knitting.  Shaping is a generic term for using special stitches to give your knitting a 3D shape.  I’ll show you how to do a simple knit two together decrease (which is usually shortened to ‘k2tog’).

We’re going to do 8 k2togs across each knit row of the hat for the rest of the project.  Make sure you are working on a knit row, and start following along.

Knit 8 stitches regularly.  Then, get ready for a k2tog.

OLYMPUS DIGITAL CAMERAk2togs are super easy to do.  It’s exactly like doing a knit, but instead of poking your right needle through a single stitch, you poke it through two stitches.  Like this:

OLYMPUS DIGITAL CAMERAThen, wrap your yarn around the tip of your needle.

OLYMPUS DIGITAL CAMERAAnd pull your new stitch through both old stitches.

OLYMPUS DIGITAL CAMERAThen drop the old stitches off your left-hand needle.  See how you’ve decreased the number of stitches by one?  (2 old stitches = 1 new stitch)

OLYMPUS DIGITAL CAMERAKeep working in the established pattern: Knit 8 stitches, then k2tog. Knit 8, k2tog, knit 8, k2tog, over and over.  You should end the row with a k2tog.

The next row is a purl row, so purl all stitches (don’t do any decreases).

The next row is a knit row, so you’ll do decreases again.  This time, knit 7 stitches, k2tog, knit 7 stitches, k2tog, etc.

Then purl a row.

Then work a knit/decrease row.  Knit 6, k2tog, knit 6, k2tog, etc.

Then purl a row.

Then do another knit/decrease row.  Knit 5, k2tog, knit 5, k2tog, etc.

Then purl a row.

See how the pattern goes?  All purl rows are worked like normal.  All knit rows include decreases.  Each time you do a decrease row, you knit 1 fewer stitch between each decrease.  (If you find yourself getting confused, make notes on a post-it to help you keep track of where you are.) If you keep working in this pattern, your decreases will end up lining up nicely.  Kind of pretty, right?

OLYMPUS DIGITAL CAMERAKeep going until you only have 8 stitches left on your needle, finishing with a knit row.   See how it actually kind of looks like a hat now?  Exciting!

OLYMPUS DIGITAL CAMERANext week, Finishing your hat!