Tag Archives: dying yarn

Dying Yarn: Ombre

Ombre is a fancy-pants fashion word for a color that changes from dark to light as you go up or down a garment.  You know what I’m talking about , even if my description doesn’t make sense.  Ombre looks like this:

ombre[1]

If you want to make an ombre project, like socks or a scarf, you can knit your project out of plain white wool yarn, then dye the finished projects.

(Or, you can start with a “Sock Blank.”  You can buy these from specialty yarn suppliers like Knitpicks.  A sock blank is a piece of stockinet knitting that is worked up with yarn held double.  It’s designed to be dyed, unraveled, and then knit into socks.  If you want to make your own, you totally can.  Just buy a skein of undyed wool sock yarn, hold the ends together, and knit up the whole thing.  Use super big needles so that the process goes quickly, and the fabric is nice and loose (if it’s too tight, the dye won’t take evenly). I’m using a sock blank, but that’s just because it’s what I had on hand.)

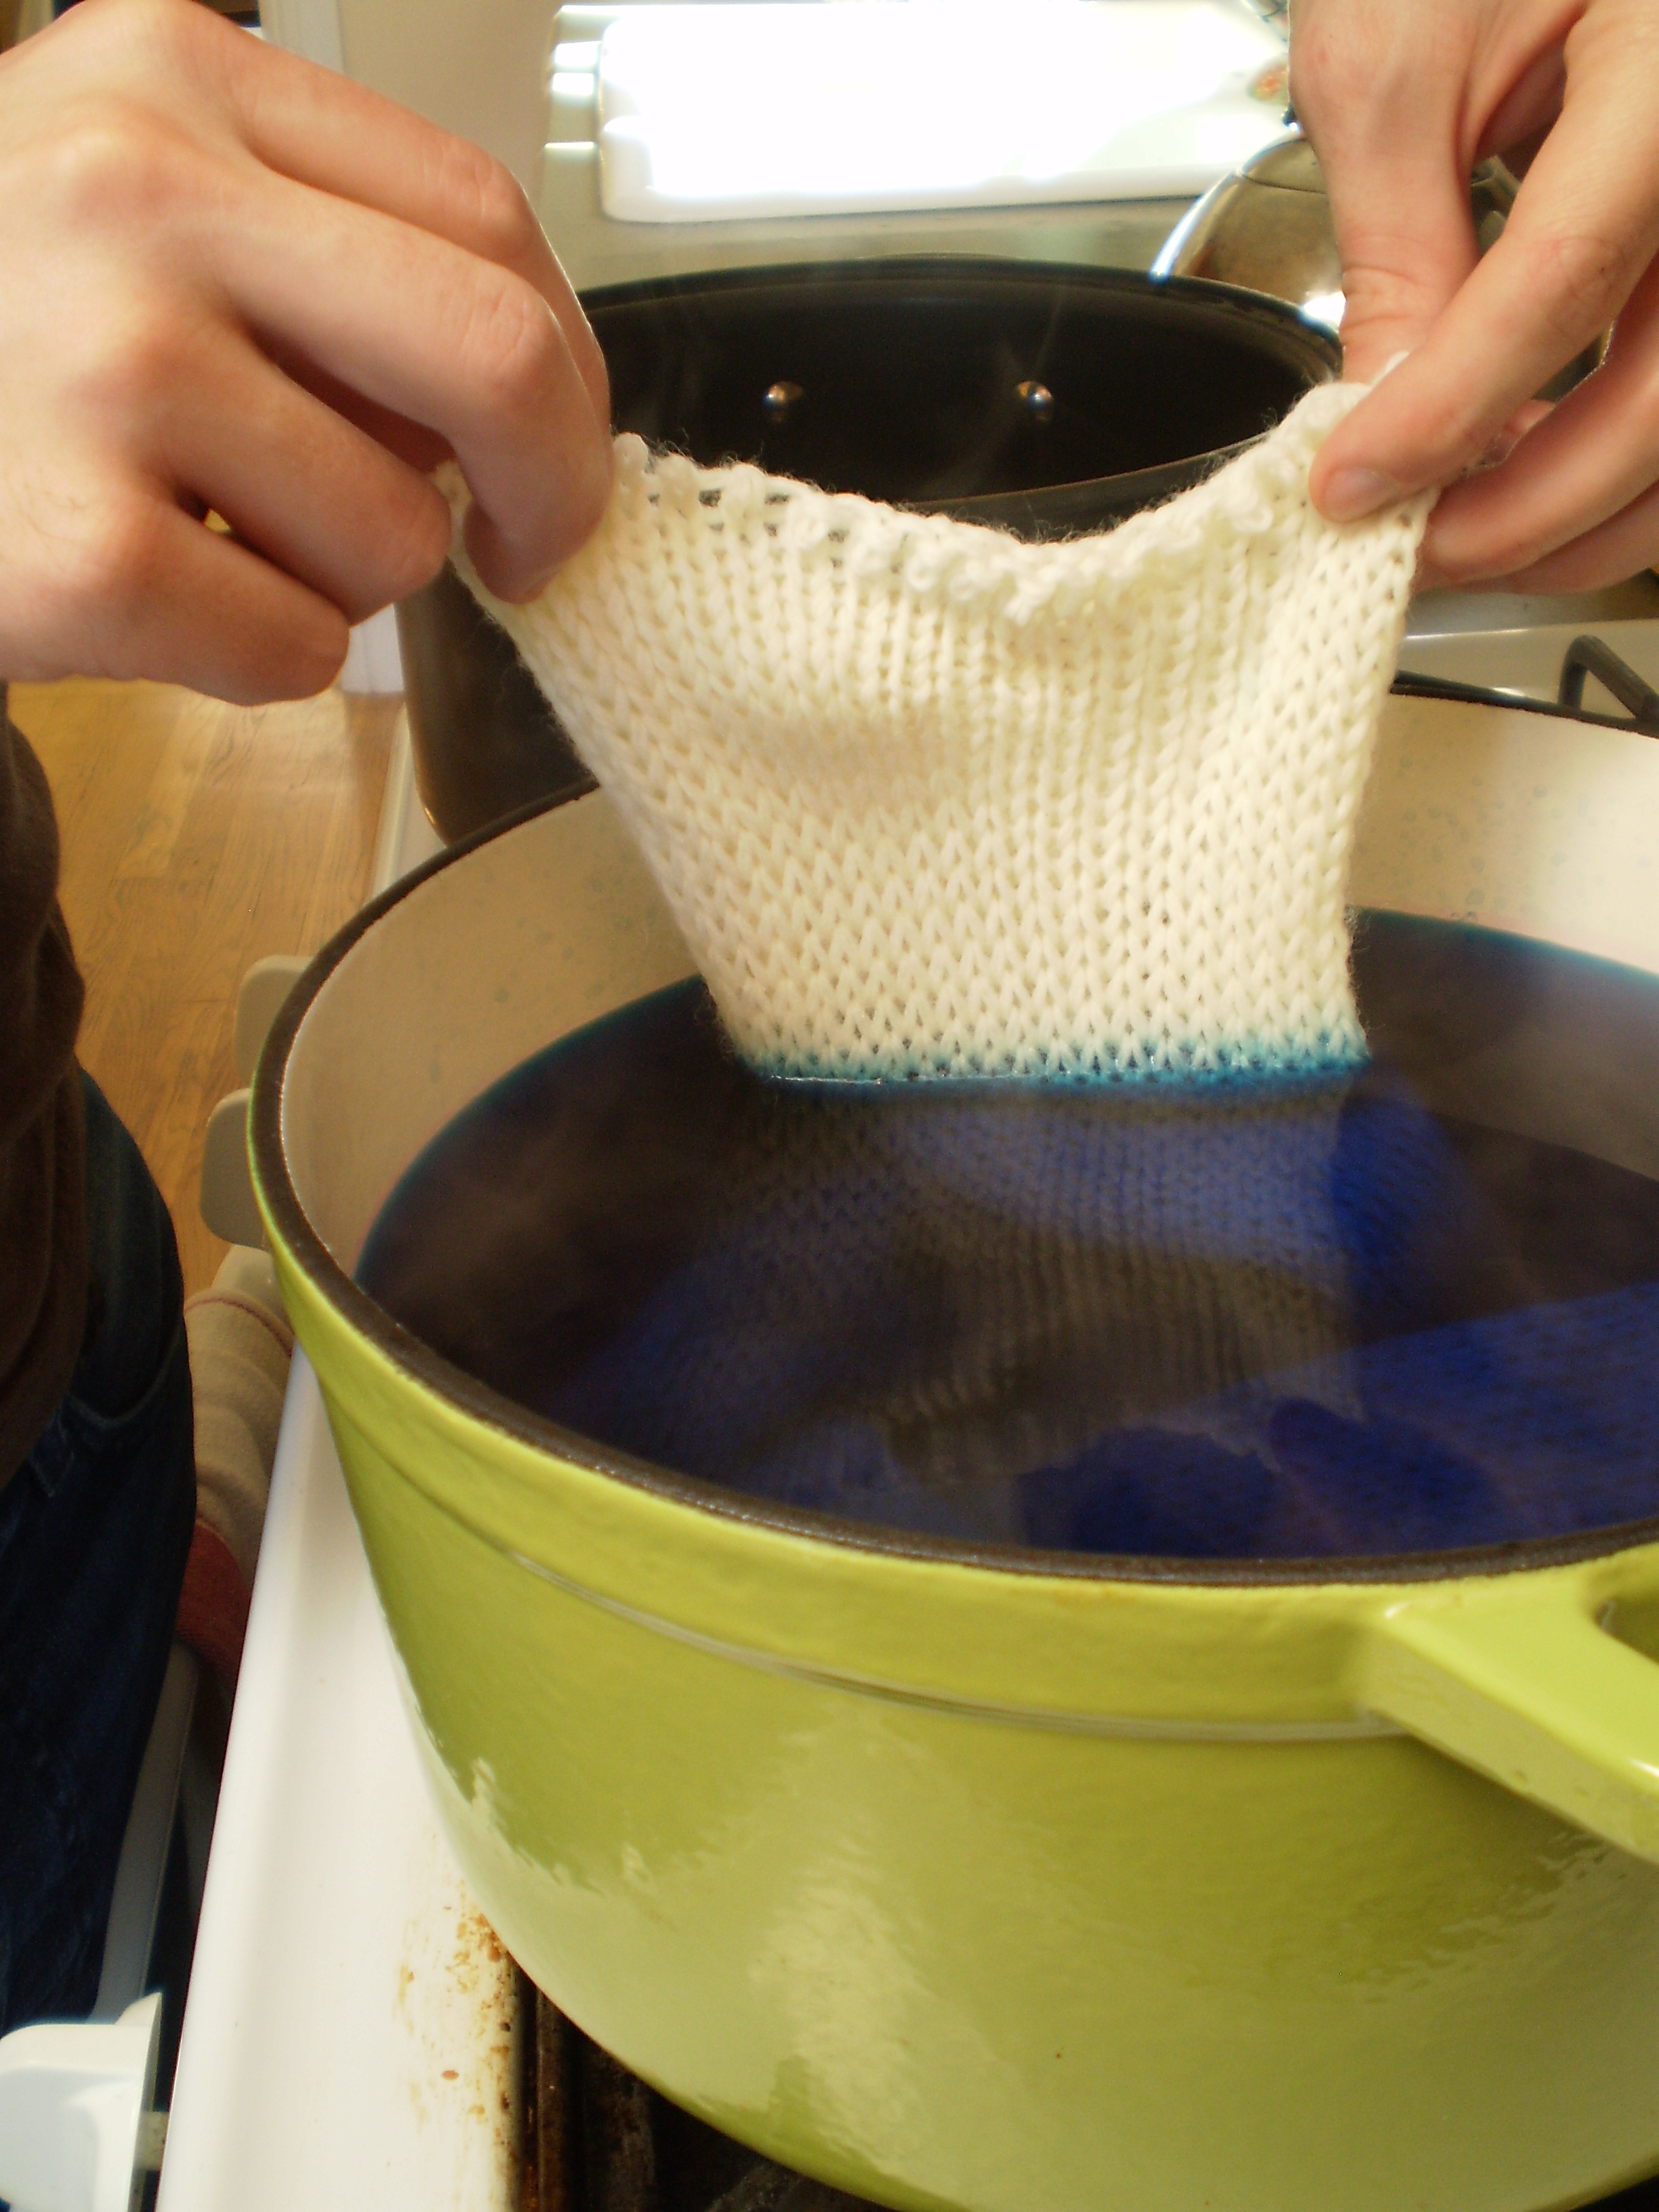
OK, so you have your knitted up fabric and your dye in your pot, just like normal.  Soak your knitted item in warm water and heat up your dye.  We’re ready to start dying.

Slooooooowwwwwly lower your sock blank into your dye.

OLYMPUS DIGITAL CAMERA

I’m talking tortoise slow, glacier slow, slower than the bus when you’re late for an important meeting.  S.L.O.W.

OLYMPUS DIGITAL CAMERA

Lower the project into the dye inch…by…inch.  It should take you several minutes to put the whole thing in the pot.  This gives the bottom of the fabric time to soak up more dye (and become darker), while the top part has less time in the dye (and stays lighter).

OLYMPUS DIGITAL CAMERA

Once the whole thing is in the pot, let it hang out in the hot acidic water for a few minutes to set the dye.

OLYMPUS DIGITAL CAMERA

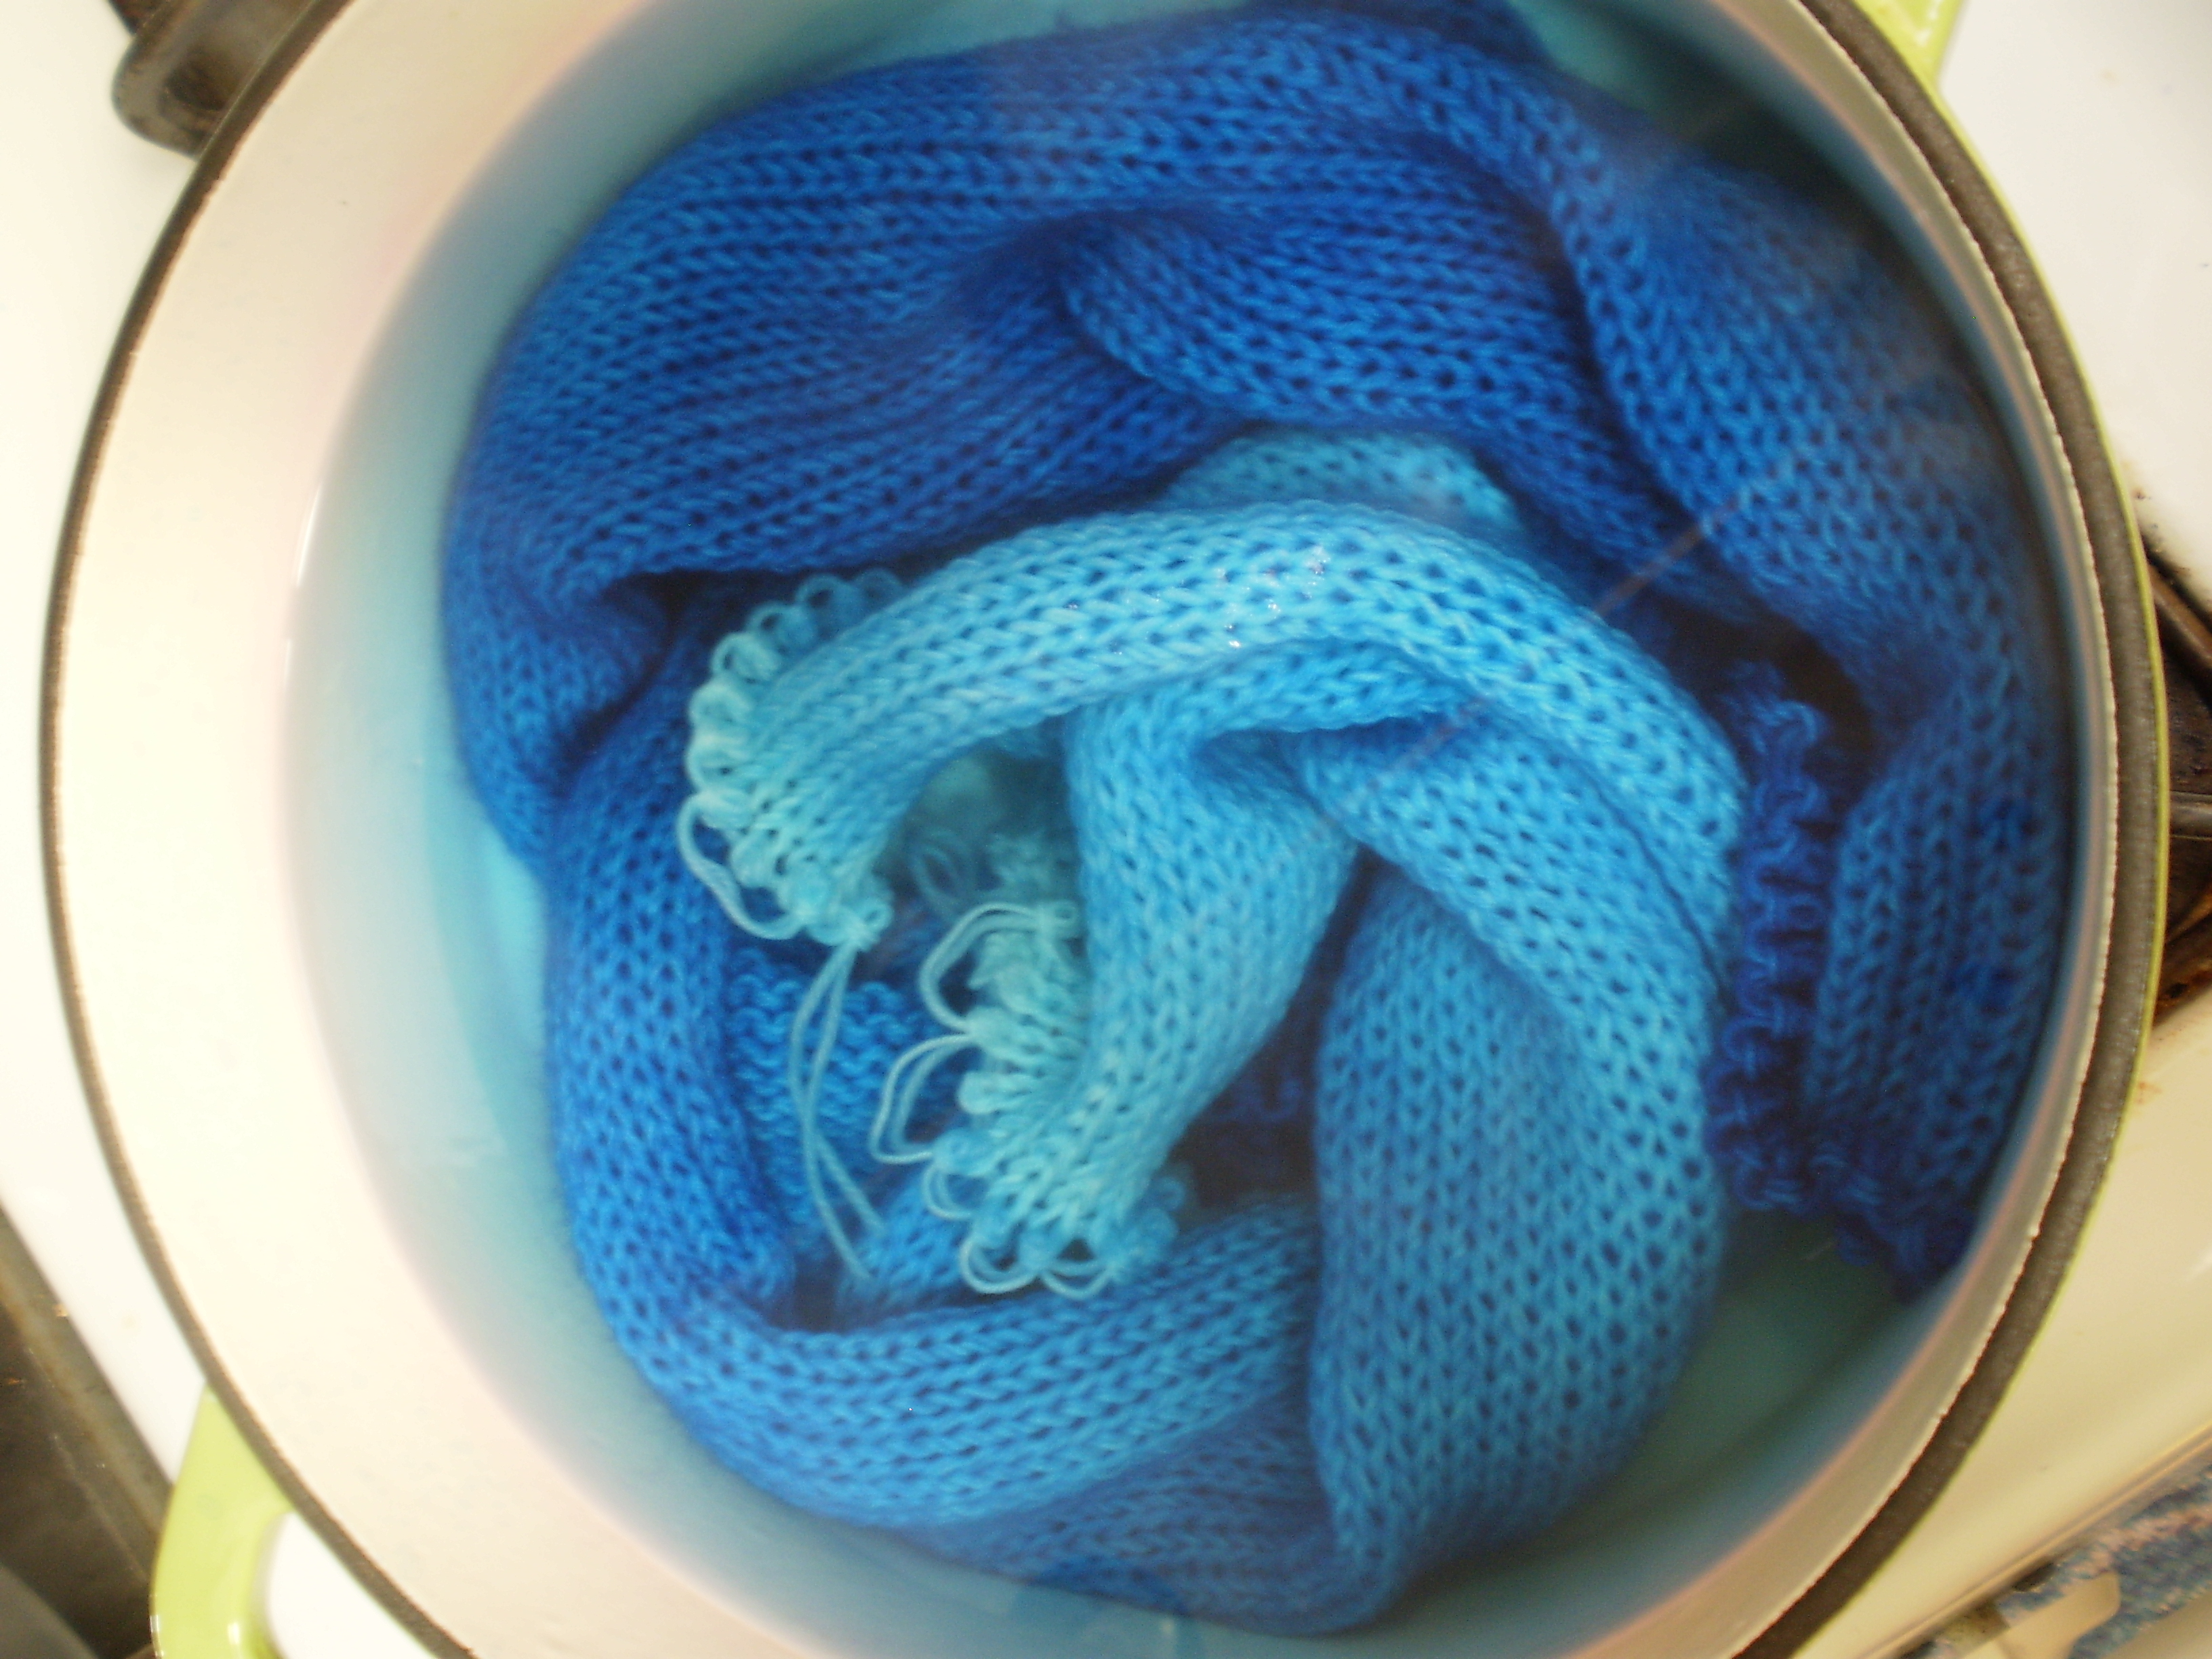
Rinse it in fresh warm water and let it hang dry.  (Then, if you’re using a sock blank, unravel it and wrap into two balls of yarn.  Use these two identically dyed balls of yarn to knit up some kickass ombre socks.)

OLYMPUS DIGITAL CAMERA

Dying With Food Coloring, Part 3

Now let’s really have some fun!  Variegated yarn is my favorite to make… it’s sort of like finger-painting, or tie dying.  But with yarn.  Fabulous!


Start out by soaking your yarn in some nice warm water (like usual).  When it’s thoroughly soaked, get out a big baking dish and line it with a piece of plastic wrap (mine is pink, because it’s left over from Christmas, when, apparently, you can buy pink plastic wrap).  Then, arrange your yarn neatly in the dish, so that it’s all nicely laid out.

OLYMPUS DIGITAL CAMERA

Set your yarn aside for a couple minutes while you put together your materials for your dye.  This is going to be a little different than how we’ve done it before, so it helps to have everything ready.

Here’s what you need to get out:

-A glass measuring cup with a spout.  If you don’t have one, that’s OK.  You can use a mug or something else heat-proof, but having a spout keeps everything neat.

-A bottle of vinegar

-Food coloring of your choice

-A spoon or butter knife for mixing

-A kettle (or pot) of boiling water (the boiling part is important)

OLYMPUS DIGITAL CAMERA

Ready to start?  You’ll have to work kind of fast, so you might want to read over the instructions before you begin.

Mix your dye.  The dye needs to be much more concentrated than the dye we used before, since we’re hardly using any water.  Here’s what I used (more or less.  You know me, I like to eyeball my measurements):

-1/2 cup of boiling water

-1/2-1 tsp of vinegar

-Food coloring to make the shade I want.  For this colorway, I probably used about a 1/4 teaspoon of each color… more or less.

Mix it together with your spoon.  If you’re using the gel food coloring, try to get rid of any lumps or chunks (but it’s not the end of the world if you miss some).

OLYMPUS DIGITAL CAMERA

While the dye is still super hot, dribble it artistically over your yarn.  (You want to move fast, so that the residual heat from the boiling water sets the color right away.  If you wait for the dye to cool, you’ll end up with muddier, mixed up colors.  Of course, if you want to go for a mushy, water-color look, then feel free to experiment.)  When you dye a section of the yarn, try to dye all the strands in the bundle.  This way your whole skein will end up with more or less the same color pattern.  But, again, feel free to experiment.

OLYMPUS DIGITAL CAMERA

Add your other colors one by one:OLYMPUS DIGITAL CAMERA

And keep going until you like how the yarn looks (or until you run out of white spaces… whichever comes first):

OLYMPUS DIGITAL CAMERA

So, assuming you did everything right, most of the dye has already been taken up by the yarn.  But, as you can see above, some dye might still be hanging around in the liquid.  We can’t have that.  So, we’ll use the microwave to add a little more heat and finally set the colors.   Bundle the plastic wrap around the yarn, making a fiber-arts burrito:

OLYMPUS DIGITAL CAMERATransfer your burrito to a microwave-safe plate or bowl.  Pop the whole thing in the microwave, and zap it for 1 minute at a time.  Every time you pull it out of the microwave, let it sit for a minute or two, then check to see if the water has turned clear.  Once it has, rinse out the yarn with warm water, and hang it up to dry.

Fun, right?

OLYMPUS DIGITAL CAMERA