Tag Archives: colorwork

New Pattern: Radish Pullover

It’s almost Christmas, and I have a present for you!

It’s the pattern for my Radish Pullover!  It turned out so well, that I just had to write it up.  And I hope you like it, too.

IMG_2276It’s a fairly simple bottom up, seamless pullover with a V-neck and 2×2 ribbing around the cuffs, hem and collar.  There is a fully-charted stranded Radish motif that runs across the sleeves and belly, and the pattern is sized from 0-6 months up to 8-10 years.

This sweater is a great way to use up those partial skeins of sock yarn that I’m sure you have laying around your stash.  The brown doesn’t use more than a half skein, and the radish colors (green, red and white) are only used for a handful of rows each.

And the best part? Since the inspiration for this sweater came from my kid’s favorite book, Sheep in a Jeep, I’m donating all proceeds from this pattern to the Children’s Literacy Initiative, a fantastic organization that supports teachers and their students to help every kid learn how to read.   I’m trying a “Pay what you can” model this time, so you can get the pattern for free, or donate up to $15 (or whatever feels right to you).IMG_2257

So, head on over to Ravelry and pick up a copy of the Radish Pullover so you can make a sweater for your favorite little reader!

Sheep are done with their Jeep!

It’s done it’s done it’s done it’s done!

My Sheep in a Jeep sweater is done in time for our big Midwestern Trip for Thanksgiving!  I’m going to have a very cozy (and dapper) boy.

Fair warning: these pictures are a little silly, because the kid is a little silly, and is incredibly interested in the camera clicking.  Honestly, most of the pictures looked like this:

IMG_2250

Looking for cars:  (You can actually see the knitting in this one, if only the back.  I’m so pleased with how the color work blocked out! I was worried it would be a little pucker-y.)

IMG_2257

Blue Steel:

IMG_2263

This is the face he’s started making when I ask him to “smile.” It’s not a real smile, but I love it very much.  Silly boy.

IMG_2276

Anyway, the verdict is: The sweater fits great, but still has a little growing room.  The floats on the cuffs caught both of his hands as we were getting dressed this morning, which will be something to keep in mind in the future (hopefully they felt up a little).  All together, I’d count it as a success!


Pattern: Piper’s Creek Pullover

Woo hoo!  It’s a pattern day!

And this one’s a little out of my usual wheelhouse, because:

  1. It’s a fingering-weight sweater worked on US3’s.  Why? Because I’m a crazy person.
  2. It’s colorwork!  I love how colorwork looks, but all things being equal, I think I’m more of a cables person.  I love a big squishy sweater. (OK, I love making a big cabled sweater.  I’d wear either in a heartbeat.)

Anyway, without further ado, let me introduce the Piper’s Creek Pullover!52724220_09
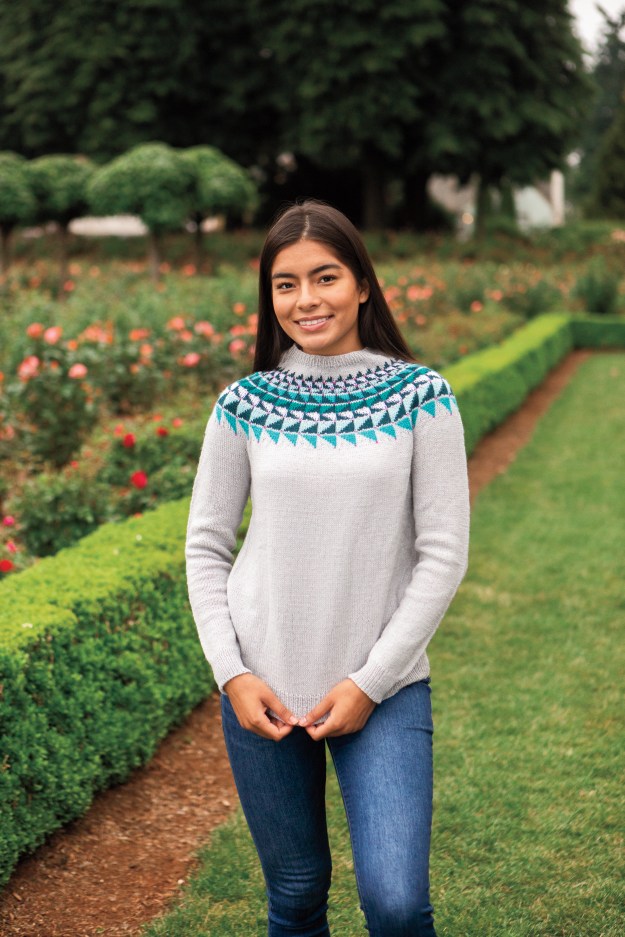
It’s a long-sleeved yoked pullover, made with Palette yarn from Knit Picks (though you could use really any fingering-weight wool).  It uses at least 7 (count em) different colors (great for using up leftover scraps!), but could be easily modified to use as many colors as you have on hand.  I made mine for my husband with a gray background and blue, red and yellow details.  It’s a great unisex sweater, and a fun, simple knit (assuming you don’t mind miles of US3 stockinette).

52724220_13.jpg
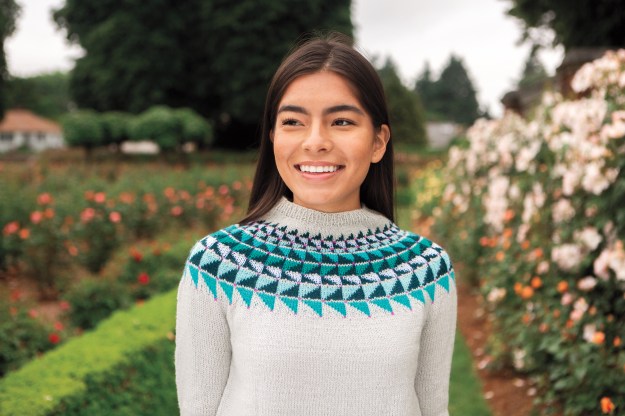
I will say one thing though- the neck on the sample in these pictures ended up kind of funny, so if you want to make a Piper’s Creek Pullover (which I highly recommend), here’s what I would do to avoid the weird neck.  First, make sure that you’re only doing the number of short rows called for in the pattern, or maybe even reduce the number by one or two, just in case.  Second, make sure to work the colorwork nice and loosely (tight shoulders will make the neck funnel up, like it is in the pictures).  And third, make sure to block the sweater so the neck goes nice and smoothly into the shoulders.  Worst case scenario, if the neck ends up terrible even with all those precautions, you can always rip it out from the top down (or cut it out),
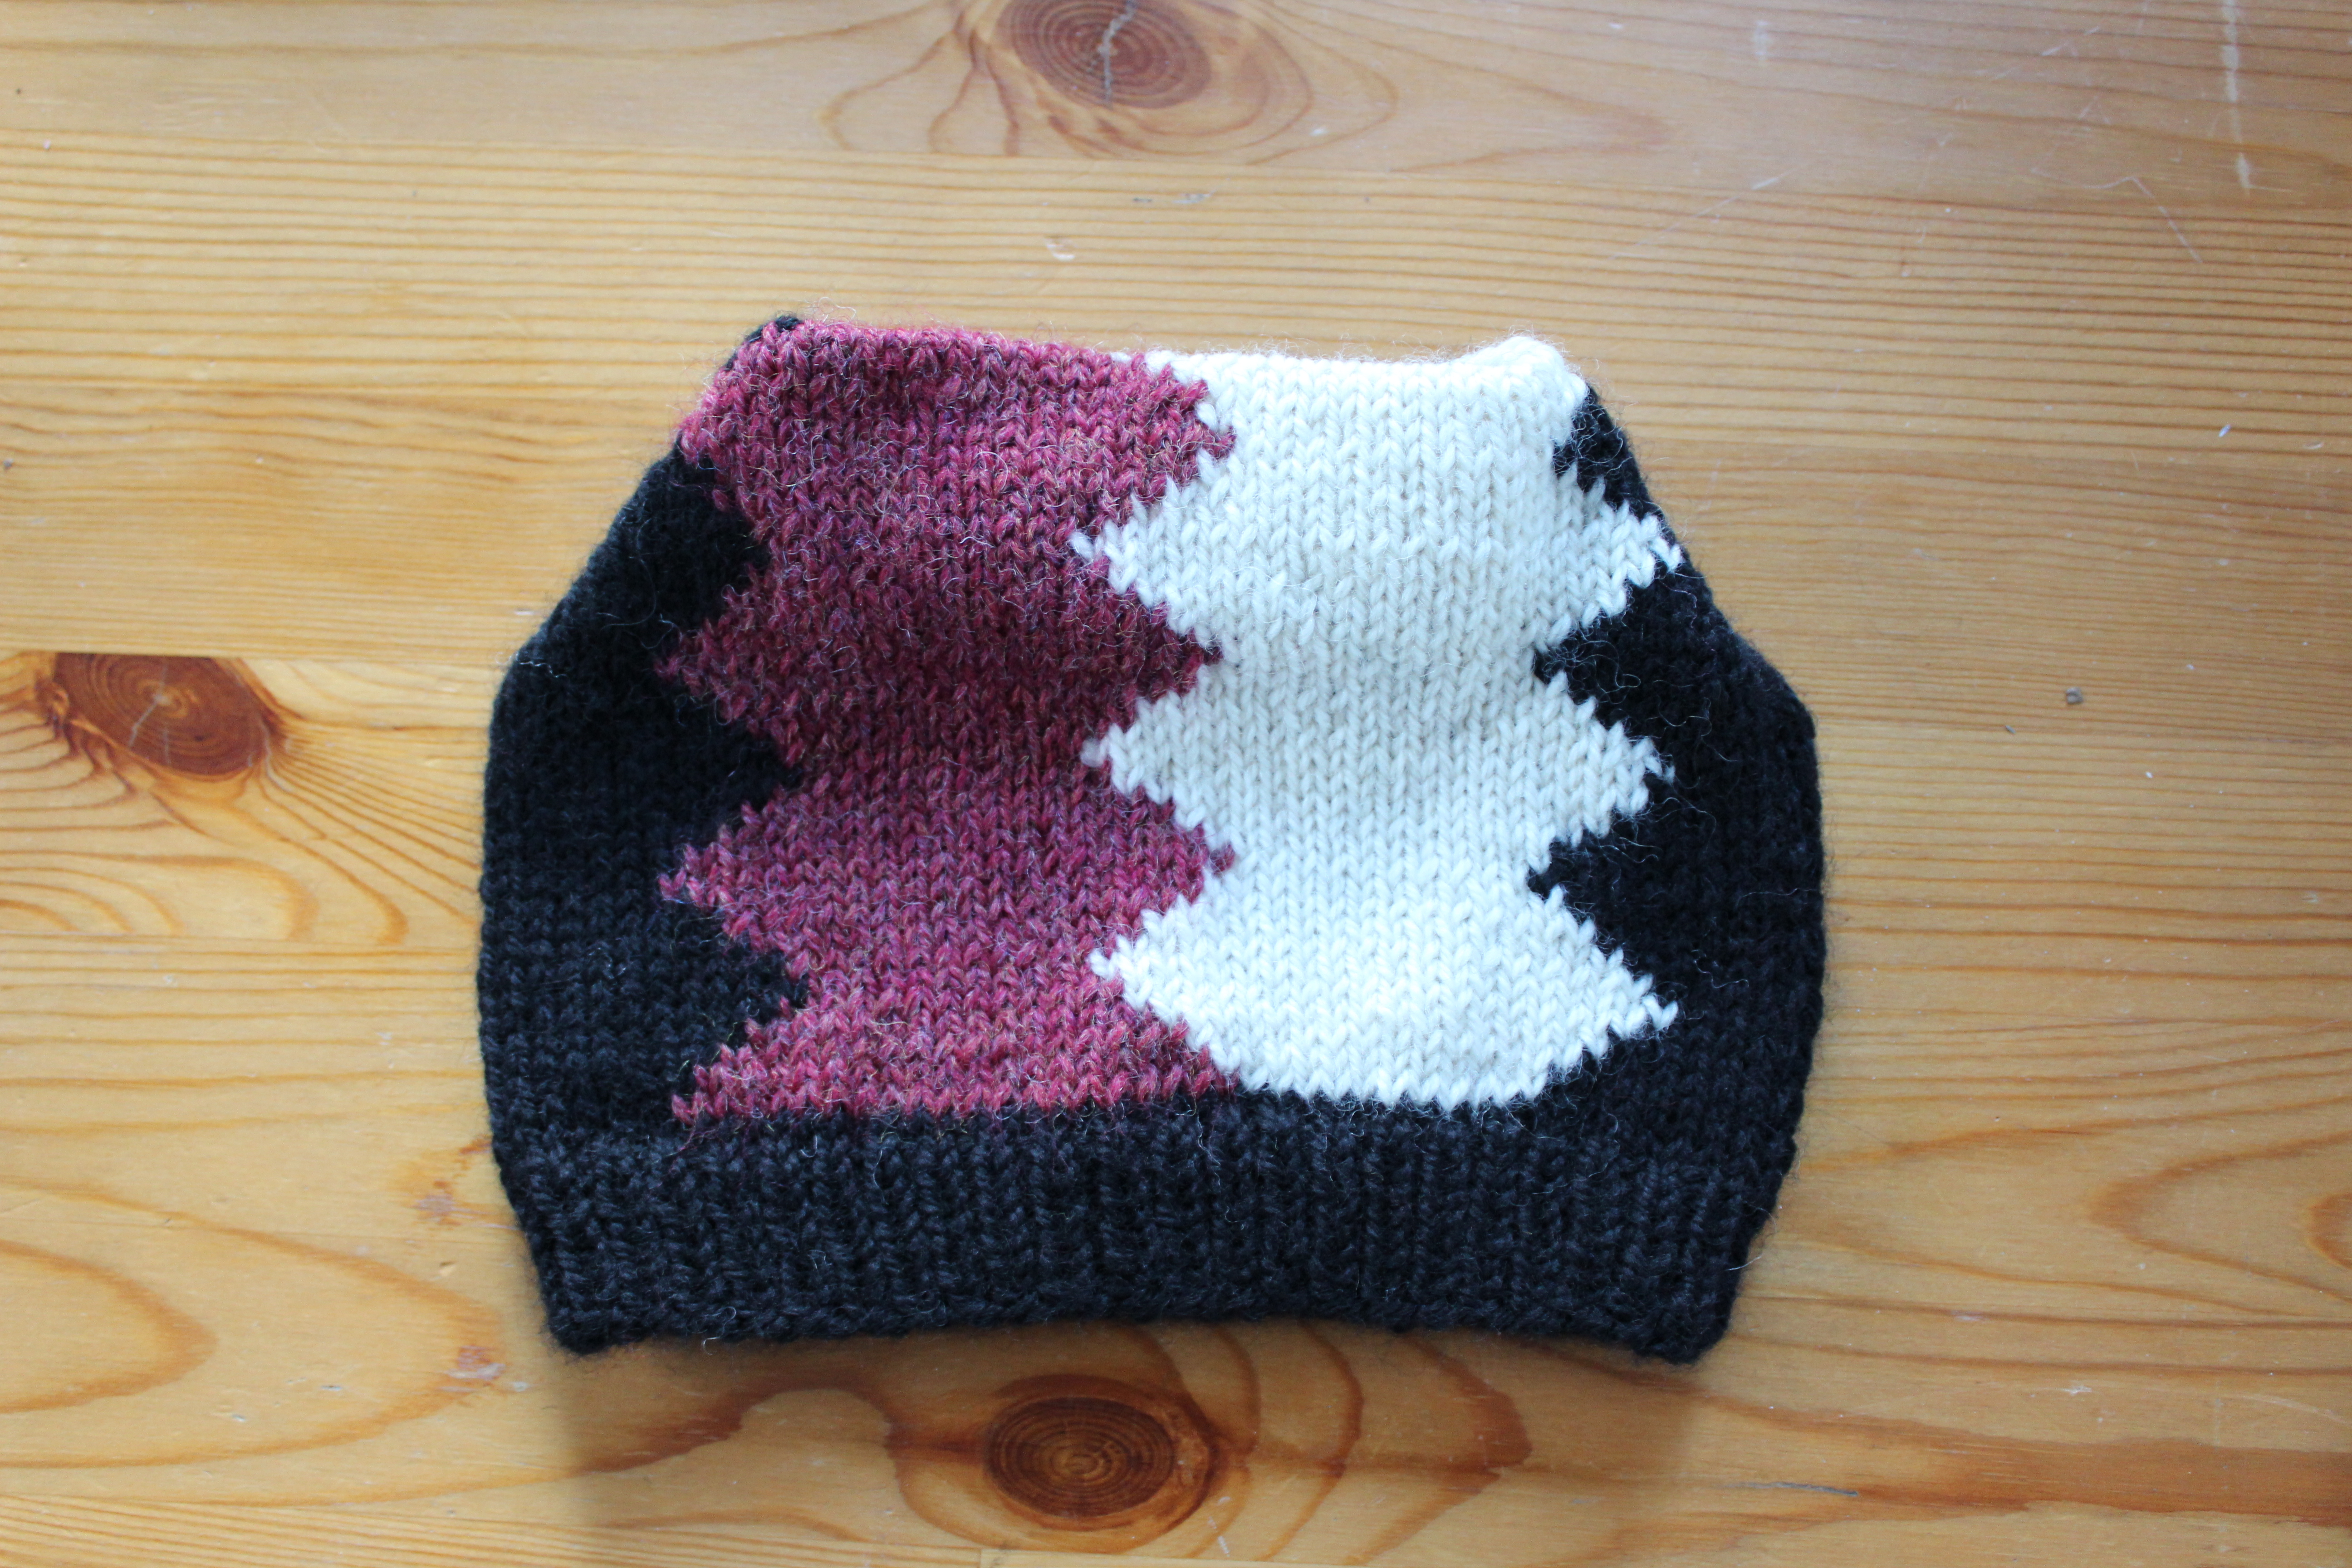
 pick up your neck stitches and work the neck and collar that you prefer after the sweater’s done.  (Though, that seems like a lot of work…)52724220_14

Want to pick up a copy? Grab the Piper’s Creek Pullover pattern here!  Or get the whole Palette collection here!

Sheep in a Jeep!

As a stay at home parent, I spend a lot of my day reading kids books.  And, since my kid’s one and a half, and getting into the “Again! Again!” phase, I’ve been reading the same books over and over again.  Sometimes it’s an absolute chore (I’m looking at you, Follow that Truck!), but sometimes it’s great.  Especially when the book has a nice story, fun rhymes and detailed pictures.  Enter: Sheep in a Jeep by Nancy  Shaw.IMG_1973.JPGIt’s a delightful book about sheep who are remarkably bad at driving.  In 26 pages, they manage to 1. stall out their Jeep on the top of a hill,  2. get their Jeep stuck in a mud puddle, and 3. crash their Jeep against a tree.  It’s all very dramatic.

Anyway, on read-through 1,325, I noticed that one of the sheep has a knitting bag with her, and it goes flying when the car crashes.  She’s got 5 colors of yarn, and a half-finished… something.  Maybe it’s the beginning of a sweater or a scarf, or maybe it’s just a swatch.  Either way, it was super cute colorwork.  IMG_1977I noticed reddish ribbing on the bottom, then a row of… maybe blue and white circles, before a row of white triangles and red circles… and maybe some green on top with black dots? It wasn’t too clear, but I had a little time in my knitting schedule and some of the kid’s crayons to try to chart it out, so away I went.IMG_1981But halfway, through, I realized the red, white and green shapes weren’t just shapes… they were turnips!  (Or maybe radishes? It’s hard to tell the difference.)

I went back through the book to see if I could find another picture of the knitting.  And, wouldn’t you believe it- right on the back, clear as day, there was another view.  And now that I know they’re radishes, I can’t not see them.  Obviously- a row of radishes and a row of green dots.  How didn’t I see it before?IMG_1980Now that I was this far, I had to keep going- And another swatch later, I’ve got a very cute little radish design.  I’d change the colors so the contrast is there, but it’s a good start.IMG_1985Now I’ve just got to decide what to use this for.  Right now, I’m thinking a little pullover for the kiddo.  Maybe with a light blue background “above ground” and a nice chocolate brown heather for the dirt.  I think I might stagger the dots and the radishes,  and the leaves still need a little work, but I like where it’s going.

This whole Sheep in a Jeep project is getting a little out of hand (but maybe that’s fitting, considering the source material…).

Where’s the weirdest place you’ve gotten knitting inspiration from?

Itsy Bitsy Fair Isle

My kid is growing like a weed.   All the sweaters I made for him (except for this monstrosity) are already way too small for him.  His little Captain Picard sweater was practically too small when he was born- I could never get it to button all the way up.  He doesn’t like knit hats, he’s too little for mittens and scarves, and socks and bootees slip right off of him.

Anyway, I have an un-sweatered baby and I’ve got a little free time in my knitting schedule and some sock yarn leftover from a recent design.  Perfect timing!IMG_0525

I decided I wanted to try my hand at some fun Fair Isle knitting.  And, it had to be a pullover (cardigans just end up in the baby’s mouth).  Plus it had to be seamless and top-down (my favorite way to knit sweaters).

So, I dug around on Ravelry for a bit, util I found this beautiful sweater!

Christmas in July by Tanis LavalleeChristmasInJuly-Laura_medium2

Insanely pretty, right?  I love how multi-colored it is!  Sure, mine will be distinctly more blue-green, since that’s the yarn I’ve got, but that’s OK.  I love the fun, modern take on a classic yoked sweater.   (And I like that the color work doesn’t go past the armpits- continuing color  work down sleeves is a pain in the butt.  I mean, I’ll do it, but I’ll complain the whole time.)

Plus, it comes in kids and grown-up sizes!  If I really like how it turns out, I can make a matching sweater for myself, and become that lady.

I’m currently about 3/4 of the way through the yoke, and I kind of love how it’s turning out.IMG_0531
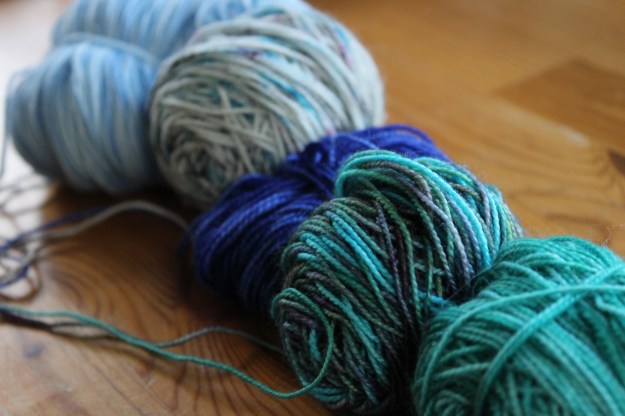
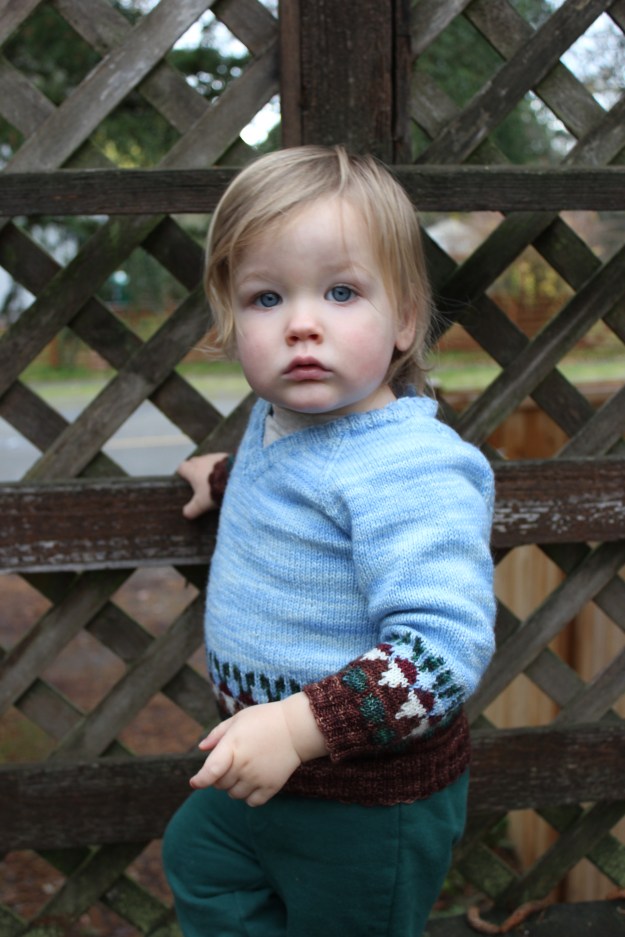
It’s not as graphic as the examples, but I love the subtle way my speckled and variegated yarns work together in the complex color work.  I think this is going to be a great little sweater.  (Here’s hoping the boy fits in it for more than fifteen minutes-  I’m making a one-year-old size, in the hopes that it’ll get a little more use.  We’ll have to see how it goes.)

I can’t wait to see it finished!

What are you working on now?

Another new pattern! Milestones and Memories

I’ve got another pretty cool collection for you guys!

This one is another collaboration with Knit Picks- but this one is a little more of a “choose your own adventure” than the usual patterns I make for you.

Introducing, Milestones and Memories!This book is a collection of colorwork charts (all the same size, and all super cute) that you can use to make memory blankets and cute themed pillows for everyone in your life.

Does your grandma love working in the kitchen?  There’s a pillow for that!Does your cousin love the great outdoors? There are squares for that!Did someone you love just get married?  Why not celebrate with a blanket?

I love the open-ended nature of this book.  There are squares that would be perfect for anyone in your life!  And, the blankets and pillows end up looking just adorable!

Grab a copy of Milestones and Memories here!

Christmas Post-Mortem: A hat

Christmas is done!  Hope you had a nice weekend.  We played lots of board games, and ate lots of cookies.  A pretty great time, if I say so myself.

But here’s the fun part!  Now I get to show off the gifts I’ve been working on over the last few months!

Let’s start with this cool hat I made for my brother-in-law!img_4099I knit with a very cool “intarsia in the round” technique that I learned at this year’s Knit Fit.  Basically, you cast on and do the brim just like normal (in the round).  Then, as you knit the top (multi-colored) part of the hat, you use really long short rows and wrap-and-turns to work the intarsia without messing up the order of your yarn.  So, you’re effectively knitting back and forth at the same time you are creating a tube that looks like it was knit in the round.  Super clever!

And, it’s got this cool top (which looks better when it’s worn):img_4102It’s dead simple to make.  You knit all the way to the top of the hat without any shaping (making it extra-long), then you seam the top to make the whole thing flat, then take the corners and sew them together.

Cool, right?

What did you make for Christmas?

Project Tea Cozy: In The Belly of The Beast?

Last week I did my first try at writing up the Tea Cozy pattern.

This week I did a bunch of knitting (and proofreading)!

Remember that math I did last week?  I determined that I needed about 120 sts around the belly of the pot.  I could just cast on 120 sts, but I want the ribbing at the bottom  to be a little tighter.  I think it’ll look better that way.

I figured if I want to increase about 1 st per 8, that should give me the result I’m looking for- just a little tighter, without any weird puckering.  So, a little more math, a bit of estimation, and I’ll cast on 106 sts.

I worked a p2 (k2p2) rib for a generous half inch (5 rows), then worked an increase row to get me up to 120 sts.

Then it was colorwork time!  img_3348Hoo boy, did I underestimate the amount of ends I would be generating!  So many stripes, so many color changes.  Oops!  At least it looks pretty.

Also, I want to bring your attention to a detail I’m really proud of.  Look at the edge of the handle hole (I really need a better word for that):img_3370See the brown edge?  I made a little mini-skein of brown for each side, and used intarsia to work a few stitches of garter stitch to keep the ends from curling.  I think it makes the tea cozy look really professional.

Now I just have to figure out how I want to make the hole for the spout…  Hmm.

Project Tea Cozy: Let’s Begin

I’ve got the gauge, I’ve got the stitch pattern, and I’ve got the design in my head.  It’s time to start getting this pattern on paper.

I’ll start by measuring my teapot.  19″ around the fattest part, which, with some math, can give me my stitch count.

img_3316Then I’ll sketch out my design, adding in notes about all the details- where the increases will be, what stitch pattern to use, etc.  I’m going to make this tea pot like a modified hat.  So, I’ll start from the bottom and work up, but I’m going to knit flat (until I make it to the “crown”).  That will make it easy to make the big hole for the handle; I’ll just sew up an inch or so at the hem, and voila!  Tea cozy.  (Or at least that’s the plan.)img_3331Then, starting with the cast on at the bottom, I write a first draft of the pattern, knowing that a bunch of it will be wrong.  But that’s OK, that’s what first drafts are for!img_3337Then, I finalized the stitch pattern…

Oh.  Except…

I totally used up most of the yarn I was planning on using (I got excited about another project and used up almost all the red and yellow and blue… oops!)img_3323Well, I’ve got lots of neutrals, so I guess this teapot will be more neutral than bright and colorful.  Ooh!  I can use neutrals for the stripes and colors for the dots.  That should look cute!img_3342OK, now that everything’s set up and beautiful, it’s time to start knitting!  (And time to start figuring out where all my mistakes are!)

Project Tea Cozy: The Swatch

Woo! It’s tea cozy time!  (Almost.)

I know no one likes swatching, me included.  (And, if I’m being honest, I rarely make a swatch if I’m following someone else’s pattern.)  But, when you’re designing a pattern making a swatch is an absolute necessity.

So I pulled out my favorite colors and made one great big swatch with three different patterns, to see which I liked best.

The first pattern was a wide stripe-and-polka dot combo.  I like it, but I think it’s a bit big for a tea cozy- after all my teapot is a little on the small side.img_3299Then, I thought, “Maybe something fancier-something more Fair Isle-y.”  I like this diamond pattern quite a bit.img_3312But, again, I think it might be too big.  So I worked up a scaled-down version of the first pattern.  Narrow stripes with teeny polka dots.  Sure, I’ll have to deal with a million little ends, but I think I like the result best.img_3304So, I’ve got my swatch and decided on my pattern.  I measured the gauge, and made sure to write it down in my book.

img_3344I’ve taken my measurements and have a plan in my head.  Next time, we’ll get down into the nitty-gritty of math.

Don’t forget!  I’ve got 2 (count ’em!) giveaways going on as we speak.  Comment here for a chance to win a copy of On the Go Knits, or here for a chance to win Knits for Everybody!