I feel like I’ve been on a streak lately, where everything I pull out of storage is full of holes. I found two sweaters, a tea cozy and a hat that needed repair, and I just tried on my most favorite pair of socks, and my toe went right through the tip.
Fair warning: The following are photos of an *ahem* well-loved sock. Not exactly the pretty things you might be looking for in a knitting blog. You have been warned.
Anyway, the toe:
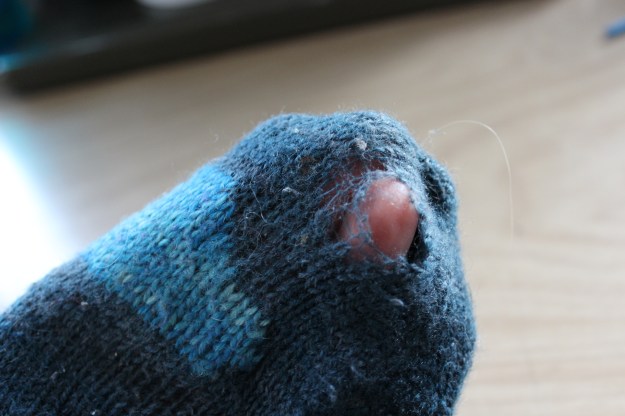
You can see that these socks have already received some TLC- I patched up a big bare spot on the ball of the foot last winter. Now the toe’s busted through and the heel is about to go. Some might give up on so worn-out a pair of socks, but not me! I worked dang hard on these bad boys, and I want to wear them!
It’s time for my favorite knitting mending technique- the duplicate stitch. (This tutorial is more about using the duplicate stitch for decorative use, but it’s the same idea if you want to use it for repair.)
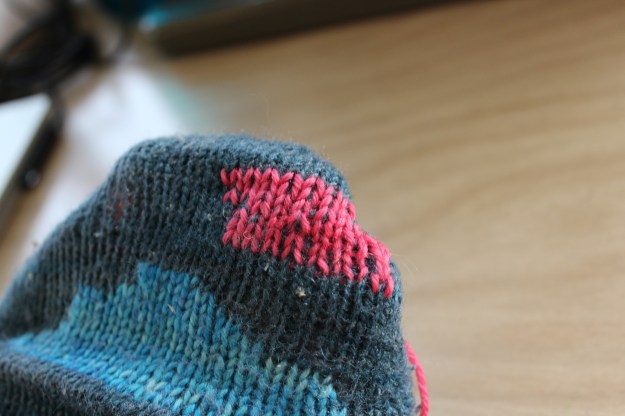
Whenever I want to darn a piece of worn-out knitting (usually socks), I use duplicate stitch, carefully going over the worn-out spot (plus a little extra all the way around). It’s a way to reinforce worn stitches with a new layer of wool. I carefully trace the knit stitches with the new yarn, following the path of the last few fibers of the old yarn.

And when there’s a real, honest-to-goodness hole, where the yarn has fully broken and there’s nothing left to “trace”, I use a knitting needle to hold my stitches until I can hook them up to the other side of the hole, building new “knitted” fabric to cover the space.

Until, the hole is covered and the sock is good as new. Well, you know what I mean.
Now I just have to repeat with all the other sad socks in my drawer.
Do you ever mend your knitting?
