I haven’t got anything pretty or cute or nice to show you today- I’m in-between personal knitting projects and neck-deep in super secret work knitting. I had thought about writing about some cute knitted pumpkins I saw the other day. Or maybe looking up spider-related knitting patterns (my kid is currently obsessed with the “Itsy Bitsy Spider”, or as he calls it “Pider Pider Pider”). Or maybe writing a quick warning that we’re just under 2 months away from Christmas (which we are, so if you’re doing any Christmas knitting, you’d better get moving).
But no, instead, I will tell you a spooky Halloween story. A tale of a real live cursed hat, and the person who must live with it (me).
Because, you guys, I’m totally and completely cursed.

So, a couple months ago, I came across a call for a design, and I came up with an idea for a really cute cabled hat (I’d love to show it to you, but it’s currently embargoed. Don’t worry, though, once it’s done I’ll be excited to share it). “This will be an easy job,” I thought to myself. Oh how wrong I was.
It’s a simple little cap, with a handful of semi-complex cables all the way around. Nothing too crazy, but getting the sizing right on something like this is kinda tricky.
So, before I even submitted my proposal, I knit up the following:
- Swatch #1: The cable didn’t look the way I thought it was going to. Ripped out.
- Swatch #2: The cable looked closer to what I was imagining , but needed some tweaks. But, I figured I could do the tweaks on the hat that I was going to do next. Ripped out.
- Hat #1: Got about 3 inches into the hat and realized it was a hat for a giant. Ripped out.
- Hat #2: Got about 4 inches into the hat and realized it was a hat for a toddler. Ripped out.
- Hat #3: Made it all the way to the crown, but ran out of yarn about 5 rows from the end. Ripped it out.
- Hat #4: Made the pattern slightly smaller, and made it to the end with about 3 feet of spare yarn. Turned out cute! Fit! Yay!
I wrote up the proposal, and figured, “Hey, if it gets picked up, great! I have the pattern essentially figured out already. And if it doesn’t get picked up, I’ve got a cute new hat. Win-win.”
A few days later, I got the news that the pattern was picked up (Yay!), but they want it knit in a different yarn (Oh no). So the process started over again.
- New Swatch #1: Looks good! Right on the money, gauge wise (which is shocking, since my prototype yarn and actual yarn are quite different).
- New Hat #1: This hat is killing me. It’s taking forever, it’s super slow-going for some reason, and making my hands ache. I can only knit on it for an hour or two at a time. But then…
Last night, I sang a little song of triumph as I got to the crown. I decided to stay up past my bedtime because I thought I might be able to finish! I pulled out the US7 DPNs from my knitting bag, and switched them out for the circular I had been using. Suddenly, the knitting felt weird. A little too easy. A little loose.
Y’all, I had been knitting the whole dang hat on US5s, instead of swithing to US7s after the brim.
There were swears.
So, I’m going to go rip out the hat. Again.
Talk about a true Halloween horror.
Have you ever worked on any truly cursed projects?


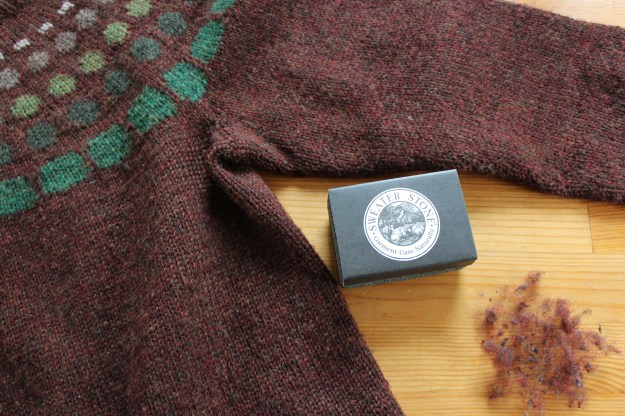 Then I did a once-over for any holes or snags. I noticed a little hole near the collar of this guy. It’s not so bad, so I’ll leave it for another day. But, if it was worse or in a more critical spot, I’d fix it before I washed it, to prevent making the run worse.
 Now it’s time for a bath! I folded the sweater, and lay it in a nice, warm, soapy bath. I like
  I never swish the sweater around or anything. Remember, wool + agitation + water = felt, so I keep the agitation to a minimum. I just push the sweater down into the water, squeezing out the air.
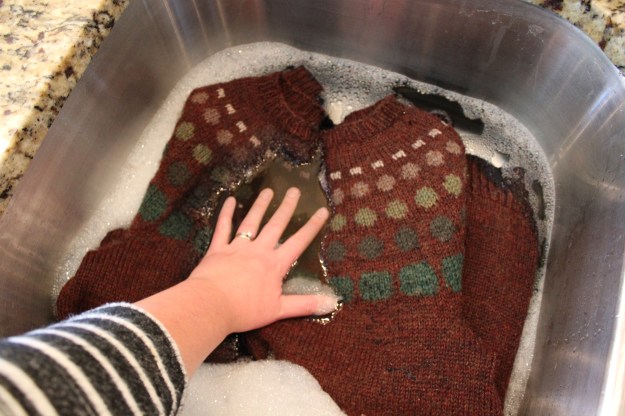 Then I let it sit for… a bit. I’m sure there’s a rule about this, but I usually just let it hang out until I get bored. At least 5 minutes or so (more, if you’re like me and wander off and forget).
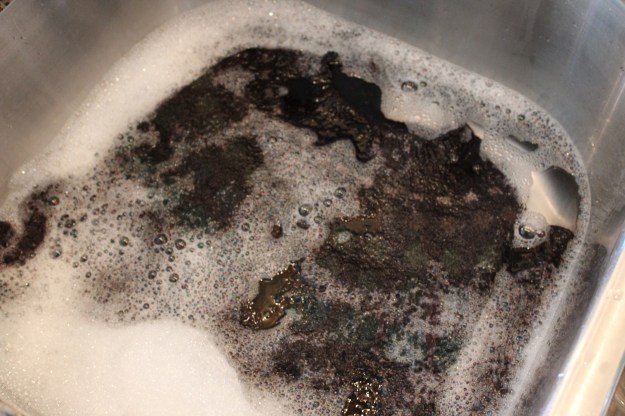 And this is the best/worst part: Look at how gross the water is!!! Yuck!
 I let the water drain away, and carefully wrung out most of the water (again being careful not to agitate too much). Then I rolled the sweater up in a towel or two, and squeezed the sweater burrito to get out even more water.
 Then it’s off to the drying rack! I like using these big (clean) window screens. (They were originally used as drying racks for hops, back when my husband grew hops for his home-brew beer, but now I mostly use them for my knitwear.) You can also use your regular blocking boards or just lay your sweater out on more clean towels. Just make sure you’ve got it blocking to the right measurements, otherwise your sweater might end up clean, but lopsided!
 Now I just have to repeat the process for my other two dozen sweaters…

